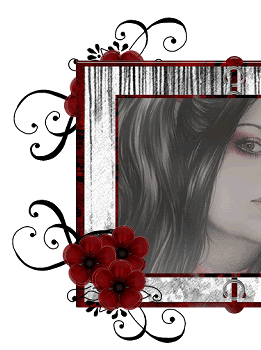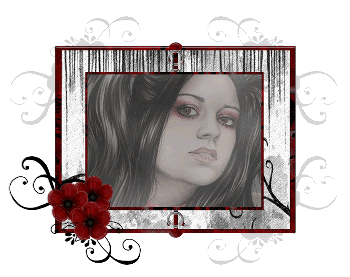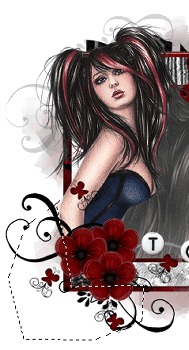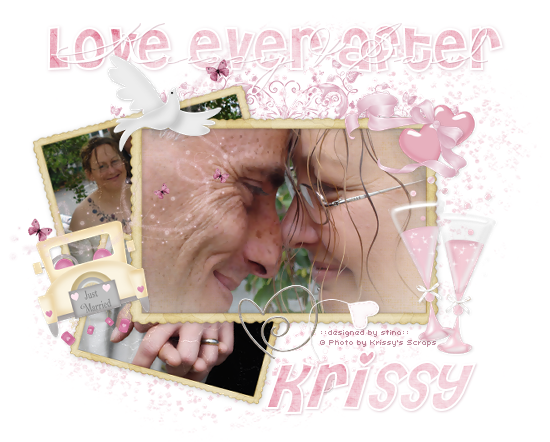
Please email me designed.by.stina@gmail.com with your creations. I'd love to see them.

Wednesday, April 29, 2009

Love Ever After

 
Supplies
 
Scrap kit of choice - I am using "Let's Get Hitched" by KristiW Designs 
Images/Photos of choice - I am using Krissy's wedding photos of Krissy's Scraps (who was married today *g*)
20-20 Mask
215 Mask
Plugins: Xero Improver and Xero Radiance
Plugin: Filters Unlimited > Photo AGing Kit > Cracked Paper
Fonts of choice - I am using Cheri and Carpenter Script
 
 
Ready? Let's begin.....
 
 
Open a new 700 x 600 blank canvas flood-filled white
 
Paste Frame2 as new layer
Resize by 20%
Duplicate twice
Rename layers FRAME1, FRAME2 and FRAME3
Hide top two layers (FRAMES 2 & 3) and we'll work on the bottom one (FRAME1)
 
Paste Image or photo of choice as new layer
Resize as necessary to fit in Frame
USe your Magic Wand to select the inner area of Frame
Selections > Modify > Expand by 10
Selections > Invert
Then delete any remaining excess
Deselect
 
On Image/Photo go to:
Effects > Plugins > Xero > Improver with the following settings:
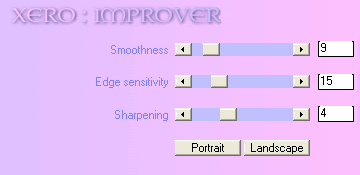
 
 
Then, Effects > Plugins > I.C.Net Software > Filters Unlimited > Photo Aging Kit > Cracked Paper with the following settings:
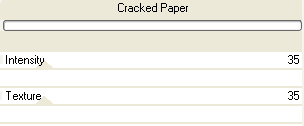
 
 
Activate Frame Layer
Layers > Merge > Merge Down
Rename to FRAME1 again
 
Image > Rotate by 15 to the left
Resize by 70%
 
Layers > Arrange > Move Down
Position to the left for the moment
 
Activate FRAME2
 
Paste another image of choice as new layer
Resize as necessary to fit into Frame
USe your Magic Wand to select the inner area of Frame
Selections > Modify > Expand by 10
Selections > Invert
Then delete any remaining excess
Deselect
 
On Image/Photo go to:
Effects > Plugins > Xero > Improver with the same settings as above
 
Effects > Plugins > Xero > Radiance with the following settings:
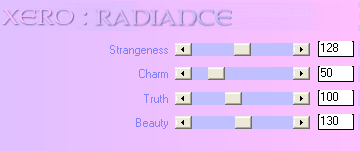
 
 
Then, Effects > Plugins > I.C.Net Software > Filters Unlimited > Photo Aging Kit > Cracked Paper with the same settings as above
 
Activate Frame Layer
Layers > Merge > Merge Down
Rename to FRAME2 again
 
Image > Rotate by 15 to the right
Resize by 65%
 
Layers > Arrange > Move Down
Also position to the left for the moment
 
Activate FRAME3 (your main Frame)
With your magic wand select the inner area of Frame
Selections > Modify > Expand by 10
Paste Paper12 as new layer
Resize by 50%
Layers > Arrange > Move Down
 
KEEP SELECTED
 
Open Image or photo of choice
 
Effects > Plugins > Xero > Improver with the same settings as above
 
Layers > Load/Save Mask > Load Mask from Disk
Locate 20/20 Mask
Ok
Layers > Merge > Merge Group
Edit > Copy
 
Back to your working canvas, and
Edit > Paste as new layer
Deselect
Layers > Arrange > Move Down
 
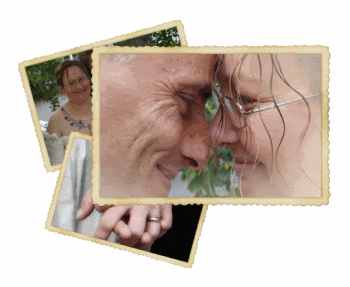
Now position FRAME1 and FRAME2 to the left of your main Frame, protruding slightly
 
You should now have something like this:
 

Paste Glasses as new layer
Resize by 10%
Position in lower right
 
Paste Car as new layer
Image > Rotate by 15 to the left
Resize by 5%
Position in lower left of Frame
 
Paste Bird as new layer
Resize by 8%
Position in upper corner of main Frame
 
Paste WireHeart as new layer
Resize by 8%
Position to your liking
Duplicate
Set Blend Mode to Screen
Layers > Merge > Merge Down
 
Paste Swirl1 as new layer
Resize by 10%
Position to the left beneath Dove/Bird
 
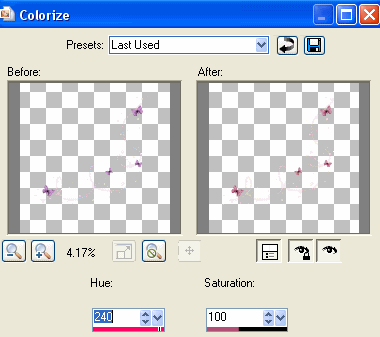
Adjust > Hue & Saturation > Colourise with the following settings:
 
 
Paste Hearts1 as new layer
Resize by 10%
Position in upper right
 
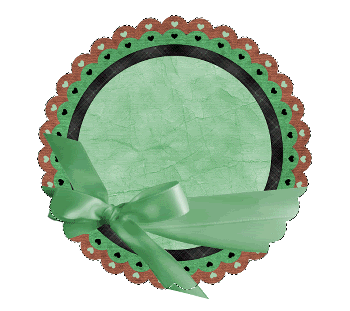
Paste Ribbon4 as new layer
Resize by 10%
Position in upper right over Hearts
 
Apply the same Hue & Saturation Colourising as above
 
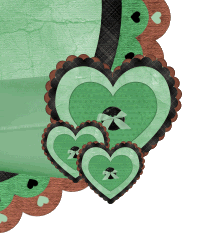
Paste StringHearts as new layer
Resize by 6%
Position as if attached to Wire Heart
 
Use your Freehand Tool to draw a selection around the excess
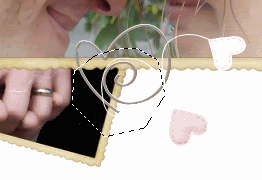
 
 
Press delete then deselect
 
Apply a slight drop shadow to your elements:
H & V - 1
Opacity - 20
Blur - 5.00
Colour - #000000
 
Paste ButterflyDoodle as new layer
Resize by 15%
Position towards top of Frames
Layers > Arrange > Send to Bottom
 
Again apply the same Hue & Saturation Colourising as above
 
Paste Glitter2 as new layer
Resize by 50%
Layers > Load/Save Mask > Load Mask from Disk
Locate 215 Mask
OK
Layers > Merge > Merge Group
Resize by 90%
Image > Mirror
 
Layers > Arrange > Send to Bottom
Lower opacity to 60
 
Crop and resize
 
Activate top layer
 
Select your Text Tool and font of choice
I chose Cheri
 
Set your Material Palette with the following:
Foreground - #FFFFF
Background - Paper or colour of choice
 
Stroke width - 2.00
 
Type out your text - I wrote "Love Ever After"
Objects > Align > Horizontal Centre in Canvas
COnvert to raster layer
Add a drop shadow:
H & V - 1
Opacity - 20
Blur - 5.00
Colour - #7c1f3f
 
If you wish to add a type-over text as I have, select a script font of choice
Text colour (background) #FFFFFF
 
Type text
Objects > Align > Horizontal Centre in Canvas
COnvert to raster layer
Apply a slight drop shadow of choice
 
Select another font of choice for your name
Apply any effects or drop shadows of your choice
Position your name to your liking
 
Finally, add your © copyright, licence and watermark, then save as a GIF or JPG and you're done!
 
Thanks for trying my tutorial!
 
::st!na::
 

© Tutorial written by Stina on 28th April 2009
All rights reserved

Monday, April 27, 2009

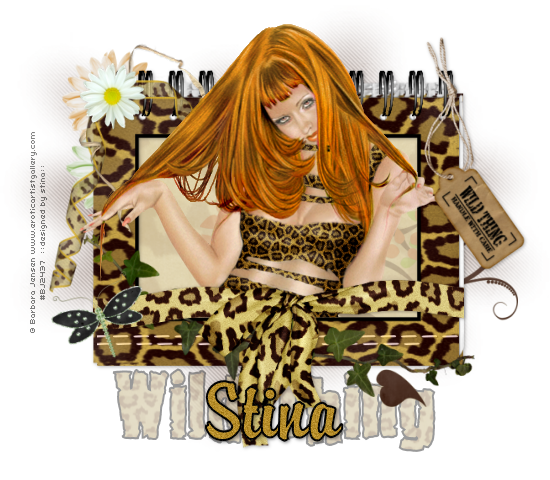
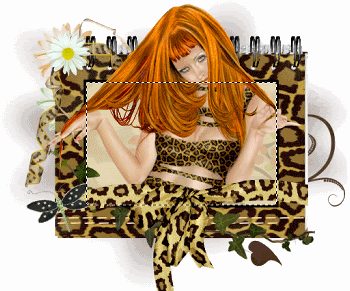
Wild Thing

 
Supplies
 
Scrap kit of choice - I am using "Wild Thing" by Candy's Treats available at Stargazer Scraps and Candy's Treats (store)
Tube of choice - I am using the artwork of Barbara Jensen available from her store
**PLEASE DO NOT USE HER ARTWORK WITHOUT THE APPROPRIATE LICENCE**
WSL_Mask7 by Chelle from her blog
Plugin: Penta.com > Jeans
Fonts of choice - 2Peas Bad Attitude and Brody
 
 
Ready? Let's begin!
 
 
Open a new 700 x 600 blank canvas flood-filled white
 
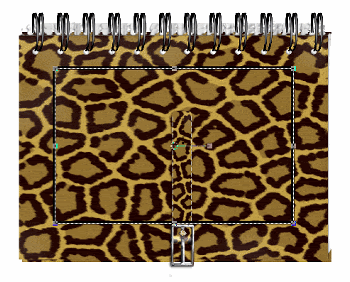
Paste Diary1 as new layer
Image > Rotate by 90 to the right
 
Select your Preset Shape to Rectangle
Foreground - #000000
Background - null
 
Stroke width - 5.00
 
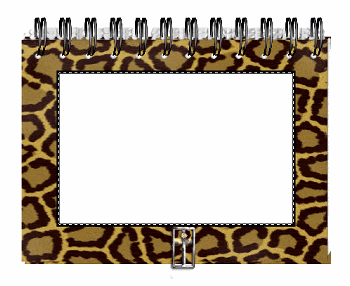
Draw out a rectangle on your Diary
Objects > Align > Centre in Canvas
Convert to raster layer
 
 
Now select the area INSIDE the shape you have just drawn with your Magic Wand
Selections > Modify > Expand by 2
Activate the Diary layer and press delete
 
KEEP SELECTED!!
 
 
Selections > Modify > Expand by 10
Paste Block11 (paper) as new layer
Resize by 55%
Selections > Invert and press delete
Layers > Arrange > Move Down
 
STILL SELECTED!!
 
Paste Treem1 as new layer
Resize by 50%
Position to your liking
Press delete then deselect
 
Activate the Preset Shape layer
Layers > Merge > Merge Down
 
You have now created a Frame!! *g*
 
Paste Stitches-White as new layer
Resize by 54%
Position along bottom of Frame
Set Blend Mode to Luminance Legacy
 
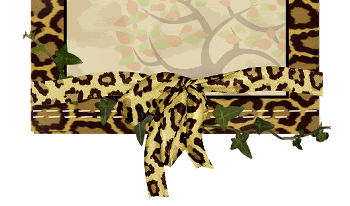
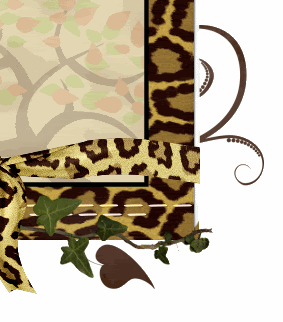
Paste JaguarRibbon1 as new layer
Resize by 56%
Position along bottom of Frame
Duplicate then set Blend Mode to Soft Light
Layers > Merge > Merge Down
 
Paste Ivy as new layer
Resize by 90%
Layers > Arrange > Move Down
Position behind Ribbon
 
 
Paste LeopardCurlyRibbon as new layer
Resize by 70%
Position in upper left
 
Paste Dragonfly as new layer
Layers > Arrange > Bring to Top
Resize by 40%
Position to the left
 
Paste Doodle1 as new layer
Resize by 40%
Layers > Arrange > Send to Bottom
Position to the lower right or anywhere to your liking
 
 
Paste Flower3 as new layer
Resize by 30%
Position behind FlowerRibbon in upper left
 
Add any other elements to your liking
 
Paste Block5 (paper) as new layer
Layers > Arrange > Send to Bottom
 
Layers > New Mask Layer > From Image
Locate WSL_Mask7
OK
Layers > Merge > Merge Group
 
Crop and resize
 
Activate your Mask layer
Effects > Plugins > Penta.com > Jeans
Default setting
 
Paste a tube of choice as a new layer
Move to the layer BEHIND the ribbon
Use your Magic Wand to select the inner area of your Frame
Selections > Invert
Selections > Modify > Feather by 2
Erase the bottom of the tube
Deselect
 
 
Paste Tag2 as new layer
Image > Rotate by 15 to the left
Resize by 60%
Position in upper right  as if fastened to the spiral
 
Add drop shadows to your elements
 
Select one of the papers from the kit
I am using Block14
 
Select your Text Tool and font of choice
I am using 2 Peas Bad Attitude
 
Set your Material Palette:
Foreground - #000000
Background - Paper of choice (Block14)
Stroke width - 2.00
 
Type out Wild Thing
Objects > Align > Horizontal Centre in Canvas
Convert to raste layer
Lower opacity to 40
Layers > Arrange > Send to Bottom, then
Layers > Arrange > Move Up
 
Activate top layer
 
Select your Text Tool again and another font of choice
I am using Brody
 
Choose two colours from your tube/tag and set them in your Material Palette:
Foreground - #000000
Background - #b68d2a
Stroke width - 2.00
 
Type out your name
Objects > Align > Horizontal Centre in Canvas
Convert to raste layer
Add some noise and apply a slight drop shadow
 
Finally, add your © copyright, licence and watermark, then save as a GIF or JPG and you're done!
 
Thanks for trying my tutorial!
 
::St!na::
 

© Tutorial written by Stina on 27th April 2009
All rights reserved
Friday, April 24, 2009

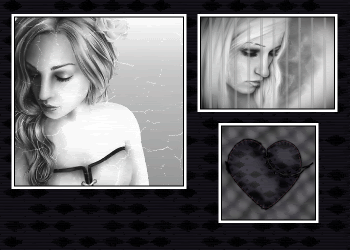
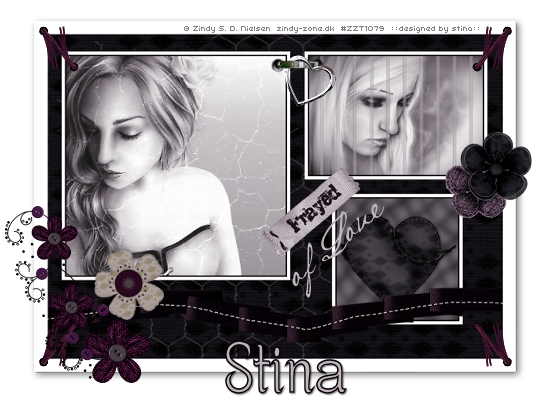
Frayed of Love

 
Supplies
 
Scrap kit of choice - I am using "Frayed of Love" by Gina of KiKeKa Designs available at Paradise 4 Scrappers
Images of choice - I am using the lovely artwork of Zindy Nielsen (one PTU and one free image) available from her store
Plugin: Xero Improver
Plugin: Filters Unlimited > Photo Aging Kit & Special Effects1
Plugin: Dreamsuite
Fonts of choice - I am using Baker Script and Centime
 
 
Ready? Let's go!
 
 
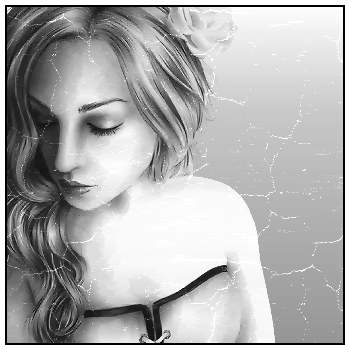
Open your image of choice (preferably square in size)
Resize down so that smallest side is 350
Image > Canvas Resize
Crop image so that image becomes 350 x 350
Edit > Copy
 
Open a new 350 x 350 transparent canvas
Selections > Select All
Edit > Paste into Selection
Deselect
 
Effects > Plugins > Xero > Improver
Default settings
 
Effects > Plugins > IC Net Software > Filters Unlimited > Photo Aging Kit > Cracked Paper with the following settings:
 
 
Add new raster layer
Flood fill layer with #FFFFFF
Select All
Selections > Modify > Contract by 5
Delete
Selections > Modify > Contract by 2
Delete then deselect
 
Layers > Merge > Merge Visible
 
Minimise and we'll come back to it
 
 
Open another image of choice
Shift D to duplicate image then close off original
Resize so that the top side is 280
Image > Canvas Resize
Crop image to 280 wide and 195 high
 
Effects > Plugins > Xero > Improver
Default settings
 
Effects > Plugins > IC Net Software > Filters Unlimited > Photo Aging Kit > Centrespot/Vignetting
 
Duplicate layer
 
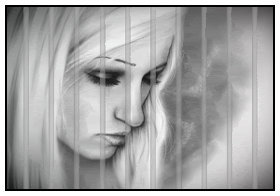
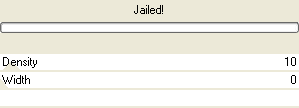
Effects > Plugins > IC Net Software > Filters Unlimited > Special Effects1 > Jailed! with the following settings:
 
 
Lower opacity of layer to 50
 
Add new raster layer
Flood fill layer with #FFFFFF
Select All
Selections > Modify > Contract by 5
Delete
Selections > Modify > Contract by 2
Delete then deselect
 
Layers > Merge > Merge Visible
 
Minimise and we'll come back to it
 
 
Open a new 200 x 200 transparent canvas
Open Paper12 and minimise
 
Select your Flood Fill Tool
Click on your Foreground colour and select Pattern
Find the Paper4 you just minimised
Flood fill canvas with your pattern
 
Adjust > Blur > Gaussian Blur with a radius of 5.00
 
Adjust > Hue & Saturation > Colourise
And set your Hue & Saturation BOTH to 0
 
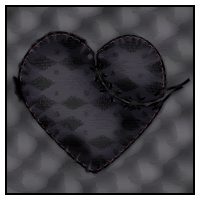
Paste Heart1 as new layer
Resize by 38%
Apply a small drop shadow
 
Add new raster layer
Flood fill layer with #FFFFFF
Select All
Selections > Modify > Contract by 5
Delete
Selections > Modify > Contract by 2
Delete then deselect
 
Layers > Merge > Merge Visible
 
Minimise for now
 
 
Open a new 700 x 500 blank canvas with transparent background
 
Open Paper4 and minimise it
 
Select your Flood Fill Tool
Click on your Foreground colour and select Pattern
Find the Paper4 you just minimised
Flood fill canvas with your pattern
 
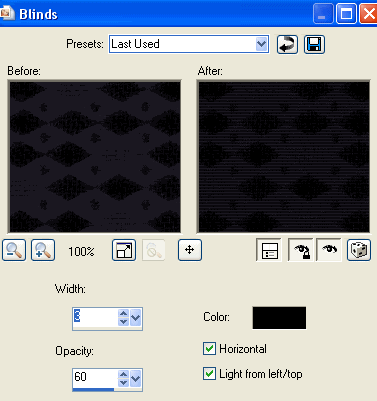
Effects > Texture Effects > Blinds with the following settings:
 
 
Activate your first image, then
Edit > Copy
Paste on your canvas as new Layer
Position toward the upper left
 
Activate your second image
Edit > Copy
Paste on your canvas as new layer
Position toward upper right
 
Activate your third image
Edit > Copy
Paste on your canvas as new layer
Position toward lower right
 
 
Hide background layer, then
Layers > Merge > Merge Visible
Unhide Background
 
Paste Wire1 as new layer
Adjust your Hue & Saturation BOTH to 0
Layers > Arrange > Move Down
Position Wire from top to bottom and up to the edge of your bottom image
Lower opacity to 55
 
Paste Ribbon1 as new layer
Position along the bottom
Duplicate layer
Adjust your Hue & Saturation BOTH to 0
Set blend mode to Multiply
Layers > Merge > Merge Down
 
Select All
Selections > Float
Selections > Defloat
You should now have "marching ants" around your ribbon
 
 
Add new raster layer
 
Open Ribbon2 and Edit > Copy
 
Then back on your canvas
Edit > Paste into Selection
Deselect
 
Merge Visible
 
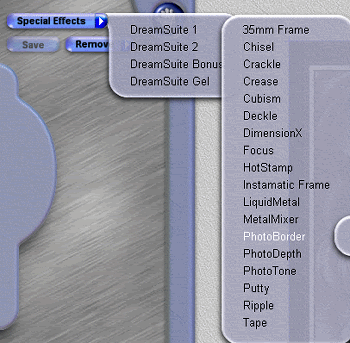
Effects > AutoFX Software > Dreamsuite > Special Effects > Dreamsuite 1 > Photo Border
OK
 
 
Paste Staple1 as new layer
Resize by 65%
Position between the two top images, joining them together
 
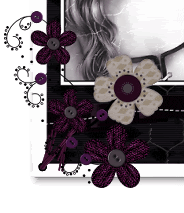
Paste Flowers1 as new layer
Resize by 45%
Position in lower left corner
Duplicate, then
Adjust > Hue & Saturation > Colourise
Hue - 220
Saturation - 20
Set Blend mode to Multiply
Layers > Merge > Merge Down
 
 
Paste Flower4 as new layer
Resize by 28%
Position to the right in corner of image
 
Paste Flower2 as new layer
Resize by 25%
Adjust > Hue & Saturation > Colourise
Hue - 220
Saturation - 20
Duplicate, then set blend mode to Multiply
Layers > Merge > Merge Down
Position alongside first flower
Layers > Arrange > Move Down
 
Activate your main layer (the one with the images and frame)
Paste Eyelet1 as new layer
Image > Rotate by 50 to the right
Resize by 28%
Position in upper left corner
 
 
Duplicate, then
Image > Mirror
Layers > Merge > Merge Down
Duplicate again
Image > Flip
Layers > Merge > Merge Down
 
Eyelets now form a border
 
Duplicate layer again
Adjust > Hue & Saturation > Colourise
Hue - 220
Saturation - 20
Set blend mode to Multiply
Layers > Merge > Merge Down
 
Paste Tag1 as new layer
Adjust > Hue & Saturation > Colourise
Hue - 220
Saturation - 20
Set blend mode to Multiply
Layers > Merge > Merge Down
 
Image > Rotate by 40 to the left
Resize by 45%
Position between all three images, overlapping each
 
Hide your Main layer again, then
Layers > Merge > Merge Visible
 
Unhide Main layer and duplicate
Adjust > Hue & Saturation > Colourise
Hue - 220
Saturation - 20
Lower opacity to 50
 
Add a new raster layer
Layers > Arrange > Send to Bottom
Flood fill white
 
Using your Selection Tool draw a selection around your tag ON the white border
Selections > Invert
 
Activate the colourised Main layer with the lowered opacity
Press delete (which will remove the darkened shadow)
Deselect
 
Layers > Merge > Merge Visible
Resize to your liking
 
Select your Text Tool and font of choice
I am using Baker Script
Choose a colour from your tag and set as Background colour
I am using #beb5bd
 
Type out the words "of Love" on a Vector layer
Image > Rotate by 40 to the left
Position then Convert to raster layer
 
 
Select another font of choice
I am using Centime
Choose another colour and set as your Foreground
 
Foreground - #080308
Background - #beb5bd
Stroke width - 1.5
 
Type out your name
Position to your liking and convert to raster layer
Apply a slight drop shadow:
H & V - 1
Opacity - 50
Blur - 2.00
Colour - #080308
 
Finally, add your © copyright, licence and watermark, then save as a GIF or JPG and you're done!
 
Thanks for trying my tutorial!
 
::st!na::
 
© Tutorial written by Stina on 24th April 2009
All rights reserved
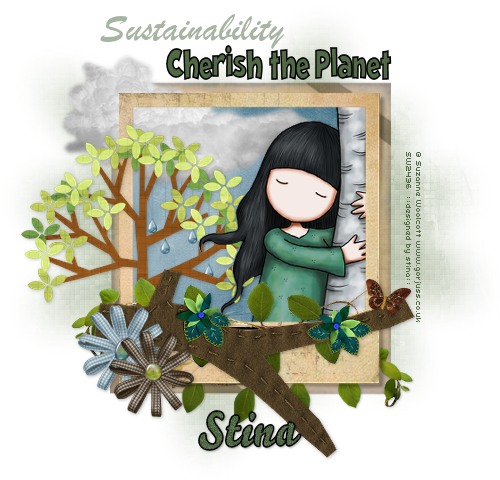
Sustainability

 
Supplies
 
"Earth Day" freebie kit available at Pimp'd Dezigns
Tube of choice - I am using the lovely artwork of Suzanne Woolcott which can be purchased from her store
WSL_Mask7 by Chelle available from her blog
Plugin: Xero Fritillary
Fonts of choice - I am using CK Retro Block, Brush Script MT and Bello Script
 
 
Ready? Let's go!
 
 
Open a new 650 x 650 blank canvas flood-filled white
 
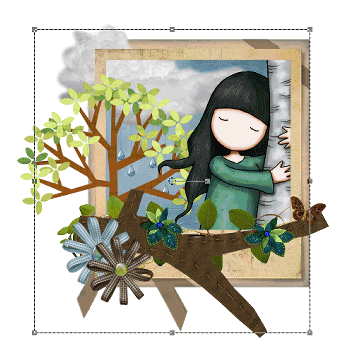
Paste Frame01 as new layer
Resize by 70%
Leave in position
 
Select inner area of Frame with Magic Wand
Selections > Modify > Expand by 10
Add new raster layer
Paste PP06 into selection
Deselect
Layers > Arrange > Move Down
 
Paste Cloud as new layer
Resize by 60%
Position to the upper left
 
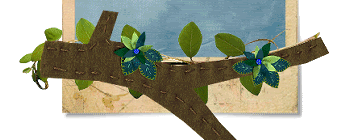
Paste TreeBranch as new layer
Layers > Arrange > Bring to Top
Resize by 60%
Position along bottom of Frame
 
Paste Greens as new layer
Resize by 70%
Layers > Arrange > Move Down
Position below and along Branch
 
 
Paste your tube as new layer
Resize as necessary
Position to the right beneath Frame layer
 
Paste Tree as new layer
Resize by 35%
Position to the left
 
Activate your tube layer
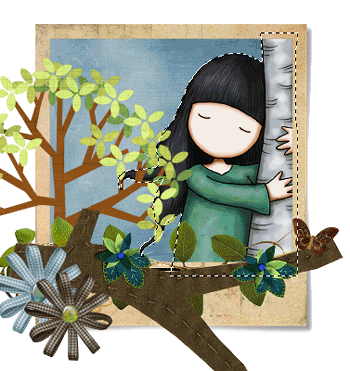
Select the area around your tube
Selections > Invert
Now activate the Tree layer
Press delete
 
 
Paste Bow01 as new layer
Layers > Arrange > Bring to Top
Resize by 20%
Position to the left
 
Paste Bow02 as new layer
Resize by 16%
Position alongside first Bow
 
Paste Butterfly as new layer
Image > Mirror
Resize by 10%
Position to the right above the Branch
 
Activate Paper Background layer
 
Paste WaterDrop as new layer (behind Tree)
Resize by 30%
Position as if falling from the sky
Duplicate several times and position
 
Layers > Merge > Merge Down
Repeat till all WaterDrops are one layer
 
Paste Frame02 as new layer
Layers > Arrange > Send to Bottom
Resize by 74%
Position behind Frame
Select Pick Tool and use nodes to pull side out to same size as first Frame
Lower opacity to around 55
 
 
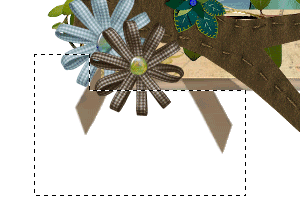
Use your Selection Tool to draw around overhanging ribbon
 
 
Press delete then deselect
 
Activate Leaf layer
Duplicate
Image > Mirror
Move down to bottom Frame layer
Position to the right, protruding from the bottom of Frame
 
Paste PP04 as new layer
Layers > Arrange > Send to Bottom
 
Image > Canvas to 600 x 600
 
Layers > New Mask Layer > From Image
Locate WSL_Mask7
OK
Layers > Merge > Merge Down
 
Crop around mask layer
Then resize tag (I resized to 500 x 480)
 
Still on Mask layer
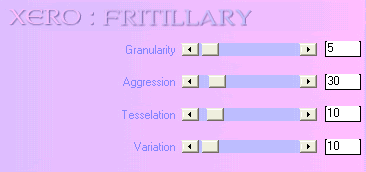
Effects > Plugins > Xero > Fritillary with the following settings:
 
 
Select your Text Tool and font of choice
I am using CK Retro Block
 
Choose two colours from your tube/tag
Set your Material Properties:
Foreground - #000000
Background - #516945
Stroke width - 1.5
 
Type out your text - "Cherish the Planet"
Position and convert to raster layer
 
Select a script font
I am using Brush Script MT
Turn off the Foreground using only the Background colour
 
Type out the word - "Sustainability"
Position and convert to raster layer
Lower opacity to 50
 
Select another font of choice or use one of those already used
Type out your name
Objects > Align > Horiztonal Centre in Canvas
Convert to raster layer
Add a slight drop shadow
 
Finally, add your © copyright, licence and watermark, then save as a GIF or JPG and you're done!
 
Thanks for trying my tutorial!
 
::st!na::
 
© Tutorial written by Stina on 23rd April 2009
All rights reserved

Thursday, April 23, 2009

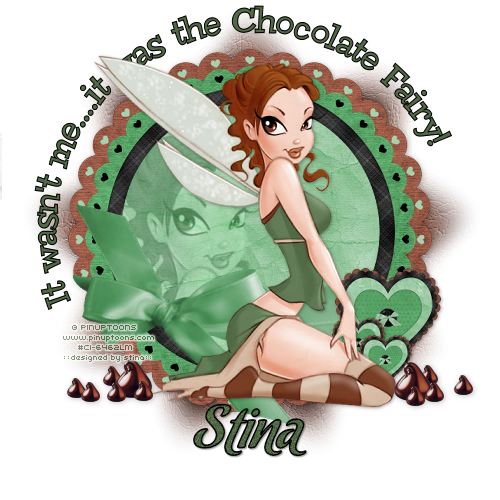
It Wasn't Me

 
Supplies
 
Scrap kit of choice - I am using the delicious "Chocolate Mint" by DMK Designs which is available from Creative Scraps, Simply Beautiful Scraps and TKO Scraps
Tube of choice - I am using the artwork of Rion Vernon and PinUpToons which can be purchased from CILM
**PLEASE DO NOT USE HIS ARTWORK WITHOUT THE APPROPRIATE LICENCE**
WSL_Mask209 by Chelle available from her blog
Chocolate tube of choice - mine is here
Plugin: dbs Fluxx Gears
Fonts of choice - I am using Chowderhead and Chocolate Dulce
 
 
Ready? Let's go!!
 
 
Open a new 650 x 650 blank canvas flood-filled white
 
Paste Frame04 as new layer
Resize by 40%
Leave in position
 
Paste Frame02 as new layer
Resize by 44%
Layers > Arrange > Move Down
 
Select the inner area of Frame04 with your Magic Wand
Selections > Modify > Expand by 10
 
Paste Paper10 as new layer
Resize by 35%
Layers > Arrange > Move Down
Selections > Invert
Delete and deselect
 
Paste RibbonWrap01 as new layer
Resize by 38%
Position in lower section of Frame to your liking
Select the area outside of the Frame02 with your Magic Wand
Selections > Modify > Feather by 2
Erase the excess overhanging Frame
Deselect
 
 
Paste PaperHeart03 as new layer
Resize by 13%
LEAVE IN POSITION
 
Paste PaperHeart04 as new layer
Resize by 12%
LEAVE IN POSITION
 
Layers > Merge > Merge Down
 
Position to right at the edge of the Wrap
Duplicate, then resize by 50%
Position slightly below heart to the left
Duplicate again and move slightly down and to the right
 
 
Paste Paper07 as new layer
Resize by 55%
Layers > Arrange > Send to Bottom
 
Layers > New Mask Layer > From Image
Locate WSL_Mask209
OK
Move Mask layer slightly so that it is centred behind Frame
 
Resize
 
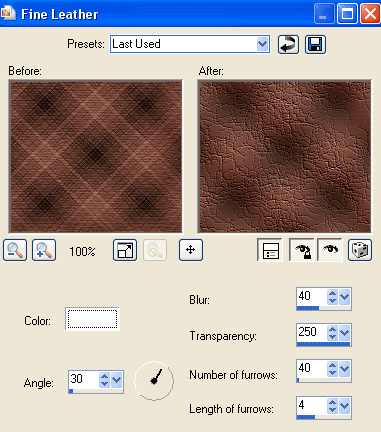
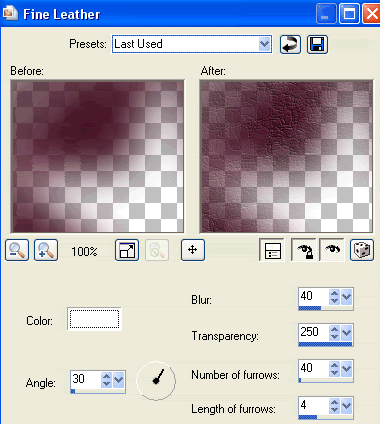
Effects > Texture Effects > Fine Leather with the following settings:


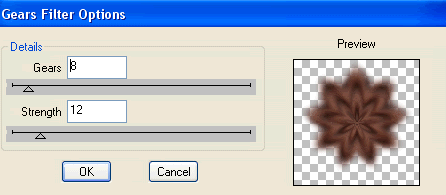
Effects > Plugins > dbs Fluxx > Gears with the following settings:
 
 
Paste tube as new layer
Resize if needed or leave as is
Position to the left inside Frame below Wrap
Set blend mode to Luminance Legacy
Lower opacity to 35
 
Select inside the Frame with your Magic Wand
Selections > Modify > Contract by 2
Selections > Modify > Feather by 2
Selections > Invert
Delete then deselect
 
 
Paste your tube as new layer again
Layers > Arrange > Bring to Top
Resize slightly smaller and position to your liking
 
Paste some chocolates and scatter them around your tube to your liking
 
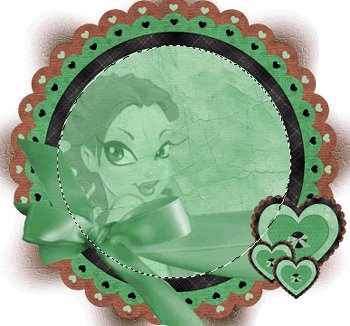
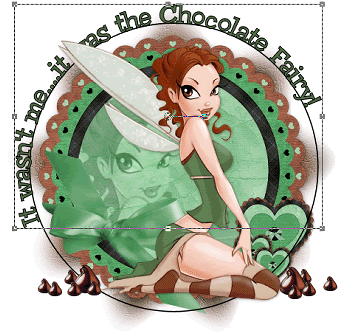
Now select your Preset Shape Tool to Ellipse
Foreground - #000000
Background - null
 
Hold your shift key down and draw out a circle around your tag
Objects > Align > Centre in Canvas
Move up slightly if not completely centred
 
Select your Text Tool and font of choice
I am using Chowderhead
Set your Foreground and Background to two colours from your tube
 
Foreground - #000000
Background - #516945
Stroke width - 1.00
 
 
Type your choice of text
Position to your liking
Then open the layer palette and the Vector Layer
Close off the ellipse then
Convert to raster layer
 
Select another font of choice
I am using Chocolate Dulce
 
Type out your name
Objects > Align > Horizontal Centre in Canvas
Convert to raster layer
Add a drop shadow of choice
 
Finally, add your © copyright, licence and watermark, then save as a GIF or JPG and you're done!
 
Thanks for trying my tutorial!
 
::st!na::
 
© Tutorial written by Stina on 22nd April 2009
All rights reserved
Tuesday, April 21, 2009

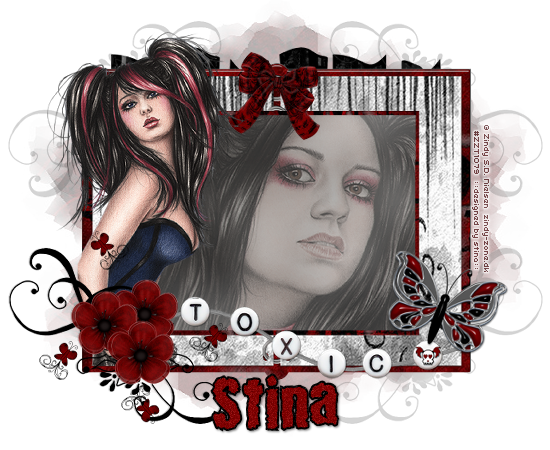
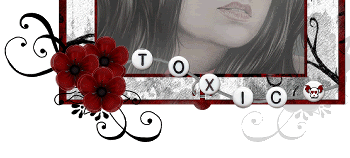
She's So Toxic

 
Supplies
 
Scrap kit of choice - I am using "Toxic" by Soxsational Scraps 
Tubes of choice - I am using the lovely artwork of Zindy Nielsen which is availble from her store
WSL_Mask220 by Chelle available from her blog
Plugin: Simple > 4 Way Average
Font of choice - I am using 2Peas Bad Attitude
 
 
Let's begin!!
 
 
Open a new 700 x 600 blank canvas flood-filled white
 
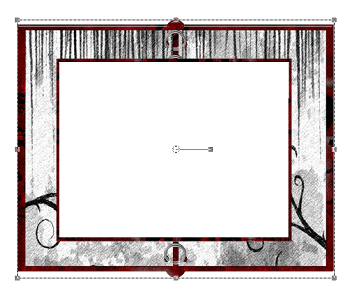
Paste FrameBook as new layer
Select your Pick Tool and use the nodes to pull sides in to the inside edge
 
 
Select the inner area of Frame with your Magic Wand
Selections > Modify > Expand by 10
 
Paste Bg8 as new layer
Layers > Arrange > Move Down
Resize by 80%
Adjust > Blur > Gaussian Blur with a radius of 20.00
Delete
 
KEEP SELECTED!!
 
Paste tube as new layer
Resize if needed
Position to your liking
Delete excess then deselect
Set blend mode to Soft Light
 
Paste DoodleFlower as new layer
Resize by 50%
Position in lower left
 
Duplicate, then Image > Flip
Layers > Arrange > Send to Bottom
 
 
Effects > Plugins > Simple > 4 Way Average
 
This will turn them a bluish colour in each corner
Keep this layer activated and go to
Adjust > Hue & Saturation > Colourise and set the Hue & Saturation to 0
 
Then position the DoodleFlower on top layer over the background one so it covers it
 
 
Paste Beads as new layer
Resize by 80%
Position along bottom and move down a layer to tuck under Flower
 
 
Paste Butterfly as new layer
Image > Rotate by 20 to the right
Resize by 30%
Position in lower right
 
Paste Bow4 as new layer
Resize by 40% and place in top centre of Frame
 
Paste GrungedButterfly as new layer
Image > Rotate by 40 to the left
Resize by 10%
Position near DoodleFlower
Duplicate several times and position to your liking
 
Paste Fence as new layer
Resize by 80%
Position near the top of the Frame
Layers > Arrange > Send to Bottom
 
 
Paste Bg2 as new layer
Layers > Arrange > Send to Bottom
 
Layers > New Mask Layer > From Image
Locate WSL_Mask220
OK
Layers > Merge > Merge Group
Resize by 90%
Lower opacity to 40
 
Crop and resize
 
Paste your second tube as new layer
Resize if needed
Place the layer below your DoodleFlower just above the Frame
 
With your Freehand Tool draw around parts of the tube and along the edge of the Frame
Delete excess then deselect
 
 
Add drop shadows to your layers
 
Choose a colour from your tube/tag
 
Select your Text Tool and font of choice
I am using 2Peas Bad Attitude
 
Set your Material Properties:
Foreground - #000000
Background - #800000
 
Stroke widrh - 2.00
 
Type out your name
Objects > Align > Horizontal Centre in Canvas
Convert to raster layer
Add some noise then a drop shadow of choice
 
Finally, add your © copyright, licence and watermark, then save as a GIF or JPG and you're done!
 
Thanks for trying my tutorial!
 
::st!na::
 
© Tutorial written by Stina on 21st April 2009
All rights reserved
Monday, April 20, 2009

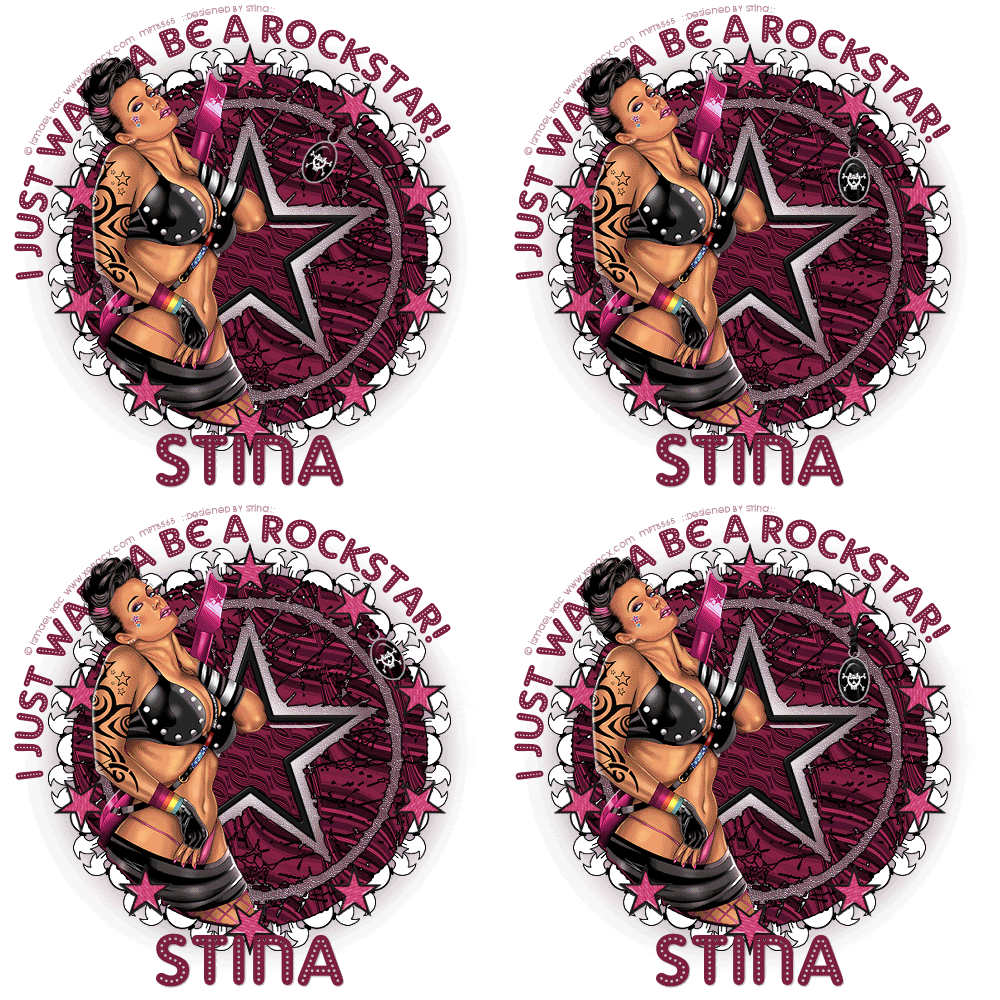
I Wanna be a Rockstar

 
Supplies
 
Scrap kit of choice - I am using the lovely "Just Another Rockstar" by Creative Intentionz which is available from Exquisite Scraps and Paradise 4 Scrappers
Tube of choice - I am using the wonderful artwork of Ismael Rac which can be purchased from My PSP Tubes
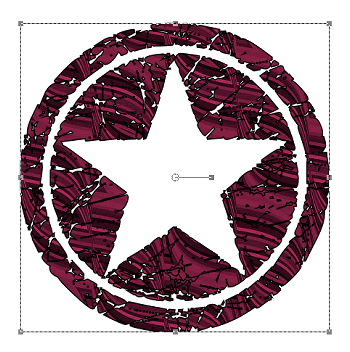
Seeing Stars Preset Shapes here
Plugin: Mura Meister Copies
Font of choice - I am using Adam Gorry-Lights
 
 
Ready? Let's begin!!
 
 
Open a new 700 x 700 blank canvas flood-filled white
 
Open Paper17 and minimise
 
Select your Preset Shape Tool to SeeingStars I
Set yout Material Properties to the following:
Foreground - #000000
Background - Paper17 (or one of choice)
 
Stroke width - 2.00
 
Hold your shift key down and draw out the shape
Objects > Align > Centre in Canvas
Convert to raster layer
 
 
Duplicate layer
 
Rename bottom layer BLUR, then
Apply Gaussian Blur with a radius of 20.00
 
Rename top layer STAR BACKGROUND, then
With your Magic Wand select the outer area
Selections > Invert
Selections > Modify > Contract by 5
 
Go back to blurred layer
Effects > Texture Effects > Fine Leather with the following settings:
 
 
Then Effects > Edge Effects > Enhance
 
Selections > Invert
Apply Gaussian Blur again
Deselect
 
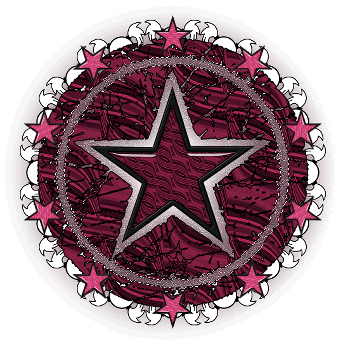
Paste Star5 as new layer
Position in the centre of star
 
 
Paste Star1 as new layer in same place as first star
Resize by 25%
 
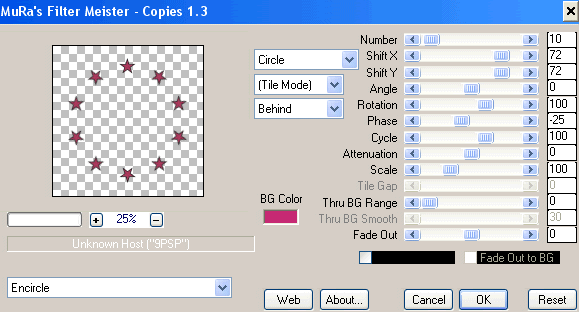
Effects > Plugins > Mura Meister > Copies with the following settings:
 
 
Duplicate layer
Adjust > Brightness & Contrast > Brightness/Contrast
Brightness - 100
Contrast - 0
 
Set blend mode to Soft Light
Layers > Merge > Merge Down
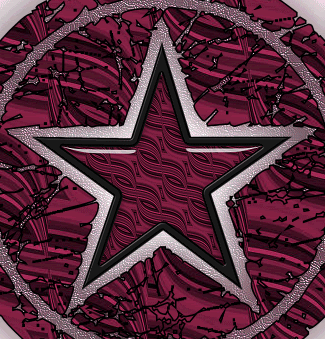
Rename layer STAR FRAME
 
Paste SkullFrame2 as new layer
Resize if needed (depending on size of your STAR BKGD)
Move to layer between BLUR and BACKGROUND STAR
 
With your Magic Wand select the inner ring of BACKGROUND STAR
Selections > Modify > Expand by 2
 
 
Activate SKULL FRAME
Press delete then deselect
 
Paste your tube as new layer
Resize if necessary
Use your Magic Wand to select the outer area of your STAR BACKGROUND
Selections > Modify > Expand by 2
 
Activate your tube and erase any excess
 
Go to STAR FRAME
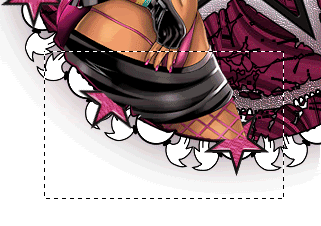
With your Selection Tool draw around the bottom two stars your Tube partially covers
 
 
Selections > Promote Selection to Layer
Layers > Arrange > Bring to Top
Deselect
 
Paste a Charm Medal of choice as new layer
Resize by 30%
Position in the centre of and beneath the upper right star
 
Paste another Charm Medal of choice as new layer
Image > Rotate by 30 to the right
Resize by 30%
Position to the left of the first charm
Duplicate, then
Image > Mirror
Position on the exact opposite side of star
 
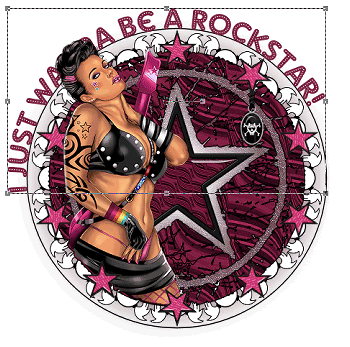
Now let's resize tag to your liking
 
Select Preset Shape Tool to Ellipse
Hold Shift key down and draw out circle slightly larger than tag
Objects > Align > Centre in Canvas
 
Select Text Tool and font of choice
I am using Adam Gorry-Lights
 
Foreground - null
Background - colour of choice (mine is #7c1f3f)
 
 
Type out your text and position to your liking
Open your Layer Palette and Vector Layer
Close off the Ellipse then convert to raster layer
 
Still using your Text Tool select another font
I used the same one
Type out your name
Objects > Align > Horizontal Centre in Canvas
 
Add a slight drop shadow:
H & V - 1
Opacity - 30
Blur - 2.00
Colour - #000000
 

**THIS NEXT PART IS IF YOU WISH TO ANIMATE**
 
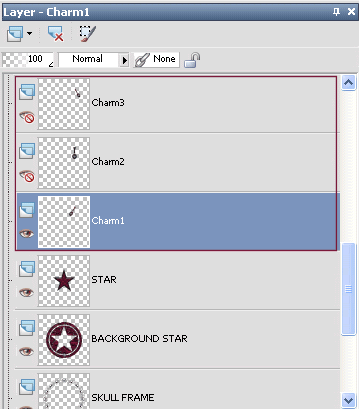
Go to your Charm layers
You should have three of them
Move the first rotated one (on the left) down a layer
Rename each to Charm1, Charm2 and Charm3
 
Your layer palette should looking something like this, with Charm1 to the left and Charm3 to the right
 
 
Now hide Charm2 and Charm3
Edit > Copy Merged
 
Open Animation Shop
Edit > Past as New Animation
 
Back to PSP
Hide Charm1 and activate Charm2
Edit > Copy Merged
 
In Animation Shop
Edit > Paste after Current Frame
 
Back to PSP
Hide Charm2 and activate Charm3
Edit > Copy Merged
 
In Animation Shop
Edit > Paste after Current Frame
 
Back to PSP
Hide Charm3 and activate Charm2 again
Edit > Copy Merged
 
In Animation Shop
Edit > Paste after Current Frame
 
You should know have a total of FOUR frames
 
Edit > Select All
Animation > Frame Properties
 
Change properties to 50
 
Finally save as a GIF and you're done!
 
Thank you for trying my tutorial!
 
::st!na::
 

© Tutorial written by Stina on 20th April 2009
All rights reserved