Please email me designed.by.stina@gmail.com with your creations. I'd love to see them.

Showing posts with label Lynn Earwicker. Show all posts

Thursday, August 27, 2009

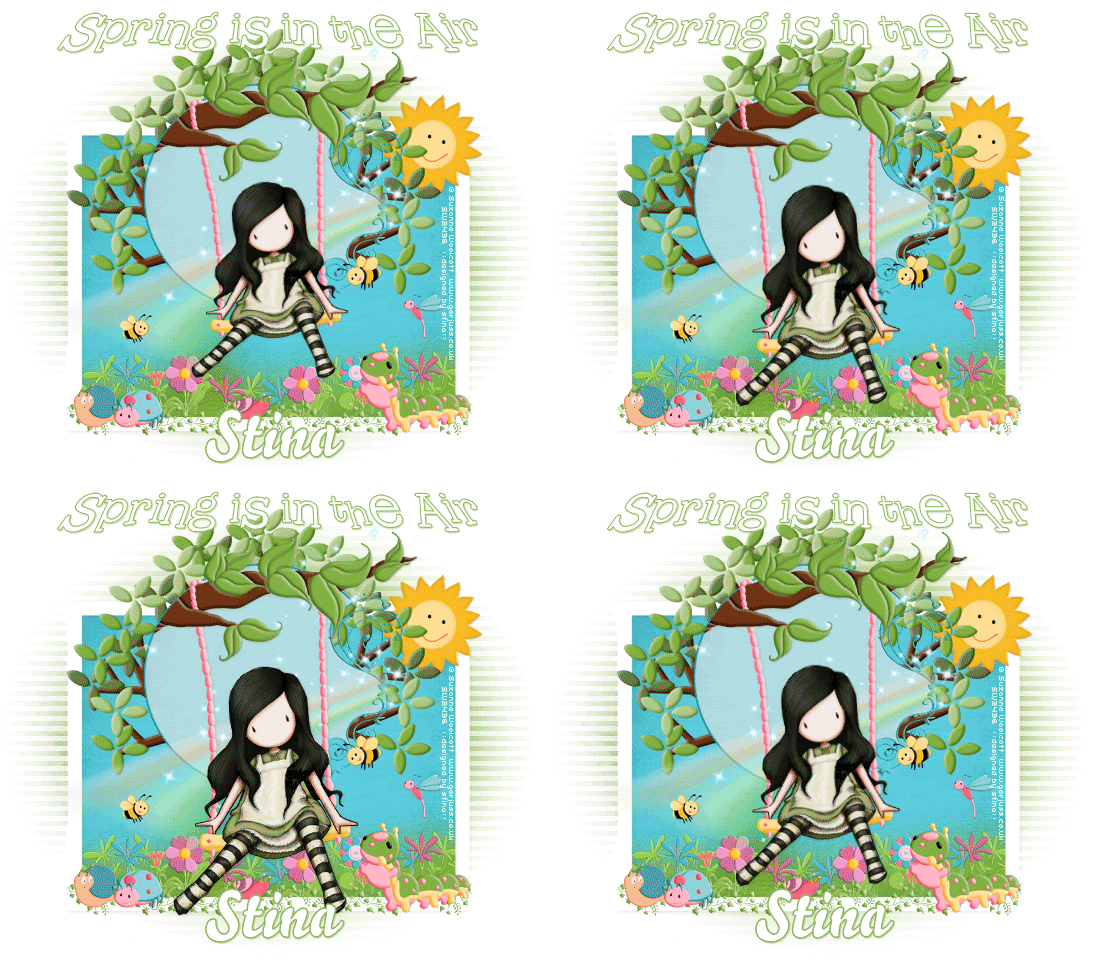
Spring is in the Air


Supplies

Scrap kit of choice - I am using "In the Between" by Lynn Earwicker available from The Scrapping Divaz Designz
Tube of choice - I am using lovely artwork of Suzanne Woolcott available with a licence from her store
**PLEASE DO NOT USE HER ARTWORK WITHOUT THE APPROPRIATE LICENCE**
WSL_Mask41 by Chelle available from her blog
Fonts of choice - I am using 2Peas Fragile and BelloScript
Plugin: dxb Flux > Linear Transmission


Let's begin...


Open a new 750 x 600 blank canvas flood-filled white

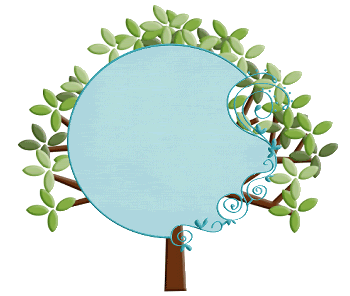
Paste Tree2 as new layer
Image > Mirror
Resize by 85%

LEAVE IN POSITION!!

Paste DoodleFrame as new layer
Resize by 60%
Position to centre of Tree
Select inside of Frame with Magic Wand
Selections > Modify > Expand by 2
Add new raster layer
Paste Paper of choice INTO selection
Layers > Arrange > Move Down

KEEP SELECTED!!

Activate Background layer
Layers > Promote Selection to Layer
Layers > Arrange > Move Up
(should be below paper background)
Deselect

Lower opacity of Paper Background to around 40
Layers > Merge > Merge Down


Paste Rainbow as new layer
Lower opacity to 55
Position to the lower left across bottom of Frame
Erase some overhanging the the upper right

Paste Sparkles as new layer
Resize by 80%
Position to liking

Paste Swing as new layer
Resize by 60%
Position slightly upwards on Frame

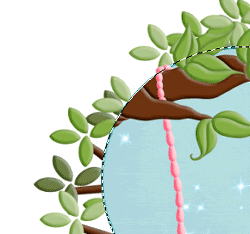
Select outside Frame with your Magic Wand
Selections > Modify > Feather by 4
Use your Eraser Tool to erase excess branch to the left

Paste Wrap2 as new layer
Position along the bottom beneath Swing
Adjust > Blur > Gaussian Blur with a Radius of 10.00
Duplicate and Merge Down again
Apply Gaussian Blur again
Layers > Merge > Merge Down

Duplicate again, then
Adjust > Blur > Gaussian Blur with a Radius of 20.00
Move slightly upwards
Then Layers > Merge > Merge Down

Effects > Art Media Effects > Brush Strokes with the following settings:
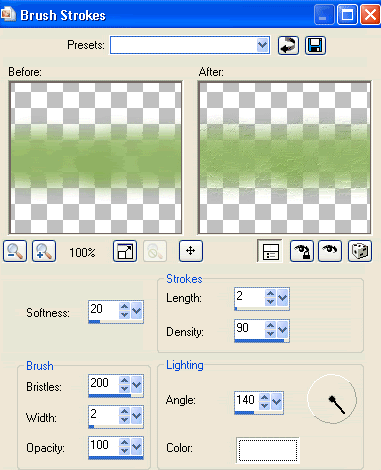

Then Effects > Edge Effects > Enhance
Adjust > Brightness & Contrast > Brightness/Contrast with the settings at:
Brightness - 20
Contrast - 0

Paste Flowers as new layers
Resize to various sizes of around 12 - 15%
Position along Grass, soft erasing bottom of each flower
Merge all Flowers together and apply the same Brightness as above

Merge Flowers with Grass then Send layer to Bottom

Select your Preset Shape Tool and set to Rectangle
Foreground - #FFFFFF
Background - null
Width - 20.00

Draw out a Rectangle:
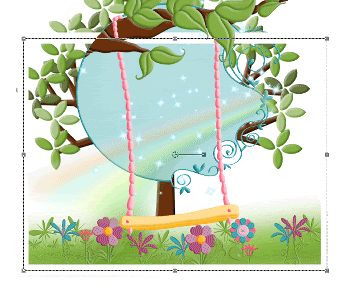

Convert to raster layer and apply a drop shadow of choice

Select inside Rectangle with your Magic Wand
Selections > Modify > Expand by 10
Add new raster layer
Paste Paper of choice INTO selection
Layers > Arrange > Move Down
Deselect

Adjust > Brightness & Contrast > Brightness/Contrast with the settings at:
Brightness - 30
Contrast - 0

Activate top layer again

Paste Tube of choice as new layer
Best choice is a "sitting" kind of tube
Resize as necessary and position seated on swing

Paste some ladybugs, snails and caterpillars and any others
Resize by around 10%
Position to liking

Paste Leaf (border) as new layer
Position along bottom of Rectangle beneath bugs
Erase ends overhanging frame

Paste Sun as new layer
Resize by 25%
Position in the upper right of Rectangle behind Tree layer

Paste Paper of choice as new layer
Layers > Arrange > Send to Bottom

Layers > New Mask Layer > From Image
Apply WSL_Mask41
OK
Layers > Merge > Merge Group

Effects > Plugins > dsb Flux > Linear Transmission with the following settings:
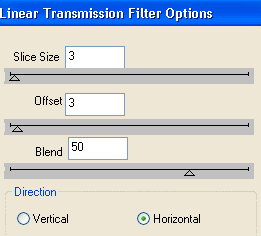

Crop and resize tag

Select Text Tool and font of choice
I am using 2Peas Fragile
Foreground - #90b658
Background - #FFFFFF
Stroke width - 1.00

Type out text of choice
Objects > Align > Horizontal Centre in Canvas

DO NOT CONVERT YET!!

Hold your Control Key and pull the bottom left node DOWN and TO THE LEFT slightly


Convert to raster layer
Apply drop shadow of choice

Select another font of choice
I am using BelloScript
Same colours as above

Type out your name
Objects > Align > Horizontal Centre in Canvas
Convert to raster layer
Apply a drop shadow of choice

Finally, add your © copyright, licence and watermark, then save as a GIF or JPG and you're done!


** IF YOU WISH TO ANIMATE PLEASE FOLLOW THESE NEXT STEPS **

Activate your Swing layer
With your Freehand Tool carefully draw around the swing
Layers > Promote Selection to Layer
Duplicate twice so you have three swings

On the original Swing layer press delete to remove selection

Duplicate Tube layer three times and merge each one with each Swing layer
Rename Swing1, Swing2 and Swing3

Hide Swing1 and Swing3

On Swing2 select your Pick Tool (Deformation Tool in earlier versions)
Hold your Control Key and push left node toward right node SLIGHTLY
Then push left node upwards and repeat with right node
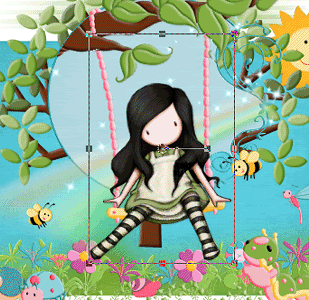

Repeat with Swing1 slightly moreso

Now to animate!

Keep Swing1 activated and Swing2 hidden
Edit > Copy Merged

Open Animation Shop
Edit > Paste as New Animation

Back to PSP
Hide Swing1 and activate Swing2
Edit > Copy Merged

In Animation Shop
Edit > Paste After Current Frame

Back to PSP
Hide Swing2 and activate Swing3
Edit > Copy Merged

In Animation Shop
Edit > Paste After Current Frame

Back to PSP
Hide Swing3 and activate Swing2 again
Edit > Copy Merged

In Animation Shop
Edit > Paste After Current Frame

You should now have FOUR frames
Select all then change Frame Properties to 25
Now save as a GIF and you're done!

Thanks for trying my tutorial!

::st!na::


Here is a non-animated version:
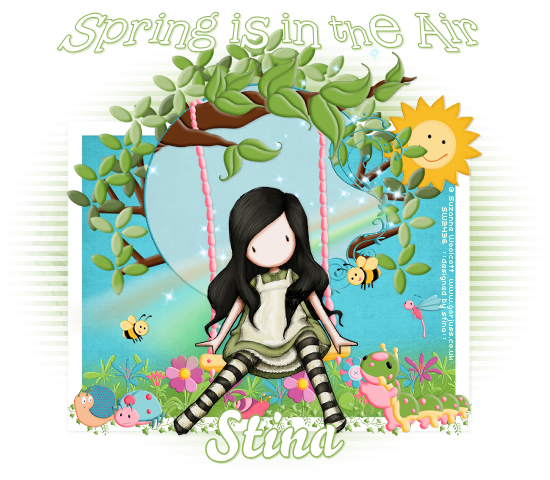

© Tutorial written by Stina on 27th August 2009
All rights reserved

Sunday, August 9, 2009

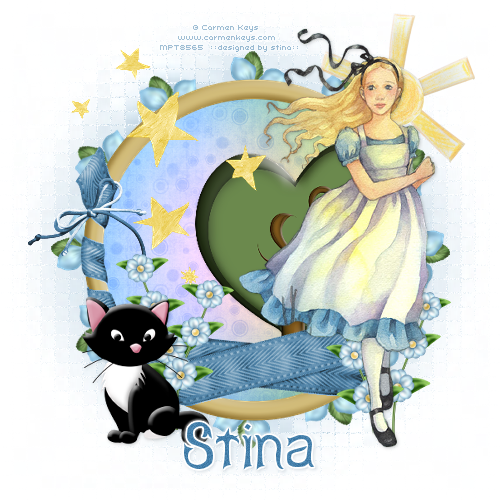
Lost in a Dream


Supplies

Scrap kit of choice - I am using "Geppetto's Dream" by Lynn Earwicker available from The Scrapping Divaz Designz
Tube of choice - I am using the lovely artwork of Carmen Keys available with a licence from My PSP Tubes
**PLEASE DO NOT USE HER ARTWORK WITHOUT THE PROPER LICENCE**
WSL_Mask181 by Chelle available from her blog
Font of choice - I am using Abagail
Plugins: Color Rave > Atmospherizer
Mura Meister > Copies
Eye Candy 400 > Gradient Glow
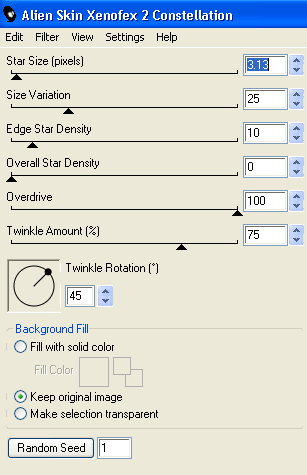
Xenofex 2 > Constellation


Let's begin...


Open a new 600 x 600 blank canvas flood-filled white

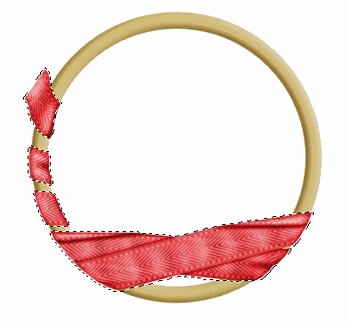
Paste Wrapped Circle Frame as new layer
Resize by 70%

Use your Magic Wand to select Ribbon on the Frame till it is all selected
You can even use your Freehand Tool to draw around the Ribbon areas if you wish


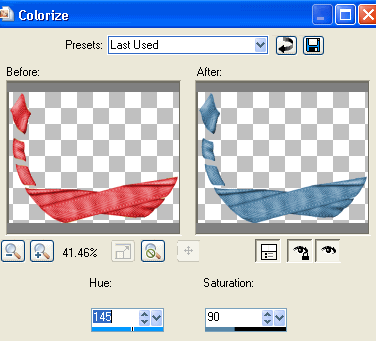
Adjust > Hue & Saturation > Colourise with the following settings:


Or to a colour that will match your Tube

Select the inside to the Frame with your Magic Wand
Selections > Modify > Expand by 10
Add new raster layer
Paste Paper of choice INTO selection
Layers > Arrange > Move Down

KEEP SELECTED!!

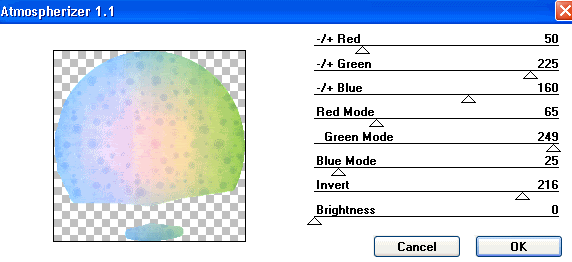
Effects > Plugins > Color Rave > Atmospheriser with the following settings:


Deselect

Paste Tree as new layer
Resize by 40%
Position to your liking within Frame

Paste Bow of choice as new layer
Resize by around 30%
Layers > Arrange > Move Up
Position on the Frame to liking

Paste Stars as new layer
Resize by 50%
Position to the left
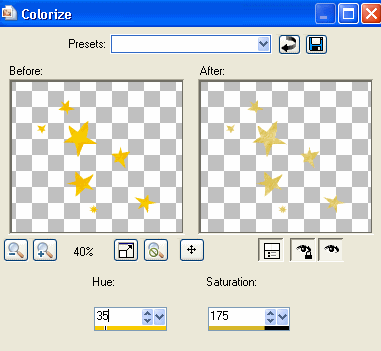
Adjust > Hue & Saturation > Colourise with the following settings:


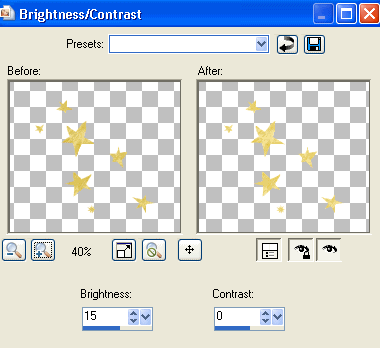
Adjust > Brightness & Contrast > Brightness/Contrast with the following settings:


Paste Figgy (cat) as new layer
Resize by 30%
Position in lower left

Paste FlowerStrand as new layer
Resize by 30%
Position behind the Cat
Duplicate, then Image > Mirror
Layers > Arrange > Move Down
Position behind first Strand


Duplicate an position again

Paste Tube as new layer
Resize as necessary
Position to your liking

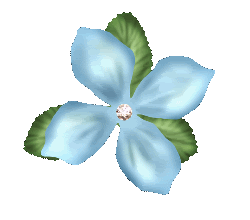
On a separate image paste Flower Leaf
Resize by 70%
Paste Flower of choice as new layer
Resize by around 70%
Position in the centre of Leaf


Edit > Copy Merged
Paste as new layer onto your working canvas
Resize by 20%

LEAVE IN POSITION!!

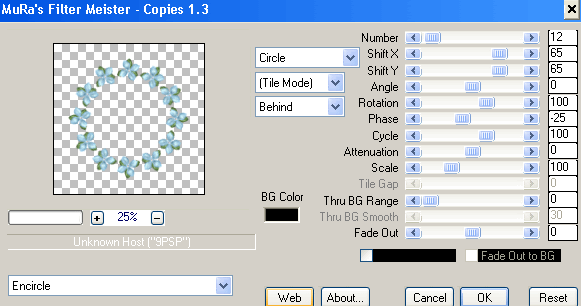
Effects > Plugins > Mura Meister > Copies with the following settings:


Layer > Arrange > Send to Bottom

Paste a Paper of choice a new layer
Layers > Arrange > Move Down (to bottom layer)

Layers > New Mask Layer > From Image
Apply WSL_Mask181
OK
Layers > Merge > Merge Group
Colourise to your liking
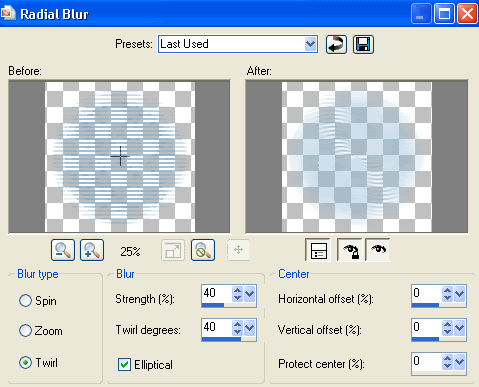
Adjust > Blur > Radial Blur with the following settings:


Crop and resize to liking

Still on Mask layer
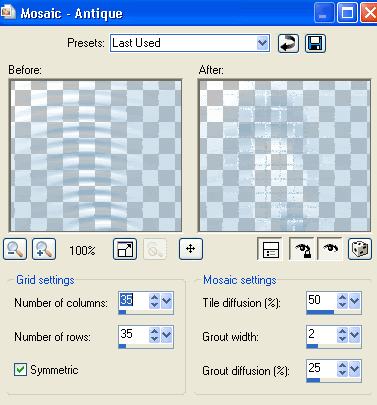
Adjust > Effects > Texture Effects > Mosaic - Antique with the following settings:


Select your Text Tool and font of choice
I am using 2Peas Flea Market
Text colour of choice to match your tag
I am using #4580ab

Type out your name
Objects > Align > Horizontal Centre in Canvas
Convert to raster layer
Apply a Gradient Glow and drop shadow of choice

Finally, add your © copyright, licence and watermark, then save as a GIF or JPG and you're done!


** IF YOU WISH TO ANIMATE PLEASE FOLLOW THESE NEXT STEPS **

Activate your Stars layer
Duplicate twice and rename Stars1, Stars2 and Stars3

Activate Stars1
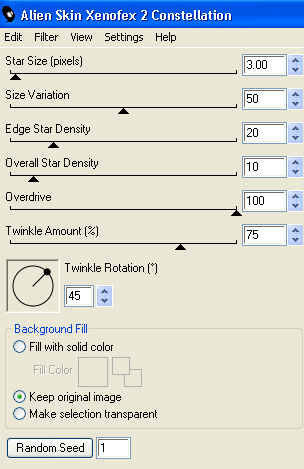
Effects > Plugins > Xenofex 2 > Constellation with the following settings:


Hide Stars1 and activate Stars2
Repeat Constellation adjusting the Random Seed

Hide Stars2 and activate Stars3
Repeat Constellation again adjusting the Random Seed once more

Now to animate!

Activate Stars1 and hide Stars2 and Stars3
Edit > Copy Merged

Open Animation Shop
Edit > Paste as New Animation

Back to PSP
Hide Stars1 and activate Stars2
Edit > Copy Merged

In Animation Shop
Edit > Paste After Current Frame

Back to PSP
Hide Stars2 and activate Stars3
Edit > Copy Merged

In Animation Shop
Edit > Paste After Current Frame

Now save as a GIF and you're done!

Thanks for trying my turorial!

::st!na::


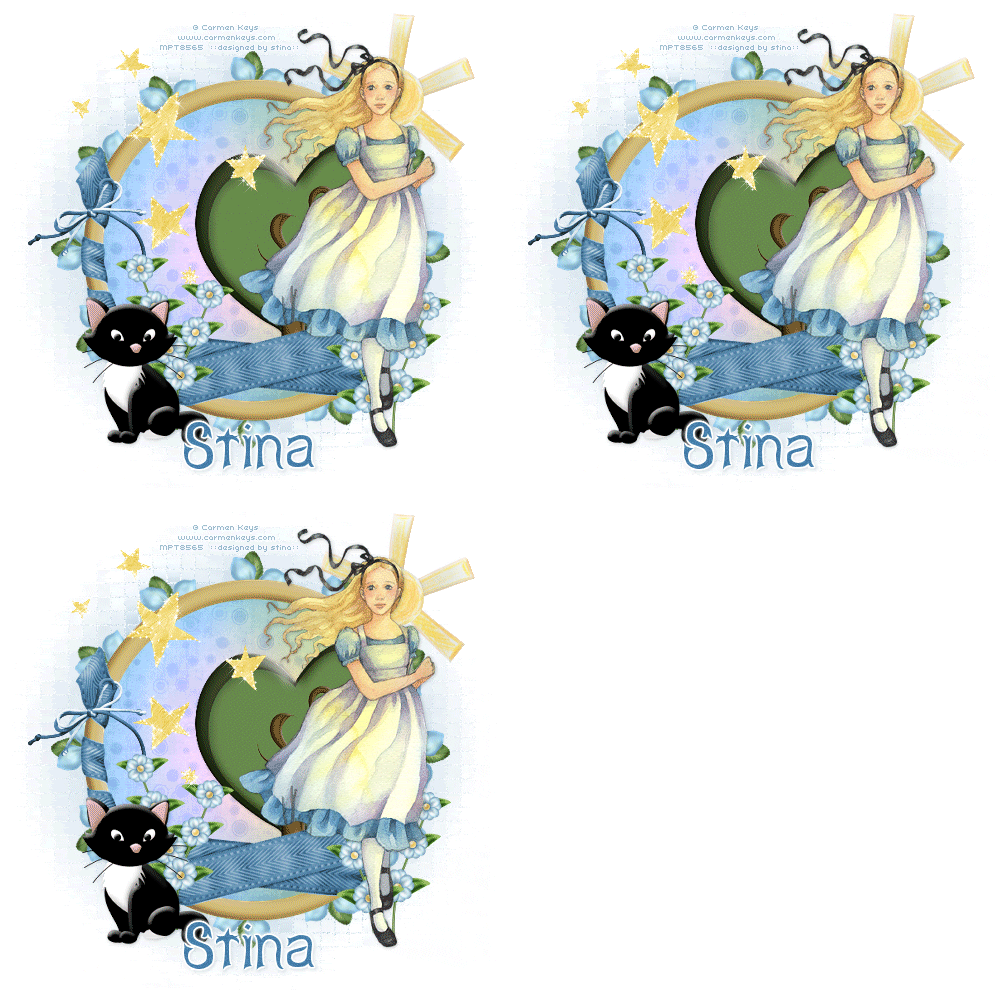
Here is a non-animated version:


© Tutorial written by Stina on 9th August, 2009
All rights reserved
Sunday, July 26, 2009

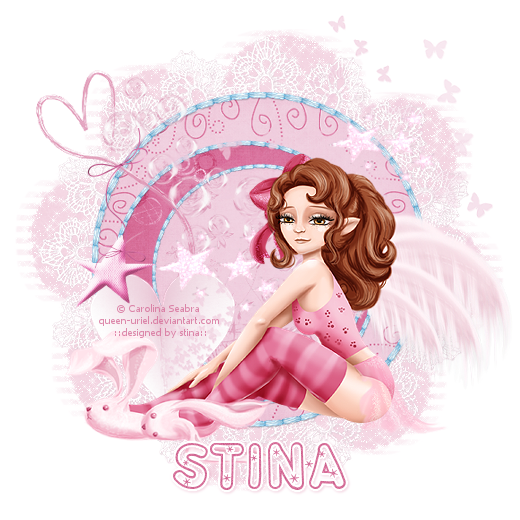
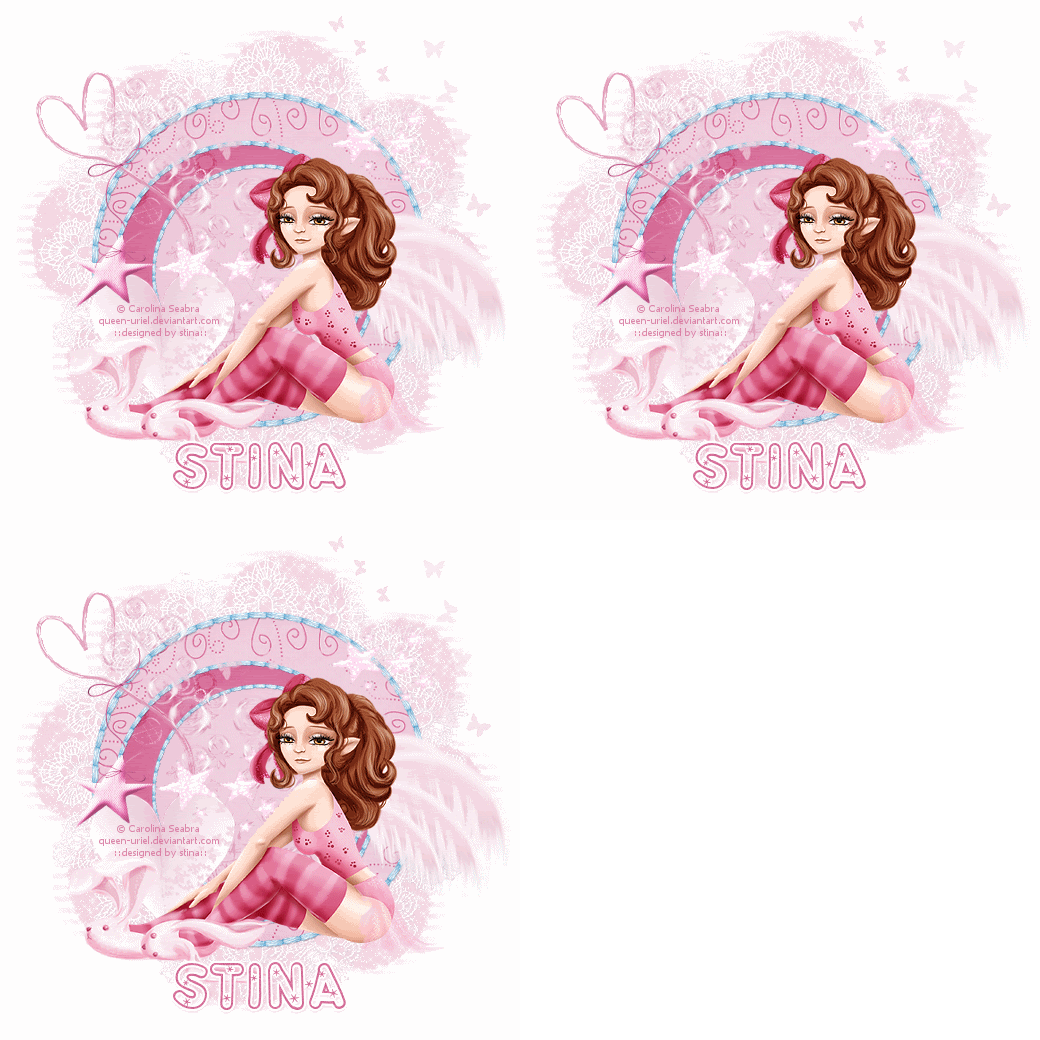
Bedtime Bunny


Supplies

Scrap kit of choice - I am using "Tiny Dancer" by Lynn Earwicker of Moo Designs available from The Scrapping Divaz Designz
Tube of choice - I am using Carolina Seabra which is FTU and available from her site in PNG format
WSL_Mask239 by Chelle available from her blog
Font of choice - I am using StarryFHope
Plugin: Xenofex 2 Constellation


Let's begin....


Open a new 600 x 600 blank canvas flood-filled white

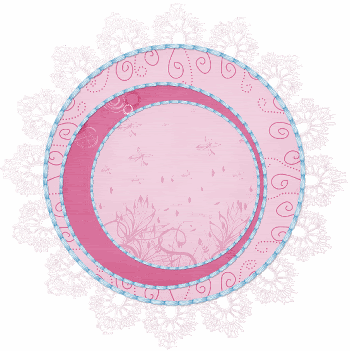
Paste LaceFrame as new layer
Resize by 95%

Paste Stitches as new layer
Resize by 70%

Select inside the first "circle" with your Magic Wand
Selections > Modify > Expand by 3
Add new raster layer
Layers > Arrange > Move Down
Paste a paper of choice INTO Selection
Deselect

Select the next circle
Selections > Modify > Expand by 3
Activate Paper layer
Paste another paper of choice INTO selection
Deselect

Select the next circle
Selections > Modify > Expand by 3
Activate Paper layer again
Paste another paper of choice INTO selection
Deselect


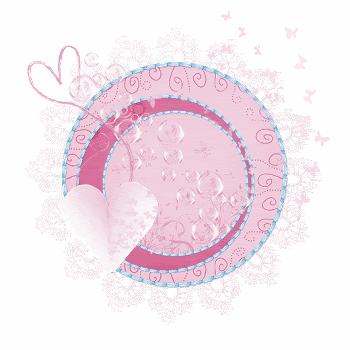
Paste Bubbles as new layer
Resize by 60%
Position to your liking

Paste HeartDoodle as new layer
Resize by 50%
Position to the upper left

Paste ButterflyCluster as new layer
Resize by 75%
Position with bottom of cluster within the inner lower left

Paste PaperHeart as new layer
Resize by 30%
Position to your liking


Paste StarTrail as new layer
Image > Rotate by 10 to the left
Resize by 40%
Adjust > Brightness & Contrast > Brightness/Contrast with the Bright preset setting
Position to your liking

Paste your Tube as new layer
Resize as necessary and position to liking
Add any other elements of your choice

Paste a Paper of choice as new layer
Layers > Arrange > Send to Bottom

Layers > New Mask Layers > From Image
Apply WSL_Mask239
OK
Layers > Merge > Merge Group
Lower opacity to around 20

Crop and resize

Select your Text Tool and font of choice
I am using StarryFHope
Colour of choice

Type our your name and position
Objects > Align > Horizontal Centre in Canvas
Convert to raster layer
Apply a Gradient Glow in white and add a drop shadow of choice

Finally, add your © copyright, licence and watermark, then save as a GIF or JPG and you're done!


** IF YOU WISH TO ANIMATE PLEASE FOLLOW THESE NEXT STEPS **

Activate your Mask layer
Duplicate twice and rename Sparkle1, Sparkle2 and Sparkle3

Activate Sparkle1
Effects > Plugins > Xenofex 2 > Constellation with the following settings:


Hide Sparkle1 and activate Sparkle2
Repeat Constellation effect adjusting the Random Seed

Hide Sparkle2 and activate Sparkle3
Repeat Constellation effect once more adjusting the Random Seed

Activate Sparkle1 and hide Sparkle2 and Sparkle3
Edit > Copy Merged

Open Animation Shop
Edit > Paste as New Animation

Back to PSP
Hide Sparkle1 and activate Sparkle2
Edit > Copy Merged

In Animation Shop
Edit > Paste after Current Frame

Back to PSP
Hide Sparkle2 and activate Sparkle3
Edit > Copy Merged

In Animation Shop
Edit > Paste after Current Frame

Now save as a GIF and you're done!
Thanks for trying my tutorial!

::st!na::

Here is a non-animated version:


© Tutorial written by Stina on 26th July 2009
All rights reserved
Saturday, July 4, 2009

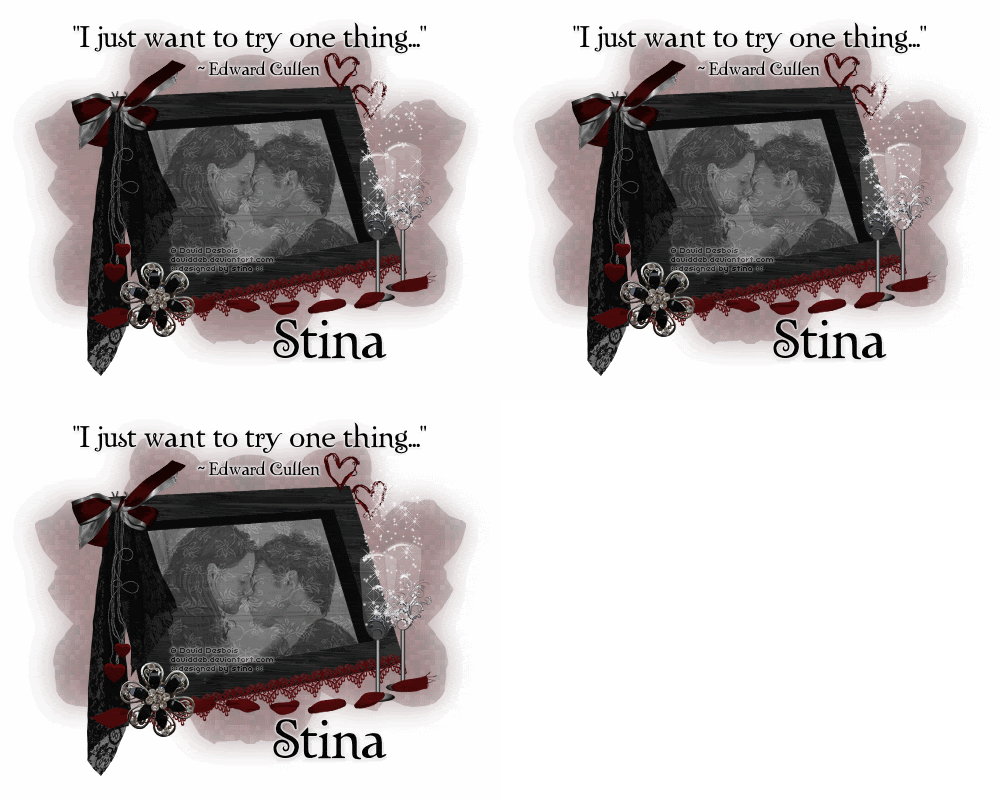
I Just Want to Try One Thing....


Supplies

Scrap kit of choice - I am using "Chosen" by Lynn Earwicker available from The Scrapping Divaz Designz
Image of choice - I am using the lovely artwork of David Desbois who is FTU with written permission
Font of choice - I am using Twilight
Plugins: Xero Fritillary and Xenofex 2 Constellation


Let's begin...


Open a new 700 x 550 canvas flood-filled white

Paste 3dFrame as new layer
Resize by 50%

Select inside the Frame with your Magic Wand
Selections > Modify > Expand by 10
Add a new raster layer
Paste Paper of choice INTO selection
Layers > Arrange > Move Down

KEEP SELECTED!!

Add another raster layer
Paste an Image of choice (with similar proportions ..ie, landscape image) INTO selection
Deselect

If you are using a colour image you will need to change it to Black and White
Adjust > Hue and Saturation > Colourise with both Hue and Saturation set to 0

Lower opacity to around 40

Activate top layer

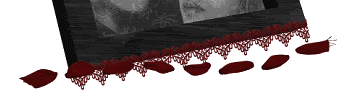
Paste LaceStrip as new layer
Image > Rotate by 12 to the left
Resize by 42%
Position along bottom edge of Frame

Paste EyeletRibbon as new layer
Resize by 55%
Position along bottom of Frame


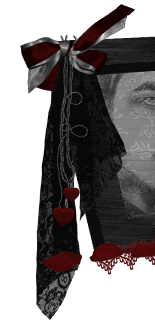
Paste BlackLace as new layer
Resize by 40%
Position in upper left of Frame

Paste HeartDangler as new layer
Resize by 35%
Position in upper left over lace

Paste Ribbon as new layer
Image > Rotate by 15 to the left
Resize by 20%
Position in upper left


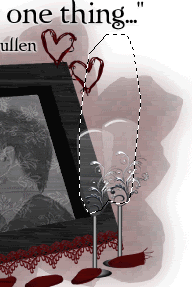
Paste ChampagneFlute as new layer
Resize by 28%
Position to the lower right
Duplicate and move slightly up and alongside

Paste Pin as new layer
Resize by 12%
Position over EyeletRibbon in lower left

Paste EntwinedHeartRibbon as new layer
Resize by 10%
Position in upper right
Duplicate, then Image > Mirror and position alongside it slightly below


Paste GlitteryFlower as new layer
Layers > Arrange > Send to Bottom
Resize by 50% and move slight to the right
Duplicate, then Image > Mirror
Layers > Merge > Merge Down
Lower opacity to around 35

Duplicate again then activate bottom layer
Adjust > Blur > Gaussian Blur with a Radius of 20.00
Rename top layer Roses

Crop and resize

Select Text Tool and font of choice
I am using Twilight
Text colour of choice

Type out text of choice and position
Objects > Align > Horizontal Centre in Canvas
Convert to raster layer
Apply a slight Gradient Glow and/or drop shadow of choice

Select another font of choice
I am using the same
Same Text colour

Type out your name and position
Convert to raster layer
Apply any effect or drop shadows as necessary to your liking
Finally, add your © copyright, licence and watermark, then save as a GIF or JPG and you're done!


** IF YOU WISH TO ANIMATE PLEASE FOLLOW THESE NEXT STEPS **

Activate your Roses layer
Duplicate twice and rename Roses1, Roses2 and Roses3

Activate Roses1
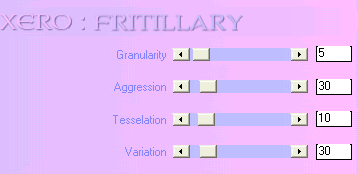
Effects > Plugins > Xero > Fritillary with the following settings:


Hide Roses1 and activate Roses2
Apply Fritillary effect again adjusting the variation by 5

Hide Roses2 and activate Roses3
Apply Fritillary effect again adjusting the variation by 5 once more

Now we need to copy merge with each Rose Fritillary layer into a new image with three layers

So activate Roses1 and hide Roses2 and Roses3
Edit > Copy Merged
Then Paste AS NEW IMAGE

Hide Roses1 and activate Roses2
Edit > Copy Merged

On the new image
Paste as new layer

Hide Roses2 and activate Roses3
Edit > Copy Merged

Back to new image
Paste as new layer

Now we are going to add sparkles and we needed the layers merged for this effect

So using your Freehand Tool carefully draw around the Champagne Flutes where you want to add the Sparkles


Hiding the top two layers go to:
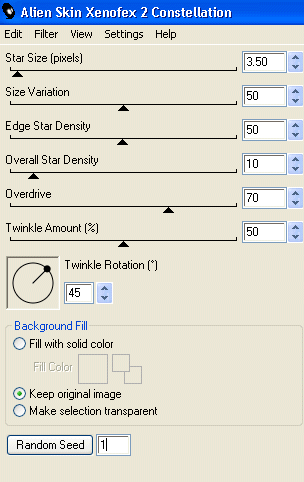
Effects > Plugins > Xenofex 2 > Constellation with the following settings:


Repeat with the remaining two layers adjusting the Random Seed

Now let's animate!!!

Activate Layer1 and hide Layer2
Edit > Copy

Open Animation Shop
Edit > Paste as New Animation

Back to PSP
Hide Layer1 and activate Layer2
Edit > Copy

In Animation Shop
Edit > Paste AFTER Current Frame

Back to PSP
Hide Layer2 and activate Layer3
Edit > Copy

In Animation Shop
Edit > Paste AFTER Current Frame

Save as a GIF and you're done!

Thanks for trying my tutorial!

::st!na::


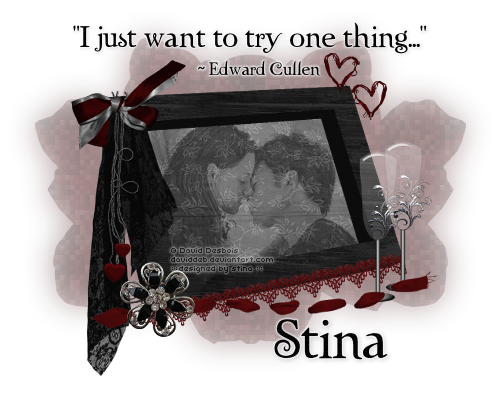
Here is a non-animated version without the sparkles:


© Tutorial written by Stina on 4thJuly 2009
All rights reserved
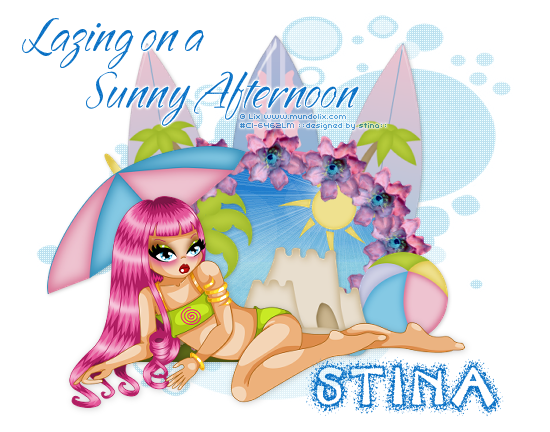
Lazing on a Sunny Afternoon


Supplies

Scrap kit of choice - I am using "Fun and Fancy Free" by Lynn Earwicker available from The Scrapping Divaz Designz
Tube of choice - I am using the delightful artwork of Lix available with a licence through CILM
**PLEASE DO NOT USE THIS ARTWORK WITHOUT THE APPROPRIATE LICENCE**
UFMask19 here
Fonts of choice - SandyTextHmkBold and SBC Sandy Beach
Plugins: Filters Unlimited Blue Sky, Mura Meister Copies and Penta.com Colour Dot


Let's begin....


Open a new 700 x 550 canvas flood-filled white

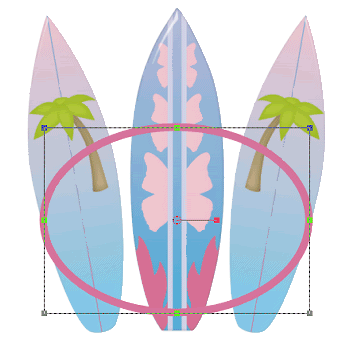
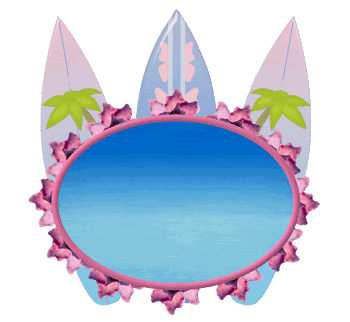
Paste a Surfboard as new layer
Image > Rotate by 10 to the left
Resize by 70%
Position slightly to the left
Duplicate, then Image > Mirror

Paste another Surfboard as new layer
Resize by 70%
Position in centre

Select your Preset Shape Tool and set to Ellipse
Foreground - colour to match tag
Background - null
Stroke width - 10.00

Draw out Ellipse towards centre
Objects > Align > Horizontal Centre in Canvas


Convert to raster layer

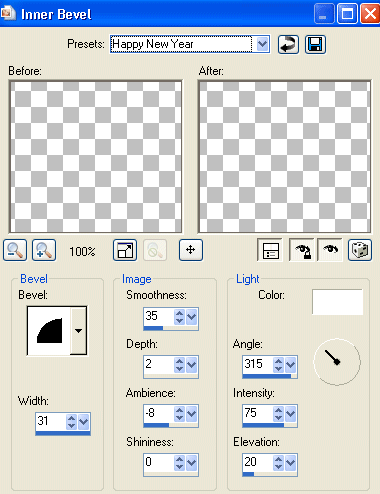
Apply the following Inner Bevel:


Select inside with your Magic Wand
Selections > Modify > Expand by 5
Add new raster layer
Paste Paper of choice INTO selection

KEEP SELECTED!!

Effects > Plugins > IC Net Software > Filters Unlimited > Color Filters > Blue Sky
Default settings
Deselect
Layers > Arrange > Move Down

Activate top layer

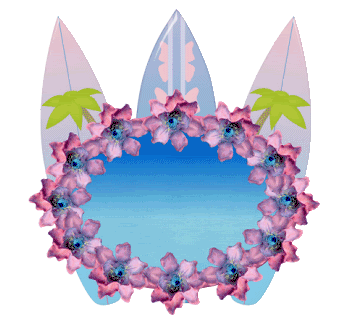
Paste Flower as new layer
Resize by 15%

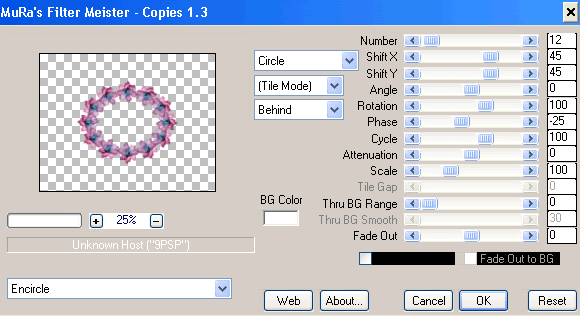
Effects > Plugins > Mura Meister > Copies with the following settings:


Position in line with Frame
Place over or behind Frame - it's up to you


Paste Tube of choice as new layer
Resize as necessary
Position along bottom of Ellipse Frame to your liking

Paste BeachBall as new layer
Resize by 20% and position

Paste Sandcastle as new layer
Resize by 40% and position

Paste Umbrella as new layer
Resize by 45% and position behind your Tube

Paste PalmTree as new layer
Resize by 40% and position behind Tube and Umbrella

Paste Sun as new layer
Resize by 25% and position to liking

Add any other elements to your liking

Paste Paper of choice a new layer
Layers > Arrange > Send to Bottom

Layers > New Mask Layer > From Image
Apply UFMask19
OK
Layers > Merge > Merge Group

Crop and resize

Still on Mask layer
Effects > Plugins > Penta.com > Colour Dot
Default settings
Lower opacity to 55

Select Text Tool and font of choice
I am using SandyTextHmkBold
Text colour of choice - I am using #0e74c7

Type out text of choice and position
Convert to raster layer
Apply a slight Gradient Glow and/or drop shadow of choice

Select another font of choice
I am using SBC Sandy Beach
Same Text colour
Type out your name and position
Convert to raster layer
Apply any effect or drop shadows as necessary to your liking

Finally, add your © copyright, licence and watermark, then save as a GIF or JPG and you're done!


** IF YOU WISH TO ANIMATE PLEASE FOLLOW THESE NEXT STEPS **

Activate your Frame Background layer
Duplicate once and rename Sunburst1 and Sunburst2

Activate Sunburst1

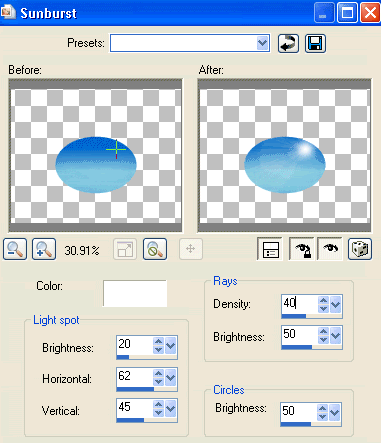
Effects > Illumination Effects > Sunburst with the following settings:


Hide Sunburst1 and activate Sunburst2
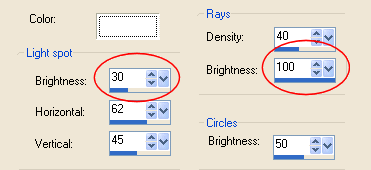
Apply Sunburst effect again with the following changes:


Now for the animation!

Activate Sunburst1 and hide Sunburst2
Edit > Copy Merged

Open Animation Shop
Edit > Paste as New Animation

Back to PSP
Hide Sunburst1 and activate Sunburst2
Edit > Copy Merged

In Animation Shop
Edit > Paste AFTER Current Frame

Select All and set your Frame Properties to 50
Save as a GIF and you're done!

Thanks for trying my tutorial!

::st!na::


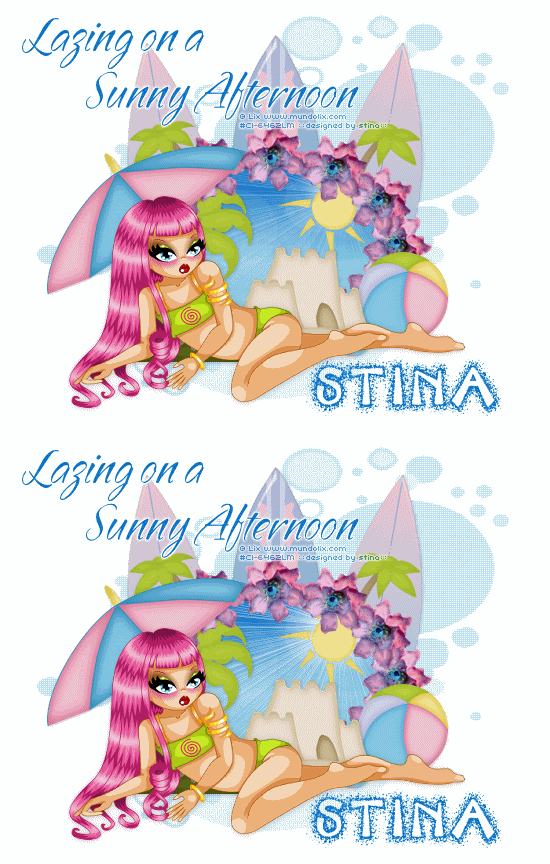
Here is a non-animated version:


© Tutorial written by Stina on 4thJuly 2009
All rights reserved
Monday, June 22, 2009

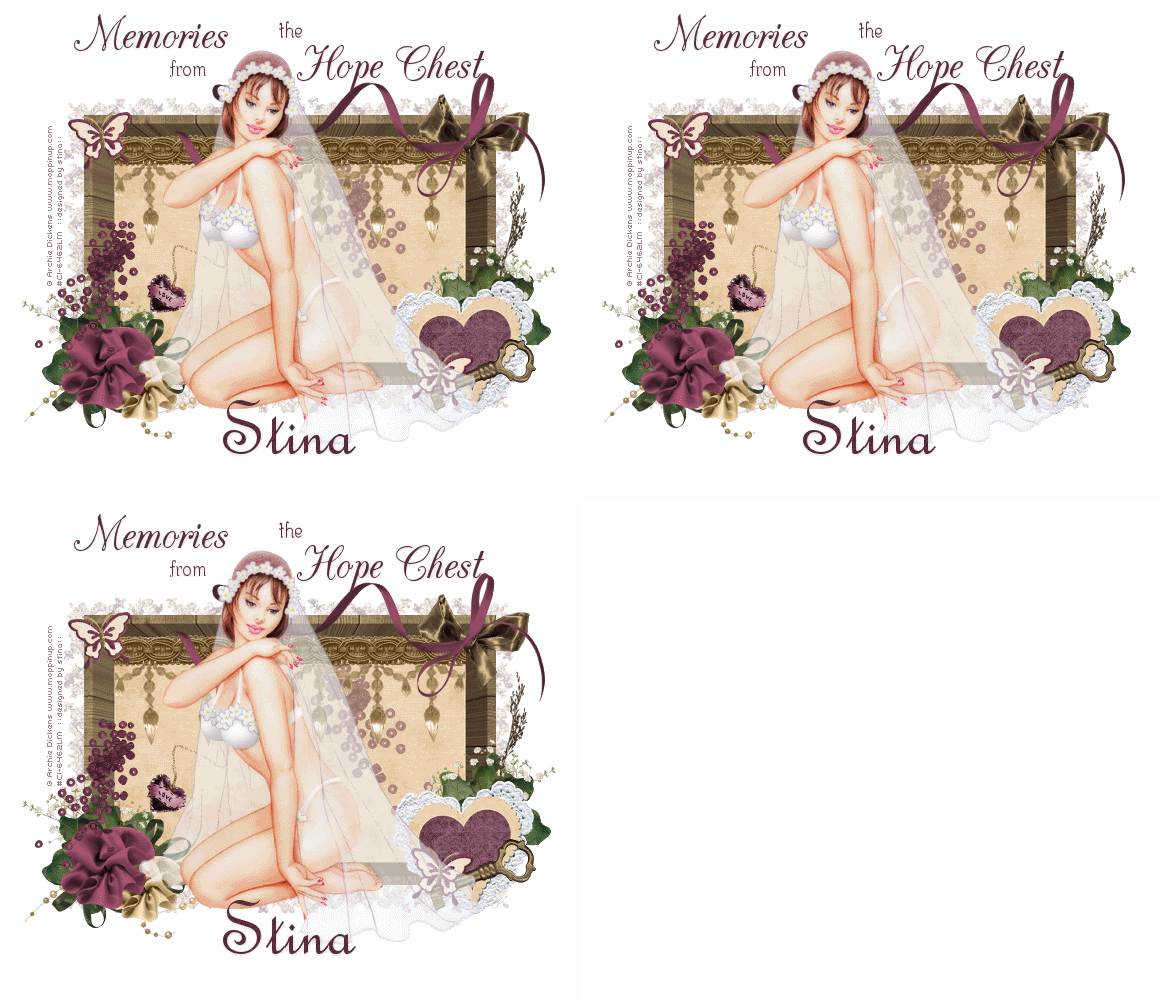
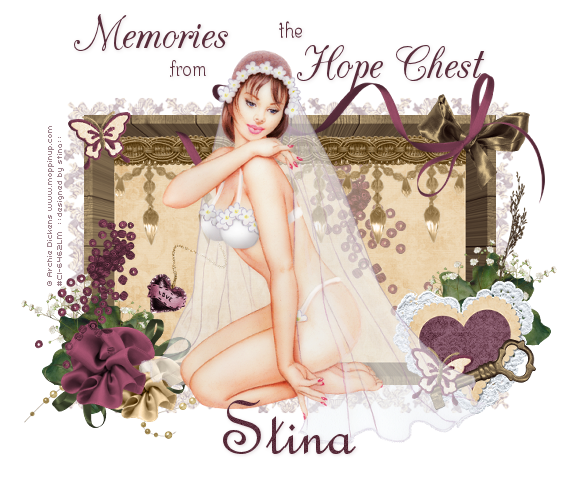
Memories from the Hope Chest

Supplies

Scrap kit of choice - I am using the lovely "Among my Souvenirs" by Lynn Earwicker available from The Scrapping Divaz Designz
Tube of choice - I am using the artwork of Archie Dickesn available with a licence through CILM
**PLEASE DO NOT USE HIS ARTWORK WITHOUT THE APPROPRIATE LICENCE**
sg_OldFashionedLace Mask here
Fonts of choice - I am using CAC Champagne, Centime and FrenchScript
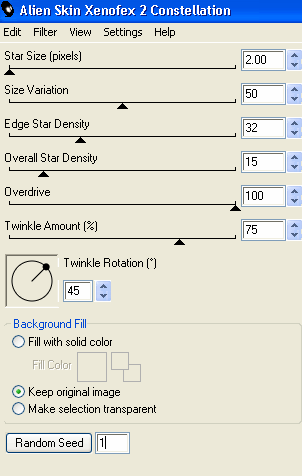
Plugins: Xero Porcelain, Xero Radiance and Xenofex 2 Constellation


Let's begin....


Open a new 600 x 600 canvas flood-filled white
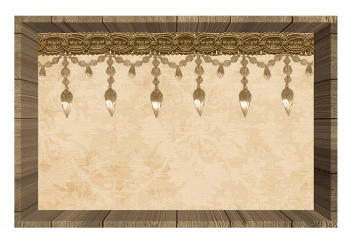
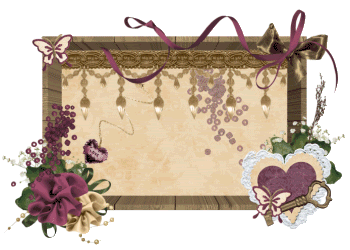
Paste Box as new layer
Resize by 70%

Paste AntiqueDanglers as new layer
Resize by 56%
Position in the upper edge of inside of box


Paste CrochetHeartFrame as new layer
Resize by 25%
Position in lower right

Select inside the Frame with Magic Wand
Selections > Modify > Expand by 5
Add new raster layer
Paste paper of choice INTO selection
Deselect

Paste StitchedButterfly as new layer
Resize by 10%
Position on the edge of Heart

Duplicate, then Image > Mirror
Position in upper left

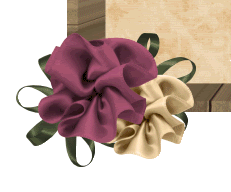
Paste Rossette1 as new layer
Resize by 12%
Position toward lower left

Paste Rossette2 as new layer
Resize by 15%
Position in lower left with first Rossette

Paste RibbonFlower as new layer
Resize by 15% and duplicate
Position both below Rossettes


Paste Beadspill as new layer
Resize by 25%
Position to the left overlapping Rossettes

Paste Beadspill again
Image > Mirror
Resize by 30%
Position on bottom of box beneath AntiqueDanglers

Lower opacity to around 50
Paste Locket as new layer
Image > Rotate by 40 to the right
Resize by 25%
Position in bottom of box toward the left

Paste OldFlower as new layer
Resize by 20%
Duplicate, then Image > Mirror
Position one behind CrochetedHeart and the other behind Flowers on the lower left

Paste BeadString as new layer
Resize by 28%
Position behind Flowers to the left

Paste DriedFlower as new layer
Image > Rotate by 10 to the right
Resize by 35%
Position to the right behind Heart

Paste Key as new layer
Image > Flip, then Image > Mirror
Resize by 18%
Position over bottom of Heart

Paste SatinBow1 as new layer
Resize by 18%
Position in upper right

Paste TwistedRibbon as new layer
Resize by 60%
Position over SatinBow

You should now have a conglomerate of treasures in your "box"


OK time to add our Tube

Paste Tube of choice as new layer
Resize as necessary
Position in centre of box

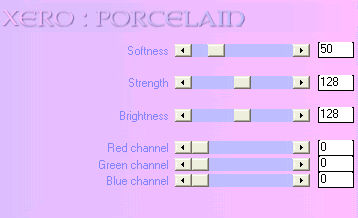
Effects > Plugins > Xero > Porcelain with the following settings:


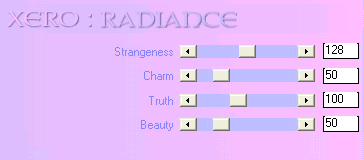
Effects > Plugins > Xero > Radiance with the following settings:


(Depending on the tube you use you may have to play around with the settings for your desired effect)

Paste Paper of choice as new layer
Layers > Arrange > Send to Bottom

Layers > New Mask Layer > From Image
Apply sg_OldFashionedLace

DO NOT MERGE YET!!

Select Pick Tool (Deformation Tool in some versions) and use nodes to resize Mask around box to liking)
Layers > Merge > Merge Group
Lower opacity to 40

Crop and resize

Select your Text Tool and a font of choice
I am using two fonts - a script one called CAC Champagne and a print one called Centime
Background - #592d3b (or to match your tag)

Type out some text of your choice
Position it to your liking
Convert to raster layer

Select another font of choice
I am using French Script
Text colour - #592d3b

Type out your name
Objects > Align > Horizontal Centre in Canvas
Convert to raster layer
Add some noise
Apply a drop shadow of choice

Finally, add your © copyright, licence and watermark, then save as GIF or JPG and you're done!


** IF YOU WISH TO ANIMATE PLEASE FOLLOW THESE NEXT STEPS **

Activate your Mask layer
Duplicate twice and rename Sparkle1, Sparkle2 and Sparkle3

Hide Sparkle2 and Sparkle3 and activate Sparkle1
Effects > Plugins > Xenofex > Constellation with the following settings:


Hide Sparkle1 and activate Sparkle2
Apply the Constellation again, adjusting the Random Seed

Hide Sparkle2 and activate Sparkle3
Apply the Constellation effect again, adjusting the Random Seed

Now for the animation!

Activate Sparkle1 and hide Sparkle2 and Sparkle3
Edit > Copy Merged

Open Animation Shop
Edit > Paste as New Animation

Back to PSP
Hide Sparkle1 and activate Sparkle2
Edit > Copy Merged

In Animation Shop
Edit > Paste AFTER Current Frame

Back to PSP
Hide Sparkle2 and activate Sparkle3
Edit > Copy Merged

In Animation Shop
Edit > Paste AFTER Current Frame

Save as a GIF and you're done!

Thanks for trying my tutorial!

::st!na::


Here is a non-animated version:


© Tutorial written by Stina on 21st April 2009
All rights reserved