Please email me designed.by.stina@gmail.com with your creations. I'd love to see them.

Showing posts with label Tootypup Scraps. Show all posts

Friday, November 9, 2012

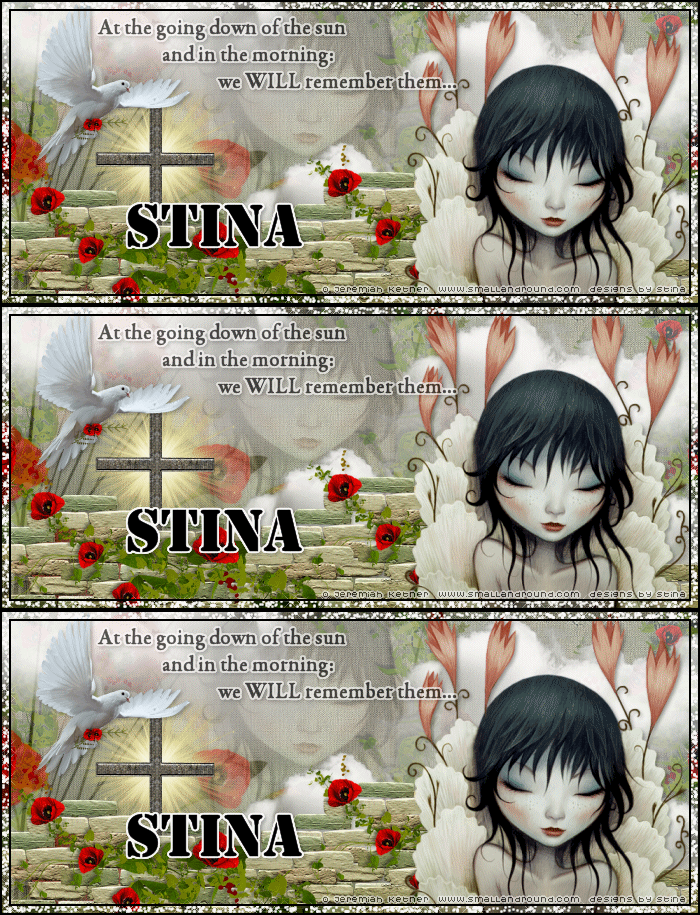
We Will Remember Them

Supplies

Scrap kit - "Poppy Fields" by Tootypup Scraps available from the stores listed on her blog
Tube of choice - I am using an FTU one by Jeremiah Ketner
Don't forget when using a tube to make sure it is SAFE to use AND give proper credit to the artist
Fonts of choice - I am using Garamond Premr Pro Smbd and Stencil
Mask of choice - I am using WSL_Mask362 by Weescotslass
Eye Candy 5 Impact Gradient Glow

Download Supplies here


Open a new 700 x 600 transparent canvas
Flood fill white


Paste TP_ScrollFrame_01 as a new layer
Leave in position, or position to your liking


Paste TP_StoneWall_01 as new layer
Resize by 55% and position towards lower half of canvas


Paste one of the TP_LestWeForget elements (I used 01)
Resize by around 70% and position to the right without covering the poppies and in line with the stone wall at the bottom


Paste TP_Cross_03 as new layer
Resize by around 25% and position BEHIND the last element of the solider's gun and boots etc.


Paste TP_PeaceDove_02 as new layer
Resize by 20%, then Image / Mirror and position to the upper left of the frame


Activate bottom layer

Paste a paper of choice as a new layer
Resize by 70%
Layers / Load Mask / Load Mask from Disk
Choose a mask of your choice
I am using WSL_Mask362

Layers / Merge / Merge Group

Now activate the Frame layer

Paste TP_Cloud_02 as new layer
Position behind the stone wall to your liking
I used the Eraser tool to erase the excess on the bottom left

Now activate your Frame layer again
Paste a tube of your choice as a new layer
I am using one by Jeremiah Ketner
Resize to your liking - I resized by 70%
Position to your liking


To make the tube "blend" more with the colours of the tag, I then did the following:
Duplicate tube layer
Adjust / Hue and Saturation / Colorise
With settings set to ZERO
Then, Adjust / Color / Manual Color Correction with the following settings:


** If you do not have Manual Color Correction in your menu, you need to go to View / Customise / Unused Commands
Then locate Manual Colour Correction in the right window and DRAG it to the menu you want it in
I placed it under Adjust / Color


Now lower the opactity of the colourised layer to around 50%
Apply a drop shadow of choice to your layers
Select a font of your choice and type a phrase or text of choice
I used the closing lines of the "Ode of Remembrance"
Apply a gradient glow if you wish, followed by a slight drop shadow

Add your name and your credits

Merge Visible then Crop to Selection and you're done!

Thank you for trying my tutorial!


Here is a forum style tag I made using the same elements and style from this tutorial. Both animated and non-animated.
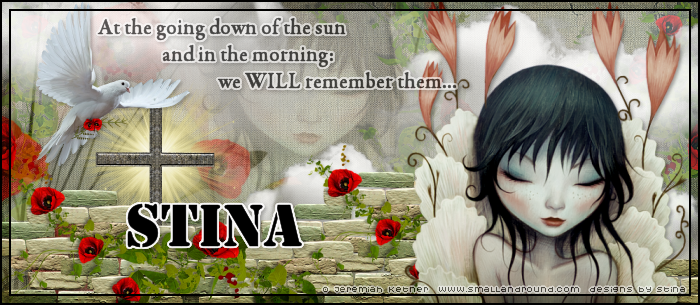
RemembranceFT

RemembranceFT ani


© Tutorial written by Stina on 9th November 2012

Monday, October 31, 2011

Hubble Bubble

Hubble Bubble
Supplies

Scrap kit of choice - I am using "Witches n' Britches" by Tootypup Scraps available from all her stores listed on her blog
Tube of choice - I am using one of the Membership Posers from the kit by Outlaw by Design
Font of choice - I am using Morpheus
Plugins:
Xero Porcelain
Alien Skin Eye Candy 5: Nature Smoke
Alien Skin Eye Candy 5: Impact Gradient Glow (optional for text)


Open the TP_SpidersWeb_01 or one of your choice
Shift + D to duplicate it and close the original
Resize to 600 x 600

Paste DBS_Pumpkin_01 as new layer
Resize by 70% and leave in position

Paste TP_TreeStump_04 as new layer
Resize by 35%
Position to the right

Paste TP_Halloween_06 as new layer
Resize by 35%
Position along the bottom

Paste TP_Owl_01 as new layer
Erase the log and any excess
Resize by 15%
Position the owl on the tree stump

Paste one the Cauldrons as a new layer
Resize by about 25% and position to the left

Paste TP_InTheWoods_10 (Pumpkins) as new layer
Resize by 25%
Position to the lower right over the skulls (don't worry, we're going to replace them *s*)

Paste TP_Skulls_01 as new layer
Resize by 12% and position in front of the Pumpkins

Paste TP_Bat_02 as new layer
Resize by 25% and position to your liking

Paste a tube of choice as a new layer
You can use one from the kit or one of your own
I used one by Outlaw by Design which is used in the kit
Resize and position to your liking

I then applied the Xero Porcelain filter with the Red, Green and Blue channels set to 0
This gives it a soft look

Image / Canvas Size
Width - 600
Height - 650
Placement - Bottom by 50

Photobucket

Select a font of your choice - I am using Morpheus
Type out your name and apply any effects you wish

Add your credits and you're done!


LET'S ANIMATE!!

Activate your Cauldron layer
Add three new raster layers, calling them
Smoke1, Smoke2 and Smoke3

Grab your Freehand Selection tool
Feather - 2

KEEP SELECTED THROUGHOUT THE PROCESS!

Draw out the shape of smoke coming from the cauldron

Photobucket

On the Smoke1 layer
Effects / Plugins / Alien Skin 5: Nature / Smoke with the following settings:

Photobucket

Hide Smoke1 and activate Smoke2
Repeat the Smoke effect, adjusting the Random Seed

Hide Smoke2 and activate Smoke3 and repeat the effect again

Deselect

Hide Smoke2 and Smoke3
Activate Smoke1
Edit / Copy Merged

Open Animation Shop
Paste as new animation

In PSP
Hide Smoke2 and activate Smoke3
Edit / Copy Merged

In Animation Shop
Paste after Current frame

Select all
ALT + Enter to open Frame Properties
Change to 20

Save as a GIF and you're done!


Thank you for trying my tutorial

Hubble Bubble


© Tutorial written by Stina on 31st October 2011

Witchylicious

Witchylicious
Supplies

Scrap kit of choice - I am using "Pumpkin Haunt" by Tootypup Scraps available from all her stores listed on her blog
Tube of choice - I am using the artwork of NoFlutter
Witchylicious Tag Template by Stormy
Mask of choice - I am using DBV_Masks135
Font of choice - I am using PetraScript
Plugins:
Eye Candy 4000 HSB (optional)
Alien Skin Eye Candy 5: Impact Gradient Glow (optional)


Open the Witchylicious template
Shift + D to duplicate it and close the original
Delete the credit layer and let's begin

Activate Left Rectangle
Selections / Select All, then Float, then Defloat
Paste paper of choice as new layer
Resize by about 70%
Selections / Invert
Delete then deselect

Activate Circle Back
Repeat Selection process
Paste paper of choice as new layer
Resize by 70%
Selections / Invert
Delete then deselect

Then Duplicate and set blend mode to Multiply
Layers / Merge / Merge Down
Repeat if necessary for a dark border

Activate Circle Front
Repeat Selection process
Paste paper of choice as new layer
Resize by 70%
Selections / Invert
Delete then deselect

Activate Right Rectangle
Repeat Selection process
Paste paper of choice as new layer
Resize by 70%
Selections / Invert
Delete then deselect

Activate Word Art (the blue layer)
Repeat Selection process
Paste paper of choice as new layer
Resize by 60%
Selections / Invert
Delete then deselect
Duplicate then set blend mode to Multiply
Layers / Merge / Merge Down

Remove the Bat Hearts unless you wish to use them but for this tutorial we aren't

Paste TP_Halloween_03 as new layer
Resize by 70% and move it just off centre but position so it is tucked slightly behind the Word Art Glitter layer

Photobucket

Paste TP_Cauldron_05 as new layer
Resize by 27% and position to the left of the tree

Paste TP_GRass_03 as new layer
Resize by 20% and position to the lower right beyond the skulls to fill in
Duplicate, then Image / Mirror and position behind Cauldron

Paste TP_Lanterns_01 as new layer
Resize by about 35% and position on the upper left rectangle

Back on top layer

Paste TP_BooksOfSpell_01 as new layer
Resize by 20% and position in lower left

Paste tube of choice as new layer
If you are using the same as me, resize it by 70%
Then Duplicate it and hide layer
On the original layer go to:

Adjust / Hue and Saturation / Colourise
Set both to 0

Select your Change to Target brush with the following settings:

Photobucket

Set your foreground colour to #5a5f35
Now carefully run your brush over the tube
Unhide the duplicate layer and set blend mode to Soft Light

I also used another tube by the same artist
Resized it to around 35% and positioned it on the book of spells

On the bottom layer paste a paper of choice
Apply a mask of choice - I am using DBV_Masks135
Layers / Merge / Merge Group

Resize tag to 600 x 600

Select a font of choice - I am using PetraScript
Type out your name and add any effects you wish
I used Eye Candy 400 HSB Noise with default settings and added a Gradient Glow

Now add your credits and you're done!

Thank you for trying my tutorial


© Tutorial written by Stina on 29th October 2011

Sunday, October 30, 2011

Pumpkin Magic

Pumpkin Magic
Supplies

Scrap kit of choice - I am using "Pumpkin Haunt" by Tootypup Scraps available from all her stores listed on her blog
Tube of choice - I am using the lovely artwork of Cris Ortega
Mask of choice - I am using WSL_Mask7 and WSL_Mask328
Font of choice - I am using Darkwood
Plugins:
Alien Skin Xenofex 2 Constellation
Eye Candy 4000 HSB (optional)


Open a new transparent image 700 x 600
Paste TP_FramePlain01 as new layer
Resize by 50%

Paste TP_Halloween05 as new layer
Resize by by 50%
Position to the left of the Frame

Select inside the Frame with your Magic Wand
Selections / Modify / Expand by 10
Paste a paper of choice as a new layer and place beneath the frame
Resize paper by 40%

Photobucket

Selections / Invert
Delete

KEEP SELECTED!!

Paste TP_Halloween_07 as new layer
Resize by 37%
Position toward the centre of the frame

Paste TP_Pumpkins_05 as new layer
Resize by 25%
Position in the corner of frame over the steps of the little house

Photobucket

Delete then deselect

Back to the top layer

Paste TP_Cauldron_5 as new layer
Resize by 16% and position at base of the tree

Paste TP_PumpkinVine_02 as new layer
Resize by 25%
Position in upper right
Select the inside of the Frame with your Magic Wand again
Then with your Eraser Tool erase just the excess vine at the bottom

Photobucket

Paste TP_MagicTreeStump_01 as new layer
Resize by 37% and position to the lower left of frame

Paste TP_Pumpkins_02 as new layer
Resize by 7% and position on steps
Duplicate, then Image / Mirror
Position at the edge of tree stump

Paste TP_Stardust_02 or one of choice as new layer
Resize by 50%
Position from top of Cauldron

Paste a tube of choice as a new layer
I am using the lovely artwork of Cris Ortega
If you are using the same as me Mirror the tube and position to the right
Duplicate it and move to below the Frame layer

Now grab your Freehand Selection Tool on Point to Point with feather set to 0
Carefully draw around where the tree stump is
(hide the top tube layer if you need to see the stump)

Photobucket

Now paste a paper of your choice as a new layer and move to the bottom
Apply a mask of your choice
I used two masks for my effect and played with the opacity to blend them together
Layers / Merge / Merge Down

Back to your top layer

Select a font of your choice and type out your name
Add any effects you wish - I used Eye Candy 4000 HSB Noise on default settings
Then add a drop shadow

Add your credits etc.


Continue for animation.....

First of all, add a white background to your canvas

Activate your Stardust layer and duplicate twice
Rename Stardust 1, Stardust 2 and Stardust 3

Hide 2 and 3 and activate Stardust 1
Effects / Plugins / Alien Skin Xenofex 2 / Constellation with the following settings:

Photobucket

Hide Stardust 1 and activate Stardust 2
Repeat the Constellation effect adjusting only the Random Seed to your liking

Hide Stardust 2 and repeat with Stardust 3

Hide Stardust 2 and 3 once again
Activate Stardust 1
Edit / Copy Merged

Open Animation Shop
Paste as new animation

In PSP
Hide Stardust 1 and activate Stardust 2

Open Animation Shop
Paste after current frame

In PSP
Hide Stardust 2 and activate Stardust 3

Open Animation Shop
Paste after current frame

Select all
ALT + Enter to open Frame Properties
Change to 20

Save as a GIF and you're done!

Thank you for trying my tutorial!

The animated version:
Pumpkin Magic

Here is another using a different tube:
Pumpkin Magic (Nene)


© Tutorial written by Stina on 29th October 2011

Tuesday, March 15, 2011

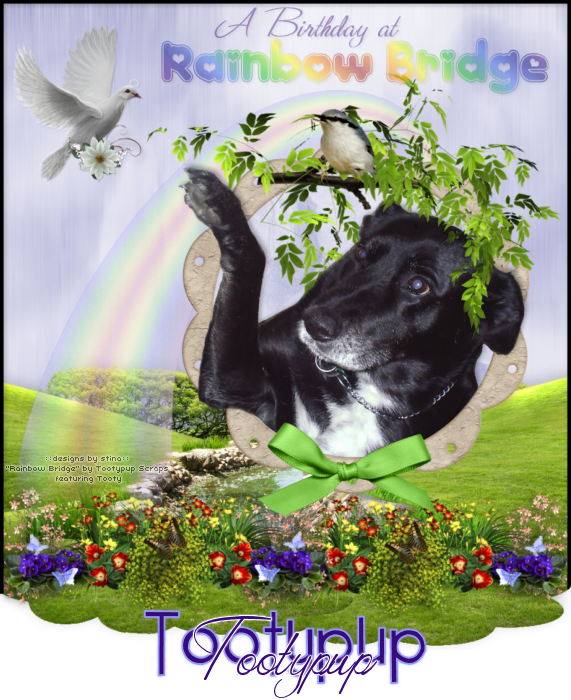
A Birthday at Rainbow Bridge

Rainbow Bridge Tooty

This tutorial is written in honour of Tooty, Susan of Tootypup Scraps' faithful friend who went to Rainbow Bridge 6 months ago. Today marks what would have been Tooty's 18th birthday.


Supplies:

Scrap kit: "Rainbow Bridge (Part 1)" by Tootypup Scraps which can be purchased at Twilight Scraps or Aussie Scraps
Image or Tube of choice - I used one of Tooty herself by Susan of Tootypup Scraps
Fonts of choice - I used Kinkie, Valentina JF and 2 Peas Quirky
No plugins


Open a new 800 x 900 transparent image

Paste a Rainbow Bridge scene as a new layer
Resize by 80% and position it toward the bottom of your canvas

Add a drop shadow as follows:
Vertical: -5
Horizontal: 0
Opacity: 20
Blur: 30
Colour: Black

Paste a rainbow of choice as new layer and position slightly to the left
Lower opacity to your liking - I used 55

Open one of the frames and paste as new layer
Resize by around 65% or to your liking and position to the left

You should have something like this:


Now with your Freehand Selection tool set to the following:
Selection type: Point to Point
Mode: Add (Shift)
Feather: 0
Smoothing: 0
Anti Alias: checked

Draw around the inside of the frame as below:


Paste a paper of choice as new layer
Layers / Arrange / Move Down
(this will move it down one layer to just beneath the frame
Resize it to your liking
Selections / Invert
Press Delete

KEEP SELECTED!!

Now paste a tube or image of your choice
Resize and position to your liking
If you are using a tube, duplicate and turn the visibility off this layer
Press Delete to remove excess of your tube

Turn the visibility on your duplicate layer again
Layers / Arrange / Move Up
(this will move the image above the frame)

Now on the frame layer use your Magic Wand to select inside the frame
Invert Selection
Then on your top image layer with your Eraser tool carefully erase any excess you do not want overlapping the frame, and in this case to bring the greenery over the top of the tube/image
The tube is duplicated because whatever you erase on the top layer is not erased beneath

Paste Dove as new layer
Resize by 30%
Position in upper left corner

Paste one of the blue papers as a new layer
Layers / Arrange / Send to Bottom

Adjust / Blur / Motion Blur with the following settings:
Angle: 180
Strength: 100

Use your Selection Tool set to Rectangle and no feather to draw out a rectangle at the bottom of your canvas


Press delete on the bottom layer
Deselect

Layers / Merge Visible

Add a new raster layer
Flood fill with a colour of your choice
I used black

Selections / Modify / Contract by 5
Press Delete
Deselect

With your Freehand Selection tool amd using the same settings as before carefully draw out where the grass in the "scene" ends as below:


Press Delete
Deselect

Now add any text you wish, your name and credit details
Resize to your liking then save as a PNG and you're done!


© Tutorial written by Stina on 15th March 2011

Wednesday, September 16, 2009

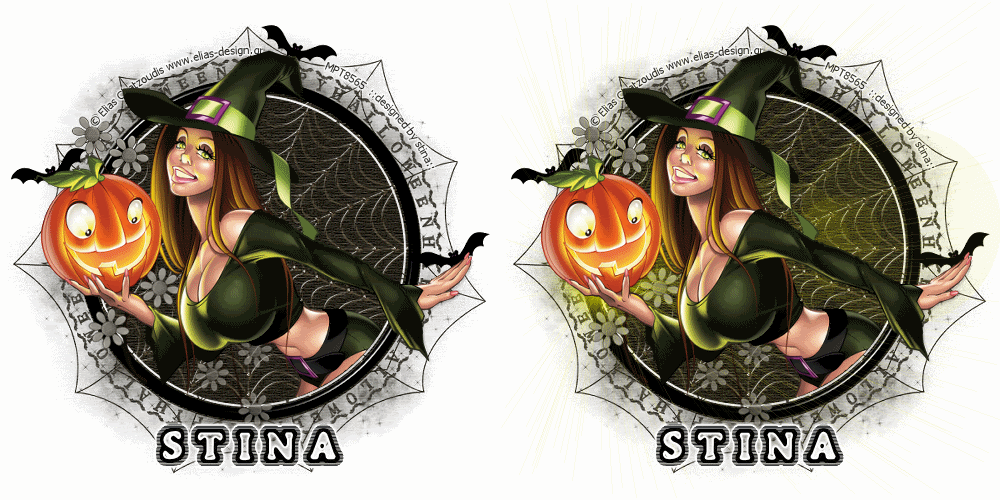
Spooktacular


Supplies

Scrap kit of choice - I am using "Spookylicious" by Tootypup Scraps available from Twilight Scraps
Tube of choice - I am using the artwork of Elias Chatzoudis which is available with a licence from My PSP Tubes
**PLEASE DO NOT USE HIS ARTWORK WITHOUT THE APPROPRIATE LICENCE**
WSL_Mask318 by Chelle available from her blog
vaybs_mask_hw_03 by Vayb available here
Fonts of choice - I am using BoneHymie
Plugins: Eye Candy 4000 > Glass


Let's begin...


Open a new 600 x 600 blank canvas flood-filled white

Paste Paper6 (or one of choice) as new layer
Resize by 75%
Duplicate and hide layer

Activate original paper layer (on the bottom)
Layers > New Mask Layer > From Image
Apply WSL_Mask318
OK
Layers > Merge > Merge Group

Activate top paper layer
Layers > New Mask Layer > From Image
Apply vaybs_mask_hw_03
Invert Mask Data CHECKED
OK
Layers > Merge > Merge Group


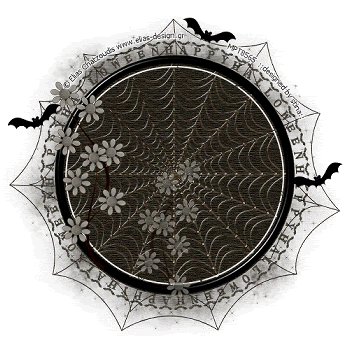
Paste one of the Webs of choice as new layer
Resize by 50%

LEAVE IN POSITION!

Set blend mode to Screen

Select Preset Shape Tool and set to Ellipse
Foreground - #000000
Background - null
Width - 15.00

Hold shift key down and draw out circle the same size as the circle of your Mask
Objects > Align > Centre in Canvas
Convert to raster layer

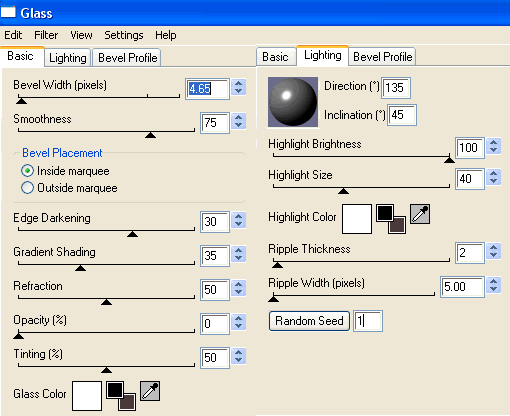
Effects > Plugins > Eye Candy 4000 > Glass with the following settings:


Paste Flowers of various colours as new layers
Resize by 30%
(Rotate one or two by 25 to the left)
Position to liking
It may look hap-hazard now but once you add your Tube it will blend in
Alternatively you can add your Tube first and then paste the flowers, positioning them behind your tube
Erase any excess you wish to your liking

Paste Tube of choice as new layer
Use your Freehand Tool to draw along the inside of your Frame around the bottom excess of Tube
Selections > Invert
Selections > Modify > Feather by
Carefully erase the excess
Deselect

Reposition flowers to fit around Tube then merge Flowers into one layer

Paste Bat as new layer
Image > Rotate by 20 to right
Resize by 10 - 15%%
Duplicate then Image > Mirror
Position to your liking

Crop and resize to liking

Select Text Tool and font of choice
I am using BoneHymie
Text colour black
Objects > Align > Horizontal Centre in Canvas
Convert to raster layer
Apply Gradient Glow and drop shadow of choice

Finally, add your © copyright, licence and watermark, then save as a GIF or JPG and you're done!


** IF YOU WISH TO ANIMATE PLEASE FOLLOW THESE NEXT STEPS **

Turn off the Visiblity of your Tube and name layers


Layers > Merge > Merge Visible
Duplicate
Rename duplicate GLOW

Re-activate layers again

Acticate GLOW layer

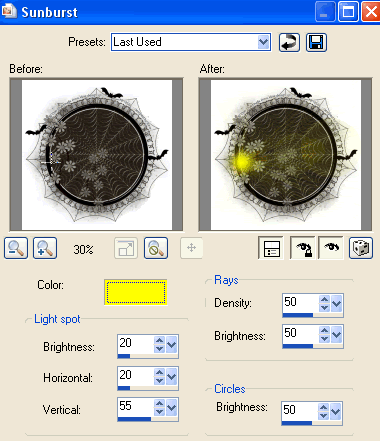
Effects > Illumination Effects > Sunburst with the following settings:


This will depend on your Tube and positioning how you wish your Illumination effect to be

Now to animate - this animation is an easy one

Turn off GLOW layer
Edit > Copy Merged

Open Animation Shop
Edit > Paste as New Animation

Now activate GLOW layer
Edit > Copy Merged

Open Animation Shop
Edit > Paste as New Animation

Select all and change Frame Properties to 50
Now save as a GIF and you're done!

Thanks for trying my tutorial!

::st!na::


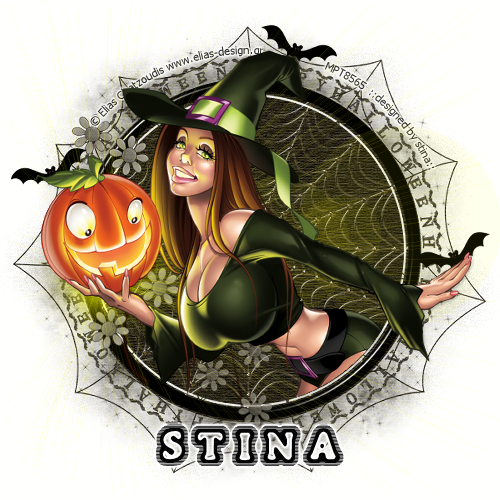
Here is a non-animated version:


© Tutorial written by Stina on 16th September 2009
All rights reserved

Sunday, August 30, 2009

Gumnut Girl


Supplies

Tubes of choice - I am using the lovely artwork of Suzanne Woolcott which is available with a licence from her store
**PLEASE DO NOT USE HER ARTWORK WITHOUT THE APPROPRIATE LICENCE**
WSL_Mask35 by Chelle available from her blog
Fonts of choice - I am using AKApprique Black and 2Peas Sunshine
Plugins: dsb Flux > Linear Transmission
Eye Candy 4000 > HSB Noise


Let's begin...


Open a new 600 x 600 blank canvas flood-filled white

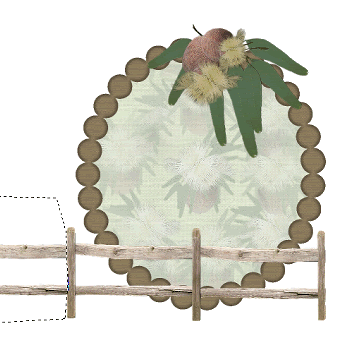
Paste a Frame of choice as new layer
Resize by 50%
(you can either choose a plain one to decorate yourself or a predecorated one)

Select inside Frame with Magic Wand
Selections > Modify > Expand by 10
Add new raster layer
Paste Paper of choice as new layer
Layers > Arrange > Move Down

KEEP SELECTED!!

Activate Background
Layers > Promote Selection to Layer
Reduce opacity of Paper to around 50
Layers > Merge > Merge Down
Deselect

Activate top layer

Paste some Gumnuts as new layer
Image > ROtate by 10 to the right
Resize by 35%
Position to the upper right of Frame

Paste Fence1 as new layer
Resize by 75%
Position along bottomg of Frame

Use your Freehand Tool to make a selection around the excess


Then delete and deselect

Paste Wattle as new layer
Resize by 40%
Position to the lower right

Paste some more Gumnuts of choice as new layer
Resize by around 25%
Position to the lower right below the wattle

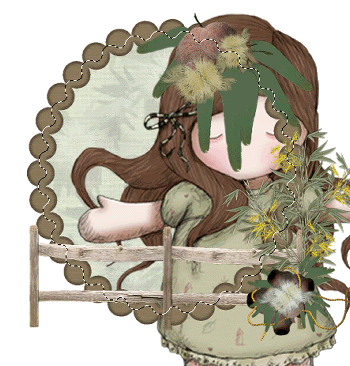
Paste tube of choice as new layer and move below Frame layer
Resize UP if needed
Select the inside of Frame again
Selections > Modify > Expand by 10
Position Tube slightly off centre
Selections > Invert


Delete then deselect
Lower opacity to liking

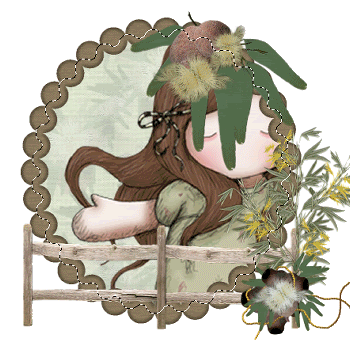
Paste Gumnut Chain as new layer
Resize by 20%
Position to the lower right along bottom railing of Fence
Duplicate then Image > Mirror
Position to liking, then erase excess from end of Fence
Layers > Merge > Merge Down

Paste a Gumnut as new layer
Resize by 25%
Position and the foot of the Fence


Paste a Heart as new layer
Image > Rotate by 15 to the left
Resize by 20%
Duplicate and Mirror a few times
Position behind gumnuts along fence

Paste your Tube as new layer
Resize as necessary and position slightly off centre

Paste a Paper of choice as new layer
Layers > Arrange > Send to Bottom

Layers > New Mask Layer > From Image
Apply WSL_Mask35
OK
Layers > Merge > Merge Group
Resize layer by 85%

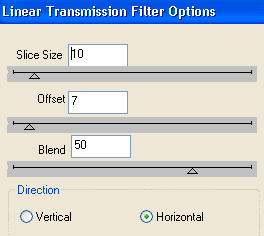
Effects > Plugins > dsb Flux > Linear Transmission with the following settings:


Crop and resize tag

Select your Text Tool and font of choice
I am using AKApprique Black
Foreground - #576e50
Background - #FFFFFF
Stroke width - 0.8

Type out text of choice
Objects > Align > Horiztonal Centre in Canvas
Convert to raster layer

Select another font of choice
I am using 2Peas Sunshine
Text colour is #576e50

Type out your name
Objects > Align > Horiztonal Centre in Canvas
Convert to raster layer
Apply any effects and drop shadow of choice

Finally, add your © copyright, licence and watermark, then save as a GIF or JPG and you're done!


** IF YOU WISH TO ANIMATE PLEASE FOLLOW THESE NEXT STEPS **

Activate your Mask layer
Duplicate twice and rename Noise1, Noise2 and Noise3

Activate Noise1
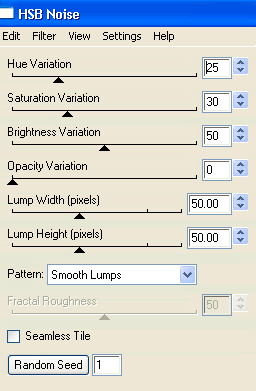
Effects > Plugins > Eye Candy 4000 > HSB Noise with the following settings:


Hide Noise1 and activate Noise2
Repeat Noise, adjusting the Random Seed

Hide Noise2 and activate Noise3
Repeat Noise once again, adjusting the Random Seed

Now to animate!

Activate Noise1 and hide Noise2 and Noise3
Edit > Copy Merged

Open Animation Shop
Edit > Paste as New Animation

Back to PSP
Hide Noise1 and activate Noise2
Edit > Copy Merged

In Animation Shop
Edit > Paste After Current Frame

Back to PSP
Hide Noise2 and activate Noise3
Edit > Copy Merged

In Animation Shop
Edit > Paste After Current Frame

Select all and change Frame Properties to 20
Now save as a GIF and you're done!

Thanks for trying my tutorial!

::st!na::


Here is a non-animated version:


© Tutorial written by Stina on 29th August 2009
All rights reserved

Thursday, August 20, 2009

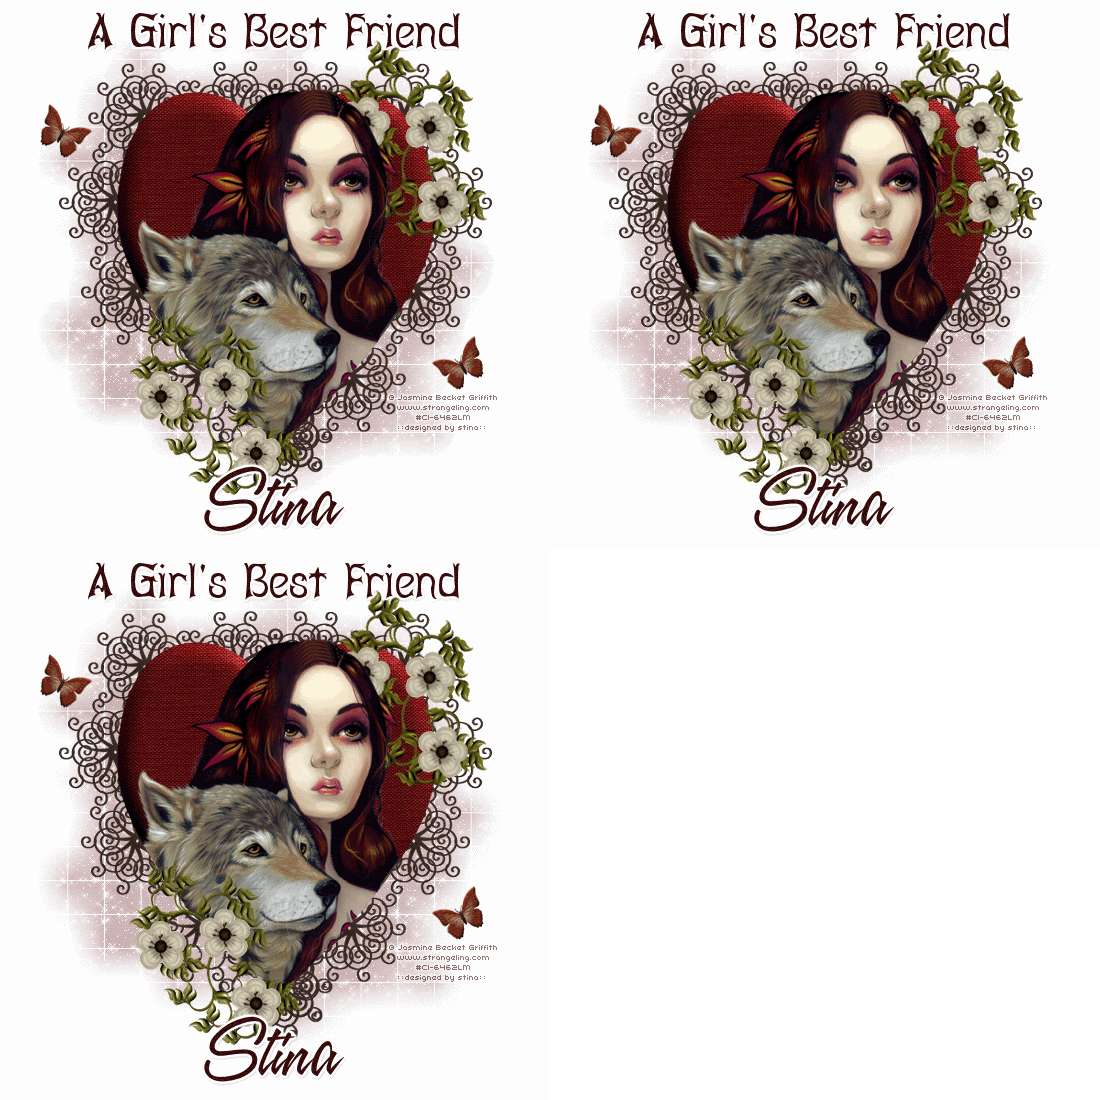
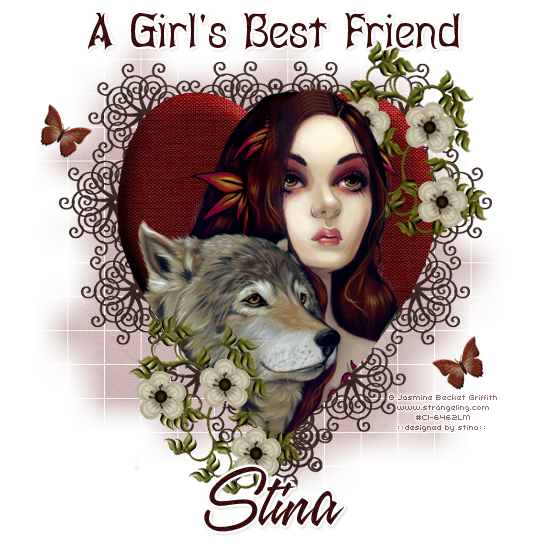
A Girl's Best Friend


Supplies

Scrap kit of choice - I am using Tootypup Scraps' part of "An Autumn Romance" collab available from Twilight Scraps
Tubes of choice - I am using the artwork of Jasmine Becket Griffith which is avialable with a licence from CILM
**PLEASE DO NOT USE HER ARTWORK WITHOUT THE APPROPRIATE LICENCE**
WSL_Mask84 by Chelle available from her blog
Fonts of choice - I am using Abagail and A&S Speedway
Plugins: Xenofex 2 > Constellation
Eye Candy 4000 > Gradient Glow (optional)


Let's begin....


Open a 600 x 600 blank canvas flood-filled white

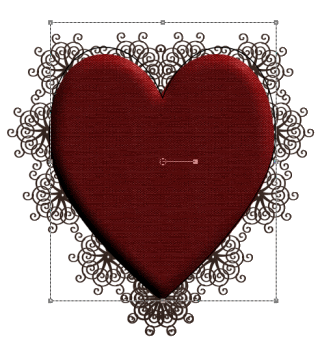
Paste Heart5b as new layer
Resize if necessary (I kept it the same size)

Paste your Tube of choice as new layer
Resize as necessary and position

Select your Preset Shape Tool to Heart
Foreground - #000000
Background - null

Draw out a heart to the same size as the one we pasted
(You might want to hide your Tube layer for this step so you can see the edge of the heart)


Once happy with your sizing,
Convert to raster layer

Select outside the Heart you just drew with your Magic Wand
Selections > Modify > Feather by 3

Activate and unhide Tube layer
Erase the any excess you wish to your liking
You can delete your heart shape now

Paste Doodle4 as new layer
Image > Rotate by 20 to the right
Resize by 30%
Position to the lower left

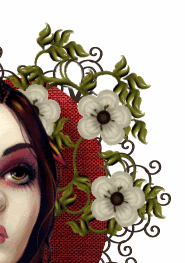
Paste a Flower of choice as new layer
Resize by around 15%
Duplicate twice and place each flower on the greenery
Layers > Merge > Merge Down
Repeat so each flower is one layer
Duplicate then set blend mode to Multiply
Lower opacity to 75, then
Layers > Merge > Merge Down

Layers > Merge > Merge Down
(Flowers and Doodle as one layer)

Duplicate then move to the upper right corner
Image > Rotate by 15 to the right
Place this layer BEHIND your Tube layer

Activate Background Heart layer
Use your Eraser Tool to erase some of the "wrought iron" so that the Doodle greenery blends with it


Paste a Butterfly as new layer
Resize by 20%
Position in upper left
Duplicate, then Image > Mirror
Position in lower right

Crop and resize

Paste Paper of choice as new layer
Layers > Arrange > Send to Bottom

Layers > New Mask Layer > From Image
Apply WSL_Mask84
OK
Layers > Merge > Merge Group
Lower opacity to 35

Select Text Tool and font of choice
I am using Abagail
Text colour to match tag - I am using #380b0c

Type out text of choice
Objects > Align > Horizontal Centre in Canvas
Convert to raster layer
Add any effects you wish and drop shadow of choice

Select another font of choice
I am using A&S Speedway
Same text colour

Type out your name
Objects > Align > Horizontal Centre in Canvas
Convert to raster layer
Add any effects you wish and drop shadow of choice

Finally, add your © copyright, licence and watermark, then save as GIF or JPG and you're done!


** IF YOU WISH TO ANIMATE PLEASE FOLLOW THESE NEXT STEPS **

Activate the Mask Layer
Duplicate twice and rename Sparkle1, Sparkle2 and Sparkle3

Hide Sparkle2 and Sparkle3 activating only Sparkle1

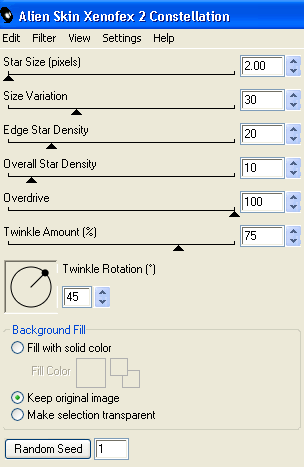
Effects > Plugins > Xenofex 2 > Constellation with the following settings:


Hide Sparkle1 and activate Sparkle2
Apply the Constellation effect, adjusting the Random Seed

Hide Sparkle2 and activate Sparkle3
Apply the Constellation effect again, adjusting the Random Seed once more

Hide Sparkle2 and Sparkle3 with only Sparkle1 visible
Edit > Copy Merged

Open Animation Shop
Edit > Paste as New Animation

Back to PSP
Hide Sparkle1 and activate Sparkle2
Edit > Copy Merged

In Animation Shop
Edit > Paste AFTER Current Frame

Back to PSP
Hide Sparkle2 and activate Sparkle3
Edit > Copy Merged

In Animation Shop
Edit > Paste AFTER Current Frame
Save as a GIF and you're done!

Thanks for trying my tutorial!

::st!na::


Here is a non-animated version:


© Tutorial written by Stina on 19th August 2009
All rights reserved

Saturday, August 8, 2009

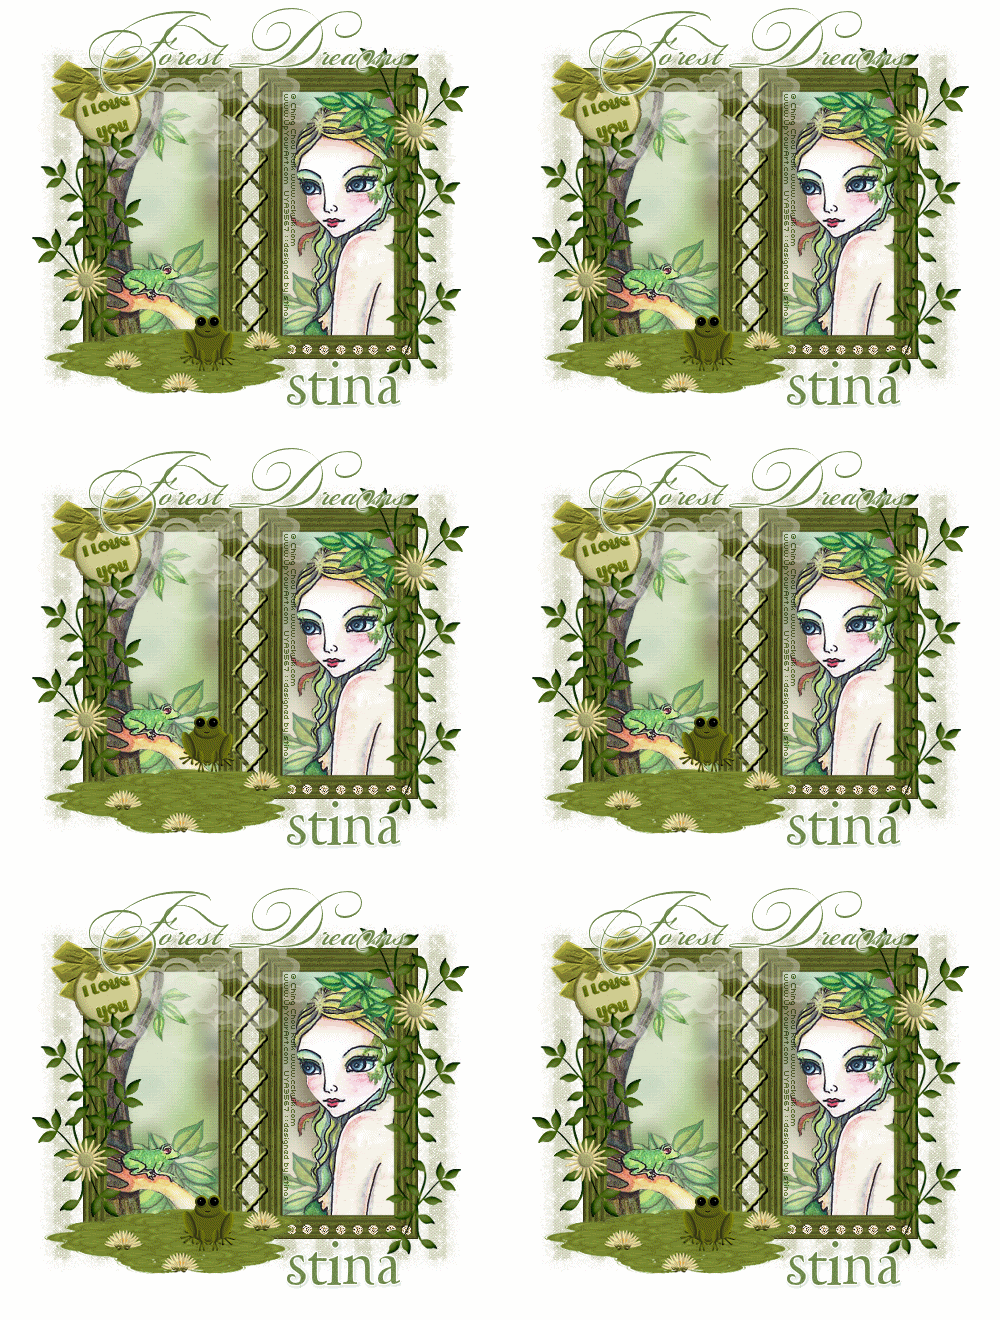
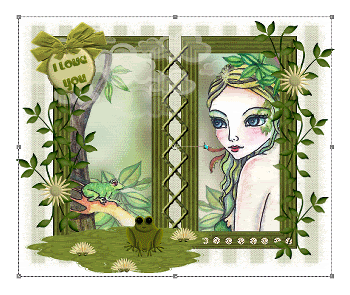
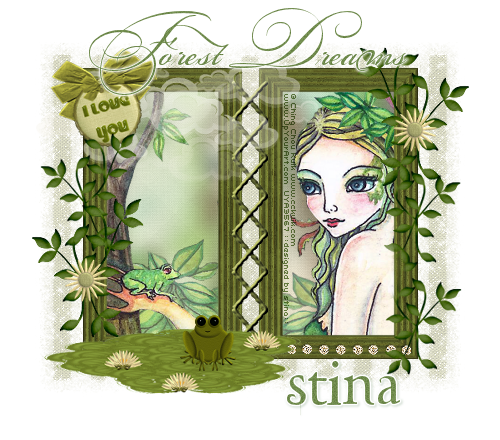
Forest Dreams


Supplies

Scrap kit of choice - I am using "The Frog Prince" by Tootypup Scraps available from Twilight Scraps, Stargazer Scraps, Scraps with Attitude, Paradise 4 Scrappers, Katelynn Designs and Dazzling Scraps
Tube of choice - I am using the artwork of Ching Chou Kuik which is available for purchase with a licence from Up Your Art
**PLEASE DO NOT USE HER ARTWORK WITHOUT THE APPROPRIATE LICENCE**
WSL_Mask185 by Chelle available from her blog
Cassel Basic Stitches Font (for Stitching) which can be purchased here
Fonts of choice - I am using BickhamScriptFancy and LD Twylight
Plugin: Eye Candy 4000 Gradient Glow and Xenofex 2 Constellation


Let's begin....


Open a new 700 x 500 blank canvas flood-filled white

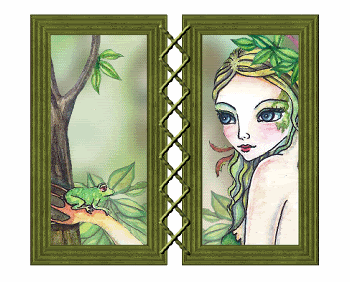
Paste Frame02 Set02 as new layer
Image > Rotate by 90
Resize by 50%

Pick a colour from your Tube with your Eye Dropper Tool and set as your Foreground
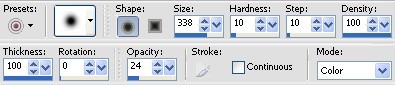
Select your Change to Target Tool with the following settings: (or similar)


Brush over your Frame with your brush

Move Frame slightly to up and to the left
Duplicate, then Image > Mirror
Layers > Merge > Merge Down

Select your Text Tool and choose Cassel Stitches3 (paid font - not supplied)
Type the letter H, ENTER, then H, ENTER, H and so on till you have stitching down the length of the Frame

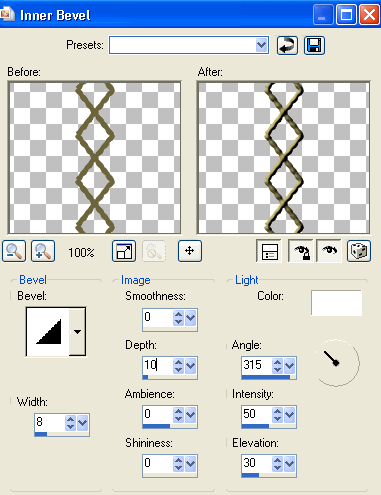
Effects > 3D Effects > Inner Bevel with the following settings:


Select the inside of your Frames with your Magic Wand
Selections > Modify > Expand by 10
Paste paper of choice as new layer
Selections > Invert
Delete
Layers > Arrange > Move Down

KEEP SELECTED!!

Paste Tube as new layer
Resize as necessary and position within selections
Selections > Invert
Delete then deselect
Erase any excess to your liking


Paste Gems as new layer
Position along bottom of right Frame
Erase any overlapping excess

Paste LilyPad as new layer
Resize by 45%
Position in lower left
Colourise using your Change to Target Brush again

Paste WaterLily as new layer
Resize by 10%
Position over the colourised waterlilies on the LilyPad

Hide Frame, Background, Frame Background, Tube and Stitches
Layers > Merge > Merge Visible
Unhide all layers again

Paste Leaves as new layer
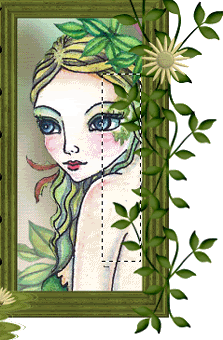
Resize by 50%
Position in upper right
Duplicate then Image > Mirror
Position in lower left

Paste Flower of choice as new layer
Resize by around 20%
Duplicate and position in Leaves

Duplicate Leaves again
Resize by 85% and position slightly up
Duplicate again and Image > Mirror
Position on opposite side
Resize by 90%
Duplicate once more and position to create a vine
Layers > Merge > Merge Down

With your Selection Tool draw a rectangle around the overhanging leaves


Delete, then deselect

Paste Tag of choice as new layer
Resize by 75%
Position in upper left
Colourise as above

Paste Paper of choice as new layer
Layers > Arrange > Send to Bottom

Layers > New Mask Layer > From Image
Apply _WSL_Mask185
OK

DO NOT MERGE!!!

Select Pick Tool and use nodes to size Mask to your liking
Layers > Merge > Merge Group
Lower opacity to 30


Crop and resize to liking

Apply any drop shadows of choice to your layers

Select your Text Tool and font of choice
I am using BickhamScriptFancy
Text colour of choice - I am using #6f8a4c

Type out text of choice
Objects > Align > Horizontal Centre in Canvas
Convert to raster layer
Add some noise and a soft Gradient Glow

Select another font of choice
I am using LD Twylight
Same text colour

Type out your name and position
Add some noise and a slight Gradient Glow
Apply a drop shadow of choice

Finally, add your © copyright, licence and watermark, then save as a GIF or JPG and you're done!


** IF YOU WISH TO ANIMATE PLEASE FOLLOW THESE NEXT STEPS **

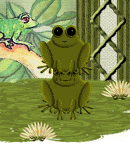
Activate your Frog layer
Duplicate and rename as Frog1 and Frog2

Leave Frog1 in postion
Activate Frog2 and move up slightly not quite above Frog1


I love this simple animation and have used it before

Now activate your Mask layer
Duplicate twice and rename Sparkle1, Sparkle2 and Sparkle3

Activate Sparkle1
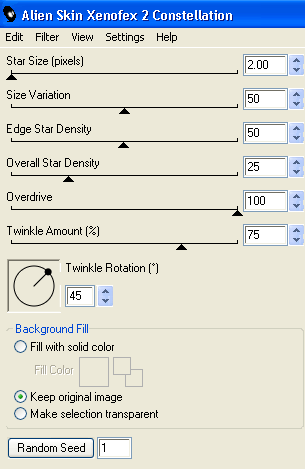
Effects > Plugins > Xenofex 2 > Constellation with the following settings:


Hide Sparkle1 and activate Sparkle2
Repeat Constellation, adjusting the Random Seed

Hide Sparkle2 and activate Sparkle3
Repeat Constellation again, adjusting the Random Seed

Now to animate!

Activate Frog1 and Sparkle 1
Edit > Copy Merged

Open Animation Shop
Edit > Paste as new animation

Back to PSP
Hide Sparkle1 and activate Sparkle2
Edit > Copy Merged

In Animation Shop
Edit > Past After Current Frame

Back to PSP
Hide Sparkle2 and activate Sparkle3
Edit > Copy Merged

In Animation Shop
Edit > Paste After Current Frame

Repeat Sparkle animation with Frog2 and once again with Frog1

You should now have a total of 9 Frames
Now save as a GIF and you're done!

Thanks for trying my turorial!

::st!na::


Here is a non-animated version:


© Tutorial written by Stina on 7th August, 2009
All rights reserved