Please email me designed.by.stina@gmail.com with your creations. I'd love to see them.

Showing posts with label Tutorials (Charity). Show all posts

Tuesday, April 14, 2009

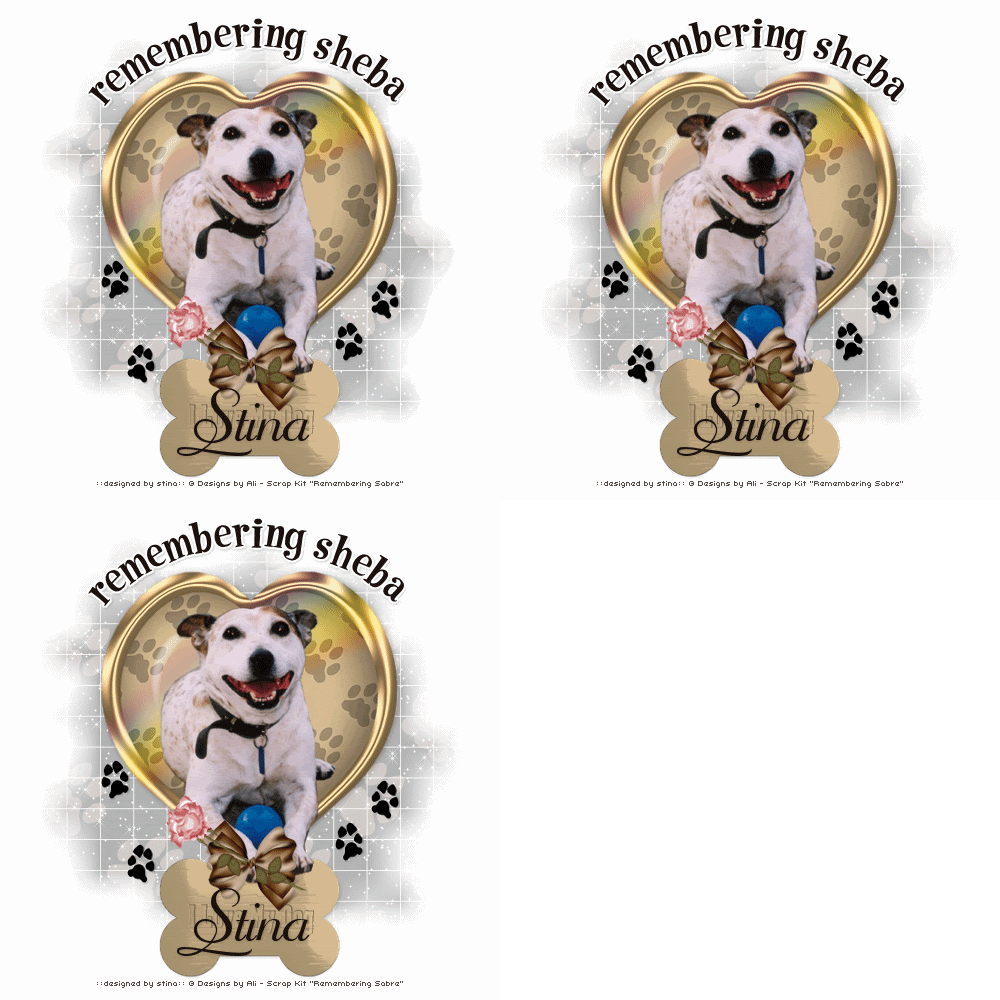
Remembering You


Tutorial written and dedicated to the memory of my beloved Sheba,
who crossed Rainbow Bridge 22nd September 2008 (last year)....after two strokes, doggy dementia, the loss of the use of her back legs and many many years of love
Always Remembered


Supplies
 
Scrap kit of choice - I am using the RSPCA charity kit "Remembering Sabre" by Designs by Ali available fromStargazer Scraps
Tube of choice - I am using one from the scrap kit
WSL_Mask84 by Chelle available from her blog
Plugin: Eye Candy 4000 Gradient Glow
Plugin: Alien Skin Xenofex 2 Constellation
Fonts of choice - I am using 2Peas Tiger Tails and Mayfair


Let's begin!
 
Open a new 600 x 600 blank canvas flood-filled white
 
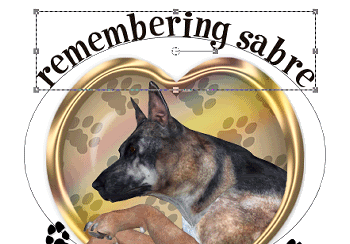
Paste DBA Brad2 as new layer
LEAVE IN POSITION
 
Paste DBA Rainbow1 as new layer
Position over the brad
Set blend mode to Soft Light
 
With your Magic Wand select the outer area of the heart
Press delete
 
KEEP SELECTED
 
Paste tube of choice as new layer
Resize as necessary
Position within the heart Brad
 
Selections > Modify > Expand by 23
Selections > Modify > Feather by 2
Use your Eraser to erase the excess you wish to remove
Deselect
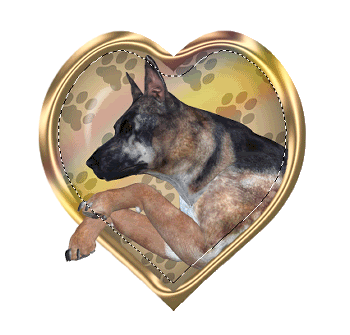
 
 
Reposition tube so it sits along the gold trim edge of the Brad heart
 
Paste DBA Dog Tag1 as new layer
Resize by 35%
Position at the bottom of the Heart
Layers > Arrange > Send to Bottom
 
Paste LadySnowflake-Sabre-Bow3 as new layer
Layers > Arrange > Bring to Top
Resize by 30%
Position over the base of the Heart joining the Tag

 
 
Paste LadySnowflake-Sabre-Rose as new layer
Image > Mirror, then
Image > Rotate by 60 to the left
Resize by 35%
Position over the Bow
 
Use your Freehand Tool to draw around the Rose head (not the stem!)
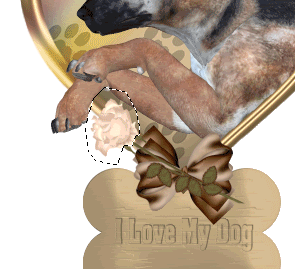
 
 
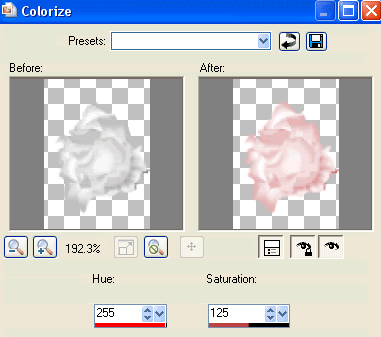
Go to Adjust > Hue & Saturation > Colourise with the following settings:
 
 
Still selected go to Selections > Promote Selection to Layer
Set blend mode to Multiply
Then deselect
Layers > Merge > Merge Down
 
Now with your Freehand Tool again draw around the knot in the Bow and the excess leaves
Lower the opacity of the Rose and Zoom in for a better view
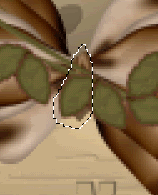
 
 
Now delete and deselect
 
Paste DBA PawPrints1 as new layer
Image > Rotate by 15 to the left
Resize by 12%
Position to the right
Duplicate, then Image > Mirror
Repeat to your liking
 
Image > Canvas Resize 600 w x 650 h
Centre top CHECKED
 
Image > Canvas Resize 550 x 550
Centre CHECKED
 
Resize tag
 
Select your Preset Shape Tool to Ellipse
Foreground - #000000
Background - null
 
Draw out an oval and shape to your liking
 
Select your Text Tool and font of choice
I am using 2Peas Tiger Tails
 
Choose a colour from your tag
I am using #1c120e
 
On the curve type your text
Position to your liking
 

In your Layer Palette open the Vector Layer
Turn off the Ellipse and convert to raster layer
Apply a Gradient glow and slight drop shadow
 
H & V - 1
Opacity - 20
Blur - 2.00
Colour - #000000
 
Add a new raster layer
Selections > Select All
Paste DBA Paper22 into Selection
Deselect
 
Layers > Arrange > Send to Bottom
 
Layers > New Mask Layer > From Image
Locate WSL_Mask84
OK
Layers > Merge > Merge Group
Lower opacity to around 30
 
Duplicate twice and rename layers to:
Sparkle1, Sparkle2 and Sparkle3
 
Hide Sparkle2 and Sparkle3 and activate Sparkle1
Effects > Plugins > Alien Skin Xenofex 2 > Constellation with the following settings:
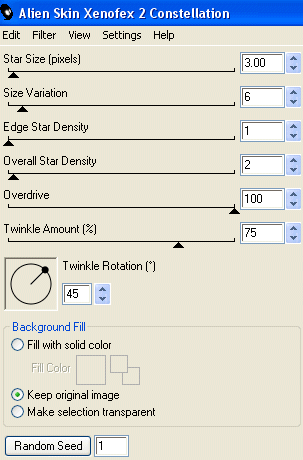
 
 
Hide Sparkle1 and activate Sparkle2
Repeat the Constellation effect, adjusting the Random Seed
 
Hide Sparkle2 and activate Sparkle3
Repeat the Constellation effect, adjusting the Random Seed
 
Select your Text Tool and font of choice
I chose Mayfair
Type out your name and place in the Tag
Apply a slight drop shadow
 
Add your © copyright, licence and watermark
 
To animate, copy merged with each respective Mosaic layer into Animation Shop
Each new layer to PASTE AFTER CURRENT FRAME
 
Leave Frame Properties at 10
 
Finally, save as a GIF and you're done!
 
Thank you for trying my tutorial!
 
::st!na::
 
 
Tag for Ali:
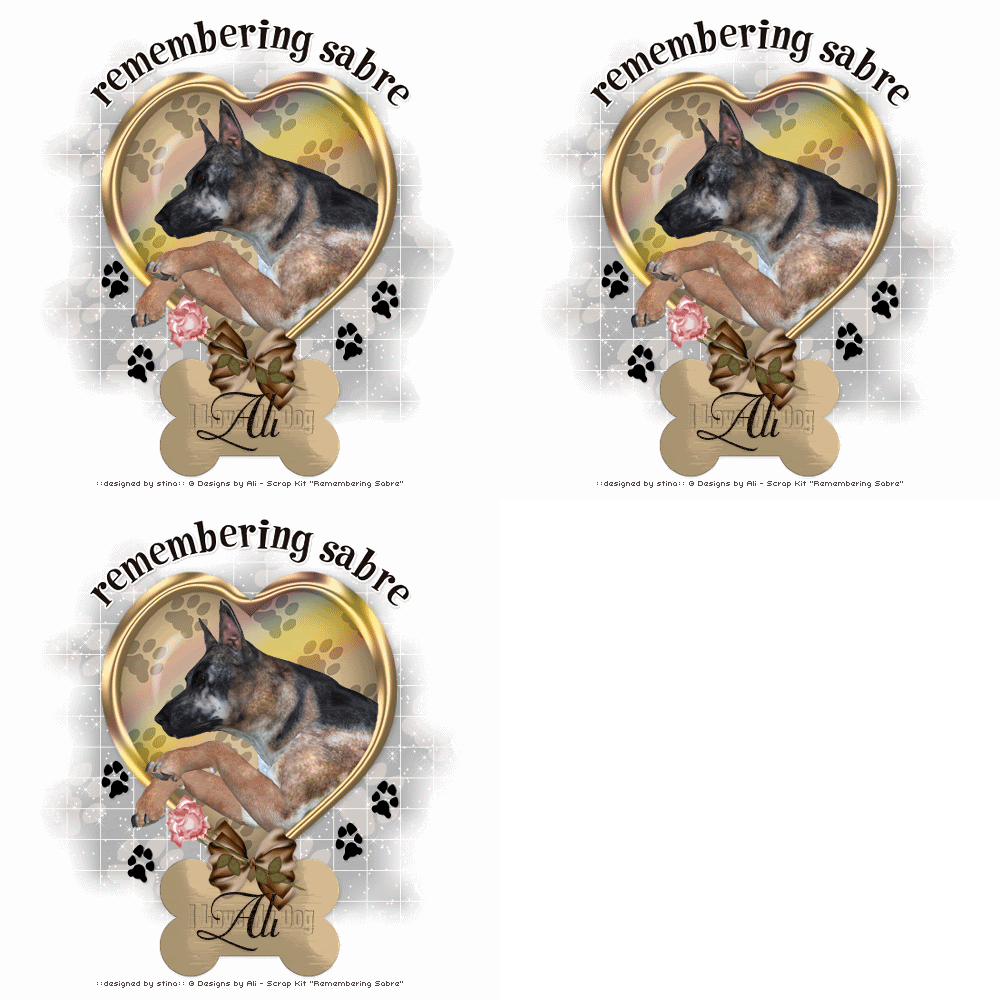
  

© Tutorial written by Stina on 13th April 2009
All rights reserved
Monday, April 13, 2009

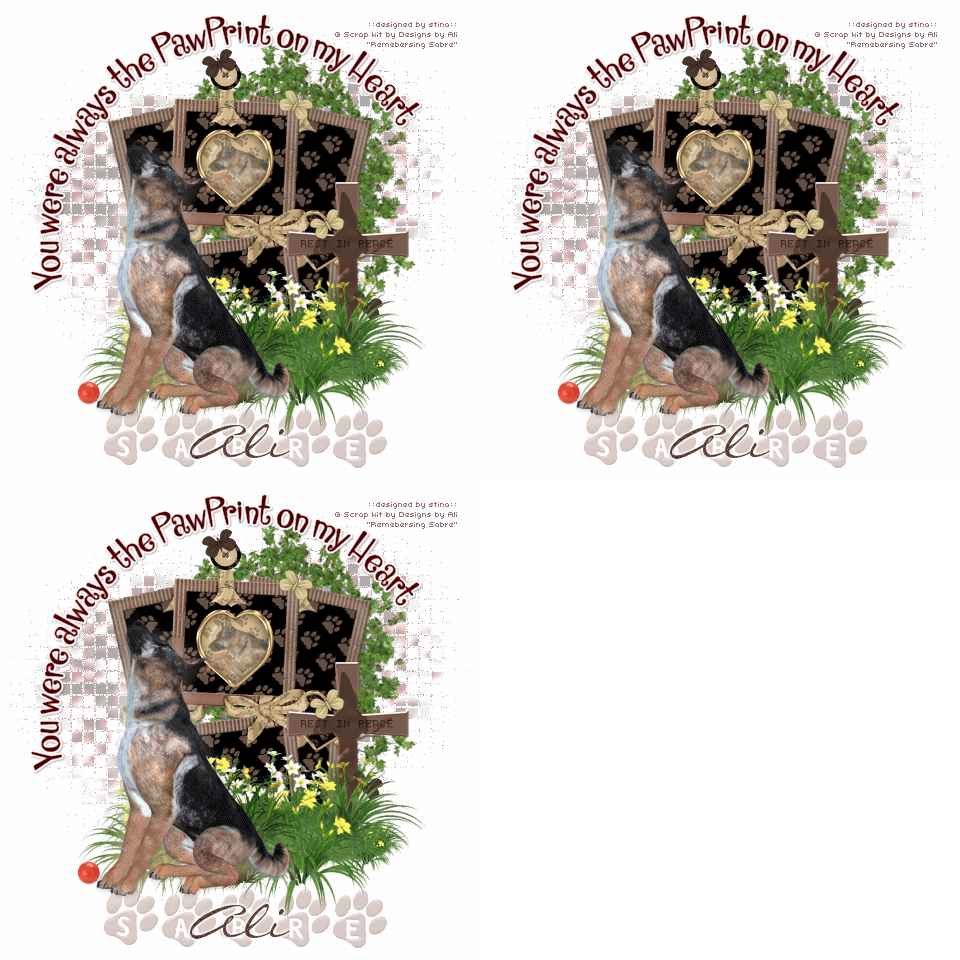
Sabre - For Ali

 
This tutorial is written and dedicated to Ali, who created the scrap kit in memory of her beloved German Shepherd Sabre
 
 
Supplies
 
Scrap kit of choice - I am using the RSPCA charity kit "Remembering Sabre" by Designs by Ali available from Stargazer Scraps
Tube of choice - I am using one from the scrap kit
WSL_Mask170 by Chelle available from her blog
Pawprint Alpha by Created by Jill available from Exquisite Scraps or Scrappin Divaz
Plugin: Eye Candy 4000 Gradient Glow
Fonts of choice - I am using Cinderella ITC TT and LiorahBT
 
 
Let's get started!!
 
Open a new 600 x 600 blank canvas flood-filled white
 
Paste Frame4 as new layer
Resize by 50%
 
Use your Magic Wand to select the area inside the frames
Selections > Modify > Expand by 10
 
Paste DBA PAPER22 as new layer
Resize by 20%
Position in top Frame
Selections > Invert
Delete
 
KEEP SELECTED
 
Paste the paper and resize by 20% again
Position in lower Frame
Delete and deselect
 
Layers > Merge > Merge Down
Repeat
 
Duplicate, then
Image > Rotate by 10 to the right
Position slightly to the right
 
Duplicate again, then
Image > Mirror
 
Paste DBA Brad2 as new layer
Resize by 30%
Place in top Frame
 
Paste DBA Flowers1 as new layer
Resize by 65%
Position along bottom of lower Frame
 
Paste DBA Grass4 as new layer
Resize by 30%
Position in the centre covering the bottom eyelet from the Frame
 
 
Paste your tube of choice or one from the kit alongside Frame
I am using DBA German Shepherd4
Resize as necessary (I resized by 60%)
 
Paste DBA Tree2 as new layer
Layers > Arrange > Send to Bottom
Resize by 70%
Position slightly to the right
 
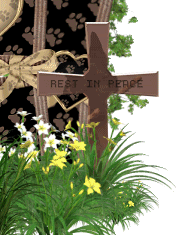
Paste DBA Rest in Peace Cross2 as new layer
Layers > Arrange > Bring to Top
Resize by 30%
Position to the right amongst and behind the flowers
 
 
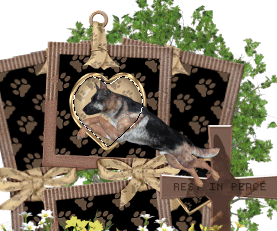
Paste DBA German Shepherd9 as new layer
Resize by 30%
Position within the Brad heart in the top Frame
 
Activate the Brad layer and use your Magic Wand to select the area around the heart
Selections > Modify > Expand by 7
 
 
Use your Eraser Tool to erase any excess
Deselect
Lower the opacity to around 50
 
Paste DBA Button2 as new layer
Resize by 8%
Place over ring at top of Frame
 
Paste DBA Butterfly3 as new layer
Image > Rotate by 20 to the left
Resize by 10%
Position on the button to your liking
 
Paste DBA Butterfly1 as new layer
Image > Rotate by 30 to the right
Resuze by 10%
Position on the Frame to your liking
 
Duplicate Butterflies, mirror and position them as you like
 
Paste DBA Ball1 as new layer
Resize by 10%
Place at Shepherd's feet
 
Crop and resize
 
Add new raster layer
Layers > Arrange > Send to Bottom
Selections > Select All
Paste Paper of choice into Selection
Deselect
 
Layers > New Mask Layer > From Image
Locate WSL_Mask170
OK
Layers > Merge > Merge Group
 
Move Mask layer up slightly
Erase any excess from bottom
 
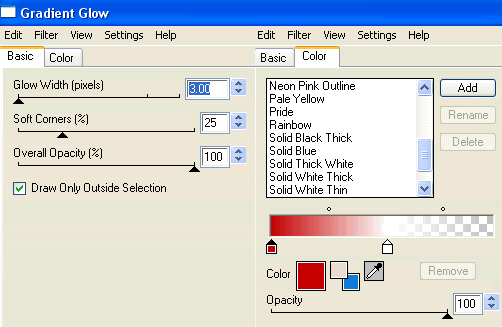
Effects > Plugins > Eye Candy 4000 > Gradient Glow with the following settings:
 
 
Lower opacity to around 35
 
Duplicate layer twice
Rename Mosaic1, Mosaic2 and Mosaic3
 
Hide Mosaic2 and Mosaic3 and activate Mosaic1
 
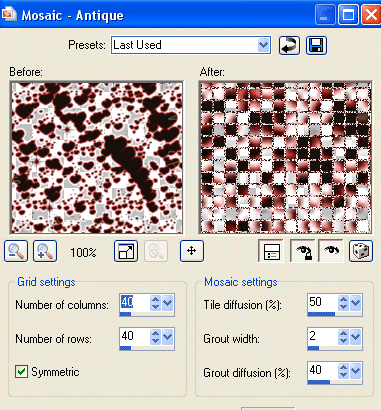
Effects > Texture Effects > Mosaic - Antique with the following settings:
 
 
Hide Mosaic1 and activate Mosaic2
Repeat the Mosaic Antique effect, changing the Grout Diffusion to 41
 
Hide Mosaic2 and activate Mosaic3
Repeat the effect again, changing the Grout Diffusion to 42
 
OK, let's leave this for now - we'll come back to it when we need to animate
 
Activate your top layer
 
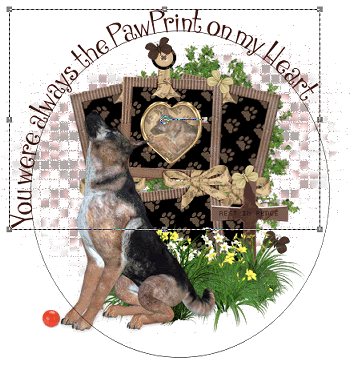
Select your Preset Shape Tool to Ellipse
Foreground - #000000
Background - null
 
Draw out a circle
 
Select your Text Tool and font of choice
I am using Cinderella ITC TT
Choose a colour from your tag for your text
 
Click on the curve and type out your choice of text
Position to your liking
 
 
In your Layer Palette open the Vector Layer
Close off the Ellipse and convert to raster layer
Apply a drop shadow of choice
 
Finally, add your © copyright, licence and watermark
 
To add your name you can select a font and colour of your choice, adding any effects and drop shadow you wish
OR
You may use an alpha as I have here (as created by Jill)
 
Colourise Alpha to match your tag
 
I also used a script font over the pawprings for the name
Adding a slight Gradient Glow with the setting on Medium
 
To animate, copy merged with each respective Mosaic layer into Animation Shop
Each new layer to PASTE AFTER CURRENT FRAME
 
Leave Frame Properties at 10
 
Finally, save as a GIF and you're done!
 
Thank you for trying my tutorial!
 
::st!na::
 

© Tutorial written by Stina on 13th April 2009
All rights reserved
Thursday, March 26, 2009

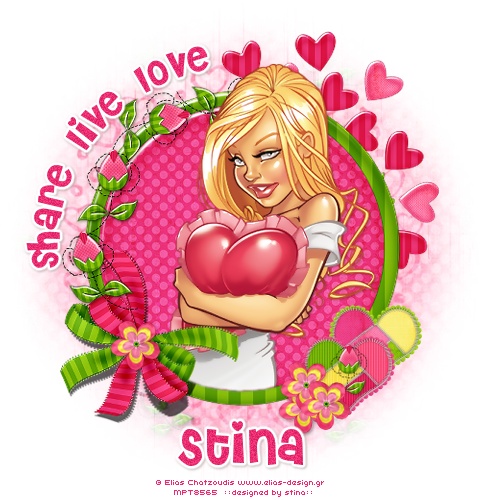
Share Love & Live

 
Supplies
 
Scrap kit of choice - I am using Maggies Scraps part of the "Share Love Live" charity collab available from Paradise 4 Scrappers
Tube of choice - I am using the artwork of Elias Chatzoudis which can be purchased from My PSP Tubes
**PLEASE DO NOT USE HIS ARTWORK WITHOUT THE APPROPRIATE LICENCE**
WSL_Mask33 by Chelle available from her blog
Fonts of choice - I am using Arriere Garde and Chowderhead
Plugin: Mura Meister Copies
Plugin: Eye Candy 4000 Gradient Glow
 
 
~ Step 1 ~
 
Open a new 600 x 600 blank canvas flood-filled white
 
Paste Frame1 as new layer
Resize by 85%
 
Use your Magic Wand to select the inside area of the Frame
Selections / Modify / Expand by 10
Add new raster layer
Paste Paper1 into Selection
Deselect
Layers / Arrange / Move Down
 
Paste your Tube as a new layer
Resize as necessary
Position over frame
 
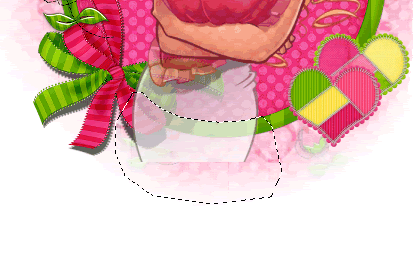
Using your Freehand Tool draw around the bottom half of your tube and along the edge of the Frame
You may need to lower the opacity of your tube to see through to the Frame
 

Hit delete then deselect
Re-adjust to 100% opacity
 

~ Step 2 ~
 
Paste Rose as new layer
Resize by 35%
LEAVE IN CENTRE
 
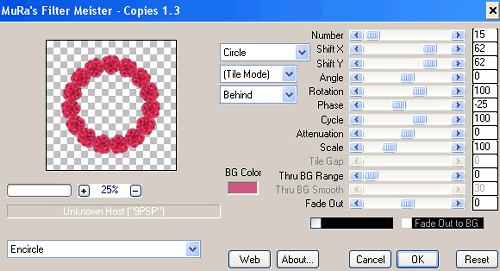
Effects / Plugins / MUra Meister / Copies with the following settings:
 
 
Layers / Arrange / Send to Bottom
 
Adjust / Hue & Saturation / Colourise with the following settings:
Hue - 240
Saturation - 220
 
Adjust / Brightness & Contrast / Brightness/Contrast with the following settings:
Brightness - 15
Contrast - 0
 
 
Paste Wrap2 as new layer
Image / Rotate by 10 to the left
Resize by 70%
Place in position
 
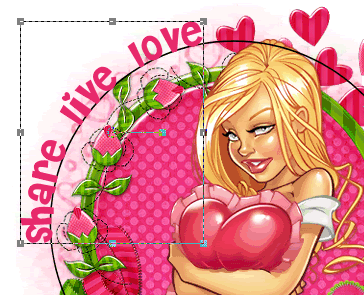
Select the area around the Frame with your Magic Wand
Selections / Modify / Contract by 1
Selections / Modify / Feather by 2
 
Use your Eraser Tool to erase the excess ribbon over the edges


Paste PearlFlower as new layer
Resize by 30%
Position over bow of the wrap
 
Paste Beads as new layer
Resize by 50%
Position to the left on tag
 
Paste Butterfly as new layer
Resize by 20%
Position in upper left to your liking
Duplicate
Image / Mirror
Resize by 70%
Position on the frame near your tube
 
Crop and resize
 

~ Step 3 ~
 
Paste Paper5 as new layer
Layers / Arrange / Send to Bottom
 
Layers / New Mask Layer / From Image
Locate WSL_Mask33
OK
Layers / Merge / Merge Group
 
Set your Preset Shape Tool to Ellipse
Foreground - #000000
Background - null
 
Hold your Shift Key and draw out a circle around your tag
 
Select your Text Tool and a colour from your tube or scrap
Change the colours in your Palette:
Foreground - null
Background - #e2326b (colour I'm using)
 
Select a font of choice - I am using Arriere Garde
On the Curve type out any text of choice
I wrote "Share the Laughter, Live for Today & Love Every Moment"
Position text to your liking
 
 
In your Layer Palette open your Vector Layer and hide ellipse
Convert to raster layer
 
Add a slight drop shadow:
H & V - 1
Opacity - 20
Blur - 5.00
Colour - #e2326b
 
Select another font of choice - I am using Chowderhead
Type your name
Objects / Align / Horizontal Centre in Canvas
Add some noise and then a Gradient Glow:
Glow width - 3.00
Soft Corners - 25
Opacity - 100
Setting - Fat
Colour - #FFFFFF
 
Apply a drop Shadow:
H & V - 1
Opacity - 30
Blur - 3.00
Colour - #5e1a30
 
Finally, add your © copyright, licence and watermark
 
Save as GIF or JPG and you're done!
 
Thank you for trying my tutorial!
 
::st!na::
 

© Tutorial written by Stina on 26th March 2009
All rights reserved
Saturday, March 21, 2009

Share Live Love

 
Supplies
 
Scrap kit of choice - I am using Swheat Creations part of the "Share Love Live" charity collab for Nora of Coquettas Designz brother
which is available at Paradise 4 Scrappers for just $6.50!!
Tube of choice - I am using the artwork of Elias Chatzoudis which can be purchased from CILM
**PLEASE DO NOT USE HIS ARTWORK WITHOUT THE APPROPRIATE LICENCE**
WSL_Mask214 by Chelle available on her blog
Font of choice - I am using Cheri
Plugin: Eye Candy 4000 Gradient Glow
 
 
~ Step 1 ~
 
Open a new 600 x 600 blank canvas flood-filled white
 
Paste Circle-Copy as new layer
Resize by 60%
 
Paste Tree1 as new layer
Resize by 60%
Layers / Arrange / Move Down
Position behind Circle so the hearts are showing in a "spray"


~ Step 2 ~

Paste Heart1 as new layer
Resize by 15%
Position in lower right
 
Paste Heart2 as new layer
Resize by 15%
Position in lower right over first heart
 
Paste Bkg11 as new layer
Layers / Arrange / Send to Bottom
 
Layers / New Mask Layer / From Image
Locate WSL_Mask214
OK
Resize by 90%
Move Mask layer so that it is centralised behind the circle layer
 
Paste your tube as a new layer
Resize as necessary
Place in position
 
Lower opacity so you can see what you are doing
Use your Freehand Tool to draw along the bottom of the "frame"
 

Selections / Modify / Contract by 5
Selections / Modify / Feather by 5
Press delete twice
Deselect
 
Effects / Plugins / Xero / Improver
Default settings
Duplicate
Effects / Plugins / Xero / Soft Mood
Default settings
Set blend mode to Screen
Lower opacity to 55
(the blend mode and opacity will depend on your tube)
 
Paste Bow1 as new layer
Image / Mirror, then Image / Flip
Image / Rotate by 42 to the right
Resize by 30%
Position over the bow in the lower left as close as possibly can to the original bow
 
Grab your Magic Wand
Activate your tube layer and select the area around it
Activate your Circle Frame
Then delete and deselect
 
 
Paste Flower2 as new layer
Resize by 20%
LEAVE IN POSITION
Paste Flower4 as new layer
Resize by 15%
Layers / Merge / Merge Down
LEAVE IN POSITION
Paste Flower3 as new layer
Resize by 10%
Layers / Merge / Merge Down
 
Duplicate
Place one Flower over the centre of the Bow
Place the other alongside the hearts
Duplicate and position this one
 
Paste Flower as new layer
Resize by 15%
Place behind one of the flowers beside the hearts
 
Crop and resize
 
 
~ Step 3 ~
 
Select your Preset Shape Tool to Ellipse
Foreground - #000000
Background - null
 
Hold your Shift key and draw out a circle around your tag
 
Objects / Align / Centre in Canvas
 
Select your Text Tool with your font of choice (I am using Cheri)
Choose a colour from your tube
 
Foreground - null
Background - #e92d70 (colour I am using)
 
Type out your text of choice on the curve
Position to your liking
 

In your Layer Palette open the Vector Layer and hide the Ellipse
Convert to raster layer
 
Add some noise - 15
 
Effects / Plugins / Eye Candy 4000 / Gradient Glow with the following settings:
Glow width - 3.00
Soft corners - 25
Opacity - 100
Setting - Fat
Colour - White
 
Apply a drop shadow:
H & V - 1
Opacity - 30
Blur - 3.00
Colour - #35190f
 
Select your Text Tool again
Same colour and font
Objects / Align / Horizontal Centre in Canvas
Convert to raster layer
Apply the same effects as above
 
Finally, add your © copyright, licence and watermark
 
Then save as a GIF or JPG and you're done!
 
Thank you for trying my tutorial!
 
::st!na::
 

© Tutorial written by Stina on 21st March 2009
All rights reserved

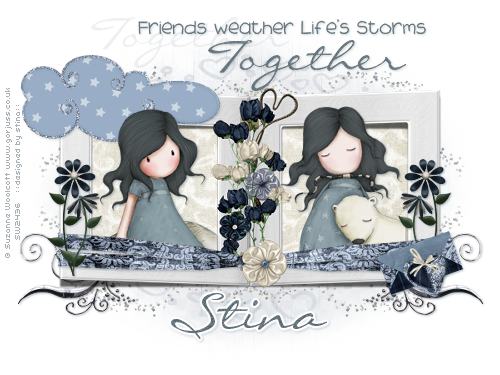
Friends Weather Life's Storms Together

 
This tutorial is dedicated with love to Tracey of Soxsational Scraps (better known as Sox) and to Oopsie Daisy
as this tut n' tag was created with the charity scrap put together for Sox and the part I am using is Oopsie's
Both could use a friend right now - Tracey for personal reasons and Oopsie had a hardcore virus sweep through her entire TERRABYTE system....and wipe the lot. She has lost everything - her kits, her designs, everything. Today she informed us she was leaving the Designing world, but NONE of us at Exquisite would hear of it!
So Tracey and Lynette - this tutorial is for you
 
Supplies
 
Scrap kit of choice - I am using Oopsie Daisy's part in the "To Sox With Love" Charity Collab available exclusively at Exquisite Scraps
Two papers used are also in the collab though are Scraps by Jessica
Tubes of choice - I am using the gorjuss artwork of Suzanne Woolcott which can be purchased from her store
WSL_Mask214 by Chelle, available from her blog
Fonts of choice - I am using 2Peas Sunshine and LiorahBT
Plugin: Eye Candy 4000 Gradient Glow (optional)
 
 
~ Step 1 ~
 
Open a new 600 x 600 blank canvas flood-filled white
 
Paste odn-tswl-Frame2 as new layer
Resize by 15%
 
With your Magic Wand select the area inside the Frames
Selections / Modify / Expand by 10
 
Activate Background layer
Paste SSK_paper6_JD as new layer
Resize by 50%
 
Selections / Invert
Delete and deselect
 

~ Step 2 ~
 
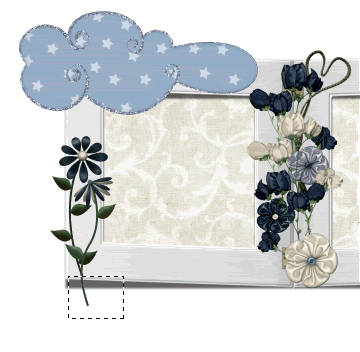
Paste odn-tswl-cloud as new layer
Resize by 12%
Position in upper left
 
Paste odn-tswl-floral6 as new layer
Resize by 8%
Position in lower left
 
Paste odn-tswl-flora7 as new layer
Resize by 8%
Position alongside other flower on the left
Move slightly down
Use your Selection Tool to draw a selection around the bottom part of the stem
Delete and deselect
 
 
 Layers / Merge / Merge Down
Duplicate
Image / Mirror
 
Paste odn-tswl-envelope as new layer
Image / Rotate by 20 to the left
Resize by 5%
Position in lower right
 
Paste odn-tswl-heart as new layer
Resize by 5%
Image / Mirror
Position over the bottom part of the envelope in lower right
 
Activate the Frame layer
 
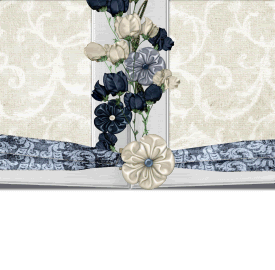
Paste odn-tswl-knottedribbon as new layer
Resize by 13%
Position with the edge that is visible along the edge of the Frame
 
Paste odn-tswl-floral5 as new layer
Resize by 5%
Position OVER the flower in the centre of the Frame above the ribbon
 
  
Paste odn-tswl-swirlbling2 as new layer
Resize by 15%
Position in lower left corner
 
Layers / Arrange / Send to Bottom
 
Duplicate
Image / Mirror
Layers / Merge / Merge Down
 
Activate top layer
Paste odn-tswl-glitterborder as new layer
Resize by 14%
Position along the bottom with the ends protruding slightly
Duplicate
Image / Mirror
Layers / Merge / Merge Down
Position to your liking
 
Duplicate again
Image / Flip
Place in position
Layers / Merge / Merge Down
 
Lower the opacity to 50


~ Step 3 ~
 
Activate your Frame layer again
 
Paste one of your tubes of choice as a new layer
Resize as necessary
Position in the left Frame
Layers / Arrange / Move Up
 
Your tube should now be above cloud but still below the ribbon
 
Repeat steps with second tube in the right Frame
 
With your Magic Wand select inside your Frames again
Selections / Modify / Expand by 2
Selections / Invert
Selections / Modify / Feather by 2
 
Activate one of your tubes
With your Eraser Tool carefully erase the excess tube beneath the ribbon that falls below the Frame
 
STILL SELECTED activate the other tube and repeat
Deselect
 
 
Activate Background layer
 
Paste SSK_paper5_JD as new layer
Layers / New Mask Layer / From Image
Locate WSL_Mask214
OK
Layers / Merge / Merge Group
Lower opacity to 30
 
Select your Text Tool and two fonts of choice
I am using 2Peas Sunshine for the print and LiorahBT for the script
Choose a colour from your tube
 
Foreground - null
Background - #64737b
 
Type out the words "Friends weather Life's Storms" in print
And "Together" in script
Convert each to raster layer separately so you can move each around to your liking
 
Duplicate the word "Together"
Move it somewhere to your liking
Lower the opacity to about 12
 
Add a drop shadow:
H & V - 1
Opacity - 30
Blur - 3.00
Colour - #64737b
 
Apply this same drop shadow to your elements
 
Select your Text Tool again with the same colours
Choose your font (or use the same one)
Type out your name
Objects / Align / Horizontal Centre in Canvas
Convert to raster layer
 
Add any effects you wish (I used some noise and a Gradient Glow)
Apply the same drop shadow as above
 
Finally, add your © copyright, licence and watermark
 
Then save as a GIF or JPG and you're done!
 
Thank you for trying my tutorial!
 
::st!na::
 

© Tutorial written by Stina on 20th March 2009
All rights reserved