Please email me designed.by.stina@gmail.com with your creations. I'd love to see them.

Showing posts with label Bel Vidotti. Show all posts

Sunday, June 14, 2009

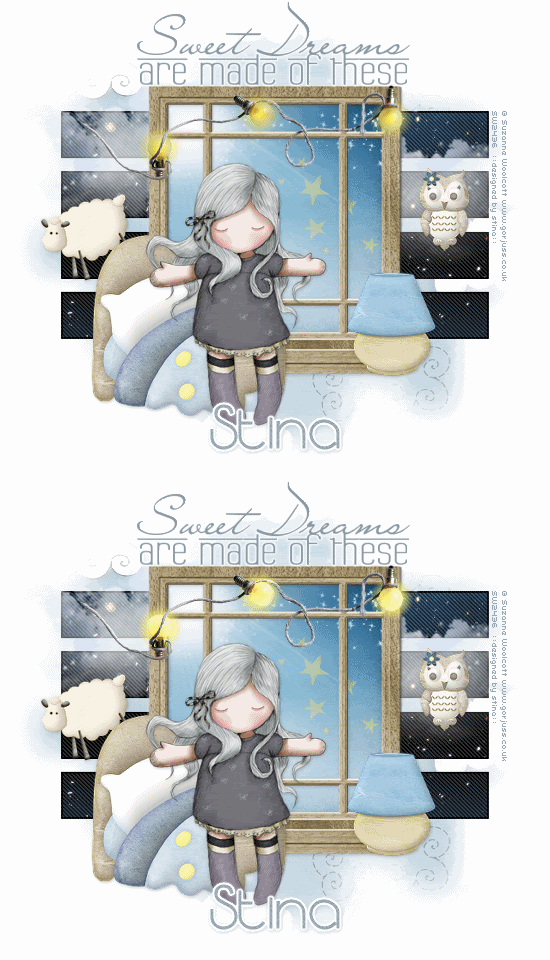
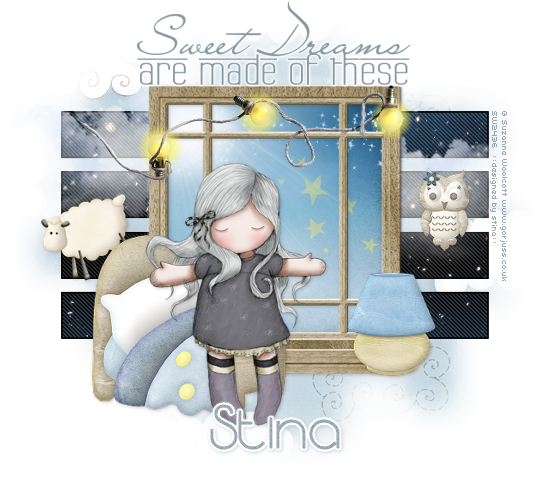
Sweet Dreams


Supplies

Scrap kit of choice - I am using "Go Ahead and Dream" by Bel Vidotti which is a freebie available on her blog
Tube of choice - I am using the delightful work of Suzanne Woolcott which available with a licence from her store
WSL_Mask230 by Chelle available from her blog
WordArt by Me, available here
Font of choice - I am using Moonbeam
Plugins: Penta.com Jeans and Eye Candy 4000 Gradient Glow (for text)


Ready? Let's begin...


Open a new 700 x 600 blank canvas flood-filled white

Select your Preset Shape Tool and set to Rectangle
Width - 2.00
Draw out a rectangle
Objects > Align > Centre in Canvas
Convert to raster layer

Duplicate and move up slightly
Duplicate again, then Image > Flip
Duplicate again and move down slightly

You should now have four rectangles
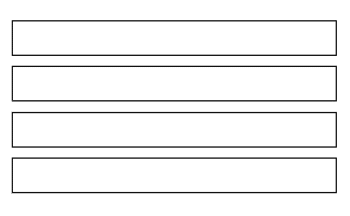

Hide Background layer, then
Layers > Merge > Merge Visible

With your Magic Wand select the inside of each rectangle
Selections > Modify > Expand by 1
Paste paper of choice as new layer
Resize by 65%
Selections > Invert
Delete then deselect

Effects > Plugins > Penta.com > Jeans with the following settings:


Paste Window as new layer

LEAVE IN POSITION!!

Select each space inside the window with your Magic Wand
Selections > Modify > Expand by 10
Add a new raster layer
Paste Paper of choice INTO selection
Layers > Arrange > Move Down

KEEP SELECTED!!

Paste Light as new layer
Resize by 65%
Position from upper left corner
Lower opacity to 55

Paste a Moon as new layer
Resize by 50%
Position in upper left
Selections > Invert
Delete

KEEP SELECTED!!

Paste Aurora as new layer
Position with the light over the Moon in upper left
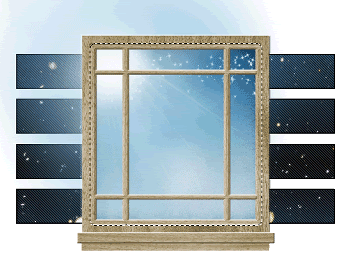

Delete and deselect

Activate top layer

Paste Lamp03 as new layer
Resize by 65%
Position to the right

Paste Bed as new layer
Resize by 60%
Position to the left

Paste Lamp02 as new layer
Resize by 65%
Position along top of window

Paste Owl as new layer
Resize by 40%
Position on the rectangle bars to the right

Paste Sheep as new layer
Image > Rotate by 20 to the left
Resize by 30%
Position tucked behind and above bed to liking

Paste Stars04 as new layer
Resize by 25%
Position within window to your liking
Set blend mode to Soft Light

Paste Tube of choice as new layer
Layers > Arrange > Bring to Top
Resize as necessary
Position to liking

Activate Rectangle bars below window

Paste Cloud04 as new layer
Resize by 95%
Position to liking
Lower opacity to 85

Paste Paper of choice as new layer
Layers > Arrange > Send to Bottom
Resize by 90%

Layers > New Mask Layer > From Image
Apply WSL_Mask230
OK
Layers > Merge > Merge Group
Lower opacity to 55

Crop and resize to liking

Paste WordArt made by me as new layer
Resize by 60% (or to liking)
Position at the top of Window
Duplicate and set blend mode to Multiply
Lower opacity to 30
Layers > Merge > Merge Down

Select your Text Tool and font of choice
I am using Moonbeam
Text colour of choice - I am using #9aa9b2

Type out your name
Objects > Align > Horizontal Centre in Canvas
Convert to raster layer
Apply a white Gradient Glow and drop shadow of choice

Finally, add your © copyright, licence and watermark, then save as GIF or JPG and you're done!


** IF YOU WISH TO ANIMATE PLEASE FOLLOW THESE NEXT STEPS **

Activate your Lights layer (across the top of the window)
Duplicate once and rename Light1 and Light2

Select the Light and glow with your Magic Wand
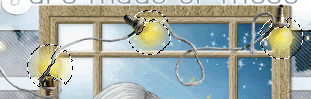

Leave Light1 as is and activate Light2

Adjust > Brightness & Contrast > Brightness/Contrast with the following settings:
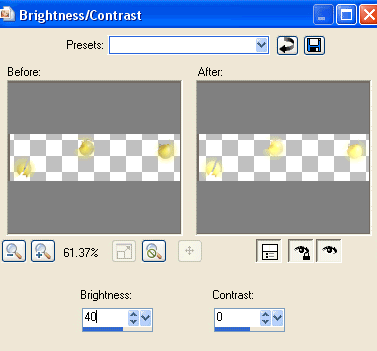

Deselect

Hide Light2 and activate Light1
Edit > Copy Merged

Open Animation Shop
Edit > Paste as New Animation

Back to PSP
Hide Light1 and activate Light2
Edit > Copy Merged

In Animation Shop
Edit > Paste after Current Frame

Select All, then set your Frame Properties to 50

Now save as a GIF and you're done!

Thanks for trying my tutorial!

::st!na::


Here is a non-animated version:

© Tutorial written by Stina on 14th June 2009
All rights reserved
Sunday, April 5, 2009

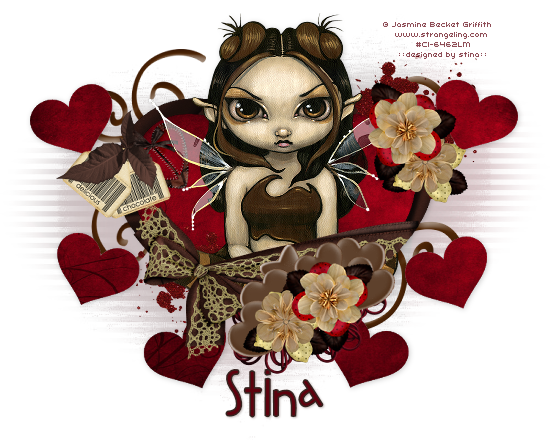
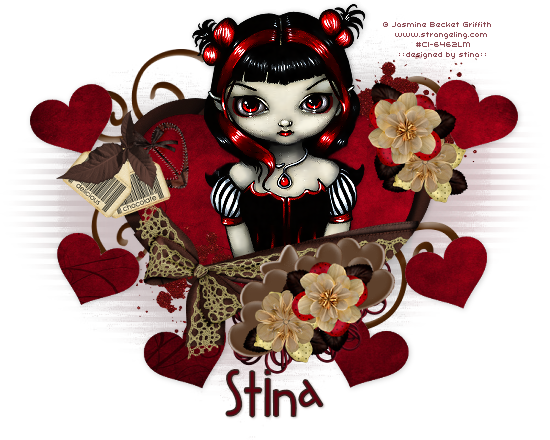
Chocolate Fairy

 
Supplies
 
"Chocolate" freebie kit by Bel Vidotti which is available from her blog
Tube of choice - I am using the artwork of Jasmine Becket Griffith which can be purchased from CILM
**PLEASE DO NOT USE HER ARTWORK WITHOUT THE APPROPRIATE LICENCE**
WSL_Mask10 by Chelle available from her blog
Template #43 by Ali available from her blog
Font of choice - I am using 2 Peas Fat Frog
 
Let's begin
 
 
Open Template 43 by Ali
Shift D to duplicate and close the original
Delete the copyright layer
 
Image > Canvas Resize 750 x 600 centred
 
Add a new raster layer and flood fill white
 
Layers > Arrange > Send to Bottom
 
Activate MAIN BACK HEART layer
Selections > All
Selections > Float
Selections > Defloat
Paste Paper01 into Selection
Deselect
 
Activate SMALLER HEARTS layer
Selections > All
Selections > Float
Selections > Defloat
Paste Paper01 into Selection (it should still be in your clipboard memory)
Deselect
 
Activate MAIN HEART FRAME
Selections > All
Selections > Float
Selections > Defloat
Paste Paper06 into Selection
Deselect
 
Duplicate then set blend mode to Multiply
Lower opacity to 50
Layers > Merge > Merge Down
 
Now Activate MAIN BACK HEART again
Resize by 90%
Activate MAIN HEART FRAME and do the same
 
Paste Doodle02 as new layer
Resize by 50%
Layers > Arrange > Move Down
Position to the right
Duplicate
Image > Mirror then Image > Flip
Resize by 85%
Position in the upper right
 
 
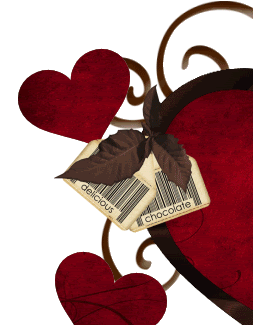
Paste Tag01 as new layer
Image > Rotate by 20 to the left
Resize by 30
Position to the left
 
paste Tag02 as new layer
Image > Rotate by 40 to the right
Resize by 30
Position over first tag
 
 
Paste Leaves as new layer
Resize by 30%
Place over tags
 
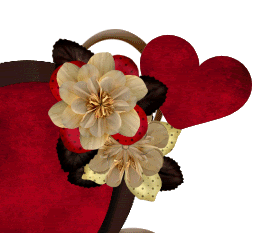
Paste Flower07 as new layer
Resize by 35%
Place in upper right
 
Paste Flower06 as new layer
Image > Rotate by 40 to the left
Resize by 40%
Place alongside other flower04
 
Paste Flowers01 and 03 as new layers
Resize each by around 35%
Place one each in the centre of the first two flowers
Layers > Merge > Merge Down on each Flower
 
 
Duplicate each Flower
Position both flowers at the bottom of the heart
 
Now paste various chocolates of choice as new layers
Resize each by 30%
Image > Rotate by 30 to the left or right
Repeat if necessary
 
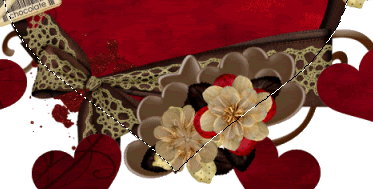
Paste Wrape03 as new layer
Resize by 55%
Position BEHIND chocolates and flowers
 
Activating your MAIN HEART FRAME AGAIN
Select the area outside of the frame with your Magic Wand
 
 
Selections > Modify > Feather by 3
Use your Eraser Tool to erase the excess overhanging the right
Deselect
 
Paste any other embellishments or elements you wish
 
Crop and resize
 
Activate your background layer
 
Paste Paper04 as new layer
Layers > New Mask Layer > From Image
Locate WSL_Mask10
OK
Layers > Merge > Merge Group
Lower opacity to around 35
 
Paste your tube as new layer
Resize as necessary
Place where desired
 
Select your Text Tool and font of choice
Choose a colour from your tube or scrap
Set it as your background in your Materials Palette
 
Type out your name
Objects > Align > Horizontal Centre in Canvas
Convert to raster layer
Apply any effects you wish and add a drop shadow
 
Finally add your © copyright, licence and watermark, then save as a GIF or JPG and you're done!
 
Thank you for trying my tutorial!
 
::st!na::
 
 
Here is another example:
 

© Tutorial written by Stina on 5th April 2009
All rights reserved
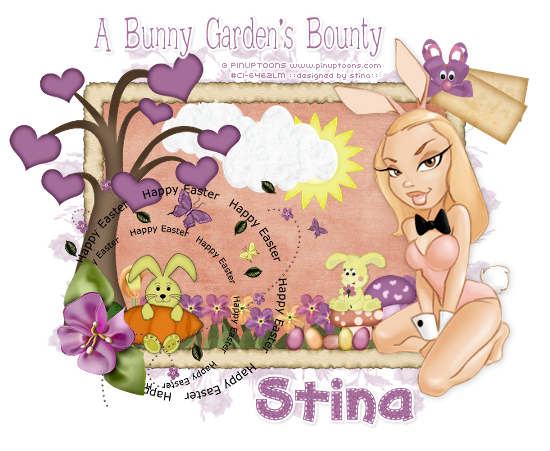
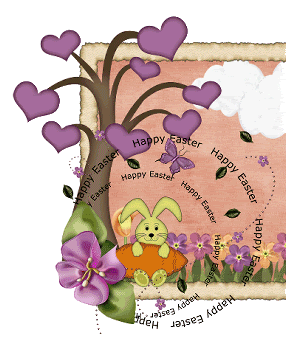
Bunny Garden

 
Supplies
 
"Easter" freebie Scrap Kit by Bel Vidotti which is available from her blog
Tube of choice - I am using the lovely artwork of Rion Vernon and PinUpToons which you can purchase from CILM
**PLEASE DO NOT USE HIS ARTWORK WITHOUT THE APPROPRIATE LICENCE**
WSL_Mask226 by Chelle available from her blog
Fonts of choice - I am using 2Peas Frazzled and AKApprique Black
Plugin: Eye Candy 4000 Gradient Glow (optional)
 
 
Let's begin
 
Open a new 700 x 600 blank canvas flood-filled white
 
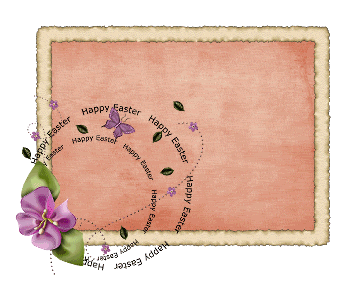
Paste Frame05 as new layer
 
Select area inside Frame with Magic Wand
Selections / MOdify / Expand by 10
 
Add new raster layer
 
Paste Paper03 into Selection
Deselect
 
Layers / Arrange / Move Down
 
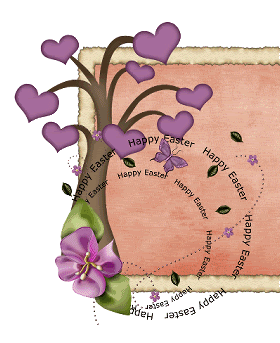
Paste WordArt as new layer
Resize by 60%
Position in lower left corner
 
 
Paste Tree as new layer
Resize by 70%
Layers / Arrange / Move Down
Position in left corner behind word art
 
 
Paste Grass as new layer
Resize by 55%
Position to the bottom of Frame
Layers / Arrange / Move Down
Repeat so Grass is behind Frame layer
 
Paste Mushroom01 as new layer
Resize by 20%
Paste Mushroom02 as new layer
Resize by 25%
Position both to the lower right beside each other
 
Paste Sun as new layer
Resize by 30%
Position to your liking
Duplicate then set blend mode to Soft Light
Layers / Merge / Merge Down
 
Paste Cloud02 as new layer
Resize by 40%
Place in position
Duplicate then resize by 85%
Position slightly to the left
 
Paste various flowers, resizing them and placing them to your liking
 
Paste Rabbit02 as new layer
Resize by 35%
Position under the tree within the word art circle
 
 
Paste Rabbit01 as new layer
Resize by 20%
Position on top of one of the Mushrooms
 
Paste Tag03 as new layer
Image / Rotate by 10 to the right
Resize by 25%
Position in upper right
 
Paste Tag03 again
Image / Rotate by 30 to the right
Resuze by 25%
Position over first tag
Layers / Merge / Merge Down
 
 
Paste BowRabbit02 as new layer
Resize by 20%
Place over the two tags in upper right
 
Paste various Butterflies
Resize by 10%
Position to your liking
 
Paste various Easter Eggs
Resize by 8%
Rotate alternatively, scattering them to your liking
 
Now paste your tube as new layer
Resize as necessary
Position to your liking
Add a drop shadow of choice
 
Paste Paper05 as new layer
Layers / Arrange / Send to Bottom
 
Layers / New Mask Layer / From Image
Locate WSL_Mask226
OK
Layers / Merge / Merge Group
Lower opacity to 40
 
Activate top layer
 
Select your Text Tool and font of choice
I am using 2Peas Frazzled
 
Choose a colour from your tag for your Background/text
 
Type out some words of your choice
Convert to raster layer
Apply a Gradient Glow if you wish and a drop shadow of choice
 
Select another font of choie
I am using AKApprique Black
 
Type out your name
Apply any effects you wish and a drop shadow of choice
 
Finally add your © copyright, licence and watermark, then save as a GIF or JPG and you're done!
 
Thank you for trying my tutorial!
 
::st!na::
 

© Tutorial written by Stina on 5th April 2009
All rights reserved
Wednesday, March 11, 2009

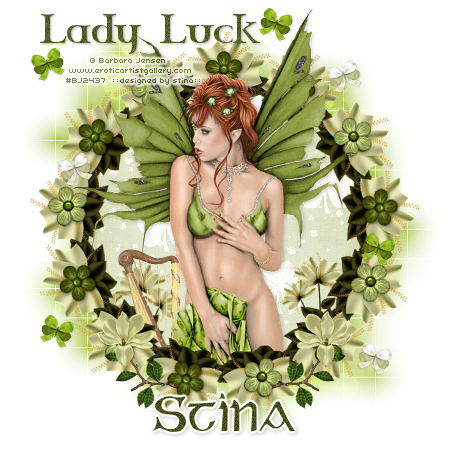
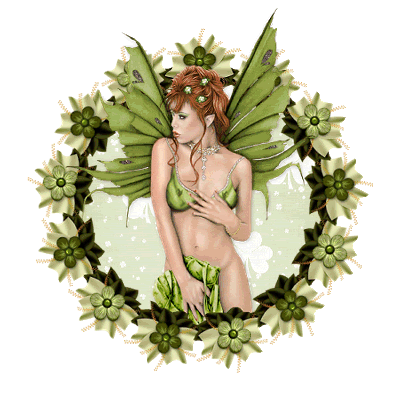
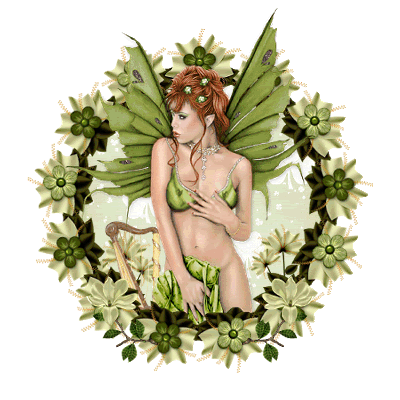
Lady Luck

 
Supplies
 
"Lucky" by Bel Vidotti as part of the Feelin' Lucky Blog Train sponsored by Scrappin' Bratz
Tube of choice - I am using the artwork of Barbara Jensen which can be purchased from her website
**PLEASE DO NOT USE HER ARTWORK WITHOUT THE APPROPRIATE LICENCE**
WSL_Mask84 by Chelle (supplied)
Fonts of choice - I am using Celtic Garamond and Celtic Gaelige (supplied)
 
My Supplies here
 
 
~ Step 1 ~
 
Open a new 600 x 600 blank canvas flood-filled white
 
Paste Frame05 as  new layer
Leave in centre
 
Add a new raster layer
Layers / Arrange / Move Down
 
Open Paper03
Edit Copy
 
Click inside Frame with your Magic Wand
Selections / Modify / Expand by 10
Paste Paper03 into Selections
Deselect
 
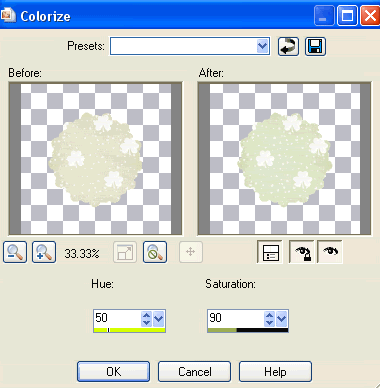
Adjust / Hue & Saturation / Colourise with the following settings:


Now I added the lighter flower to every second flower on the frame
I did so by pasting the flower and resizing it by 12% each time
I pasted a new layer and resized for each flower rather than duplicating the existing one as it would distort
Then I rotated each flower to match the flower it would replace
It's up to you if you wish to play with this step to your liking
Then Layers / Merge / Merge Down
  
 
~ Step 2 ~
 
Paste your tube as new layer
Place in position and resize as necessary
 
Click inside the Frame again with your Magic Wand
Selections / Invert
Selections / Modify / Contract by 2
Selections / Modify / Feather by 2
Now use your Eraser Tool to carefully erase the bottom of the tube
Deselect
 
Apply a soft drop shadow
 
Paste Flower05 as new layer
Resize by 30%
Position to the left
 
Layers / Arrange / Move Down
Repeat
 
Flower should now be UNDER the Frame
 
Duplicate layer
Image / Mirror
 
Open Harp and paste as new layer
Resize by 40%
Position above and over flower to the left
 
Paste Leaves as new layer
Resize by 30%
Paste Flower04 as new layer
Resize by 30%
 
Position flower over leaves
Layers / Merge / Merge Down
 
Resize by 85%
Position to the lower right on the Frame
Duplicate then
Image / Mirror
 
You should now have something like this:
 
 
Paste Butterfly02 as new layer
Image / Rotate by 20 to the right
Resize by 12%
Position to the right on the Frame
 
Paste Butterfly03 as new layer
Image / Rotate by 20 to the left
Resize by 12%
Position to the left on the Frame
 
Duplicate Butterflies and place to your liking
 
Resize image
 
  
~ Step 3 ~
 
Activate Background
 
Add a new raster layer
Selections / Select All
Paste Paper02 into Selection
Deselect
 
Layers / New Mask Layer / From Image
Locate WSL_Mask84
OK
 
Lower opacity to around 75
 
Choose a colour from your tube - I chose #464d15
Set it as your background in the Materials Palette
 
Select your Text Tool and choose your font
I am using Celtic Garamond
Type out the words "Lady Luck" or anything of your choosing
Add some Noise
Apply a slight drop shadow
 
Choose another font (if you wish)
I am using Celtic Gaelige
Same colour for background/text
 
Type your name
Add some Noise
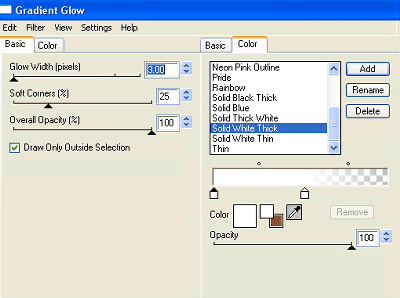
Effects / Plugins / Eye Candy 4000 / Gradient Glow with the following settings:
 
 
Apply a drop shadow:
H & V - 1
Opacity - 30
Blur - 5.00
Colour - #464d15
 
Finally, add your © copyright, licence and watermark
Then save as a GIF or JPG and you're done!
 
Thank you for trying my tutorial
 
::st!na::


© Tutorial written by 11th March 2009
All rights reserved
Monday, March 9, 2009

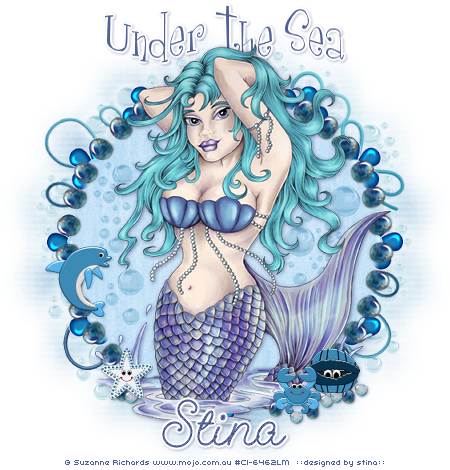
Under the Sea


Supplies
 
"Sea Life" scrap kit by Bel Vidotti Scraps which is a freebie available on her blog
Tube of choice - I am using the artwork of Suzanne Richards which can be purchased from CILM
**PLEASE DO NOT USE HER ARTWORK WITHOUT THE APPROPRIATE LICENCE**
WSL_Mask33 by Chelle (supplied)
Fonts of choice - Girls are Weird and GeeoHhmk (supplied
Plugin: Mura Meister Copies (supplied)
Plugin: Eye Candy 4000 Gradient Glow
 
My Supplies here
 
 
~ Step 1 ~
 
Open a new 600 x 600 blank canvas flood-filled white
 
Paste FramePebble as new layer
Resize by 80%
Leave in position
 
Grab your Selection Tool and choose Circle
Now this is the part I always find fiddly *g*
Position your point in the centre of the canvas – you will see in your Status bar at the bottom the co-ordinates
You need to position your pointer at Y – 300 and X – 300
 

Then draw out your circle till it reaches the centre of the pebbles on the frame
 
Add new raster layer
Layers / Arrange / Move Down
Open Paper06
Edit / Copy
Then Edit / Paste into Selection
KEEP SELECTED
Selections / Invert
Selections / Modify / Feather by 10
On the Paper layer press delete once or twice
Deselect
 
Paste Flower01 as new layer
Resize by 25%
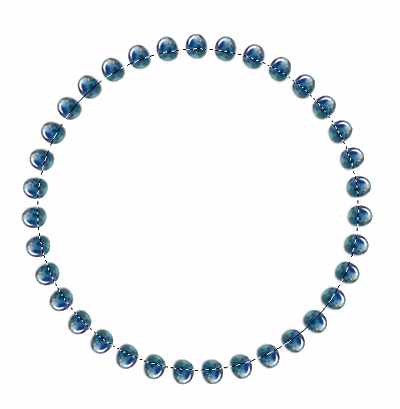
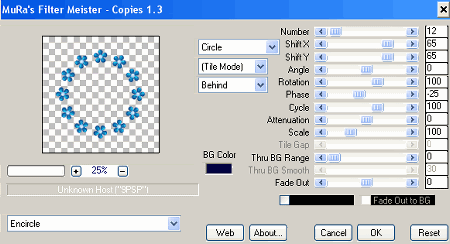
Effects / Plugins / Mura Meister / Copies with the following settings:
 
 
Layers / Arrange / Send to Bottom
 
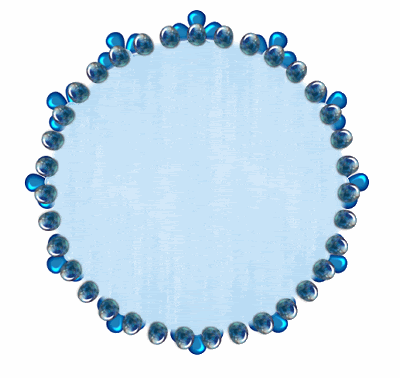
You should now have something like this:


~ Step 2 ~
 
Paste your tube as new layer
Resize as necessary and position to your liking
 
Paste Bubbles03 as new layer
Place into position and set blend mode to Multiply
 
Paste Bubbles02 as new layer
Image / Mirror
Place into position
Set blend mode to Multiply
 
Paste Dolphin as new layer
Resize by 20%
Place to the left to your liking
 
Paste Clam as new layer
Resize by 15%
Place to the lower right
 
Paste Crab as new layer
Resize by 15%
Place alongside Clam
 
Paste Starfish as new layer
Resize by 12%
Position in the lower left
 
Paste Pebble01 and Pebble02 as new layers
Resize them by 15% and place them in various positions to your liking
 

~ Step 3 ~
 
Paste some bubbles around the frame
Once you are happy with their position merge each of them down till they are one layer then
Layers / Arrange / Send to Bottom
Duplicate
 
Activate Background layer
Paste Paper04 as new layer
Resize by 75%
 
Layers / New Mask Layer / From Image
Locate WSL_Mask33
Source Luminance
OK
 
Layers / Merge / Merge Group
 
Add some drop shadows to your elements
 
Crop and resize
 
Select your Text tool, font and colour of choice to match your tube and kit
I chose #516097
 
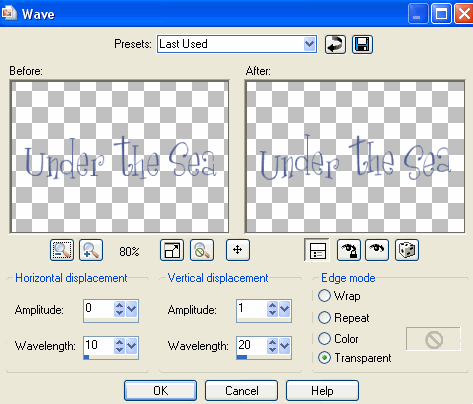
Type out "Under the Sea" or anything you like
 
Effects / Distortion Effects / Wave with the following settings:


Add a Gradient Glow and drop shadow:
H & V – 1
Opacity – 25
Blur – 2.00
Coloir - #000040
 
Choose another font for your name
Finally add your © copyright, licence and watermark
Then save as a GIF or JPG and you're done!
 
Thanks for trying my tutorial
 
::st!na::
 

©Tutorial written by Stina on 8th March 2009
All rights reserved
Monday, February 16, 2009

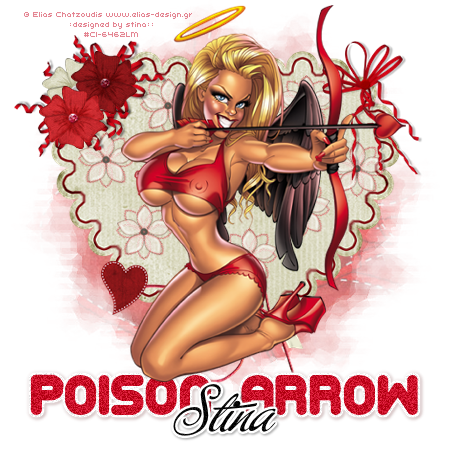
Poison Arrow

poisonarrow-stina_stina0209

Supplies

Elements from the following scrap kits:
"Valentine" scrap kit by Szunyo (freebie) which can be found on her blog
"Valentine Hearts" scrap kit by Monti (freebie) found on his site
"Poison Rock Girl" scrap kit by Bel Vidotti (freebie) which can be found on her blog
Tube of choice - I am using the artwork of Elias Chatzoudis which can be purchased from My PSP Tubes
**PLEASE DO NOT USE HIS ARTWORK WITHOUT THE APPROPRIATE LICENCE**
WSL_Mask161 by Chelle which can be found on her blog
Fonts of choice - Corpulent Caps and Buffet Script (pay font)
Eye Candy 4000 Gradient Glow

~ Step 1 ~

Open Mask and fonts and minimise for later

Open new blank canvas 600 x 600 flood-filled white

Let's start with the Szunyo_Valentine kit

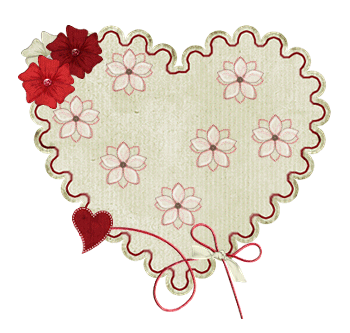
Paste Szunyo_V_komm4 as new layer
Resize by 25%
Leave in place

Paste Szunyo_V_flower1g as new layer
Resize by 7%
Position in top left corner

Paste Szunyo_V_flower2 as new layer
Resize by 7%
Position in top left corner with first flower
Duplicate this layer and move slightly across
Duplicate again then change blend mode to Screen
Layers / Merge / Merge Down

Position Flowers to your liking

Paste Szunyo_V_rope as new layer
Resize by 15%
Position at the bottom of the heart

Paste Szunyo_V_emb8 (red heart) as new layer
Resize by 5% then Image / Mirror
Position at the bottom on the end of the string rope

~ Step 2 ~

Go to Bel Vidotti's "Poison Rock Girl" kit

Paste Flower05 as new layer
Adjust / Hue & Saturation / Colourise
Hue - 255
Saturation - 255
Resize by 15%

Paste Flower02 as new layer
With your FReehand Tool draw around the Black Gem in the centre of the flower
Adjust / Hue & Saturation / Colourise
Hue - 255
Saturation - 255

Then adjust the Hue & Saturation again this time changing the Saturation to 100

Resize by 20%
Position over first flower
Layers / Merge / Merge Down

Lower opacity to 60
Duplicate this flower several times and place around the heart

pa-01

~ Step 3 ~

Go to Monti's Valentine Hearts kit

Paste Bow1 as new layer
Resize by 35%
Position BEHIND the flowers on the left
Duplicate layer then Image / Flip
Move next to first bow beneath the flowers
pa-02

Paste Bow as new layer
Image / Rotate by 20 to the left
Resize by 40% and position to the upper right

Paste Paper01 as new layer
Layers / Arrange / Send to Bottom
Resize by 90%
Layers / New Mask Layer / From Image
Locate WSL_Mask161 in menu
Source Luminance
OK

Layers / Merge / Merge Group

Lower opacity of this layer to 60

~ Step 4 ~

Foreground: #FFFFFF
Background: #c90d27

Font: Corpulent Caps
Size: 60
Stroke width: 2.00
Kerning: -50

Type out the words POISON ARROW
Objects / Align / Horizontal Centre in Canvas
Convert to Raster Layer

Adjust / Add/Remove Noise / Add Noise
Gaussian
Noise: 25
Monochrome

Effects / Plugins / Eye Candy 4000 / Gradient Glow
Glow width: 3.00
Soft Corners: 25
Opacity: 100
Setting: Fat
Colour: White

Apply a drop Shadow:
H & V: 1.00
Opacity: 40
Blur: 3.00
Colour: #5a1415

Now let's add our name

Turn the foreground off to null
Change Background to #000000

Font: Buffet Script
Size: 40
Kerning: 0

Type your name
Objects / Align / Horizontal Centre in Canvas
Convert to Raster layer

Effects / Plugins / Eye Candy 4000 / Gradient Glow
Glow width: 3.00
Soft Corners: 25
Opacity: 100
Setting: Fat
Colour: White

Apply a drop Shadow:
H & V: 1.00
Opacity: 40
Blur: 3.00
Colour: #000000

Add your © copyright, licence and watermark and you're done!

Thanks for trying my tutorial

::st!na::


©Tutorial written by Stina on 14th February 2009
All rights reserved

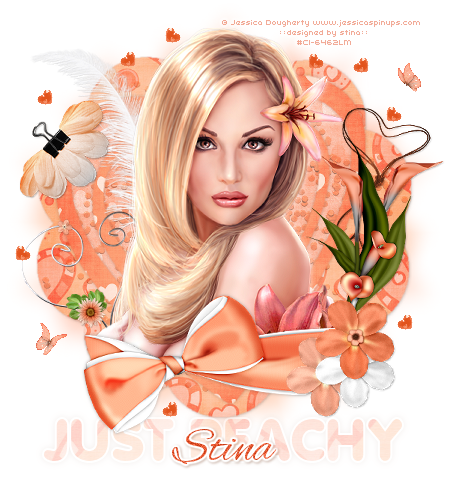
Just Peachy

Supplies

"My Peach Love" scrap kit by Bel Vidotti which is a freebie and available from her blog
Tube of choice - I am using the lovely artwork of Jessica Dougherty which may be purchased from CILM
**PLEASE DO NOT USE HER ARTWORK WITHOUT THE APPROPRIATE LICENCE**
Template #8 by Bel Vidotti available from her blog
Fonts and Alex Brush (pay font)
Eye Candy 4000 Gradient Glow

~ Step 1 ~

Open Template and duplicate (shift D)
Close off original
Delete copyright layer

Activate CLOUD layer
Selections / Modify / Feather by 2
Add new raster layer
Open Paper4, copy and paste into selection
Deselect

Activate HEART1 layer
Selections / Modify / Feather by 2
Add new raster layer
Open Paper12, copy and paste into selection
Deselect

Activate HEART2 layer
Selections / Modify / Feather by 2
Add new raster layer
Copy Paper12 and paste into selection
Deselect

Activate HEART3 layer
Selections / Modify / Feather by 2
Add new raster layer
Open Paper8, copy and paste into selection
Deselect

~ Step 2 ~

Paste your tube as new layer
Resize if necessary

Paste Wrap02 as new layer
Resize by 70%
Position at the bottom of tube

Activate the CLOUD layer again and using your magic wand click outside the layer
Selections / Modify / Feather by 2
Use your Eraser Tool to carefull erase parts of the wrap

jp-01
Paste Flowers07, 08 and 10 as new layers
Resize each by 30% and position to the right at the end of the wrap

Paste Flower05 as new layer
Resize by 60%
Position to the right behind the flowers

Paste FlowerClip as new layer
Image / Rotate by 50 to the left
Resize by 45%
Position to the left

Paste Feather as new layer
Image / Mirror then resize by 60%
Tuck behind tube and to the left

Paste Decorated Metal Heart as new layer
Image / Rotate by 20 to the left
Resize by 40%
Position to the left behind tube and Wrap

Paste Glitter as new layer and move between the Heart2 and Heart layers
Change blend mode to Multiply and lower opacity to 50

Add drop shadows of choice to each layer and delete template layers

Crop and resize

~ Step 3 ~

In your Materials Palette choose a paper for your background and select #FFFFFF for your foreground

jp-02

Select your Text Tool
Stroke width - 2.00
Font - Valken

Type out the words JUST PEACHY in caps

Add a drop shadow:
H & V - 1
Opacity - 25
Blur - 10.00
Colour - #804c30

Lower opacity of this layer to 30 and drag layer beneath Wrap/Bow

Add a few extra elements to your liking. You can even add a mask to your background if you wish

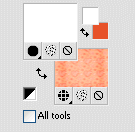
Change your Material Palette to:
Foreground - null
Background - #e45730

Select your Text Tool again
Font - Alex Brush

Type out your name
Adjust / Add/Remove Noise / Add Noise
Gaussian
Noise - 25
Monochrome

Effects / Plugins / Eye Candy 4000 / Gradient Glow
Glow width - 3.00
Soft Corners - 25
Opacity - 100
Setting - Fat
Colour - White

Apply a drop shadow:
H & V - 1.00
Opacity - 40
Blur - 3.00
Colour - #804c30

Add your ©copyright, licence and watermark and you're done!

Thank you for trying my tutorial

::st!na::

©Tutorial written by Stina on 13th February 2009
All rights reserved