Supplies
Elements from the following scrap kits:
"Valentine" scrap kit by Szunyo (freebie) which can be found on her blog
"Valentine Hearts" scrap kit by Monti (freebie) found on his site
"Poison Rock Girl" scrap kit by Bel Vidotti (freebie) which can be found on her blog
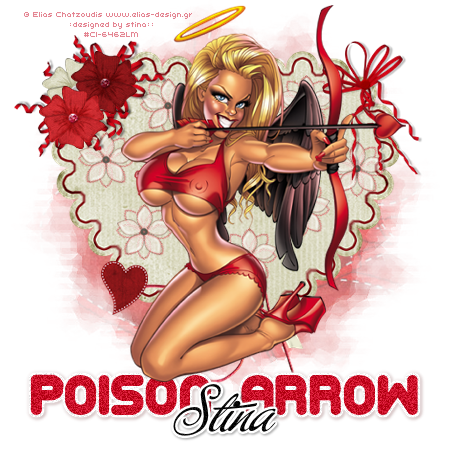
Tube of choice - I am using the artwork of Elias Chatzoudis which can be purchased from My PSP Tubes
**PLEASE DO NOT USE HIS ARTWORK WITHOUT THE APPROPRIATE LICENCE**
WSL_Mask161 by Chelle which can be found on her blog
Fonts of choice - Corpulent Caps and Buffet Script (pay font)
Eye Candy 4000 Gradient Glow
~ Step 1 ~
Open Mask and fonts and minimise for later
Open new blank canvas 600 x 600 flood-filled white
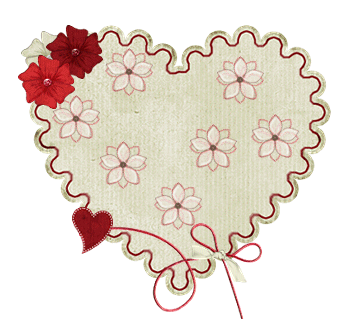
Let's start with the Szunyo_Valentine kit
Paste Szunyo_V_komm4 as new layer
Resize by 25%
Leave in place
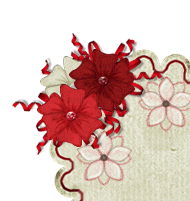
Paste Szunyo_V_flower1g as new layer
Resize by 7%
Position in top left corner
Paste Szunyo_V_flower2 as new layer
Resize by 7%
Position in top left corner with first flower
Duplicate this layer and move slightly across
Duplicate again then change blend mode to Screen
Layers / Merge / Merge Down
Position Flowers to your liking
Paste Szunyo_V_rope as new layer
Resize by 15%
Position at the bottom of the heart
Paste Szunyo_V_emb8 (red heart) as new layer
Resize by 5% then Image / Mirror
Position at the bottom on the end of the string rope
~ Step 2 ~
Go to Bel Vidotti's "Poison Rock Girl" kit
Paste Flower05 as new layer
Adjust / Hue & Saturation / Colourise
Hue - 255
Saturation - 255
Resize by 15%
Paste Flower02 as new layer
With your FReehand Tool draw around the Black Gem in the centre of the flower
Adjust / Hue & Saturation / Colourise
Hue - 255
Saturation - 255
Then adjust the Hue & Saturation again this time changing the Saturation to 100
Resize by 20%
Position over first flower
Layers / Merge / Merge Down
Lower opacity to 60
Duplicate this flower several times and place around the heart

~ Step 3 ~
Go to Monti's Valentine Hearts kit
Paste Bow1 as new layer
Resize by 35%
Position BEHIND the flowers on the left
Duplicate layer then Image / Flip
Move next to first bow beneath the flowers
Paste Bow as new layer
Image / Rotate by 20 to the left
Resize by 40% and position to the upper right
Paste Paper01 as new layer
Layers / Arrange / Send to Bottom
Resize by 90%
Layers / New Mask Layer / From Image
Locate WSL_Mask161 in menu
Source Luminance
OK
Layers / Merge / Merge Group
Lower opacity of this layer to 60
~ Step 4 ~
Foreground: #FFFFFF
Background: #c90d27
Font: Corpulent Caps
Size: 60
Stroke width: 2.00
Kerning: -50
Type out the words POISON ARROW
Objects / Align / Horizontal Centre in Canvas
Convert to Raster Layer
Adjust / Add/Remove Noise / Add Noise
Gaussian
Noise: 25
Monochrome
Effects / Plugins / Eye Candy 4000 / Gradient Glow
Glow width: 3.00
Soft Corners: 25
Opacity: 100
Setting: Fat
Colour: White
Apply a drop Shadow:
H & V: 1.00
Opacity: 40
Blur: 3.00
Colour: #5a1415
Now let's add our name
Turn the foreground off to null
Change Background to #000000
Font: Buffet Script
Size: 40
Kerning: 0
Type your name
Objects / Align / Horizontal Centre in Canvas
Convert to Raster layer
Effects / Plugins / Eye Candy 4000 / Gradient Glow
Glow width: 3.00
Soft Corners: 25
Opacity: 100
Setting: Fat
Colour: White
Apply a drop Shadow:
H & V: 1.00
Opacity: 40
Blur: 3.00
Colour: #000000
Add your © copyright, licence and watermark and you're done!
Thanks for trying my tutorial
::st!na::
©Tutorial written by Stina on 14th February 2009
All rights reserved

No comments:
Post a Comment