Supplies
Scrap kit of choice - I am using the cute "Love Our Pets" kit by SwheatCreations
which can be purchased at Paradise 4 Scrappers
Thank you Norma for this gorgeous and adorable kit! I loved using it!
Template #9 by Bel Vidotti which can be found on her blog
Tube of choice - I am using the tube Ready to Pounce (supplied)
WSL_Mask41 by Chelle (supplied)
Fonts of choice - I am using BabyKruffy and Girls are Weird (supplied)
Eye Candy 4000 Glass
Eye Candy 4000 Gradient Glow (optional)
Any other elements/brushes of choice
My Supplies here
~ Step 1 ~
Open Mask and fonts and minimise for later
Open Template and duplicate (shift D) then close off original
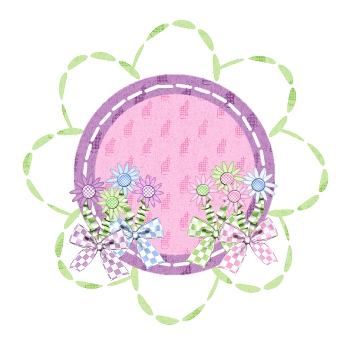
Click on the FRAME BACK layer with your magic wand
Add new raster layer
Open your PetBkg13, copy and paste into selection
Deselect
Click on the FRAME layer
Selections / Modify / Feather by 2
Add new raster layer
Open PetBkg12, copy and paste into selection
Deselect
Activate the FLOWER layer
Selections / Float then Selections / Defloat
Add new raster layer
Open PetBkg1, copy and paste as selection
Deselect
I decided to leave the STITCH layer white but you can colour it if you wish using the same step as above
Delete original FLOWER, FRAME BACK and FRAME layers
~ Step 2 ~
Open Flowers1, 2, 3 and 4
Resize them by 25%
Paste Flowers 2 and 3 to the left of the template
Paste Flowers 1 and 4 then Image / Mirror each and position to the right
Paste Ready To Pounce Kitten as new layer
Position in centre of canvas
Paste PetBow3 as new layer
Resize by 20% and position over the ribbon on the little kitty's tail
Still on the Bow go to
Adjust / Hue & Saturation / Colourise with the following settings:

Duplicate then blend mode to Multiply
Layers / Merge / Merge Down
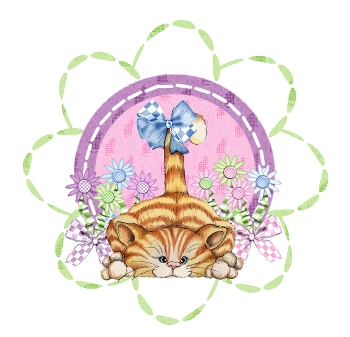
You should now have something like this:

~ Step 3 ~
Activate your white BACKGROUND layer
Open PetBkg14 and paste as new layer
Resize by 85%
Layers / New Mask Layer / From Image
Locate WSL_Mask41 from the drop down list
Fit to Canvas
Source Luminance checked
Invert mask Data UNchecked
OK
Layers / Merge / Merge Group
Reduce opacity of this layer to 65
Crop and resize tag
~ Step 4 ~
Now it's time to let your creativity flow! *s*
Add any elements, brushes or what-have-you you like to make the tag "your own"
Add drop shadows to your elements and template
To add any brushes, don't forget to Add a new raster layer
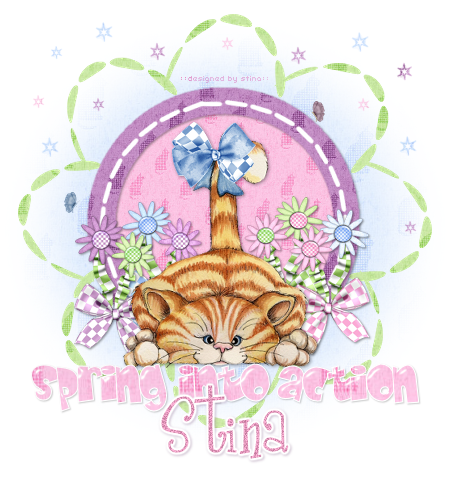
Type out the words SPRING INTO ACTION in a nice bold font
(I used Baby Kruffy whis I supplied)
Using one of the pink Papers for my background and my foreground on White (stroke width 1.0)
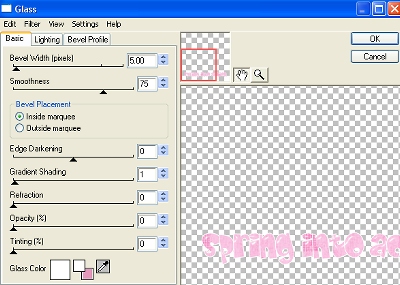
Effects / Plugins / Eye Candy 4000 / Glass with the following settings:

Repeat Glass effect once more
Choose a colour from your tag to use for your text, then type out your name in a font of your choice
Add Gradient Glow as I did to make it stand out, and then apply a drop shadow
Add your ©copyright and watermark and you're done!
Thanks for trying my tutorial
::st!na::
©Tutorial written by Stina on 5th February 2009
All rights reserved


Hi Stina, i just luv this tutorial. what a cutie. one thing though, i downloaded your supplies, but the cute kitty is not included. could you tell me where to find it? thank you so so much.
ReplyDeletedebby