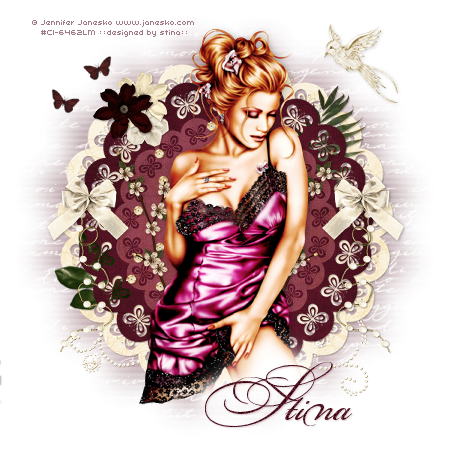
Supplies
Scrap kit of choice - I am using the lovely "Devotion" kit by Teresa's Scraps
which you can purchase at her store or Cotton Candy Kreations
Thank you Teresa for this gorgeous kit!
Tubes of choice - I am using the gorgeous work of Jennifer Janesko
which can be purchased at CILM with the appropriate licence
**PLEAS DO NOT USE HER ARTWORK WITHOUT THE PROPER LICENCE**
Font of choice - I am using Bickham Script Fancy (which is a pay font)
WSK_Mask33 by Chelle which can be found on her blog
~ Step 1 ~
Open WSK_Mask33 and font of choice and minimise for later
Open a new image 600 x 600 with white background
Paste Template01 as new layer and resize by 50%
Rename this Template1
Open Template02 and resize by 56%
Paste as new layer and move below first template
Rename this Template2
Go back to Template02 and resize again by 67%
Paste as new layer ABOVE first template
Change the blend mode to Soft Light
Rename this Template3
Your layer palette should now look like this: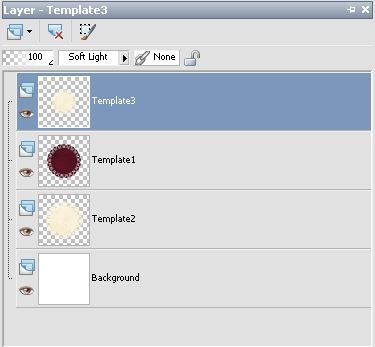
~ Step 2 ~
Paste Bow01 as new layer
Resize by 15% and position to the right halfway down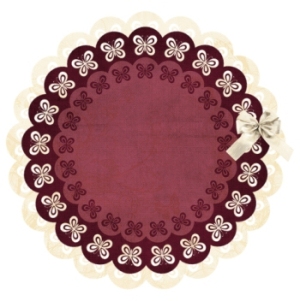
Duplicate then Image / Mirror
Paste Flower01 as new layer
Resize by 10% and position in the top left
Paste Flower01 as new layer
Resize by 10% and position in the top left overlapping Flower01 slightly
Paste Flower03 as new layer
Resize by 8% and position below both flowers
Paste Flower04 as new layer
Resize by 50% and position slightly to the left (see below)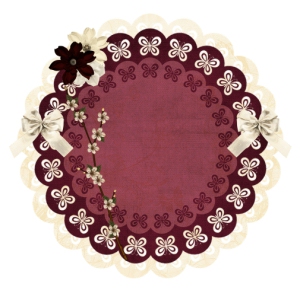
Drag this layer below other flowers in case they overlap
Duplicate then Image / Mirror
~ Step 3 ~
Paste Sequins01 as new layer
Activate your Template3 layer
With your magic wand click outside the template in the blank area
Activate the sequins layer again and hit delete
Deselect
Paste Leaf02 as new layer
Resize by 20% then Image / Rotate by 20 to the left
Position to the left between Template layers 1 and 2
Paste Leaf01 as new layer
Resize by 35% then Image / Rotate by 20 to the left
Image / Mirror and position in the upper right between Template layers 1 and two (see below)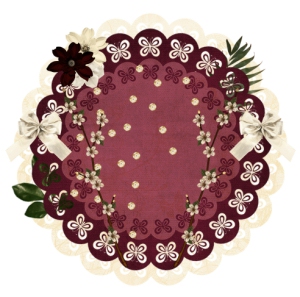
Paste BeadedRope as new layer
Image / Rotate by 90 to the left
Resize by 30% and position to the left beneath the bow
Adjust / Sharpness / Sharpen
Duplicate then Image / Mirror
Paste SwirlBling as new layer
Resize by 50% and position at the bottom
Move this layer to the bottom layer
~ Step 4 ~
Paste your tube as new layer and resize if necessary
Position to your liking
Activate your Template2 layer (bottom template)
With your magic wand click the blank area outside the template
Selections / Modify / Feather by 2
Back on your tube layer with your eraser on the following settings:
![]()
Then carefully erase the excess tube along the bottom
Deselect
Paste Bird01 as new layer
Resize by 20% and position in the top right
Paste Butterfly02 as new layer
Image / Rotate by 20 the left
Resize by 5%
Position in the upper left
Duplicate then Image / Mirror, placing the duplicate butterfly just above it
Crop and resize your tag
~ Step 5 ~
Now duplicate your tube layer
Add a drop shadow like I have
V & H - 1
Opacity - 30
Blur - 10.00
Colour - #000000
Then draw out a rectangle on the bottom part of your tube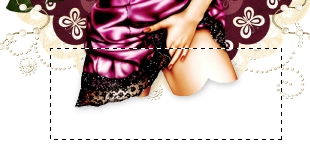
The hit delete to remove the drop shadow from that part of your tube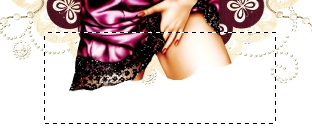
Add new raster layer
Change your foreground to #FFFFFF
Select your Brush Tool with the following settings:

Now just add a touch of white to the bottom of the tube to give the impression she is on a cloud
Now paste Paper03 as new layer and resize by 70%
Move to bottom layer above white background
Layers / New Mask Layer / From Image
Locate WSL_Mask33 in the drop down list
Fit to Canvas checked
Source Luminance checked
Invert Mask Data UNchecked
OK
Layers / Merge / Merge Group
Now add some drop shadows to your other elements and layers
Add your name in a nice script font with a slight drop shadow
Add your © copyright, licence and watermark and you're done!
Thanks for trying my tutorial
::st!na::
©Tutorial written by Stina on 5th February 2009
All rights reserved

No comments:
Post a Comment