Supplies
I used two scrap kits - both are freebies
"All You Need is Love" by Sara's Scraps and "Sweet Valentine" by Missy of Misfits Scrapz,
and you can find both kits on each designers' blog
Tube of choice - I use the lovely artwork of Suzanne Richards
which can be purchased from CILM
**PLEASE DO NOT USE HER ARTWORK WITHOUT THE APPROPRIATE LICENCE**
WSL_Mask214 by Chelle
Heartland Regular font
Eye Candy 4000 Gradient Glow
Font and Mask here
~ Step 1 ~
Open font and Mask and minimise for later
Open a new blank canvas 650 x 600 flood-filled white
Paste Frame1 as new layer
Move slightly to the left
Duplicate then Image / Mirror
Position frames to your liking
With your magic wand click inside first frame
Selections / Modify / Expand by 10
Activate your background layer and then
Selections / Promote Selection to Layer
KEEP SELECTED!!
Add new raster layer
Copy Paper1 and paste INTO Selection
Deselect
Lower opacity of this layer to 50
Layers / Merge / Merge Down
Then on the frame layer again
Layers / Merge / Merge Down
With your magic wand click inside the second frame
Selections / Modify / Expand by 10
Activate background layer again
Selections / Promote selection to Layer
Move this layer ABOVE first frame but still beneath second frame
KEEP SELECTED!!
Add new raster layer
Copy Paper1 again and paste into selection
Deselect
NOW go to Adjust / Hue & Saturation / Colourise with the following settings:

Lower opacity of this layer to 40
Layers / Merge / Merge Down
Then on the frame layer again
Layers / Merge / Merge Down
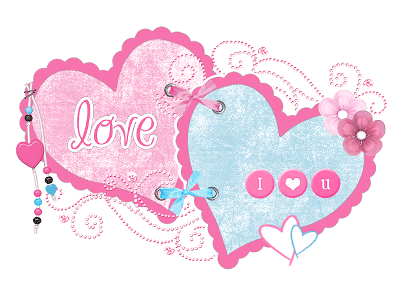
You should now have two hearts on two layers
DO NOT MERGE THESE TWO HEARTS!!
~ Step 2 ~
Paste HeartRibbon as new layer
Resize by 70% and position to the left
Paste Love WardArt as new layer
Resize by 70% and position in first heart
Paste I Love U Buttons as new layer
Resuze by 70% and position in the lower right of second heart
Paste Double Heart as new layer
Resize by 70% and position on the frame to the lower right

Paste Bow Eyelet 1 as new layer
Image / Rotate by 20 to the right
Resize by 60%
Position towards the top between the two hearts
Paste Bow Eyelet 2 as new layer
Resize by 60% and position toward the bottom of the hearts
Paste the Missy_sv_Flower2 as new layer from Missy's kit
Resize by 20% and duplicate
Position them together on the upper right of the frame
Name them Flower1 and Flower2

Duplicate Flower1 and set the blend mode to Multiply
Layers / Merge / Merge Down
Duplicate Flower2 and set the blend mode to Hard Light
Layers / Merge / Merge Down
Tuck Flower2 behind Flower1 so that the darker one is the top layer
Paste Missy_sv-Bling Doodle 1 as new layer
Resize by 50%
Position in the lower left between the two hearts
Duplicate layer
Image / Mirror then Image / Flip
Position top bling in the upper right
Add any other elements you wish
Crop and resize your tag (I resized mine to 500 x 400)
~ Step 3 ~
Paste your tube and resize as necessary
(My lil cupid I resized by 65%)
Duplicate layer
On original tube layer:
Effects / Plugins / Eye Candy 4000 / Gradient Glow with the following settings:
Glow width - 8.00
Soft Corners - 25
Opacity - 100
Setting - MEDUIM
Colour - White
The lower opacity of Gradient Glow layer to your liking
This will give the effect of a soft glow around the tube
Paste Paper7 (from Sara's Scrap kit) as new layer and move to bottom layer
Resise by 75%
Layers / New Mask Layer / From Image
Locate WSL_Mask214 in drop down
Source Luminance checked
OK
Layers / Merge / Merge Group
Lower opacity to 40
Choose a colour to match your tag with your eye dropper tool and select it as your background
Select your Text Tool and font
Type out your name
Add a Gradient Glow
I used the following settings:
Glow width - 3.00
Soft corners - 25
Opacity - 100
Setting - Fat
Colour - White
Apply a drop shadow:
H & V - 1
Opacity - 40
Blur - 5.00
Colour - #ee7cbd
Add your © copyright, licence and watermark and you're done!
Thanks for trying my tutorial
::st!na::
©Tutorial written by Stina on 11th February 2009
All rights reserved


No comments:
Post a Comment