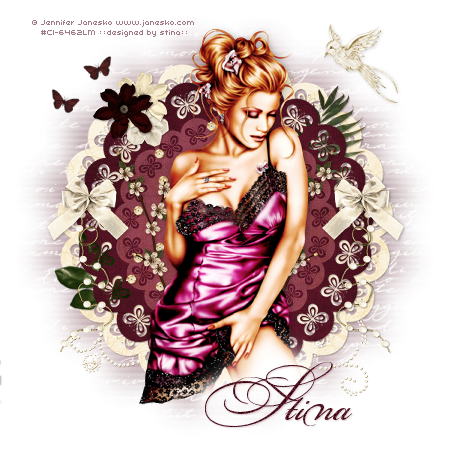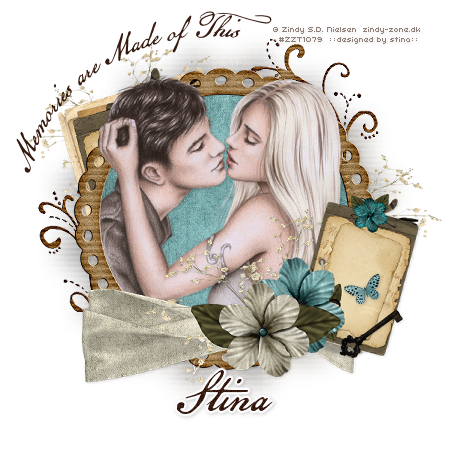
Supplies
Scrap kit of choice - I am using the lovely "A Thousand Miles" kit by Teresa's Scraps which is available at Cotton Candy Kreations and Heavenly Taggerz
Tube of choice - I am using the gorgeous work of Zindy Nielsen which can be purchased from her store
**PLEASE DO NOT USE HER ARTWORK WITHOUT AN APPROPRIATE LICENCE**
WSL_Mask33 by Chelle which is available from her blog
Font of choice - I am using American Scribe
~ Step 1 ~
Open a new 600 x 600 blank canvas flood-filled white
Paste Frame05 as new layer
Resize by 70%
Resize by 70%
Grab your Freehand Tool and draw around the Frame
Add new raster layer
Layers / Arrange / Move Down
Add new raster layer
Layers / Arrange / Move Down
Open Paper01
Edit / Copy
Edit / Copy
On working canvas, Paste into Selection
Deselect
Deselect
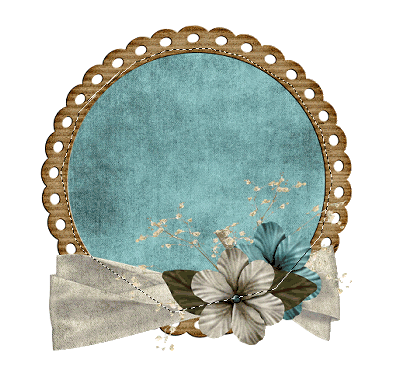
Paste Doodle02 as new layer
Resize by 45%
Position in the lower left
Resize by 45%
Position in the lower left
Paste Doodle03 as new layer
Resize by 40%
Position in the upper right
Resize by 40%
Position in the upper right
Once satisfied with positioning
Layers / Merge / Merge Down, then
Layers / Arrange / Send to Bottom
Layers / Merge / Merge Down, then
Layers / Arrange / Send to Bottom
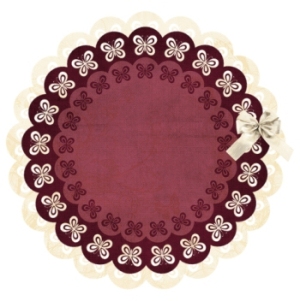
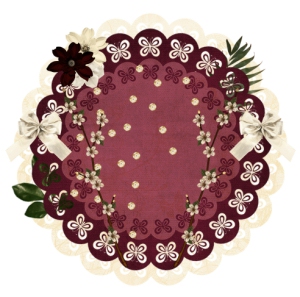
You should now have something like this:
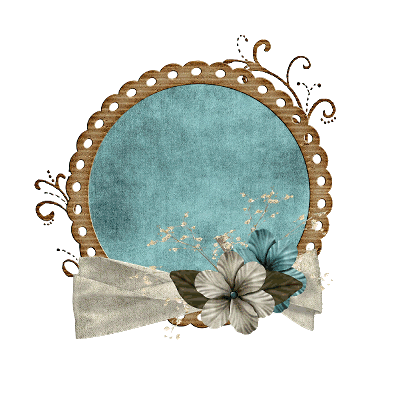
~ Step 2 ~
Activate top layer
Paste Frame07 as new layer
Image / Mirror
Paste Journal as new layer
Position over Frame
Image / Mirror
Paste Journal as new layer
Position over Frame
Layers / Merge / Merge Down
Image / Rotate by 15 to the left
Resize by 50%
Position to the upper left
Resize by 50%
Position to the upper left
Layers / Arrange / Move Down
Repeat
Repeat
Return to top layer
Paste Journal again
Image / Rotate by 15 to the right
Resize by 35%
Position to the right over the ribbon and flowers
Image / Rotate by 15 to the right
Resize by 35%
Position to the right over the ribbon and flowers
Select your Freehand Tool
Zoom in and fade the Journal layer to see what you are doing
Draw carefully around the flowers where the Journal pad is
Zoom in and fade the Journal layer to see what you are doing
Draw carefully around the flowers where the Journal pad is
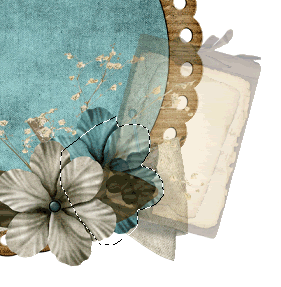
Selections / Modify / Feather by 1
Delete twice
Deselect
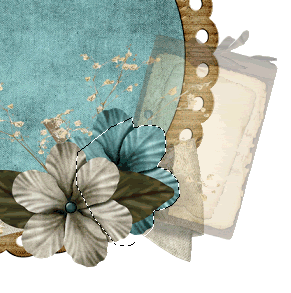
Paste Flower11 as new layer
Resize by 15%
Place on top of Journal pad over Frame
Paste Flower13 as new layer
Resize by 30%
Position in upper right
Paste Flower13 again
Image / Mirror
Image / Rotate by 50 to the left
Resize by 30%
Position alongside first copy
Layers / Merge / Merge Down
Resize by 30%
Position in upper right
Paste Flower13 again
Image / Mirror
Image / Rotate by 50 to the left
Resize by 30%
Position alongside first copy
Layers / Merge / Merge Down
Layers / Arrange / Send to Bottom
Duplicate
Image / Mirror
Position above and behind Journal pad to the right
Image / Mirror
Position above and behind Journal pad to the right
Paste Antique Key as new layer
Image / Rotate by 40 to the left
Resize by 12%
Position on the corner of Journal pad
Image / Rotate by 40 to the left
Resize by 12%
Position on the corner of Journal pad
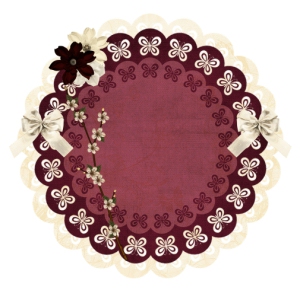
Crop and resize
~ Step 3 ~
Paste your tube as a new layer
Resize as necessary
Position tube under frame
Resize as necessary
Position tube under frame
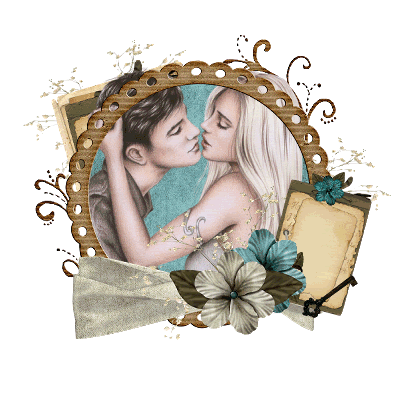
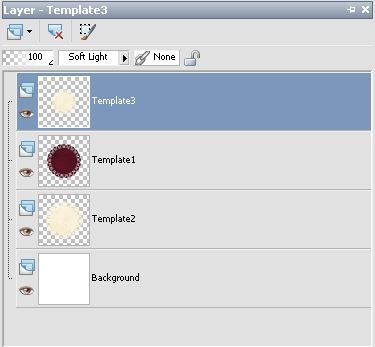
Duplicate, then
Layers / Arrange / Move Up
So now you should have a tube layer on top of your frame
Layers / Arrange / Move Up
So now you should have a tube layer on top of your frame
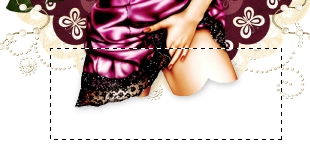
With your Freehand Tool draw around the bottom part of the tube:
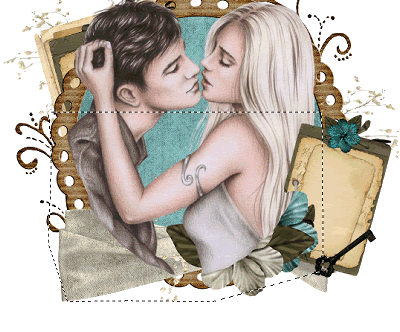
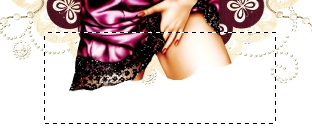
Press delete
Deselect
Your tube now looks like it is behind the ribbon and protruding out of the frame
Activate your Background layer
Paste Paper09 as new layer
Layers / New mask Layer / From Image
Locate WSL_Mask33
OK
Layers / Merge / Merge Group
Resize by 90%
Layers / New mask Layer / From Image
Locate WSL_Mask33
OK
Layers / Merge / Merge Group
Resize by 90%
Select your Preset Shape Tool on Ellipse
Foreground - #000000
Background - null
Foreground - #000000
Background - null
Draw out out circle around your tag
Select your Text Tool and font
Choose a colour from your tag
Foreground - null
Background - #35190f (colour I used)
Choose a colour from your tag
Foreground - null
Background - #35190f (colour I used)
On the curve type out "Memories are Made of This" or anything you like
In your Layer Palette open your Vector Layer and hide the Ellipse
Convert to raster layer
Convert to raster layer
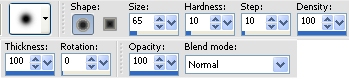
Add a slight drop shadow:
H & V - 1
Opacity - 20
Blur - 5.00
Colour - #000000
H & V - 1
Opacity - 20
Blur - 5.00
Colour - #000000
In a similar font type your name, adding any extra effects you wish
Finally, add your © copyright, licence and watermark
Then save as a GIF or JPG and you're done!
Then save as a GIF or JPG and you're done!
Thanks for trying my tutorial
::st!na::
© Tutorial written by Stina on 17th March 2009
All rights reserved