Please email me designed.by.stina@gmail.com with your creations. I'd love to see them.

Showing posts with label Jennifer Janesko. Show all posts

Tuesday, September 8, 2009

City Diva


Supplies

Scrap kit of choice - I am using "Velvet Rose" by Gina's Gems Scraps available from Scraps with Attitude and Paradise 4 Scrappers
Tube of choice - I am using the lovely artwork of Jennifer Janesko available with a licence from CILM
**PLEASE DO NOT USE HER ARTWORK WITHOUT THE APPROPRIATE LICENCE**
47MaskkelsWWA here
WSL_Mask133 by Chelle available from her blog
Fonts of choice - I am using Adam Gorry Lights and MonteCarloScript
Plugins: PhotoEffex > Scanlines
Eye Candy 4000 > HSB Noise and Gradient Glow (optional)


Let's begin...


Open a new 650 x 400 blank canvas flood-filled white

Paste a paper of choice as new layer

Layers > New Mask Later > From Image
Apply 47MasskelsWWA
Invert Mask Data checked
OK
Layers > Merge > Merge Group
Resize by 70%

Select OUTSIDE mask with Magic Wand
Selections > Invert
Selections > Modify > Contract by 1

Activate background layer
Layers > Promote Selection to Layer
Deselect

On Mask Layer, Layers > Merge > Merge Down
Your Mask should now be merged with your Promoted selection layer
Rename City Mask

Paste Butterflies and Spark as new layer
Resize and position to your liking
Erase any excess
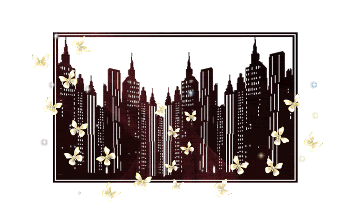


Paste Gold Swirl Frame1 as new layer
Resize by 80%

LEAVE IN POSITION!!

Select inside Frame with Magic Wand
Selections > Modify > Expand by 4
Add new raster layer
Paste Paper of choice INTO selection
Layer > Arrange > Move Down

KEEP SELECTED!!

Paste Tube of choice as new layer
Resize as necessary and position within Frame

Selections > Invert
Delete, then deselect

Activate Mask layer again

Paste Branch as new layer
Resize by 45%
Position to the left behind Frame
Duplicate, Image > Mirror, then Image > Flip
Position to the right behind Frame
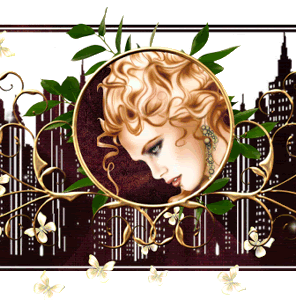


Paste PressedFlowers3 as new layer
Image > Rotate by 35 to the left
Resize by 45%
Position to the left behind Frame
Duplicate, then Image > Mirror
Image > Rotate by 40 to the right
Position to the right

Paste Vine with Roses as new layer
With your Eraser Tool erase part of the Vine that creates the loop at the top
Resize by 50% and position along bottom of Frame with the Rose at the bottom centre

Paste a Satin Butterfly of choice as new layer
Image > Rotate by 15 to the right
Resize by 15%
Position to the right on one of the swirls

Paste another Satin Butterfly of choice as new layer
Image > Rotate by 15 to the left
Resize by 15%
Position to the left on another swirl

Resize to 550 wide
Image > Canvas Resize 550 x 460 centred

Paste Paper of choice as new layer
Layers > Arrange > Send to Bottom

Layers > New Mask Layer > From Image
Apply WSL_Mask133
Invert Mask Data UNchecked
OK
Layers > Merge > Merge Group
Lower opacity to 30
Rename Mask Background

Effects > Plugins > PhotoEffex > Scanlines with default settings
Repeat effect

Select your Text Tool and font of choice
I am using Adam Gorry Lights
Text colour to match tag - I am using #220c0e
Type out text of choice
Objects > Align > Horizontal Centre in Canvas
Convert to raster layer
Apply a drop shadow of choice

Select another font of choice
I am using MonteCarloScript
Same Text colour
Type out your name
Objects > Align > Horizontal Centre in Canvas
Convert to raster layer
Apply a Gradient Glow and drop shadow of choice

Finally, add your © copyright, licence and watermark, then save as GIF or JPG and you're done!


** IF YOU WISH TO ANIMATE PLEASE FOLLOW THESE NEXT STEPS **

Activate your City Mask layer
Duplicate three times
Leave the main one as City Mask and rename the copies to City1, City2 and City3
Lower the opacity of City1-3 to 65

Activate City1 layer

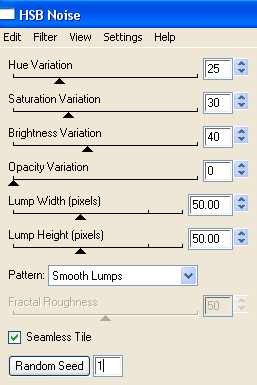
Effects > Plugins > Eye Candy 4000 > HSB Noise with the following settings:


Hide City1 and activate City2
Repeat effect adjusting the random seed

Hide City2 and activate City3
Repeat effect again adjusting the random seed

Now activate your Tube layer and hide
Activate City1
Edit > Copy Merged

In Animation Shop
Edit > Paste as New Animation

On your Tube layer set the opacity to 10
Activate City2
Edit > Copy Merged

Set the opacity of your Tube to 25
Activate City3
Edit > Copy Merged

In Animation Shop
Edit > Paste after Current Frame

Set the opacity of your Tube to 50
Activate City1 again
Edit > Copy Merged

In Animation Shop
Edit > Paste after Current Frame

Set the opacity of your Tube to 75
Activate City2
Edit > Copy Merged

In Animation Shop
Edit > Paste after Current Frame

Set the opacity of your Tube to 100
Activate City3
Edit > Copy Merged

In Animation Shop
Edit > Paste after Current Frame

Now repeat the above steps lowering the opacity from 100 back down to 0 whilst activating each City layer with each step

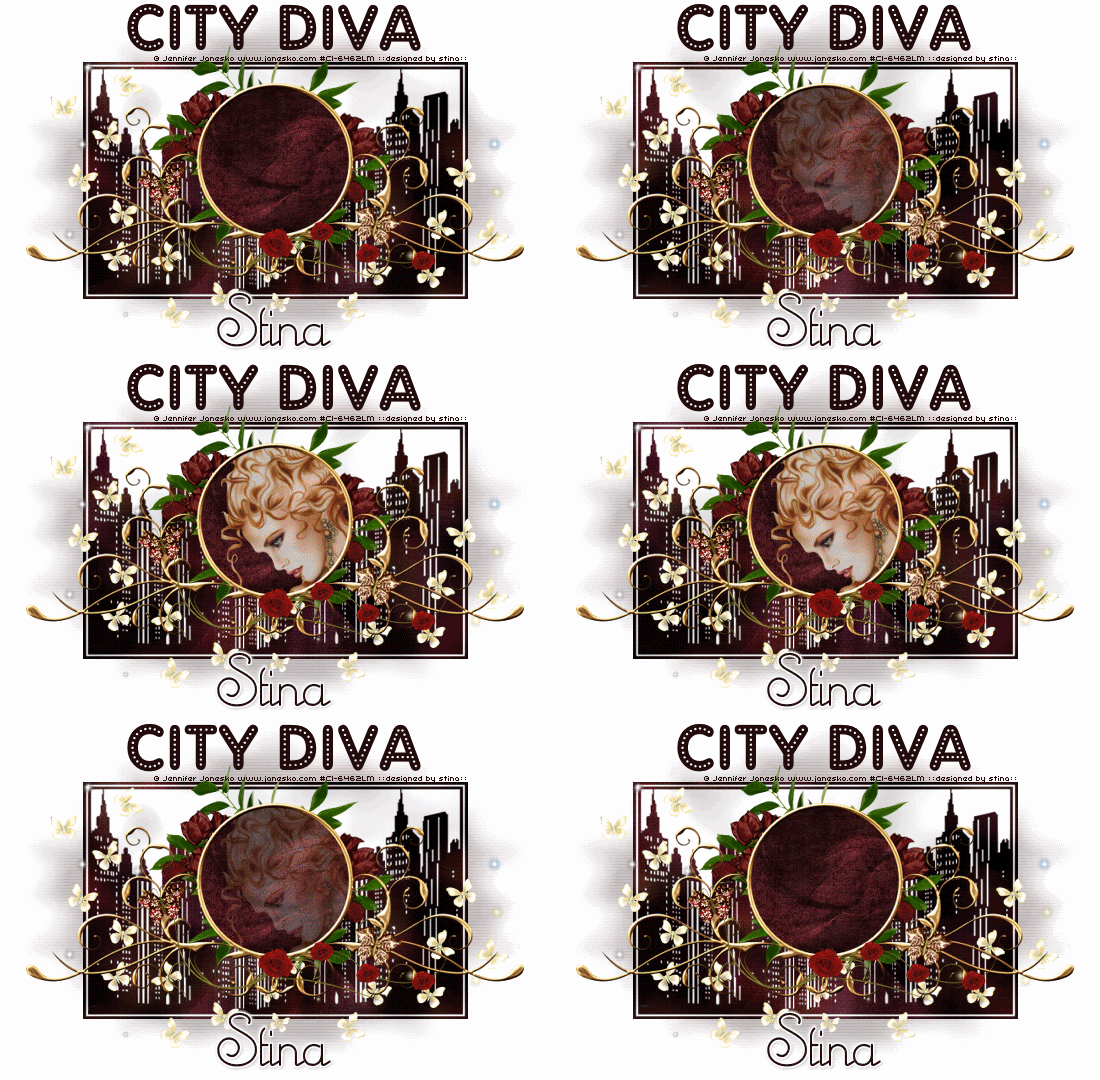
You should end up with 12 Frames
Select All, then change the Frame Properties to 20
Save as a GIF and you're done!

Thanks for trying my tutorial!

::st!na::


Here is a non-animated version:
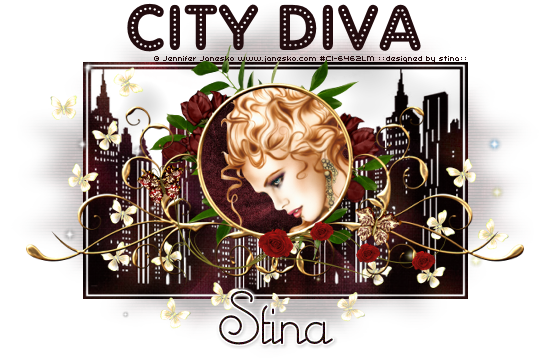


© Tutorial written by Stina on 8th September 2009
All rights reserved

Monday, June 8, 2009

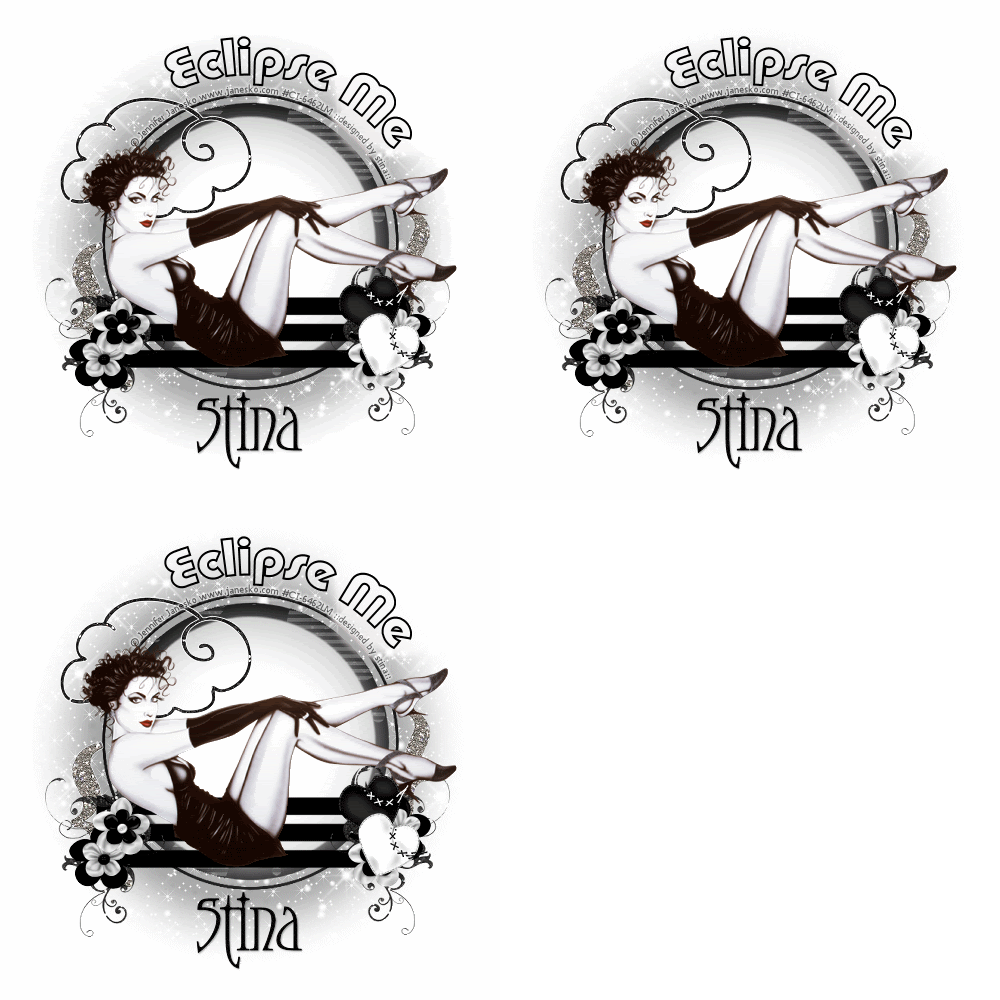
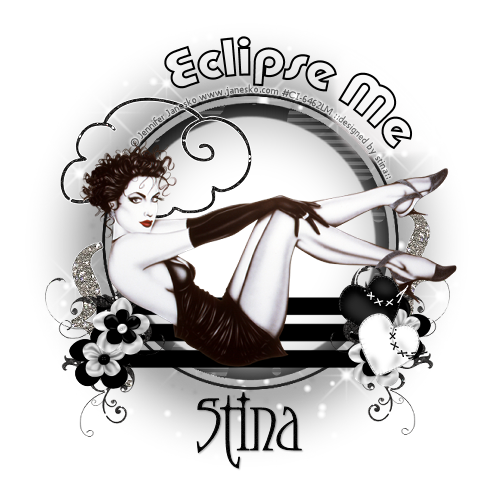
Eclipse Me


Supplies

Scrap kit of choice - I am using "New Moon" by Vassia Designs available from Stargazer Scraps and Twilight Scraps
Tube of choice - I am using the lovely artwork of Jennifer Janesko available with a licence through CILM
**PLEASE DO NOT USE HER ARTWORK WITHOUT THE APPROPRIATE LICENCE**
WSL_Mask54 and WSL_Mask41 by Chelle available from her blog
Fonts of choice - I am using Pump Demi Bold and Moonstone
Plugin: Xenofex 2 Constellation


Ready? Let's begin....


Open a new 700 x 500 blank canvas flood-filled white

Select your Preset Shape Tool and set to Ellipse
In your Materials Palette set your background colour to #c0c0c0
Hold your Shift key and draw out a circle
Objects > Align > Centre in Canvas
Convert to raster later

LEAVE IN POSITION!!

Change the background colour in your palette to #FFFFFF
Hold your Shift key again and draw out another circle slightly smaller than the Grey one
Objects > Align > Centre in Canvas
Convert to raster later


With your White circle activated, go to
Adjust > Blur > Gaussian Blur with a radius of 30.00

Now on your Grey layer,
Adjust > Blur > Gaussian Blur with a radius of 1.00


Merge the two circle layers together and rename MOON

Open a paper of choice and minimise

Select your Preset Shape Tool again and set to Rectangle
Open your Materials Palette properites and select the Pattern tab
Find your paper in the thumbnails and select

Draw out a thin rectangle to the bottom of the Moon
Objects > Align > Horizontal Centre in Canvas
Convert to raster layer

Duplicate and move up slightly
Duplicate again and move up slightly again

Hide Background and Moon, then
Layers > Merge > Merge Visible

Paste GlitterDoodle2 as new layer
Resize by 50%
Position to the right of rectangles
Duplicate, then Image > Mirror

Paste Flower1 as new layer
Resize by 40%
Position to the lower left

Paste Flower2 as new layer
Resiz eby 35%
Position slightly above Flower1


Paste Heart1 as new layer
Image > Rotate by 20 to the left
Resize by 30%

Position to the right
Paste Heart2 as new layer
Image > Rotate by 20 to the right
Resize by 30%
Position slightly below Heart1
Place a couple of flowers behind them


Paste Cloud as new layer
Resize by 50%
Position to the left

Paste Tube of choice as new layer
Resize as necessary
Position to your liking

Paste Bracket2 as new layer
Image > Rotate by 20 to the left
Resize by 40%
Position to the left

Duplicate, then Image > Mirror and position
Resize by 85%

Layers > Merge > Merge Down, then
Adjust > Sharpness, Sharpen

Paste Paper of choice as new layer
Layers > Arrange > Send to Bottom
Duplicate and hide bottom copy

Activate dupliate layer
Layers > New Mask Layer > From Image
Apply WSL_Mask54
OK
Layers > Merge > Merge Group
Resize by 80%
Position directly behind Moon
Rename Mask2

Unhide original paper layer
Layers > New Mask Layer > From Image
Apply WSL_Mask41
OK
Layers > Merge > Merge Group
Resize by 90%
Lower opacity to around 50
Rename Mask1

Crop and resize
Still on Mask1 Layer

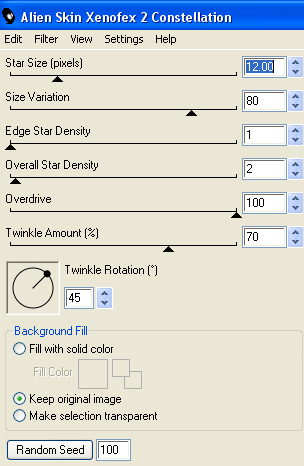
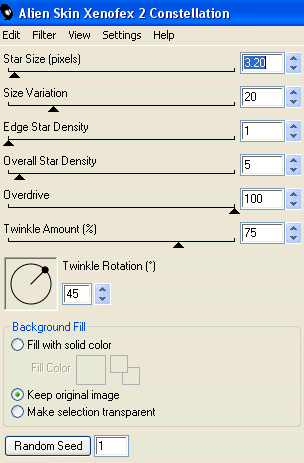
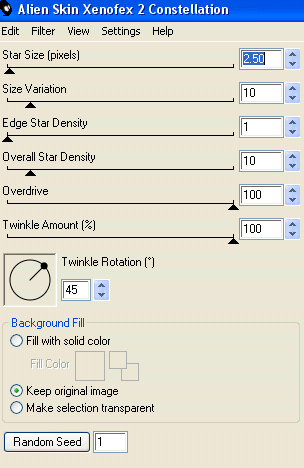
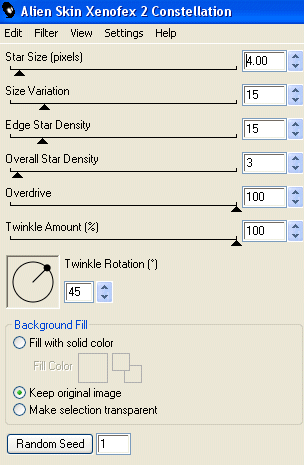
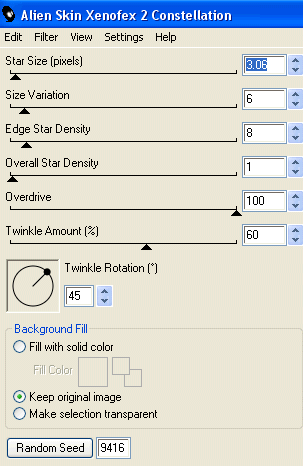
Effects > Plugins > Xenofex 2 > Constellation withthe following settings:


Or play with the settings to your liking

Select your Preset Shape Tool and set to Ellipse
With your Foreground on #000000 Hold your Shift key and draw out a circle
Objects > Align > Centre in Canvas

Select your Text Tool and font of choice
I am using Pump Demi Bold
Foreground - #000000
Background - (colour to match tag - I'm using #FFFFFF faded)
Stroke width - 2.0

Type out your Text and position to liking
Convert to raster layer
Add some noise and a drop shadow of choice

Select another font of choice
I used Moonstone
Text colour black

Type out your name
Objects > Align > Horizontal Centre in Canvas
Convert to raster layer
Add some noise and a drop shadow of choice

Finally, add your © copyright, licence and watermark, then save as GIF or JPG and you're done!


** IF YOU WISH TO ANIMATE PLEASE FOLLOW THESE NEXT STEPS **

Activate your Mask1 layer which we've already applied the Constellation effect on once
(yes we are going to again, but with different settings)

Duplicate twice and rename Sparkle1, Sparkle2 and Sparkle3

Hide Sparkle2 and Sparkle3 and activate Sparkle1

Effects > Plugins > Xenofex 2 > Constellation with the following settings:


Hide Sparkle1 and activate Sparkle2
Apply the Constellation effect again, adjusting the Random Seed

Hide Sparkle2 and activate Sparkle3
Apply the Constellation effect again, adjusting the Random Seed

Now for the animation!

Activate Sparkle1 and hide Sparkle2 and Sparkle3
Edit > Copy Merged
Open Animation Shop
Edit > Paste as New Animation

Back to PSP
Hide Sparkle1 and activate Sparkle2
Edit > Copy Merged

In Animation Shop
Edit > Paste AFTER Current Frame

Back to PSP
Hide Sparkle1 and activate Sparkle2
Edit > Copy Merged

In Animation Shop
Edit > Paste AFTER Current Frame

Save as a GIF and you're done!

Thanks for trying my tutorial!

::st!na::


Here is a non-animated version:

© Tutorial written by Stina on 8th June 2009
All rights reserved
Friday, May 22, 2009

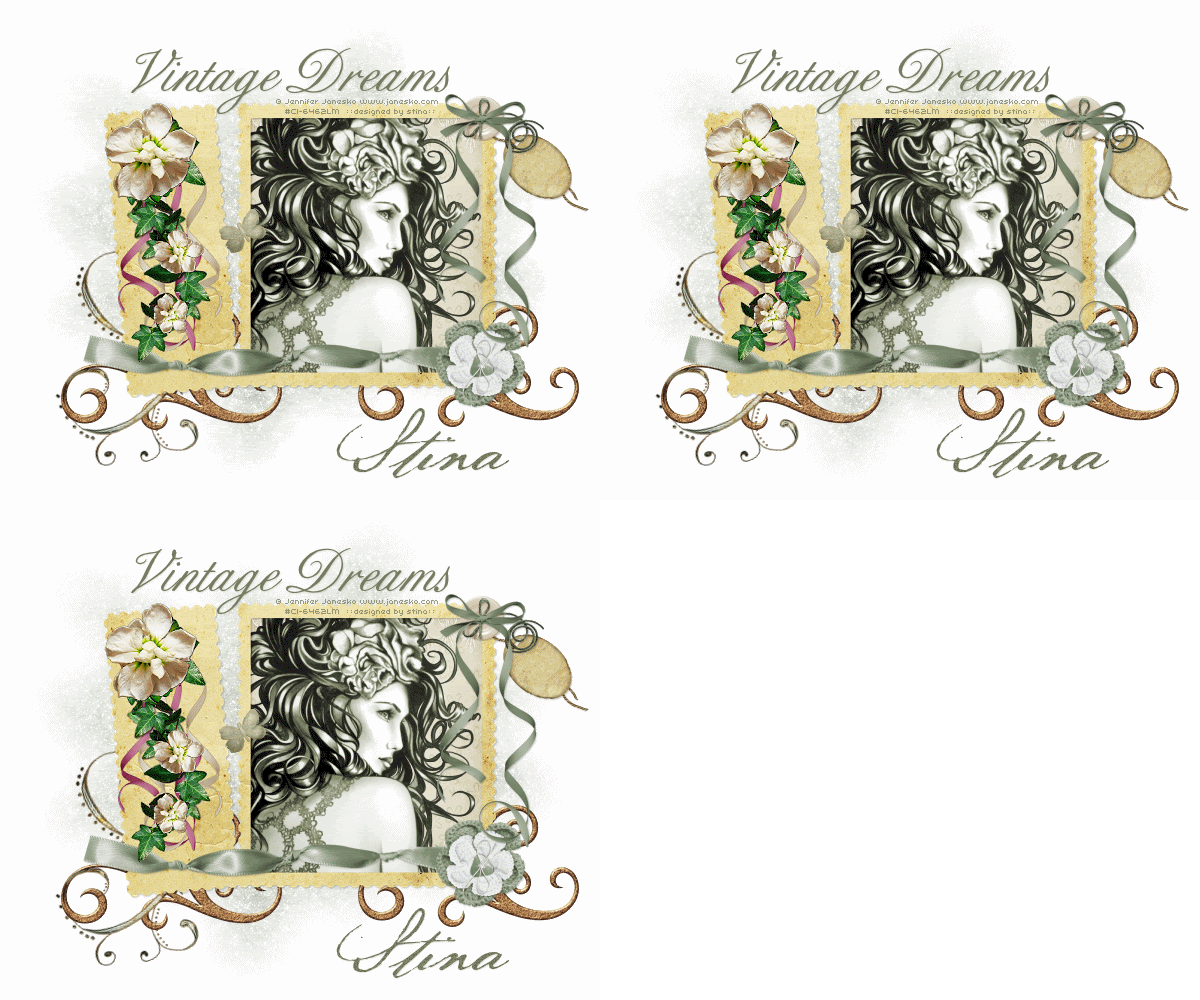
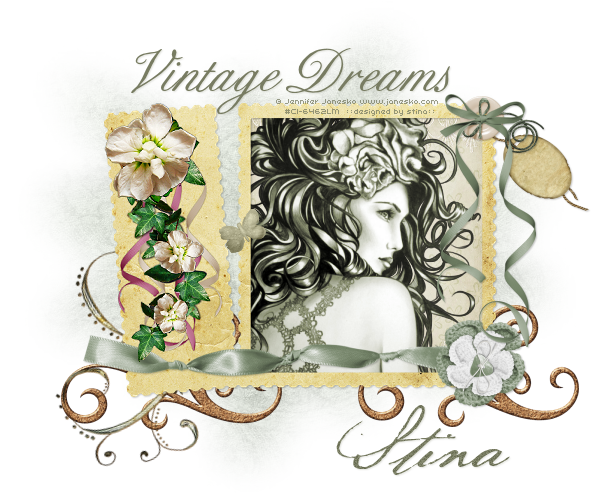
Vintage Dreams

 
Supplies
 
Scrap kit of choice - I am using "Vintage Floral" by Babycakes Scraps available from Creative Scraps, Scraps With Attitude and Cotton Candy Kreations
Tube of choice - I am using the lovely artwork of Jennifer Janesko which is available with a licence from CILM
**PLEASE DO NOT USE HER ARTWORK WITHOUT THE APPROPRIATE LICENCE**
WSL_Mask7 by Chelle available from her blog
Fonts of choice - I am using BixAntiqueScriptHmk and Baker Script
Plugin: Xenofex 2 Constellation
 
 
Ready? Let's begin....
 
 
Open a new 600 x 600 blank canvas flood-filled white
 
Paste StampFrame as new layer
Resize by 70%
 
Select the area inside the Frame with your Magic Wand
Selections > Modify > Expand by 8
Add new raster layer
Paste Paper of choice INTO selection
Deselect
 
Layers > Arrange > Move Down
 
Paste RibbonFlower of choice as new layer
resize by 15%
Position in lower right
 
Paste a Ribbon of choice as new layer
Resize as necessary, depending on size
Position along bottom of Frame
 
With your Freehand Tool draw around the part of the leaf on the Frame that overlaps the Ribbon
Delete then deselect
 
 
Paste TiedButton as new layer
Resize by 25%
Position in upper right
 
Paste Bow & Ribbon as new layer
Resize by around 30%
Position in upper right over the centre of Button
 
Paste a Tag as new layer
Image > Rotate by 50 to the left
Resize by 15%
Position in upper right and below the Tied Button
 
 
Paste SwirlTwo as new layer
Resize by 30%
Position to the lower right
 
Layers > Arrange > Send to Bottom
 
Duplicate, then move across to the left
 
Paste Doodle as new layer
Resize by 40%
Use your Pick Tool to rotate slightly to the left
Position over Swirl in lower left
 
 
Paste Butterfly as new layer
Image > Rotate by 30 to the left
Resize by 10%
Position to your liking
 
Paste your Tube of choice as new layer
Resize as necessary and position
 
Paste Paper of choice as new layer
Layers > Arrange > Send to Bottom
 
Layers > New Mask Layer > From Image
Locate WSL_Mask7
OK
Layers > Merge > Merge Group
Lower opacity to 80
 
Activate top layer
 
Select your Text Tool and font of choice
I am using BixAntiqueScriptHmk
Text colour is #787c62
 
Type out text of choice
Position and convert to raster layer
Apply a drop shadow of choice
 
Select another font of choice
I am using BakerScript
 
Type out your name and position
Convert to raster layer
Apply drop shadow of choice
 
Finally, add your © copyright, licence and watermark, then save as a GIF or JPG and you're done!
 
 
** IF YOU WISH TO ANIMATE PLEASE FOLLOW THESE NEXT STEPS **
 
Activate the Mask Layer
Duplicate twice and rename Sparkle1, Sparkle2 and Sparkle3
 
Hide Sparkle2 and Sparkle3 activating only Sparkle1
 
Effects > Plugins > Xenofex 2 > Constellation with the following settings:
 
 
Hide Sparkle1 and activate Sparkle2
Apply the Constellation effect, adjusting the Random Seed
 
Hide Sparkle2 and activate Sparkle3
Apply the Constellation effect again, adjusting the Random Seed once more
 
Hide Sparkle2 and Sparkle3 with only Sparkle1 visible
Edit > Copy Merged
 
Open Animation Shop
Edit > Paste as New Animation
 
Back to PSP
Hide Sparkle1 and activate Sparkle2
Edit > Copy Merged
 
In Animation Shop
Edit > Paste AFTER Current Frame
 
Back to PSP
Hide Sparkle2 and activate Sparkle3
Edit > Copy Merged
 
In Animation Shop
Edit > Paste AFTER Current Frame
 
Save as a GIF and you're done!
 
Thanks for trying my tutorial!
 
::st!na::
 
 
Here is a non-animated version:


© Tutorial written by Stina on 22nd May 2009
All rights reserved
Thursday, May 21, 2009

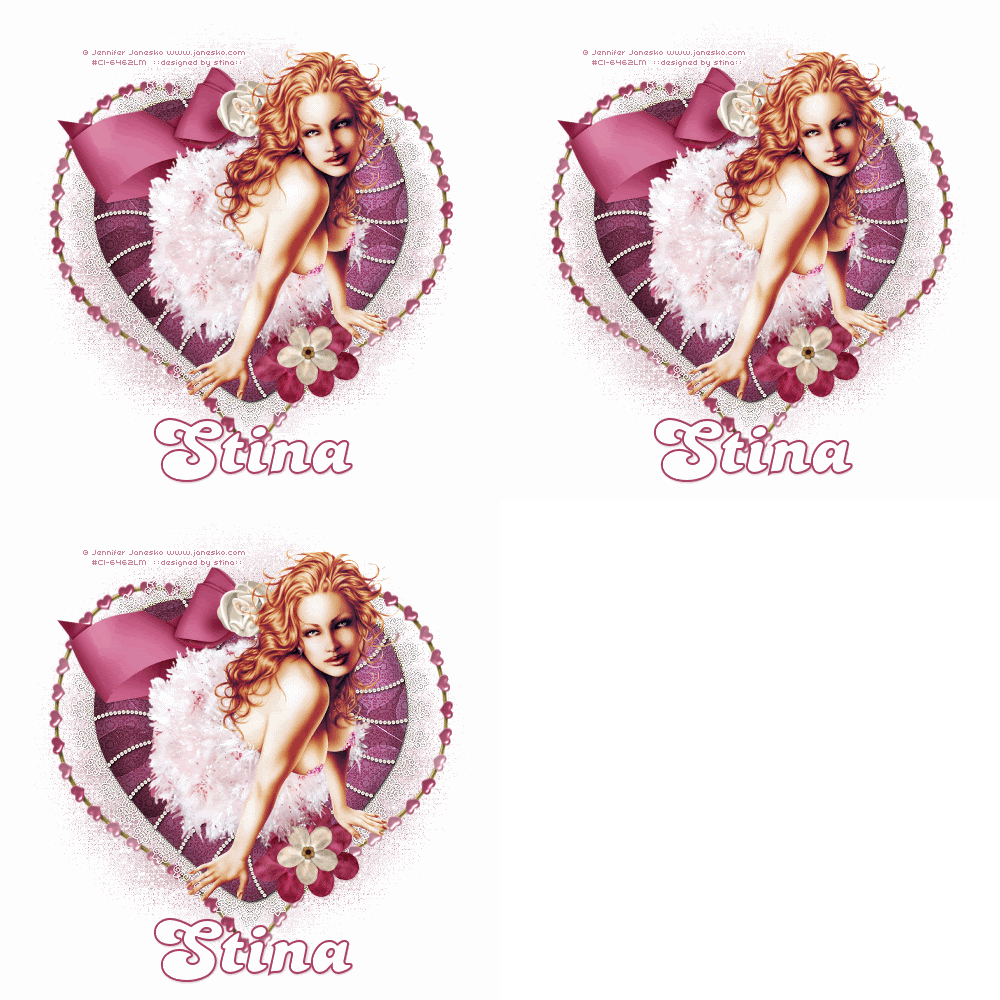
Berry Beautiful

 
Supplies
 
Scrap kit of choice - I am using "A Berry Soft Time" by Norma of Swheat Creations, available from her blog or The Creativity Box
Tube of choice - I am using the lovely artwork of Jennifer Janesko available from CILM
**PLEASE DO NOT USE HER ARTWORK WITHOUT THE APPROPRIATE LICENCE**
WSL_Mask34 by Chelle available from her blog
Plugin: Xenofex 2 Constellation
Font of choice - I am using PT Banana Split
 
 
Ready? Let's begin....
 
 
Open a new 500 x 500 blank canvas flood-filled white
 
Paste Paper of choice as new layer
Layers > Arrange > Send to Bottom
 
Layers > New Mask Layer > From Image
WSL_Mask34
OK
 
Open your Layer Palette and activate the Mask
Resize by 90%
Layers > Merge > Merge Group
 
STILL ON MASK LAYER
 
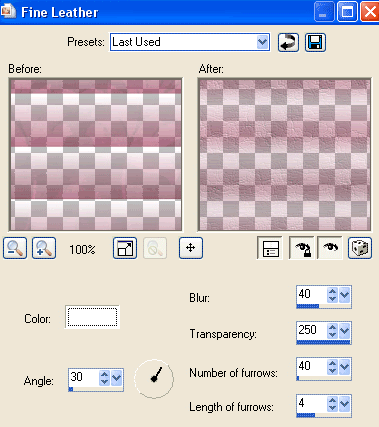
Effects > Texture Effects > Fine Leather with the following settings:
 
 
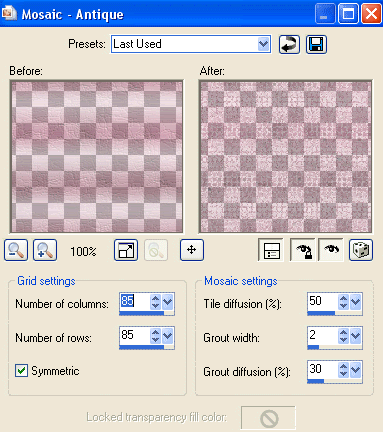
Then, Effects > Texture Effects > Mosaic Antique with the following settings:
 
 
Paste a LacePearlHeart as new layer
Resize by 50%
 
Paste HeartClip as new layer
Resize by 50%
Layers > Arrange > Move Down
Use Pick Tool (or Deformation Tool in some PSP versions) and use nodes to pull up or down to Frame Lace Heart
 
 
Paste a Bow as new layer
Resize by 30%
Layers > Arrange > Bring to top
Position with the bow in the top centre of Lace Heart
 
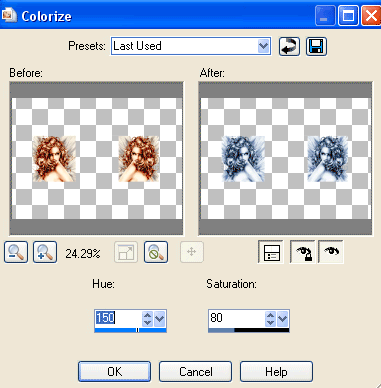
Duplicate, then Adjust > Hue & Saturation > Colourise with the following settings:
 
 
Set blend mode of layer to Screen then lower opacity to 60
Layers > Merge > Merge Down
 
Paste a Rose as new layer
Resize by 20%
Place in centre of bow
 
 
Paste a Flower as new layer
Resize by 25%
Position to the lower right
Duplicate and move slightly over
Duplicate again and move slightly up
 
Paste another Flower as new layer
Resize by 20%
Position in centre of the three flowers
 
Apply a drop shadow of choice to your layers
 
 
Paste a tube of choice as new layer
Resize as necessary
Position in the centre of heart covering the centre lace
 
Select your Text Tool and font of choice
I am using PT Banana Split
Choose two colours from your tag and set as Foreground and Background
I am using #ab4266 and #FFFFFF
Stroke width - 2.0
 
Type out your name
Objects > Align > Horizontal Centre in Canvas
Convert to raster layer
Apply a drop shadow of choice
 
Finally, add your © copyright, licence and watermark, then save as a GIF or JPG and you're done!


** IF YOU WISH TO ANIMATE PLEASE FOLLOW THESE NEXT STEPS **
 
Activate the Mask Layer
Duplicate twice and rename Sparkle1, Sparkle2 and Sparkle3
 
Hide Sparkle2 and Sparkle3 activating only Sparkle1
 
Effects > Plugins > Xenofex 2 > Constellation with the following settings:
 
 
Hide Sparkle1 and activate Sparkle2
Apply the Constellation effect, adjusting the Random Seed
 
Hide Sparkle2 and activate Sparkle3
Apply the Constellation effect again, adjusting the Random Seed once more
 
Hide Sparkle2 and Sparkle3 with only Sparkle1 visible
Edit > Copy Merged
 
Open Animation Shop
Edit > Paste as New Animation
 
Back to PSP
Hide Sparkle1 and activate Sparkle2
Edit > Copy Merged
 
In Animation Shop
Edit > Paste AFTER Current Frame
 
Back to PSP
Hide Sparkle2 and activate Sparkle3
Edit > Copy Merged
 
In Animation Shop
Edit > Paste AFTER Current Frame
 
Save as a GIF and you're done!
 
Thanks for trying my tutorial!
 
::st!na::
 

Here is a non-animated version:
 

© Tutorial written by Stina on 21st May 2009
All rights reserved
Friday, April 3, 2009

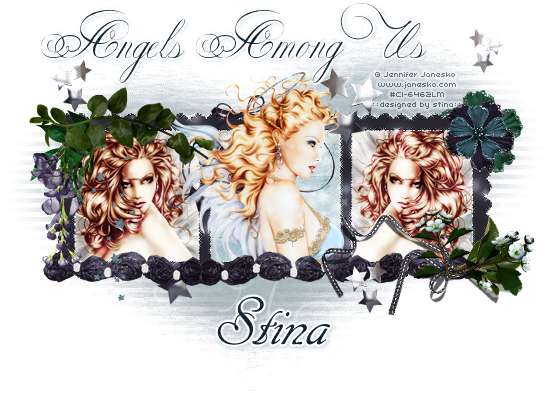
Angels Among Us


Supplies
 
Scrap kit of choice - I am using the lovely "Midsummer Night's Dream" by Pimpd Designs available at Paradise for Scrappers
Tube of choice - I am using the lovely artwork of Jennifer Janesko which can be purchased from CILM
WSL_Mask10 by Chelle available from her Blog
Fonts of choice - I am using Copper Alt Caps Expert and Cancellaresca Script
Plugin: Eye Candy 4000 Gradient Glow
 
 
~ Step 1 ~
 
Open a new 700 x 500 blank canvas flood-filled white
 
Paste Frame-07 as new layer
Resize by 75%
LEAVE IN POSITION
 
With your Selection Tool draw a rectangle around the length of the Frame
Paste PP28 as new layer
Selections / Invert
Delete and deselect
Layers / Arrange / Move Down
 

~ Step 2 ~
 
Paste Greens-Ribbon as new layer
Resize by 40%
Position in lower right corner
 
Paste Flower-01 as new layer
Image / Mirror
Resize by 35%
Position over greenery with ribbon
Duplicate then set blend mode to Overlay
Layers / Merge / Merge Down
 
 
Paste Green-01 as new layer
Image / Rotate by 50 to the left
Resize by 27%
Position in upper left
 
Paste Flower-03 as new layer
Resize by 25%
Position in the upper left BENEATH the greenery layer
 
 
Paste Flower-11 as new layer
Image / Rotate by 30 to the right
Resize by 25%
Position in upper right
 
Pase Flower-07 as new layer
Resize by 20%
Position over the first flower, then
Layers / Merge / Merge Down
 
Paste Flower-10 as new layer
Resize by 30%
Position over other flower, then
Layers / Arrange / Send to Bottom
 
 
Activate Frame layer
Paste Flower-13 as new layer
Resize by 32%
Position in centre bottom of Frame
Duplicate, then move to the right
Duplicate again, then Image / Mirror
Layers / Merge / Merge Down
Repeat
 
 
Paste Ribbon-01 as new layer
Resize by 40%
Position at the top between first and second Frames
 
Paste Stars-02 as new layer
Resize by 30%
Position in first frame below the greenery layer
 
Paste Fairy-Dust-02 as new layer
Resize by 70%
Position within the three Frames
Make a selection along the bottom and delete
Set blend mode to Overlay and lower opacity to 70
 
 
Paste Silver-Stars as new layer
Resize by 10%
Place in position
Duplicate and position
 
Paste again and resize by 15%
Position then duplicate
Then position to your liking
Place one of these stars on very bottom layer
 

~ Step 3 ~
 
Paste your first tube in the first frame
Resize as necessary
 
With your Selection Tool draw a rectangle around the first frame
Selections / Invert
Delete and deselect
 
Duplicate then Image / Mirror
 
Layers / Merge / Merge Down so the two tubes are one layer
Ensure they are below the Frame layer also
 
Duplicate layer twice
Turn off visibility of top one
On middle one go to:
Adjust / Blur / Gaussian Blur with a radius of 10.00
Set the blend mode of this layer to Soft Light
 
Turn on the visibility of the top duplicate
Go to Adjust / Hue & Saturation / Colourise with the following settings:
 
 
Activate middle duplicate
Layers / Merge / Merge Down
 
Activate top duplicate
Layers / Merge / Merge Down
 
Activate the Frame
Paste your main tube into the middle Frame
 
Use your Selection Tool to draw out a rectangle at the bottom of the tube
Delete and deselect
 
Now make sure all your layers are in place
 
Duplicate the FairyDust layer and move above your tube layers
Change the blend mode of this one to Soft Light
 
Crop and resize
 

~ Step 4 ~
 
Paste PP15 as new layer
Layers / Arrange / Send to Bottom
 
Layers / New Mask Layer / From Image
Locate WSL_Mask10
OK
Layers / Merge / Merge Group
Lower opacity to 60
 
Select your Text Tool and font of choice
I am using Copper Alt Caps Expert
Choose a colour from your tag and set it as your Background
 
Type out your text
Position to your liking
Convert to raster layer
Apply a Gradient Glow if you wish
 
Select another font of choice
I chose Cancellaresca Script
Type out your name
Objects / Align / Horiztonal Centre in Canvas
Convert to raster layer
Apply a Gradient Glow and drop shadow of choice
 
Finally, add your © copyright, licence and watermark then save as a GIF or JPG and you're done!
 
Thank you for trying my tutorial!
 
::st!na::
 

© Tutorial written by Stina on 2nd April 2009
All rights reserved
Thursday, March 26, 2009

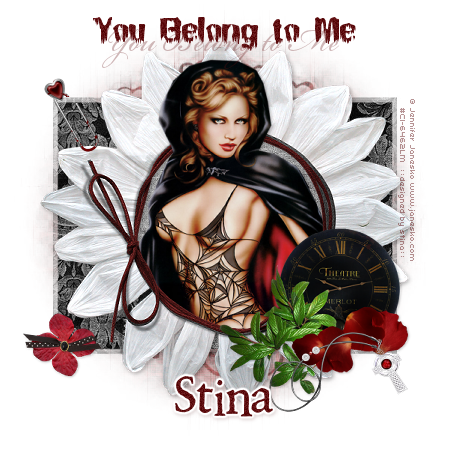
You Belong to Me

 
Supplies
 
Scrap kit of choice - I am using the lovely "You Are My Life Now" by Helly's Designs which is available at Cotton Candy Kreations
Tube of choice - I am using the gorgeous work of Jennifer Janesko which can be purchased from CILM
**PLEASE DO NOT USE HER ARTWORK WITHOUT THE APPROPRIATE LICENCE**
WSL_Mask148 and WSL_Mask214 by Chelle available on her blog
Fonts of choice - I am using BN Manson Nights, Bickham Pro Regular and 2Peas Renaissance
Plugin: Eye Candy 4000 Gradient Glow
 
 
~ Step 1 ~
 
Open a new 600 x 600 blank canvas flood-filled white
 
Paste Paper2 as new layer
Layers / New Mask Layer / From Image
Locate WSL_Mask148
OK
Layers / Merge / Merge Group
Resize by 85%
 
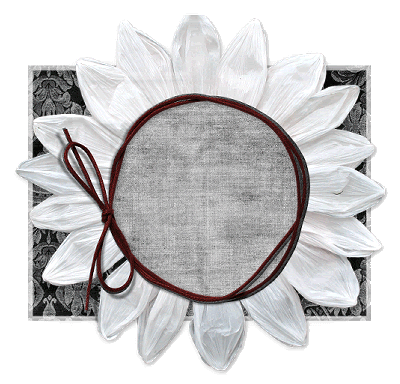
Paste DoubleString Frame as new layer
Resize by 80%
 
Select the area inside the Frame with your Magic Wand
Selections / Modify / Expand by 10
Add a new raster layer
Layers / Arrange / Move Down
Paste Paper3 into Selection
Deselect
 
Add a drop shadow to the Frame:
H & V - 2
Opacity - 3.00
Blur - 8.00
Colour - #000000


~ Step 2 ~
 
Paste Clock as new layer
Resize by 50%
Position in lower right along the edge of the Mask layer
 
Apply a drop shadow:
H & V - 1
Opacity - 30
Blur - 5.00
Colour - #000000
 
Paste Necklace as new layer
Image / Mirror
Image / Rotate by 30 to the left
Resize by 20%
Position in the lower right below the clock
 
Paste Clip as new layer
Image / Rotate by 30 to the left
Position in the upper left at the top of the Mask layer
 
With your Freehand Tool draw around part of the clip that looks like it is "clipped" beneath the mask
 
 
Delete and deselect
 
Paste Flower2 as new layer
Resize by 20%
Position in lower left
Apply same drop as above
 
Paste Bow as new layer
Resize by 20%
Position over centre of Flower
Apply same drop shadow
 
Paste Tube as new layer
Resize as necessary
Place into position
 
DO NOT MOVE!!
 
Duplicate and move between the Frame and Paper layers
 
Select the inside of the Frame with your Magic Wand
(Lower the opacity of the top layer so you can see what you are doing)
Selections / Modify / Expand by 10
Selections / Invert


Activate BOTTOM tube layer
Press delete and then deselect
 
Activate your TOP layer and return the opacity to normal
 
Apply a drop shadow:
H & V - 1
Opacity - 30
Blur - 5.00
Colour - #000000
 
Now draw a rectangle around the bottom half of your tube
 
 
Press delete and then deselect
 
Crop and resize
 
 
~ Step 3 ~
 
Paste Paper1 as new layer
 
Layers / Arrange / Send to Bottom
 
Layers / New Mask Layer / From Image
Locate WSL_Mask214
OK
Layers / Merge / Merge Down
 
Select your Text Tool and a font of your choice (I am using BN Manson Nights)
Choose a colour from your tube and set it as your background
Keep your foreground NULL
 
Type out your text
I chose "You Belong to Me"
 
Objects / Align / Horizontal Centre in Canvas
Convert to raster layer
Add some Noise - 15
 
Change to a nice script font (I am using Bickham Script Pro Regular)
Keep everything else the same
Add the same text slightly below the first
Objects / Align / Horizontal Centre in Canvas
Convert to raster layer
Lower opacity to 30
 
Still with your Text Tool, select another font for your name (I am using 2Peas Renaissance)
Objects / Align / Horizontal Centre in Canvas
Convert to raster layer
Apply a Gradient Glow:
Glow width - 3.00
Soft Corners - 25
Opacity - 100
Setting - fat
Colour - #FFFFFF
 
Add a drop shadow:
H & V - 1
Opacity - 20
Blur - 5.00
Colour - #400000
 
Finally, add your © copyright, licence and watermark
 
Save as a GIF or JPG and you're done!
 
Thanks for trying my tutorial!
 
::st!na::
 

© Tutorial written by Stina on 26th March 2009
All rights reserved
Friday, March 20, 2009

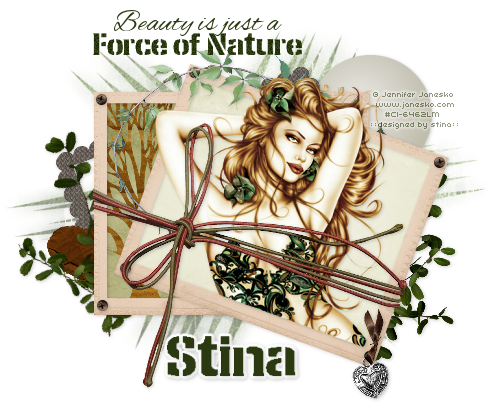
Force of Nature


Supplies
 
Scrap kit of choice - I am using "The Pause" from The Saga Collection by Pimp'd Designs which is available from Paradise 4 Scrappers
Tube of choice - I am using the lovely artwork of Jennifer Janesko which can be purchased from CILM
**PLEASE DO NOT USE HER ARTWORK WITHOUT THE APPROPRIATE LICENCE**
WSL_Mask137 by Chelle, available from her blog
Fonts of choice - I am using 2Peas Frazzled Stencil and Alex Brush
Plugin: Eye Candy 4000 Gradient Glow (optional)
 
 
~ Step 1 ~
 
Open a new 600 x 600 blank canvas flood-filled white
 
Paste Frame as new layer
Resize by 50%
Duplicate
Image / Rotate by 20 to the right
Position Frame slightly to the right and the original to the left
 
Activate original
Resize by 90%
 
Using your Magic Wand click inside the original Frame layer
Selections / Modify / Expand by 5
 
Open PP04
Edit / Copy
 
On working Canvas add a new raster layer
Paste into Selection
Deselect
 
Layers / Arrange / Move Down
 
On the rotated Frame repeat these same steps with PP03
 
Paste MetalFrame as new layer
Image / Rotate by 20 to the left
Resize by 40%
Layers / Arrange / Send to Bottom
Position behind Frames to your liking


~ Step 2 ~
 
Paste Tree as new layer
Resize by 40%
Position between the first Paper and Frame layers
 
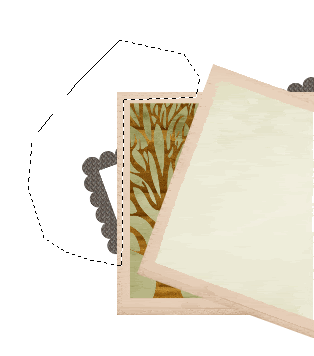
Using your Freehand Tool draw around the excess
Then delete
Deselect
 
Now you see it....


Now you don't!
 
Paste Green-01 as new layer
Image / Mirror
Resize by 40%
Position along the top of the top Frame so that it curves around the end
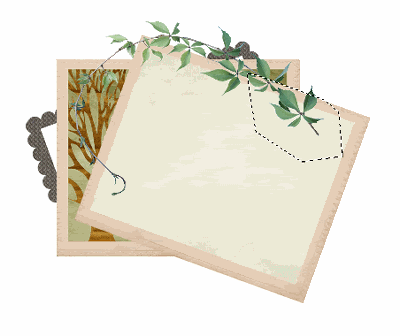
Grab your Freehand Tool again and draw around some of the overhang at the top
Give it the impression it is tucked behind the Frame
 
 
Paste Moon as new layer
Resize by 35%
Position in top corners of Frames
Layers / Arrange / Send to Bottom
 
Paste Screw as new layer
Resize by 12%
Postion in one of the Frame corners
Duplicate then Image / Mirror
Position on opposite side
Duplicate again then Image / Flip
Position at the bottom
Repeat duplicates and Mirrors till all visible corners have been filled
 
Paste HeartTrinket as new layer
Resize by 50%
Position along the lower right of the Frame
 
Paste WornHeart as new layer
Image / Rotate by 20 to the left
Resize by 25%
Position to the left protruding from the edge of the Frame
Move down to the layer ABOVE the MetalFrame
 
Paste Green-02 as new layer
Image / Rotate by 20 to the right
Resize by 30%
Position to the left above worn heart and metal frame
 
 
Paste Green-02 again
Image / Rotate by 55 to the right
Resize by 30%
Position along the right side of the Frame
 
Paste Wrapped-Bow as new layer
Resize by 55%
Position over Frames
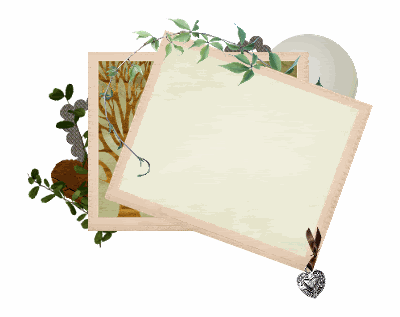
Use your Selection Tool to draw around the excess ribbon
Then delete
 

~ Step 3 ~
 
Paste Tube as new layer
Resize as necessary
 
Use your Magic Wand on your Frame layer to click inside your Frame
Selections / Modify / Expand by 2
Selections / Invert
Selections / Modofy / Feather by 2
 
Use your Eraser Tool to erase the excess of your tube from the bottom of the Frame
Deselect
 
Duplicate tube layer
On the duplicate layer go to
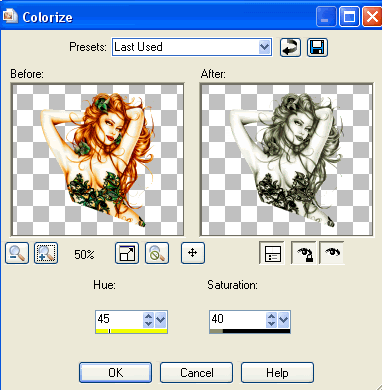
Adjust / Hue & Saturation / Colourise with the following settings:
 

Now lower the opacity of this layer to around 55
 
Now depending on the colour and brightness of your tube will depend on your colourisation and opacity so have a play with the settings
 
Add a slight drop shadow to each of your elements and to your tube
 
H & V - 1
Opacity - 20
Blur - 5.00
Colour - #000000
 
Crop and resize
 

~ Step 4 ~
 
Activate your background layer
 
Paste PP09 as new layer
Layers / New Mask Layer / From Image
Locate WSL_Mask137
OK
Layers / Merge / Merge Group
Lower the opacity to whatever your liking
I set mine to 50
 
Now Select your Text Tool and font of choice
I am using 2Peas Frazzled Stencil
Select a colour from your tube
Foreground - null
Background - #2a390f (my colour)
Type out the words "Force of Nature"
Convert to raster layer
 
Change to a script font - I am using Alex Brush
Keep the same colour and settings
Type out the words "Beauty is just a"
Convert to raster layer
 
Position both layers to your liking
 
Choose another font or use the same
Type out your name
Add any effects you wish (I used some noise and a Gradient Glow)
Apply a drop shadow of choice
 
Finally, add your © copyright, licence and watermark
 
Then save as a GIF or JPG and you're done!
 
Thank you for trying my tutorial!
 
::st!na::
 

© Tutorial written by Stina on 20th March 2009
All rights reserved
Tuesday, March 10, 2009

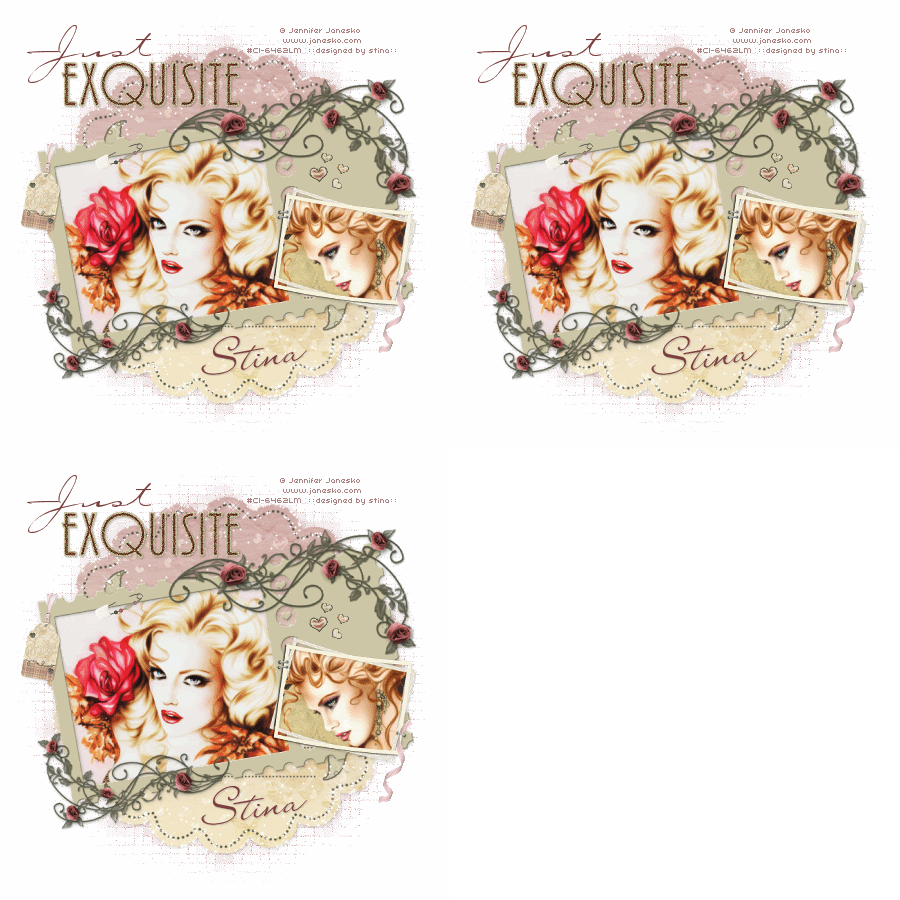
Just Exquisite

 
Supplies
 
"Exquisite Love" by Sam's Scraps available exclusively at her store
Images of choice - I used the lovely artwork of Jennifer Janesko which can be purchased from CILM
**PLEASE DO NOT USE HER ARTWORK WITHOUT THE APPROPRIATE LICENCE**
WSL_Mask133 by Chelle available from her blog
Fonts of choice - Carpenter Script and LainieDay
Plugin: Alien Skin Xenofex 2 Constellation
 
 
~ Step 1 ~
 
Open a new 600 x 600 blank canvas flood-filled white
 
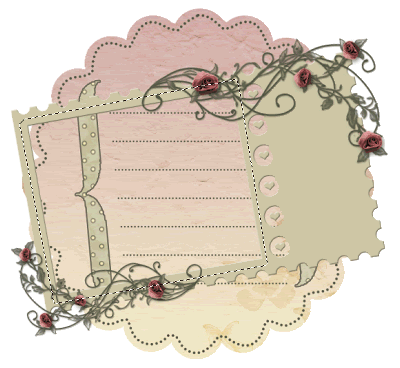
Paste Journal Tag as new layer
Resize by 70%
Leave in position
 
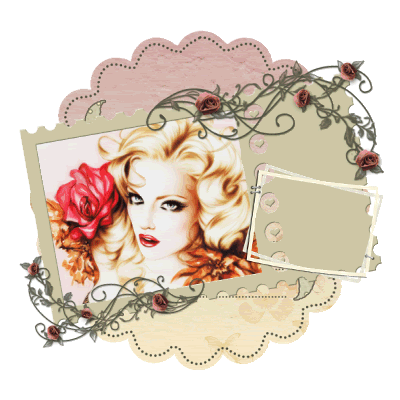
Paste Frame1 as new layer
Resize by 35%
Image / Rotate by 10 to the left
 
Paste your first image of choice as new layer
Image / Rotate by 10 to the left
Layers / Arrange / Move Down
Position beneath Frame to your liking
Resize if necessary
 
Draw around the outside of your Frame with your Freehand Tool
 
 
Selections / Invert
Delete
Deselect
 
Add a drop shadow to the Frame

Paste Frame2 as new layer
Image / Rotate by 10 to the right
Resize by 11%
Position to the right of the first Frame as if it is stapled
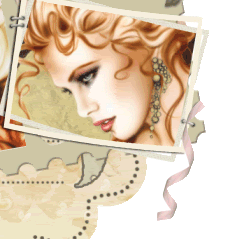
Paste your second image of choice as new layer
Image / Rotate by 10 to the right
Resize as necessary
Layers / Arrange / Move Down
Position below Frame
 
Click inside Frame with your Magic Wand
Selections / Modify / Expand by 3
Selections / Invert
Delete
Deselect
 
Add a drop shadow of choice
  
 
~ Step 2 ~
 
Paste Heart Border as new layer
Image / Rotate by 10 to the left
Resize by 10%
Position along the bottom of the Journal Tag
 
Duplicate and move to the top
 
Erase any excess hearts from outside of the tag on both layers
 
Layers / Merge / Merge Down
Blend mode to Soft Light
 
Back to the HeartBorder
Using your Freehand Tool draw around various hearts
Paste them each as new layers
Resize by 10%
Position them above your second Frame
 
Once satisfied with their position
Layers / Merge / Merge Down on each till you have one layer (for the hearts)
 
Set the Blend mode to Multiply
Duplicate and set the blend mode of this layer to Soft Light
 
Paste Safety Pin With Beads as new layer
Image / Rotate by 30 to the left
Resize by 12%
Position anywhere to your liking
Use your Eraser Tool to carefully erase a small part of the pin to look as though it is "pinned" to the Frame
 
Paste Tag as new layer
Image / Rotate by 10 to the right
Resize by 8%
Position in upper left of first frame
Add a drop shadow of choice
 
Paste Ribbon1 as new layer
Image / Rotate by 40 to the left
Resize by 8%
Position over the staple in the lower left of second frame
Add a drop shadow of choice


~ Step 3 ~
 
Add a new raster layer
 
Selections / Select All
Copy Paper1 then Paste into Selection
Deselect
 
Layers / Arrange / Move to Bottom
 
Layers / New Mask Layer / From Image
Locate WSL_Mask133
OK
 
Layers / Merge / Merge Group
 
Image / Canvas Resize to 650 x 650 centred
 
Activate Mask Layer
 
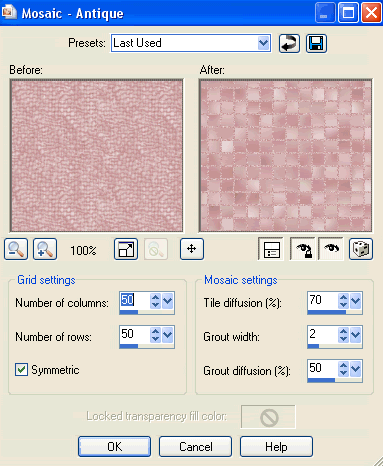
Effects / Texture Effects / Mosiac - Antique with following settings:


Open the WordArt and with your Selection Tool make a selection around the word "Exquisite"
Edit / Copy
Then paste as new layer
Resize by 15%
Position in the upper left
 
Resize your tag (I resized mine to 450 x 450)
 
Select your Text Tool
Set your colour to one that matches your images - I chose mine from the roses on the Frame (#7d4141)
 
Set your Foreground to null
And your Background to #7d4141 (or one of your choice)
 
In a script font type the word "Just" and place it above the word "Exquisite"
 
In the same colour choose another script font and type your name
Image / Rotate by 10 to the left
Apply a drop shadow and place at the bottom of the Journal Tag
 
Add your © copyright, licence and watermark
  
 
~ Step 4 ~
 
**This next step is if you wish to animate**
 
Activate your Journal Tag layer
Duplicate three times to give you a total of FOUR layers
Rename them from the bottom up:
Journal Tag (your original)
Sparkle1
Sparkle2
Sparkle3

Hide Sparkle2 & 3

Give the Journal Tag layer a drop shadow:
H & V - 1
Opacity - 2-
Blur - 5.00
Colour - #000000
(this layer will remain visible at all times to give each of your animated layers the drop shadow)
  
Effects / Plugins / Alien Skin Xenofex 2 / Constellation with the following settings:


Repeat the Constellation effect on the other two layers changing the Random Seed each time
Deselect
 
Once again hide the top two layers (Sparkle2 & 3) leaving Sparkle1 visible
 
Edit / Copy Merged
 
Open Animation Shop
Edit / Paste as new animation
 
Back in PSP
Turn off visibility of Sparkle1 and turn on next layer Sparkle2
Edit / Copy Merged
 
In Animation Shop
Edit / Paste after Current Frame
 
Back in PSP
Turn off visibility of Sparkle2 and turn on last layer Sparkle3
Edit / Copy Merged
 
In Animation Shop
Edit / Paste after current frame
 
Select All frames
Go to Frame Properties and change to 20
 
Finally save as a GIF and you're done!
 
Thank you for trying my tutorial
 
::st!na::
  
 
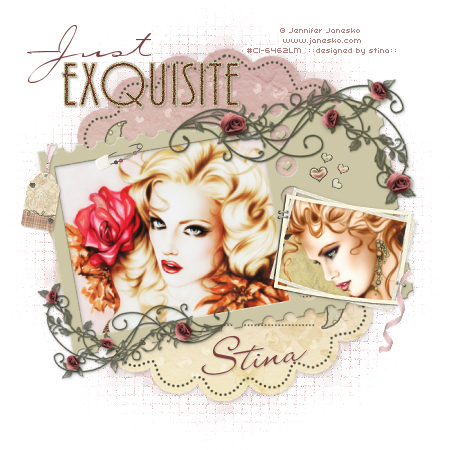
Here is a non-animated version:
 
 
© Tutorial written by 10th March 2009
All rights reserved