Please email me designed.by.stina@gmail.com with your creations. I'd love to see them.

Showing posts with label Suzanne Richards. Show all posts

Tuesday, May 19, 2009

Goodnight Moon

 
Supplies
 
Scrap kit of choice - I am using "Spellbinding" by Soxsational Scraps 
Tube of choice - I am using the lovely artwork of Suzanne Richards available with a licence from CILM
**PLEASE DO NOT USE HER ARTWORK WITHOUT THE APPROPRIATE LICENCE**
WSL_Mask7 by Chelle from her blog
A star preset shape
Plugins: Mura Meister Copies and DSB Fluxx Bright Noise
Fonts of choice - I am using Agency FB and 2Peas Typo
 
 
Ready? Let's go....
 
 
Open a new 600 x 600 blank canvas flood-filled white
 
Open and minimise paper of choice
 
Select your Preset Shape Tool and set to a Star
Set your Background in your Materials Palette to the paper we just minimised
 
Hold your Shift key down and draw out the star
Once happy with size, go to
Objects > Align > Centre in Canvas
Convert to raster layer
 
Duplicate, then activate bottom layer
 
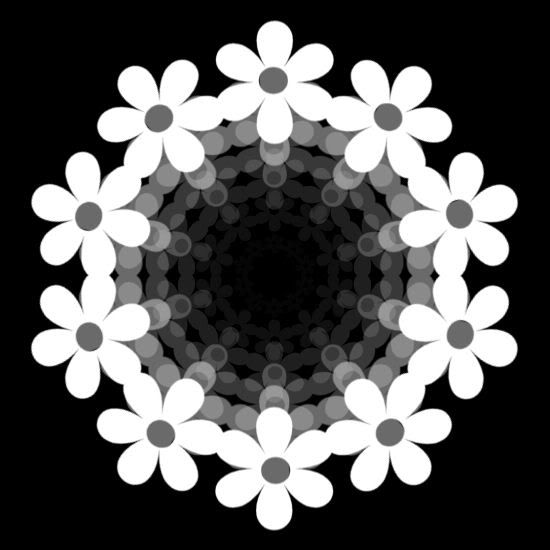
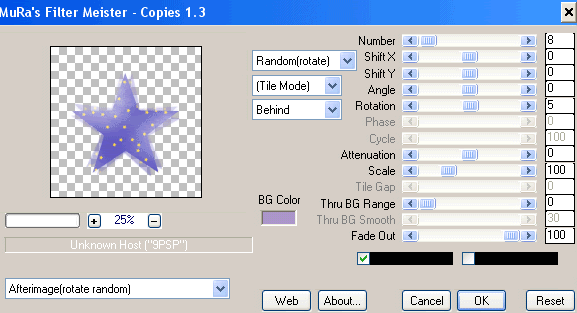
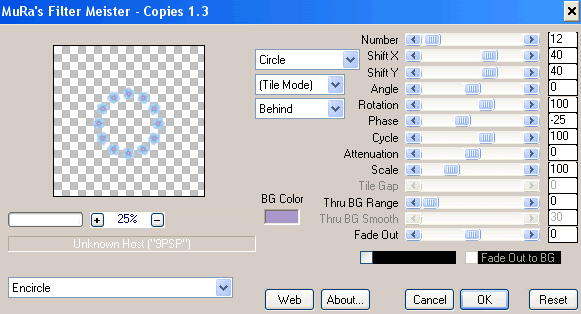
Effects >  Plugins > Mura Meister > Copies with the following settings:
 
 
Paste Flower of choice as new layer
Layers > Arrange > Send to Bottom
 
Adjust > Blur > Gaussian Blur with a Radius of 20.00
 
Effects > Distortion Effects > Curlicues with the following settings:
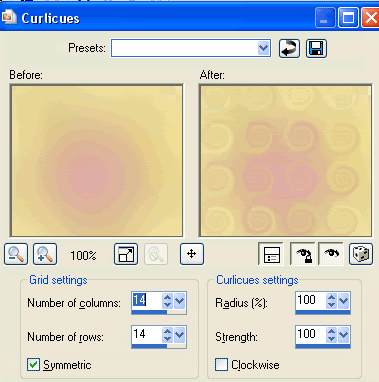
 
 
Repeat Curlicues
 
Paste another Flower of choice as new layer
Resize by 15%
 
LEAVE IN POSITION
 
Effects >  Plugins > Mura Meister > Copies with the following settings:
 
 
Paste a one of the Sparkles as new layer
Resize by 65%
Position centrally over Star layer
 
Paste tube of choice as new layer
Resize as necessary
Position in centre of star
 
Paste Cloud as new layer
Resize by around 85 - 90%
Layers > Arrange > Move Down
Position behind tube to your liking
 
Lower opacity to around 55
 
Paste one of the Stars as a new layer
Layers > Arrange > Send to Bottom
 
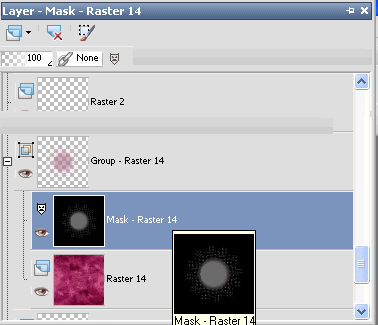
Layers > New Mask Layer > From Image
Locate WSL_Mask7
OK
Layers > Merge > Merge Group
 
Select your Preset Shape Tool again
Set to Ellipse with your Foreground on #000000
 
Hold your Shift key and draw out a circle
Objects > Align > Centre in Canvas
 
Select your Text Tool and font of choice
I am using Agency FB
Choose a colour from your tag
I am using #7c76cc
 
Type out your Text on the curve between the two upper left points of the Star
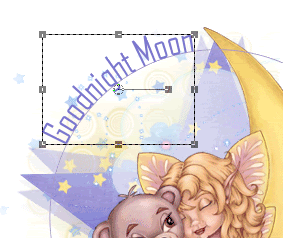
 
 
In your Layer Palette open your Vector Layer
Hide the Ellipse
Convert to raster layer
 
Effects > Reflection Effects > Feedback with the following settings:
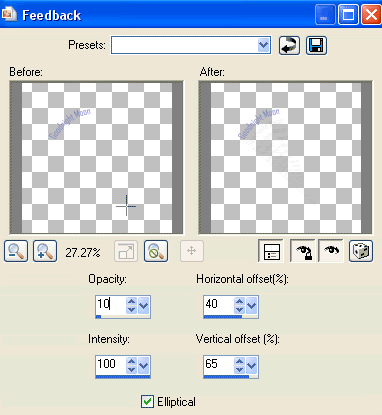
 
 
Then, Layers > Arrange > Move Down (below Tube layer)
 
Select your Text Tool again and another font of choice
I am using 2Peas Typo
Colours of choice are:
Foreground - #7c76cc
Background - #FFFFFF
 
Stroke width - 1.5
 
Type out your name
Objects > Align > Horizontal Centre in Canvas
Convert to raster layer
Apply a drop shadow of choice
 
Finally, add your © copyright, licence and watermark, then save as a GIF or JPG and you're done!
 

** IF YOU WISH TO ANIMATE PLEASE FOLLOW THESE NEXT STEPS **
 
Activate the Mask (Stars) Layer
Duplicate twice and rename Noise1, Noise2 and Noise3
 
Hide Noise2 and Noise3 activating only Noise1
 
Effects > Plugins > dsb Fluxx > Bright Noise with the following settings:
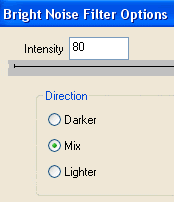
 
 
Hide Noise1 and activate Noise2
Apply the Bright Noise effect, adjusting the Noise to 85
 
Hide Noise2 and activate Noise3
Apply same again, adjusting the Noise to 90
 
Hide Noise2 and Noise3 again with only Noise1 visible
Edit > Copy Merged
 
Open Animation Shop
Edit > Paste as New Animation
 
Back to PSP
Hide Noise1 and activate Noise2
Edit > Copy Merged
 
In Animation Shop
Edit > Paste AFTER Current Frame
 
Back to PSP
Hide Noise2 and activate Noise3
Edit > Copy Merged
 
In Animation Shop
Edit > Paste after Current Frame
 
Thanks for trying my tutorial!
 
::st!na::
 
 
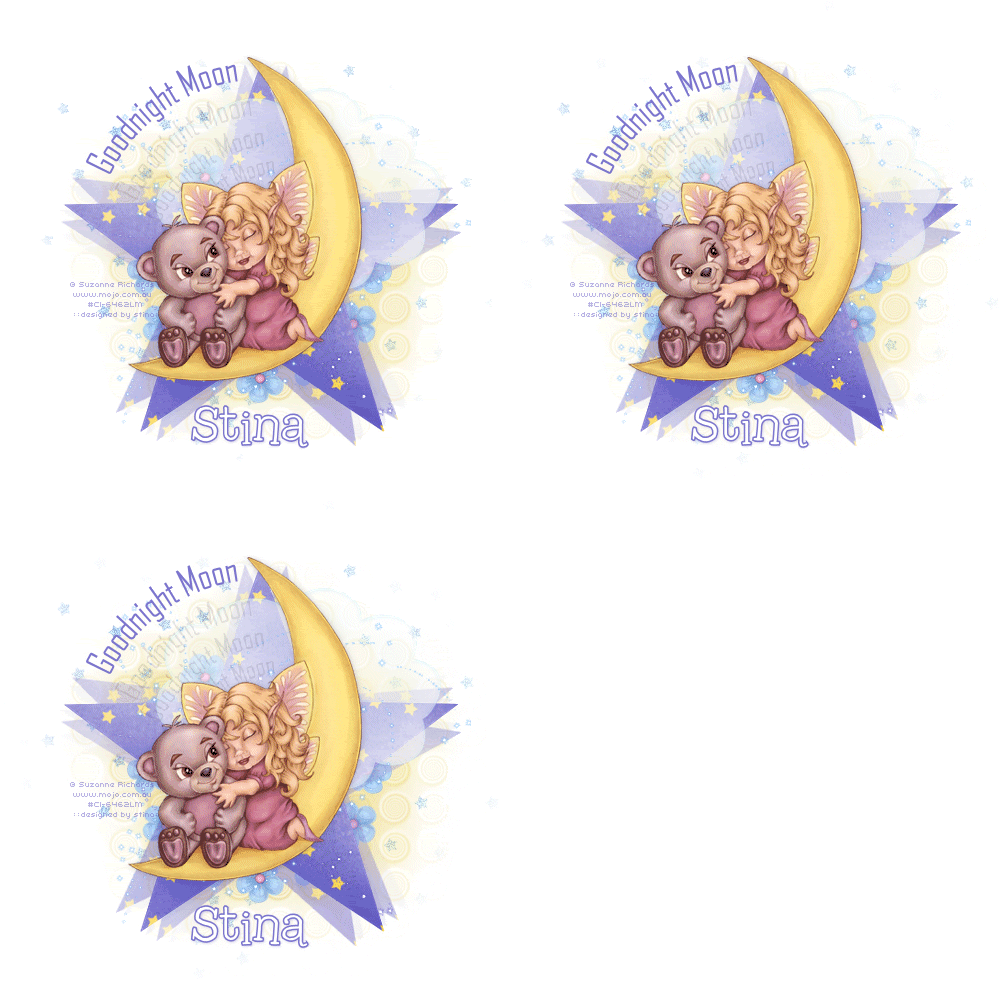
Here is a non-animated version:
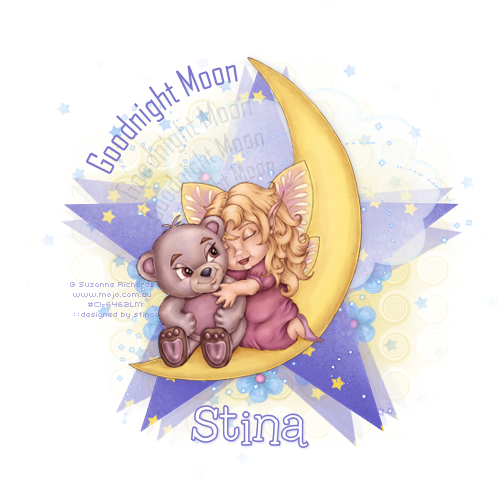


© Tutorial written by Stina on 19th May 2009
All rights reserved
Monday, March 9, 2009

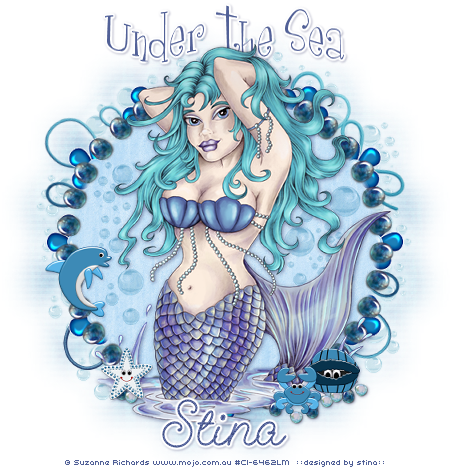
Under the Sea


Supplies
 
"Sea Life" scrap kit by Bel Vidotti Scraps which is a freebie available on her blog
Tube of choice - I am using the artwork of Suzanne Richards which can be purchased from CILM
**PLEASE DO NOT USE HER ARTWORK WITHOUT THE APPROPRIATE LICENCE**
WSL_Mask33 by Chelle (supplied)
Fonts of choice - Girls are Weird and GeeoHhmk (supplied
Plugin: Mura Meister Copies (supplied)
Plugin: Eye Candy 4000 Gradient Glow
 
My Supplies here
 
 
~ Step 1 ~
 
Open a new 600 x 600 blank canvas flood-filled white
 
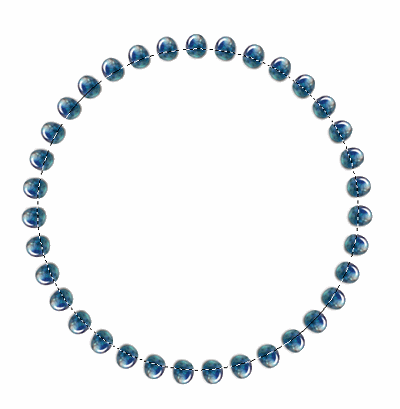
Paste FramePebble as new layer
Resize by 80%
Leave in position
 
Grab your Selection Tool and choose Circle
Now this is the part I always find fiddly *g*
Position your point in the centre of the canvas – you will see in your Status bar at the bottom the co-ordinates
You need to position your pointer at Y – 300 and X – 300
 

Then draw out your circle till it reaches the centre of the pebbles on the frame
 
Add new raster layer
Layers / Arrange / Move Down
Open Paper06
Edit / Copy
Then Edit / Paste into Selection
KEEP SELECTED
Selections / Invert
Selections / Modify / Feather by 10
On the Paper layer press delete once or twice
Deselect
 
Paste Flower01 as new layer
Resize by 25%
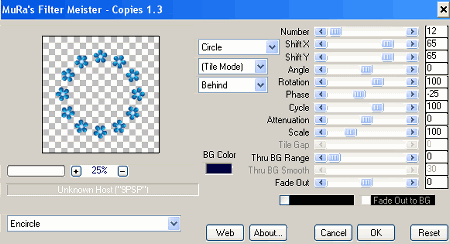
Effects / Plugins / Mura Meister / Copies with the following settings:
 
 
Layers / Arrange / Send to Bottom
 
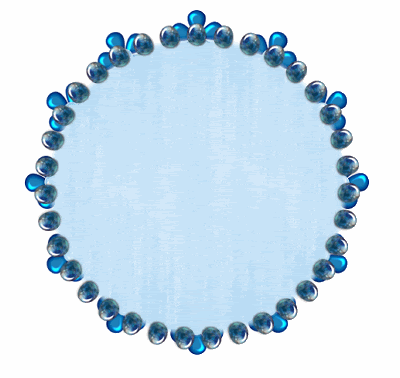
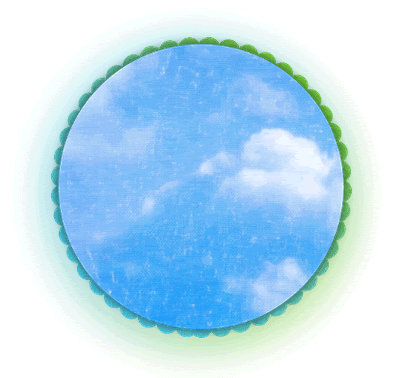
You should now have something like this:


~ Step 2 ~
 
Paste your tube as new layer
Resize as necessary and position to your liking
 
Paste Bubbles03 as new layer
Place into position and set blend mode to Multiply
 
Paste Bubbles02 as new layer
Image / Mirror
Place into position
Set blend mode to Multiply
 
Paste Dolphin as new layer
Resize by 20%
Place to the left to your liking
 
Paste Clam as new layer
Resize by 15%
Place to the lower right
 
Paste Crab as new layer
Resize by 15%
Place alongside Clam
 
Paste Starfish as new layer
Resize by 12%
Position in the lower left
 
Paste Pebble01 and Pebble02 as new layers
Resize them by 15% and place them in various positions to your liking
 

~ Step 3 ~
 
Paste some bubbles around the frame
Once you are happy with their position merge each of them down till they are one layer then
Layers / Arrange / Send to Bottom
Duplicate
 
Activate Background layer
Paste Paper04 as new layer
Resize by 75%
 
Layers / New Mask Layer / From Image
Locate WSL_Mask33
Source Luminance
OK
 
Layers / Merge / Merge Group
 
Add some drop shadows to your elements
 
Crop and resize
 
Select your Text tool, font and colour of choice to match your tube and kit
I chose #516097
 
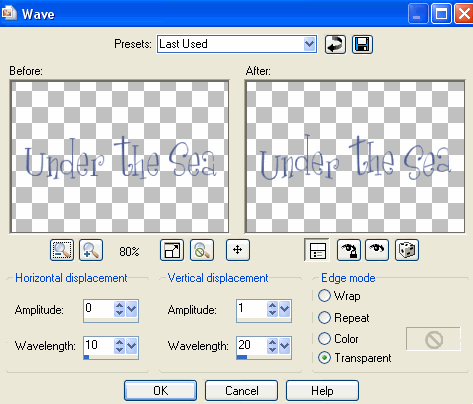
Type out "Under the Sea" or anything you like
 
Effects / Distortion Effects / Wave with the following settings:


Add a Gradient Glow and drop shadow:
H & V – 1
Opacity – 25
Blur – 2.00
Coloir - #000040
 
Choose another font for your name
Finally add your © copyright, licence and watermark
Then save as a GIF or JPG and you're done!
 
Thanks for trying my tutorial
 
::st!na::
 

©Tutorial written by Stina on 8th March 2009
All rights reserved
Wednesday, March 4, 2009

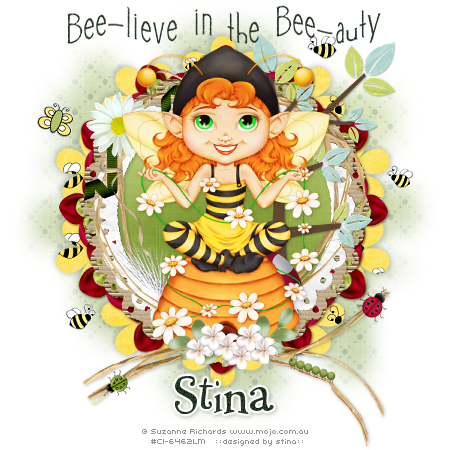
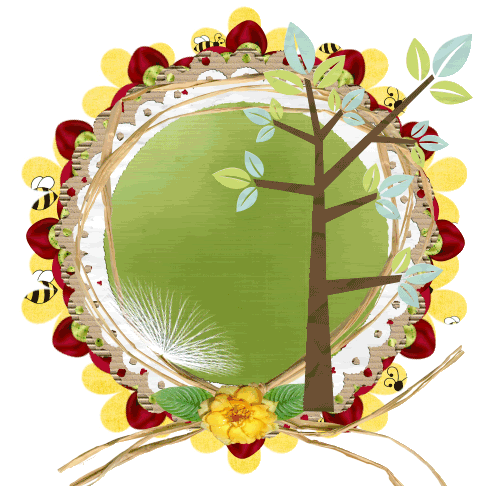
Bee-lieve in the Bee-auty of Life

 
Supplies
 
Scrap kit of choice - I am using the deelightful "Don't Bug Me" kit by Oopsie Daisy which can be purchased exclusively at Exquisite Scraps
Tube of choice - I am using the lovely artwork of Suzanne Richards which can be purchased from CILM
**PLEASE DO NOT USE HER ARTWORK WITHOUT THE APPROPRIATE LICENCE**
Flowers from "Spring Fling" freebie kit by Sharon's Creations
Fonts of choice - I used 2Peas Chatter and 2Peas Flea Market
 
 
~ Step 1 ~
 
Place the Vix_Mask172 into your Masks folder
 
Open a new 600 x 600 blank canvas flood-filled white
 
Paste Frame2 as new layer
Resize by 12%
Image / Flip
 
With your magic wand click inside the frame
Selections / Modify / Expand by 15
Paste PP-3 as new layer
Resize by 12%
Selections / Invert
Delete
Deselect
Rename this Frame-bkgd
 
Add a drop shadow to your Frame:
H & V - 1
Opacity - 25
Blur - 5.00
Colour - #000000
 
Activate your Background layer
Paste PP-7 as new layer
Resize by 14%
 
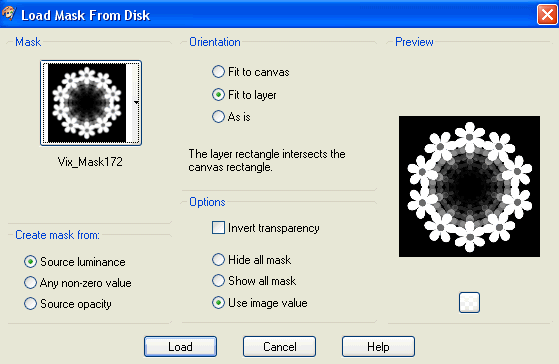
Layers / Load/Save Mask / Load Mask from Disk
Locate the Vix_Mask172 with the following settings:
 
 
Position mask layer behind Frame
 
Add a drop shadow:
H & V: 2
Opacity: 20
Blur: 8.00
Colour: #223324
 
Repeat Drop Shadow changing the Horizontal and Vertical drops to -2
 
In your Layer Palette turn off the visibility of your Frame and Frame-bkgd layers so you can see this next step
 
Paste Floral1 as new layer
Resize by 10%
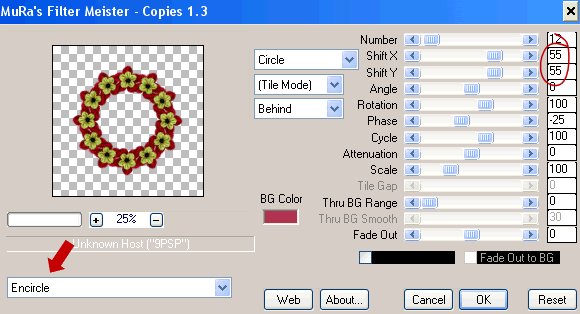
Effects / Plugins / Mura Meister / Copies with the following settings:
 

Turn on the visibility of your Frame and Frame-bkgd layers again
Position the Flowers behind the Frame so it encircles it
 
Add a drop shadow:
H & V - 1
Opacity - 50
Blur - 3.00
Colour - #000000
 

~ Step 2 ~
 
First let's add our tube
Paste tube and resize as necessary
Position in the centre of Frame
 
Paste Tree as new layer
Resize by 15%
Position behind your tube and slightly to the right
 
Paste WishFlower as new layer
Image / Mirror
Resize by 10%
 
Grab your Eraser Tool and erase the stem from the flower
Image / Rotate by 10 to the right
Position along the inside edge of the Frame to the left of the tube
 
 
Paste FloralCorner as new layer
Resize by 10%
Place in the upper left to your liking
 
Paste BeeSticker as new layer
Resize by 5%
Place in upper right outside of Frame
 
Duplicate then Image / Rotate by 20 to the right
Position slightly down
Resize by 85% Bicubic resample
Duplicate then Image / Mirror
Position to your liking
 
Paste ButterflySticker as new later
Resize by 5%
Image / Mirror
Position to the left outside of Frame
 
Paste Ladybug4 as new layer
Resize by 5%
Image / Rotate by 40 to the right
Place on the end of the StrawRaffia ribbon of the Frame
 
Paste Caterpillar as new layer
Resize by 5%
Image / Rotate by 20 to the right
Place on Raffia Ribbon
 
Paste SpringFling-Flower11 as new layer
Resize by 50%
Position along bottom of tube
 
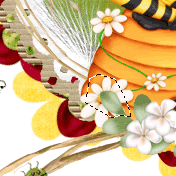
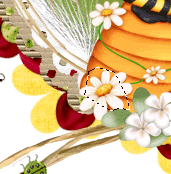
With your Freehand Tool draw around the leaf overlapping one of the daisies


Crop and resize tag
 

~ Step 3 ~
 
Activate Background layer
 
Paste PP12 as new layer
Resize by 20%
 
Layers / Load/Save Mask / Load Mask from Disk
Locate WSL_Mask230
Fit to Canvas
Source luminance
Invert Transparency UNchecked
OK
 
Layers / Merge / Merge Group
 
Lower the opacity of this layer to 40
 
Activate the top layer again
Select your Text Tool and a font of your choice - I am using 2 Peas Chatter
 
Foreground - null
Background - #223324
 
Type out "Bee-lieve in the Bee-auty"
Convery to raster layer
 
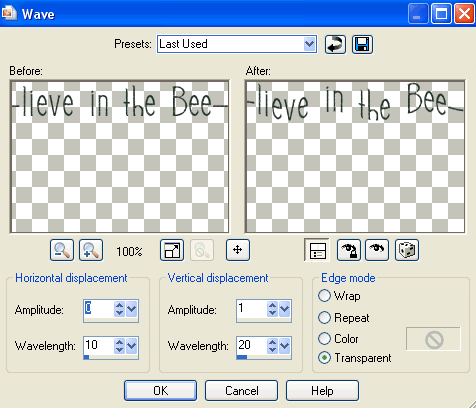
Effects / Distortion Effections / Wave with the following settings:
 
 
Select another font for your name
Add a Gradient Glow (optional) and slight drop shadow
 
Finally add your © copyright, licence and watermark, then save as a GIF or JPG and you're done!
 
Thanks for trying my tutorial!
 
::st!na::
 

© Tutorial writtem by Stina on 4th March 2009
All rights reserved
 

Friday, February 27, 2009

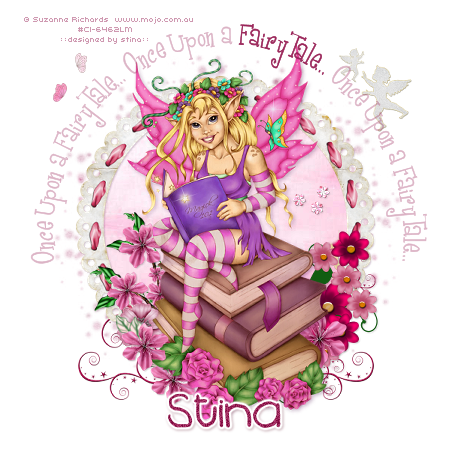
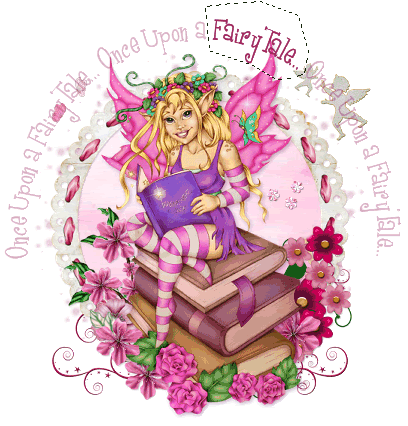
Once Upon a Fairytale...

 
Supplies
 
Scrap kit of choice - I am using the lovely "All About Love" by BabyCakes Scraps which can be purchased from her blog, Creative Scraps, Cotton Candy Kreations and Aussie Scraps (full list available on her blog)
Tube of choice - I am using the delightful artwork of Suzanne Richards which can be purchased from CILM
**PLEASE DO NOT USE HER ARTWORK WITHOUT THE APPROPRIATE LICENCE**
Frame by Cinnamon Scraps from her "All About Love" kit
WSL_Mask1 by Chelle
Fonts of choice - I am using Girls Are Weird and 2Peas Blueberry Pie
Plugin: Eye Candy 4000 Gradient Glow (optional)
 
 
~ Step 1 ~
 
Open a new blank 600 x 600 canvas flood filled white
 
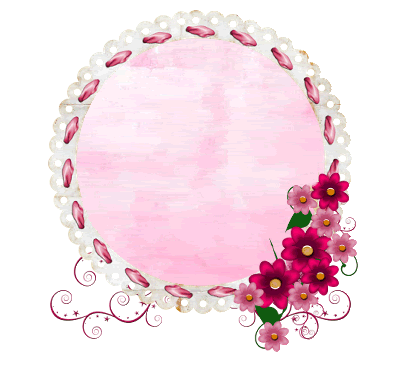
Paste AllAboutLoveFrame as new layer
Resize by 65%
With your magic wand click inside the frame
Selections / Modify / Expand by 10
Paste Soft Pink Paper as new layer
Move below Frame
Selections / Invert
Delete
Deselect
 
Duplicate and set blend mode to Multiply
 
Paste FancyDoodle as new layer
Resize by 50%
Move below Frame
 
Paste ClusterFrame as new layer
Resize by 30%
With your Eraser Tool carefully erase out ALL PARTS of the frame - you may have to zoom in to see better
Position to the lower right


~ Step 2 ~
 
Paste your tube as a new layer
Resize as necessary
Position in the centre of frame
 
Paste BlossomWithLeaves as new layer
Resize by 25% then Image / Mirror
Position to the left
 
Paste PrettyPinkFlower as new layer
Resize by 15%
Position to the left behind flower and books
 
Paste BlossomBranch as new layer
Image / Rotate by 20 to the right
Resize by 40%
Position tucked behind tube and flowers
 
Select your magic wand with the following settings:
 
 
Carefully select inside the dark green areas of the leaves on the branch (zoom in for a better look if you prefer)
When each of the desired areas have been selected, go to
Layers / Promote Selection to Layer
Deselect
Set your blend mode to Screen and duplicate


Paste Cluster as new layer
Resize by 50% and position to the right in the frame
 
Paste DoubleWings as new layer
Resize by 20% twice
Position to the upper left
 
Paste PinkDoubleWings as new layer and repeat resizing as above
Image / Mirror and position alongside first set of wings to the left
 
Paste LargeCupid as new layer
Resize by 40% twice
Position in upper right
 
Duplicate then resize by 50%
Image / Mirror and position with other cupid
Lower the opacity of both these layers to 60
 
Apply slight drop shadows to your layers
Then crop and resize
 

~ Step 3 ~
 
Activate your background
Paste SpongeTexturePaper as new layer
 
Layers / New Mask Layer / From Image
Locate WSL_Mask1
SOurce Luminance
OK
 
In your Layer Palette locate the Mask Layers
Click on the + to open the Group
Activate the actual Mask layer itself
 

Resize by 105%
Then Layers / Merge / Merge Group
 
Select your Preset Shapes Tool with your foreground coloured and background null
Choose Ellipse and draw out a circle around your tag
 
Select your Text Tool and choose a font
On the curve type out "Once upon a FairyTale..." or anything you choose
 
In your layer palette open the Vector Layer and close off the Ellipse
Convert to raster layer
Lower the opacity of this layer to about 35
 
Grab your Freehand Tool and draw around one of the words that stand out in the text
Layers / Promote Selection to Layer
You will see this layer revert to its normal opacity and therefore stands out from the rest of the text
 

Deselect
 
Select another font, type out your name and add any effects you wish
(I used some Noise, Gradient Glow on my usual settings and a slight drop shadow)
 
Add your © copyright, licence and watermark then save as a GIF or JPG and you're done!
 
Thanks for trying my tutorial
 
::st!na::
 

© Tutorial written by Stina on 26th Febraury 2009
All rights reserved
 

Saturday, February 21, 2009

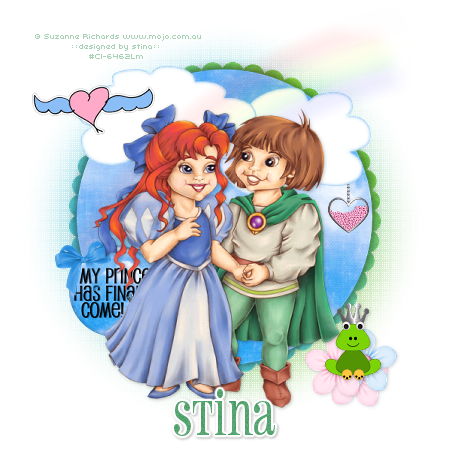
My Prince Has Come

 
Supplies
 
Scrap kit of choice - I am using "My Prince Has Come" by DMK Designs which can be purchased from Creative Scraps, Simply Beautiful Scraps and TKO Scraps
Tube of choice - I am using the gorgeous artwork of Suzanne Richards which can be purchased from CILM
**PLEASE DO NOT USE HER ARTWORK WITHOUT THE APPROPRIATE LICENCE**
Chain (supplied)
Rainbow (supplied)
Plugin: Penta.com / Dot and Cross
Plugin: Eye Candy 4000 Gradient Glow
Font of choice - I am using Pharmacy
 
My Supplies here
 
 
~ Step 1 ~
 
Open a new blank canvas 600 x 600 flood filled white
 
Open Paper10 and resize it to 500 x 500 then minimise
 
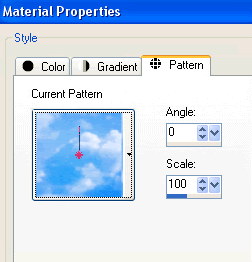
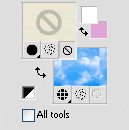
In your Materials Palette find the paper patten and select it as your background
Keep your Foreground null
 
 
Select your Preset Shape Tool and set it to Ellipse
Hold down your Shift key and draw out a circle
(Holding shift ensures the circle is drawn symmetrical)
Objects / Align / Centre in Canvas
Convert to Raster Layer
 
Paste Frame06 as new layer
Resize by 36%
Position below and behind Circle layer
 
Duplicate
Adjust / Blur / Gaussian Blur
Radius - 20.00
Repeat
 
Image / Flip and re-position behind frame
 
Now activate your Circle layer and add a drop shadow:
H & V - 2
Opacity - 40
Blur - 15.00
Colour - #000000
 
Repeat but change the H & V to -2
 

~ Step 2 ~
 
Paste Clouds as new layer
Resize by 40% and place in position
 
Paste Button05 as new layer
Resize by 25%
Position towards lower left
 
Paste FrogPrince as new layer
Resize by 12%
Position in the lower right
(these can be rearranged once tube is in place)
 
Paste AcrylicDoodle03 as new layer
Resize by 20%
Position to the left in the cloud
 
Paste FilledHeart as new layer
Resize by 5%
Position to the right below the cloud
 
Paste Chain (supplied) as new layer
Resize by 30%
Move it down a layer and attach it to the heart
Activate the Heart layer again then
Layers / Merge / Merge Group
Move this layer below the cloud so the chain tucks underneath it
 
Paste Flower01 and Flower02 as new layers
Resize by 20% each and position beneath the frog
 
Add a drop shadow to each flower:
H & V - 1
Opacity - 15
Blur - 5.00
Colour #000000
 
Add the same drop shadow to the frog but change the opacity to 25
 
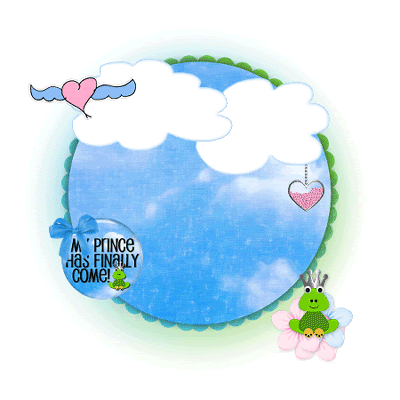
You should now have something like this

Now crop and resize


~ Step 3 ~
 
Add your tube of choice and resize as necessary
Apply a drop shadow as above
 
Paste a frame from the Rainbow.psp file (supplied) beneath your tube
Adjust / Blur / Gaussian
Radius - 5.00
 
Duplicate then set blend mode to Hard Light
Layers / Merge / Merge Down
 
Select your Eraser Tool with the following settings:
 

Then carefully erase the excess rainbow from the bottom and soften the edge to it at the top
 
Now activate your blurred background layer below the frame
Effects / Plugins / Penta.com / Dot and Cross
Default settings
Repeat
 
Select your Text Tool and font of choice
I am using Pharmacy
Set your background to a colour matching your tube - I used #56a570
 
Type out your name
Effects / Plugins / Eye Candy 4000 / Gradient Glow
Glow width - 3.00
Soft Corners - 25
Opacity - 100
Setting - Fat
 
Apply a drop shadow:
H & V - 1
Opacity - 30
Blur - 3.00
Colour - #000000
 
Add your copyright, licence (if applicable) and watermark and you're done!
 
Thanks for trying my tutorial
 
::St!na::
 

© Tutorial written by Stina on 21st February 2009
All rights reserved
 

Tuesday, February 17, 2009

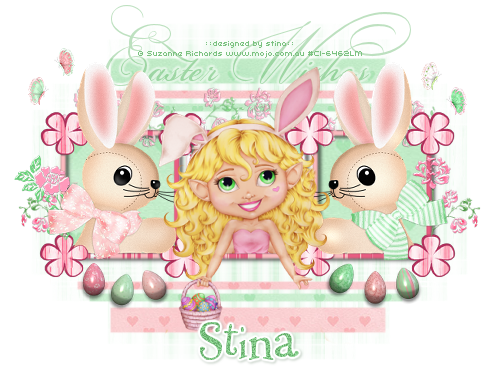
Easter Bunny Wishes


Supplies
 
Scrap kit of choice - I am using Hoppy Easter by Swheat Creations which can be purchased from Paradise 4 Scrappers
Thanks Norma for this gorgeous kit! It is delightful!
Tube/s of choice - I am using the delightful artwork of Suzanne Richards which can be purchased from CILM
**PLEASE DO NOT USE HER ARTWORK WITHOUT THE APPROPRIATE LICENCE**
Template # by Cheri (supplied)
WSL_Mask149 by Chelle (supplied)
Fonts of choice - I am using Bickham Script Fancy and 2Peas Flea Market (both are pay fonts)
 
My Supplies here
 
 
~ Step 1 ~
 
Open Template 3 by Cheri
Duplicate (Shift D) and close off original
Delete watermark layer
 
Activate background
Image / Canvas Resize to 650 x 500
Flood fill the excess areas white
 
Activate BOTTOM LONG BAR layer
Using your magic wand click inside the BAR
Selections / Modify / Feather by 2
Open RoseBkg8 and paste as new layer
Resize by 70%
Selections / Invert
Delete
Deselect
 
Activate BOTTOM SHORT BAR
Clickin inside it
Selections / MOdify / Expand by 2
Open RoseBkg14 and paste as new layer
Resize by 70%
Selections / Invert
Delete
Deselect
 
Activate BOTTOM FAT BAR
Click the area inside it
Selections / Modify / Expand by 2
Paste RoseBkg8 as new layer
Resize by 70%
Selections / Invert
Delete
Deselect
 
Activate TOP LONG BAR
Repeat the above steps alternating the papers
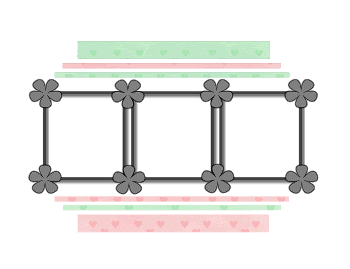
So now you should have something that looks like this:
 

Delete all the LONG, SHORT and FAT BARS from the template
Hide your Frame and Background
Layers / Merge / Merge Visible
Rename this later to BARS if you wish for easier identification

~ Step 2 ~
 
Activate your Frame layer
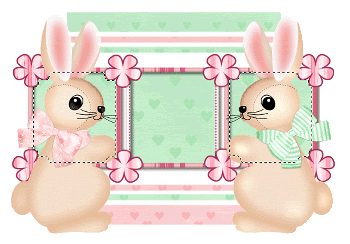
With your magic wand click each section of the frame till you have them all with marching ants around them:


Selections / Modify / Feather by 2
Open RoseBkg7 and paste as new layer
Resize by 70% and place in position of marching ants
Selections / Invert
Delete
Deselect
 
Activate your Frame layer again
Using your Selection Tool draw out a rectangle around each one
OR (do as I did)
Use your Magic Wand and click inside each frame,
and again in the shadow so ALL the frame space has marching ants around it
(whichever is easiest for you as both methods work fine - I'm just a magic wand girl...lol)
 
Selections / Modify / Expand by 3
 
Activate your BARS layer
 
Paste RoseBkg14 as new layer
Resize if you wish or leave it as is - up to you
 
Selections / Invert
Delete
Deselect
 
Activate Frame layer again
With your magic wand (Tolerance & Feather 0) click inside each of the flowers
Select RoseBkg9 and paste as new layer
Selections / Invert
Delete
 
KEEP SELECTED!!
 
Selections / Invert
Selections / Modify / Expand by 2
Activate Frame Layer (yes, again...lol)
Add new raster layer
Flood fill with #ac2a57 (or a colour matching the kit and tube you are using)
Deselect
 
 
~ Step 3 ~
 
Paste BunnyNBow as new layer
Resize by 35% then Image / Mirror
Position over the frame to the left
 
Paste BunnyNBow3 as new layer
Resize by 45%
Position to the right opposite the other bunny
 
Your bunnies should be the top two layers (above the frame)
Ensure they are level - to do so, rest the feet of both under the FAT BAR at the bottom


Now with your Magic Wand click inside the two outer frames (and the shadows) so that the whole area of the frame is selected
 
Selections / Modify / Feather by 2
Selections / Invert
 
Now activating each bunny layer carefully erase the excess - leaving the bow around the bunnies'necks overhanging
You may want to use your Freehand Tool for this
 
 
~ Step 4 ~
 
Paste your tube as a new layer and resize as necessary
Position in centre frame to your liking
Again with your magic wand click the area inside the frame and the shadow
 
Selections / Modify / Feather by 2
 
Selections / Invert
 
Now carefully erase the bottom of your tube leaving hands or bows, or whatever else there may be, overhanging
Set your eraser to a medium small size and your hardness to around 80
 
Paste several eggs, rotating some either way and scattering them about
Resize each by 20%
 
Paste some flowers on either end of the frame
Resize and position to your liking
 
Add any extra elements you wish!
Make this creation YOUR OWN *g*
 
 
~ Step 5 ~
 
Activate Background layer
Paste Rosebkg12 as new layer
 
Layers / New Mask Layer / From Image
Locate WSL_Mask149
Source Luminance
OK
 
Layers / Merge / Merge Group
 
Crop and resize tag
 
In your Material Palette set your background to #7cc281 (or a colour matching the scrap kit you use)
 
Select your Text Tool and choose a font
(I am using Bickham Script Fancy)
 
Type out whatever text you like at the top
(I tossed between "Easter Wishes" and "Easter Bunny Wishes"
but the latter was a little too long and didn't look right *LOL*)
 
Objects / Align / Horizontal Centre in Canvas
Convert to raster layer
 
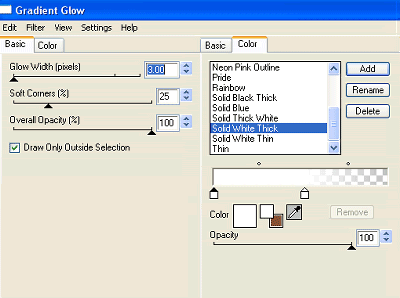
Apply a Gradient Glow:


Add your name, © copyright, licence and watermark and you're done!
 
Thanks for trying my tutorial
 
::st!na::
 

©Tutorial written by Stina 17th February 2009
All rights reserved


Sunday, February 15, 2009

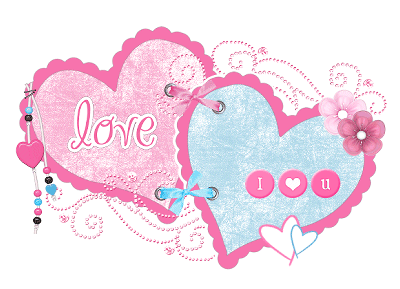
Cupid's Kiss

cupidskiss-stina_stina0209

Supplies

I used two scrap kits - both are freebies
"All You Need is Love" by Sara's Scraps and "Sweet Valentine" by Missy of Misfits Scrapz,
and you can find both kits on each designers' blog
Tube of choice - I use the lovely artwork of Suzanne Richards
which can be purchased from CILM
**PLEASE DO NOT USE HER ARTWORK WITHOUT THE APPROPRIATE LICENCE**
WSL_Mask214 by Chelle
Heartland Regular font
Eye Candy 4000 Gradient Glow

Font and Mask here

~ Step 1 ~

Open font and Mask and minimise for later

Open a new blank canvas 650 x 600 flood-filled white

Paste Frame1 as new layer
Move slightly to the left
Duplicate then Image / Mirror
Position frames to your liking

With your magic wand click inside first frame
Selections / Modify / Expand by 10
Activate your background layer and then
Selections / Promote Selection to Layer

KEEP SELECTED!!

Add new raster layer
Copy Paper1 and paste INTO Selection
Deselect
Lower opacity of this layer to 50

Layers / Merge / Merge Down
Then on the frame layer again
Layers / Merge / Merge Down

With your magic wand click inside the second frame
Selections / Modify / Expand by 10
Activate background layer again
Selections / Promote selection to Layer
Move this layer ABOVE first frame but still beneath second frame

KEEP SELECTED!!

Add new raster layer
Copy Paper1 again and paste into selection
Deselect

NOW go to Adjust / Hue & Saturation / Colourise with the following settings:

ss_ck-01

Lower opacity of this layer to 40

Layers / Merge / Merge Down
Then on the frame layer again
Layers / Merge / Merge Down

You should now have two hearts on two layers
DO NOT MERGE THESE TWO HEARTS!!

~ Step 2 ~

Paste HeartRibbon as new layer
Resize by 70% and position to the left

Paste Love WardArt as new layer
Resize by 70% and position in first heart

Paste I Love U Buttons as new layer
Resuze by 70% and position in the lower right of second heart

Paste Double Heart as new layer
Resize by 70% and position on the frame to the lower right

ss_ck-02
Paste Bow Eyelet 1 as new layer
Image / Rotate by 20 to the right
Resize by 60%
Position towards the top between the two hearts

Paste Bow Eyelet 2 as new layer
Resize by 60% and position toward the bottom of the hearts

Paste the Missy_sv_Flower2 as new layer from Missy's kit
Resize by 20% and duplicate
Position them together on the upper right of the frame

Name them Flower1 and Flower2

ss_ck-03

Duplicate Flower1 and set the blend mode to Multiply
Layers / Merge / Merge Down

Duplicate Flower2 and set the blend mode to Hard Light
Layers / Merge / Merge Down

Tuck Flower2 behind Flower1 so that the darker one is the top layer

Paste Missy_sv-Bling Doodle 1 as new layer
Resize by 50%
Position in the lower left between the two hearts
Duplicate layer
Image / Mirror then Image / Flip
Position top bling in the upper right
ss_ck-04
Add any other elements you wish

Crop and resize your tag (I resized mine to 500 x 400)

~ Step 3 ~

Paste your tube and resize as necessary
(My lil cupid I resized by 65%)
Duplicate layer

On original tube layer:

Effects / Plugins / Eye Candy 4000 / Gradient Glow with the following settings:
Glow width - 8.00
Soft Corners - 25
Opacity - 100
Setting - MEDUIM
Colour - White

The lower opacity of Gradient Glow layer to your liking
This will give the effect of a soft glow around the tube

Paste Paper7 (from Sara's Scrap kit) as new layer and move to bottom layer
Resise by 75%

Layers / New Mask Layer / From Image
Locate WSL_Mask214 in drop down
Source Luminance checked
OK

Layers / Merge / Merge Group

Lower opacity to 40

Choose a colour to match your tag with your eye dropper tool and select it as your background

Select your Text Tool and font
Type out your name
Add a Gradient Glow
I used the following settings:

Glow width - 3.00
Soft corners - 25
Opacity - 100
Setting - Fat
Colour - White

Apply a drop shadow:
H & V - 1
Opacity - 40
Blur - 5.00
Colour - #ee7cbd

Add your © copyright, licence and watermark and you're done!

Thanks for trying my tutorial

::st!na::

©Tutorial written by Stina on 11th February 2009
All rights reserved
An Easter Wish for You

easterwishes-christina_stina0209

Supplies

Scrap kit of choice - I am using "Easter Parade" by Scraps by Jo
which can be purchased at Paradise4Scrappers
Thanks Jo for allowing me to work with this very cute kit!
Tube of choice - I am using the gorgeous work of Suzanne Richards
which can be purchased from CILM
**PLEASE DO NOT USE HER WORK WITHOUT THE APPROPRIATE LICENCE**
WSL_Mask230 by Chelle which can be downloaded from her blog
Fonts are 2Peas Blueberry Pie and 2Peas FatFrog which are pay fonts
No outside filters were used

~ Step 1 ~

Open mask and fonts and minimse for later

Open a new blank canvas 600 x 600 flood-filled white
Paste Frame2 as new layer
Resize by 80%

Using your magic wand select the blank centre area of the frame
Selections / Modify / Expand by 10
Add a new raster layer
Drag it below the frame

Open Paper2, copy and then paste into selection

KEEP SELECTED

Adjust / Blur / Gaussian Blur
Radius - 5.00

STILL KEEP SELECTED *g*

Paste your tube as a new layer beneath frame
Resize by 130%
Position in frame to your liking
Selections / Invert
Delete
Deselect

Reduce the opacity of this layer to around 35

~ Step 2 ~

Paste the little Basket with the duck and eggs called "element" as a new layer
Resize by 40% and position in the lower right

Adjust / Brightness & Contrast / Brightness/Contrast

jo_ew-01
Paste Flower5 as new layer and resize by 10%
Position in front of the basket
Duplicate and set blend mode to Multiply
Layers / Merge / Merge Down

Paste Flower3 as new layer and resize by 10%
Position in front of the basket next to first flower
Duplicate and set blend mode to Multiply
Then lower opacity to 50
Layers / Merge / Merge Down

Paste Flower4 as new layer and resize by 10%
Place in front of flowers and basket

Paste Egg2 as new layer
Resize by 15%
Image / Rotate by 20 to the right
Position against the flowers
Move this layer beneath the basket layer

Paste Egg as new layer
Resize by 15%
Image / Rotate by 20 to the left and postion slightly behind Egg2

Paste Bow2 as new layer
Resize by 15% then place on basket handle

Paste FlowerPin2 as new layer
Resize by 30% then Image / Mirror
Position on the frame to the right
jo_ew-021

Paste Buttefly2 as new layer
Resize by 5%
Image / Rotate by 20 to the left
Position to the right of your frame
Duplicate then Image / Mirror
Position second butterfly above first

Paste your tube as a new layer
Resize if necessary (if using the same tube as me you do not need to resize)
Position to the left of the frame

Crop and resize tag

~ Step 3 ~

Activate your background layer
Add new raster layer
Using your eye dropper tool select a colour from your tube or kit ( I used #c996f8 )
and flood fill layer

Layers / New Mask Layer / From Image
Locate WSL_Mask230 in drop down
Source luminance checked
Invert Mask data UNchecked
OK

Layers / Merge / Merge Group

Reduce the opacity of this layer to about 40

Using your Preset Shape Tool:
Foreground - #000000
Background - null

Select Ellipse and draw out a circle over your tag

Select your Text Tool and set your foreground to a colour matching your tube (I used #ec6cb4)
Choose your font and on the curve type out "An Easter Wish for You" or anything you like

Once happy with the position in your layer palette click on the + to open the Vector Layer,
hide the ellipse shape and Convert to raster layer
**You can position the text anywhere along the curve by using the centre node to rotate it**

Swap the colours in your Material Palette:
Foreground - #ec6cb4 or one of your choosing
Background - #FFFFFF

With your Text Tool again, stroke width on 1.2 and a font of your choice (I used 2Peas Fat Frog) type out your name

Apply a drop shadow:
H & V - 1
Opacity - 50
Blur - 5.00
Colour - #ec6cb4 (again of your choosing)

Add your © copyright, licence and watermark

~ Step 4 ~
Animation (optional)

First we're going to merge the layers to make it easier for animation

Hide your background, Mask and name layers
Layers / Merge / Merge Visible
Then unhide layers

Activate your mask layer
Duplicate it twice so you have a total of 3 layers
Rename them Mask1, Mask2 and Mask3
Hide Masks2 & 3 and start with the original (Mask1)

jo_ew-03

Adjust / Add/Remove Noise / Add Noise
Gaussian checked
Noise - 15
Monochrome checked
OK

Go to next layer
Apply the same effect but change the Noise to 20
OK

Go to third layer
Apply same again but change the Noise to 25

Now there are two ways of animating -
There is the copy and paste mode or the Save mode
I will show you both and let you decide which you prefer *g*

Copy and Paste Mode

Hide both Mask2 & 3 layers so only Mask1 is activated
Edit / Copy Merged
Go to Animation Shop and Paste as New Image

Back in PSP, hide Mask1 and unhide Mask2
Edit / Copy Merged
Go to Animation Shop, go to Edit / Paste / Paste AFTER Current Frame

Back in PSP again, hide Mask2 and unhide Mask3
Edit / Copy Merged
Go to Animation Shop, go to Edit / Paste / Paste AFTER Current Frame

Save as a GIF and you're done!

Save Mode

First duplicate your main graphic and name layers twice so you have three of each

You should now have:
3 Name layers
3 Tag layers
3 Mask layers

Hide 2 of each layer then
Layers / Merge / Merge Visible

Hide your merged layer and then unhide one of each layer again
Layers / Merge / Merge Visible

Hide second merged layer
Layers / Merge / Merge Visible

You should now have three layers the same - the only difference being the Noise on each Mask layer

Save file as a .psp file compatible for Animation Shop (PSP7 file)

In Animation Shop open file and save as a GIF!

Thanks for trying my tutorial

::st!na::

A non-animated version
easterwishes-christina_stina0209

©Tutorial written by Stina on 10th February 2009
All rights reserved

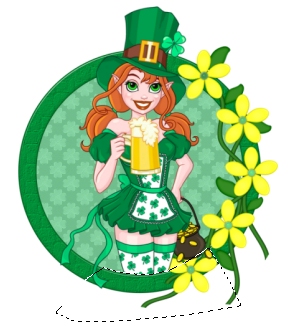
Luck O' the Irish

Supplies

Scrap kit of choice - I'm using "Me Lucky Charms" by Cindy of Southern Scrapz
which can be purchased from Paradise4Scrappers
Thank you Cindy for this cute kit! I enjoyed using it!
Tube of choice - I am using the lovely artwork of Suzanne Richards
which can be purchased from CILM with a proper licence
**PLEASE DO NOT USE HER ARTWORK WITHOUT THE APPROPRIATE LICENCE**
WSL_Mask239 by Chelle which can be downloaded from her blog
Fonts of choice - I am using PattyDay (which is a pay font)

~ Step 1 ~

Open Mask and fonts and minimise till later

Open new blank image 600 x 600 with white background

Paste the yellow floral green frame (#39) as new layer
Resize by 70%
With your magic wand select inside the frame and the spaces in between the flowers
Selections / Modify / Expand by 10
Add new raster layer
Copy Paper12 and paste into selection
Deselect
Drag layer below frame

~ Step 2 ~

Paste your tube of choice as new layer
Resize as necessary then position to your liking

Using your freehand tool on point to point (you may need to zoom in for this step)
carefully draw along the inside edge of the frame
and continue OVER the flowers along frame edge
Then bring it back around the bottom to the other side
Using your eraser tool erase the legs but careful not to erase the ribbon
ss_loti-01

Paste Pot of Gold (#4) as new layer
Resize by 30% and position it to the left tucked slightly behind the girl and behind the frame layer

Paste Clover Bag (#4 8) as new layer and resize by 15%
Position in front of the pot of gold

Paste Yellow Flower (#45) as new layer
Resize by 15% and tuck slightly behind the bag
Paste Green Flower (#46) as new layer
Resize by 15% and tuck slightly behind yellow flower
Use your Pick Tool (or Deformation Tool in earlier versions) and turn it slightly to right or Image / Rotate by 10 to the right

Paste Horseshoe (#50) as new layer
Resize by 25% and postion to the left on frame

Paste Green Bow with Gem (#51) as new layer
Resize by 25%
Position an the bottom of the horseshoe

~ Step 3 ~

Paste Rainbow (#5) as new layer
Place one end behind the pot of gold
Use your Pick Tool (or Deformation Tool) to rotate the rainbow and stretch it into position to your liking

Select your Freehand Tool and draw around the cloud at the top end of the rainbow

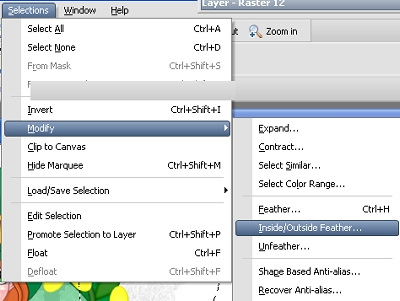
ss_loti-02
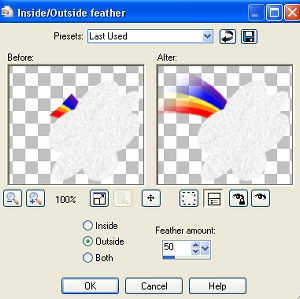
Selections / Modify / Inside/Outside Feather with the following settings:

ss_loti-03

Hit delete
Deselect

Use your Pick Tool again to stretch rainbow so you can see the end slightly
Erase any excess cloud from the end behind the pot of gold

Lower opacity to about 50

~ Step 4 ~

Paste the Dark Green Doodle (#15) as new layer
Image / Mirror then Image / Flip
Resize by 60%
Position in lower left corner beneath frame

Paste Paper12 as new layer
Resize by 75%

Layers / New Mask Layer / From Image
Locate WSL_Mask239 from drop down list
Source Luminance checked
Invert Mask Data UNchecked
OK

Layers / Merge / Merge Group

Resize by 95% and position centrally behind frame
Lower opacity to about 30

Crop and resize tag

~ Step 5 ~

Using your preset shape tool with your foreground set to a colour like #000000 draw out an ellipse just slightly larger than the frame
Objects / Align / Center in Canvas
You may need to position the shape slightly where you intend placing your text

Select your text tool and choose an Irish font if you wish (I used PattyDay)
Change the background colour in your Materials Palette to a green that matches your tube (I used #008441)

Where the A on your text tool curves over the shape click to open your text box and type your text - I chose "Luck of the Irish"
Click OK
Use your mouse to move the text slightly left or right to your liking

In your Layer palette click the + to open the Vector Layer
Hide the ellipse
Convert to raster layer

Effects / Plugins / Eye Candy 4000 / Gradient Glow
Glow width: 3.00
Soft Corners: 25
Opacity: 100
Colour: Soft Yellow

Type your name out in the same font or another one
Add Noise -
Uniform
25
Monochrome

Effects / Plugins / Eye Candy 4000 / Gradient Glow
Glow width: 3.00
Soft Corners: 25
Opacity: 100
Colour: White

Apply a slight drop shadow

Add your © copyright, licence and watermark and you're done!

Thanks for trying my tutorial

::st!na::

©Tutorial written by Stina on 5th February 2009
All rights reserved