Please email me designed.by.stina@gmail.com with your creations. I'd love to see them.

Showing posts with label Ismael Rac. Show all posts

Saturday, May 23, 2009

Risky Business

 
Supplies
 
Scrap kit of choice - I am using the "Rockin' with Attitude" Re-Grand Opening Collab available from Scraps With Attitude
Tube of choice - I am using the stunning artwork of Ismael Rac available with a licence from CILM
**PLEASE DO NOT USE HIS ARTWORK WITHOUT THE APPROPRIATE LICENCE**
Template #163 by Missy
WSL_Mask26 by Chelle available from her blog
Fonts of choice - I am using A&S Snapper Script and Pump Demi Bold
Plugins: Eye Candy 4000 Gradient Glow and Graphics Plus Cross Shadow
 
 
Ready? Let's begin....
 
 
Open Missy's Template 163 and duplicate (Shift D)
Delete copyright layer
 
Image > Canvas Resize 600 x 500 centred
Activate Background layer and flood-fill excess white
 
Select STAR1 with your Magic Wand
Selections > Modify > Feather by 2
Press delete severasl times to remove star template
Paste Paper of choice INTO selection
Deselect
 
Repeat process with STAR2 and MUSIC NOTE layers
 
Paste a MusicNote as new layer
Resize by 55%
Position OVER the music note template
Use your Pick Tool (Deformation Tool in some versions) and bring the nodes in to size with the Template
 
Duplicate, then set blend mode to Soft Light
Layers > Merge > Merge Down
 
 
Paste MusicNote again as new layer
Resize by 8%
Duplicate several times
Image > Rotate by 30 to the left and right alternatively
Resize some again by 80%
Position around tag
 
Paste another MusicNote as new layer and repeat, resizing by 5%
 
Paste a flower (glitter doodle) as new layer
Resize by 5% and duplicate a few times
Position around tag
Repeat with another colour flower of the same
 
Hide all layers but the MusicNotes and Flowers, then
Layers > Merge > Merge Visible
Lower opacity to 55

 
 
Paste your tube of choice
Resize as necessary and position beside MusicNote template layer
 
Paste a Guitar as new layer
Resize by 8%
Position alongside tube
 
Paste Paper of choice as new layer
Layers > Arrange > Send to Bottom, then
Move Up above white Background
Resize by 17%
 
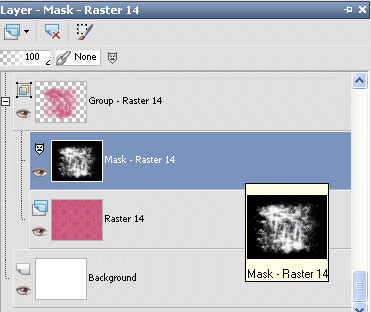
Layers > New Mask Layer > From Image
Locate WSL_Mask26
OK
Layers > Merge > Merge Group
 
Crop and resize to liking
 
Select your Text Tool and font of choice
I am using A&S Snapper Script
Choose a colour from your tag for your text - I am using #e51f93
 
Type out your text
Image > Rotate 25 to the left
Position to your liking, then
Convert to raster layer
Add some noise
 
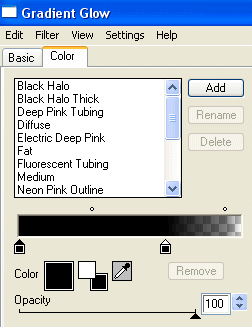
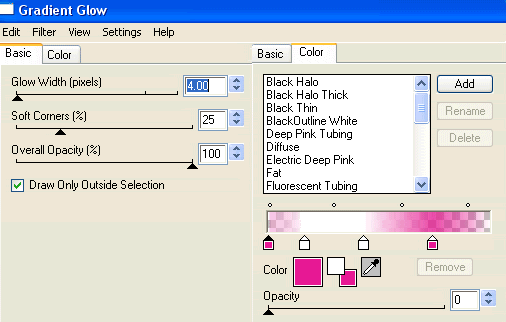
Effects > Plugins > Eye Candy 4000 > Gradient Glow with the following settings:
 
 
Select another font of choice
I am using Pump Demi Bold with the same text colour
 
Type out your name
Objects > Align > Horiztonal Centre in Canvas
Convert to raster layer
Add some noise
Apply the same Gradient Glow as above
 
Finally, add your © copyright, licence and watermark, then save as a GIF or JPG and you're done!
 
 
** IF YOU WISH TO ANIMATE PLEASE FOLLOW THESE NEXT STEPS **
 
Activate the Mask Layer
Duplicate once and rename Light1 and Light2
 
Leave Light1 as is and activate Light2
 
Effects > Plugins > Graphics Plus > Cross Shadow with default settings
 
Hide Light2 with only Light1 visible
Edit > Copy Merged
 
Open Animation Shop
Edit > Paste as New Animation
 
Back to PSP
Hide Light1 and activateLight2
Edit > Copy Merged
 
In Animation Shop
Edit > Paste AFTER Current Frame
 
Go to Frame Properties and change to 30, then save as a GIF and you're done!
 
Thanks for trying my tutorial!
 
::st!na::
 
 
Here is a non-animated version:



© Tutorial written by Stina on 23rd May 2009
All rights reserved

Friday, May 15, 2009

Angel of Rock

**Grand Opening of Twilight Scraps tut**
 
Supplies
 
Scrap kit of choice - I am using "Born to Rock" by Soxsational Scraps 
Tube of choice - I am using the lovely artwork of Ismael Rac available from My PSP Tubes
Fonts of choice - I am using Freebooter and A&S Snapper Script
Plugins: Eye Candy 4000 Gradient Glow and Alien Skin Xenofex 2 Constellation


Ready? Let's Go...
 
 
Open a new 700 x 700 blank canvas flood-filled white
 
Paste Frame1 as new layer
 
Select the inside of Frame with your Magic Wand
Selections > Modify > Expand by 10
Add new raster layer
Paste Paper (of choice) INTO selection
I used Paper8
 
Activate your background layer
Set your Foreground to #000000 and open a paper of choice and set that as your Background
 
Select your Preset Shape Tool and set it to some Star shapes
Draw out various star shapes around your Frame
Convert to raster layer
 
Still on your Stars layer,
Paste Music (notes) as new layer
Position to your liking
 
Layers > Arrange > Move Down
(so music notes are below the stars layer)
 
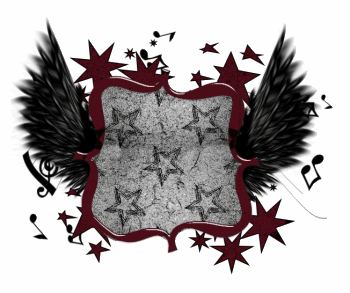
You should have something resembling this:
 
 
Paste Amp as new layer
Resize by 30%
Position in lower left
 
Paste Shoes as new layer
Resize by 30%
Position beside Amp
 
Paste Skull as new layer
Resuze by 30%
Position in upper right
 
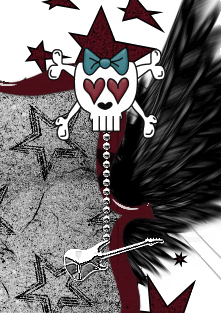
Paste a KeyChain (charm) as new layer
Resize by 70%
Layers > Arrange > Move Down
Position beneath the skull
 
Apply a drop shadow to the chain:
H & V - 1
Opacity - 60
Blur - 1.00
Colour - #000000
 
 
Paste Bow as new layer
Image > Rotate by 10 to the left
Resize by 30%
Position in upper left
 
Choose two colour TornHearts
Paste the first one as new layer
Image > Rotate by 20 to the left
Resize by 60%
Position in upper left
Layers > Arrange > Send to Bottom
 
Paste second torn heart as new layer
Image > Rotate by 20 to the right
Resize by 80%
Position to the right to your liking
 
Activate top layer again
 
Paste a butterfly as new layer
Image > Rotate by 20 to the left
Resize by 20%
Position to the left
Duplicate then Image > Mirror
 
Paste another butterfly as new later
Image > Rotate by 20 to the right
Resize by 20%
Position to the left
Duplicate and move toward the right
 
Paste another butterfly and repeat left rotation
Resize by 20% and position
 
 
Paste tube as new layer
Resize if necessary
Position to your liking
 
Resize tag to your liking
 
Paste one of the ROCK WordArts as new layer
Resize by 75%
Position at bottom of Tube
(I used two and set the top one to Hard Light to get the colour effect of mine)
 
Select your Text Tool and font of choice
I am using Freebooter
Set your Background to a colour matching your tag
I am using #75b9bf
 
Type out "Angel of" and position above the ROCK word Art
Objects > Align > Horizontal Centre in Canvas
Convert to raster layer
Apply a Gradient Glow in BLACK
 
Select your Text Tool again with another font of choice
I am using A&S Snapper Script
Set Foreground to #000000
Background to #75b9bf
Stroke width - 1.5
 
Type out your name
Objects > Align > Horizontal Centre in Canvas
Convert to raster layer and apply a slight drop shadow
 
Finally, add your © copyright, licence and watermark, then save as a GIF or JPG and you're done!
 

** THE FOLLOWING STEPS ARE FOR ANIMATION - IF YOU DO NOT WISH TO ANIMATE JUST SKIP THIS STEP **
 
Duplicate the ROCK WordArt twice
Rename Bling1, Bling2 and Bling 3
 
With your Selection Tool draw a rectangle around the word ROCK
 
 
Hide Bling2 and Bling3 activating only Bling1
 
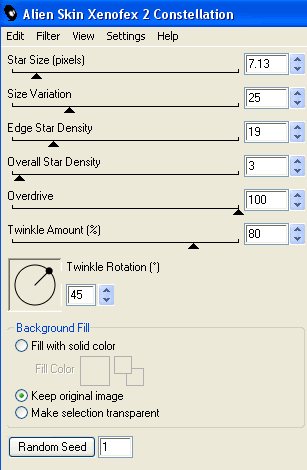
Effects > Plugins > Alien Skin Xenofex 2 > Constellation with the following settings:
 
 
Hide Bling1 and activate Bling2
Apply the Constellation effect, adjusting the Random Seed
 
Hide Bling2 and activate Bling3
Apply same again, adjusting the Random Seed
 
Hide Bling2 and Bling3 again with only Bling1 visible
Edit > Copy Merged
 
Open Animation Shop
Edit > Paste as New Animation
 
Back to PSP
Hide Bling1 and activate Bling2
Edit > Copy Merged
 
In Animation Shop
Edit > Paste AFTER Current Frame
 
Back to PSP
Hide Bling2 and activate Bling3
Edit > Copy Merged
 
In Animation Shop
Edit > Paste after Current Frame


Finally, add your © copyright, licence and watermark, then save as a GIF or JPG and you're done!
 
Thanks for trying my tutorial!
 
::st!na::
 
 
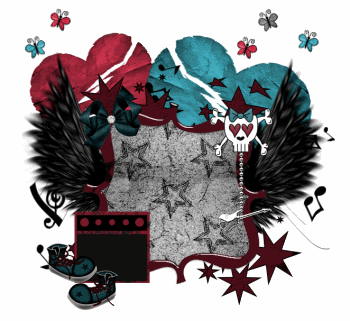
Here is a non-animated version:


© Tutorial written by Stina on 12th May 2009
All rights reserved
Monday, April 20, 2009

I Wanna be a Rockstar

 
Supplies
 
Scrap kit of choice - I am using the lovely "Just Another Rockstar" by Creative Intentionz which is available from Exquisite Scraps and Paradise 4 Scrappers
Tube of choice - I am using the wonderful artwork of Ismael Rac which can be purchased from My PSP Tubes
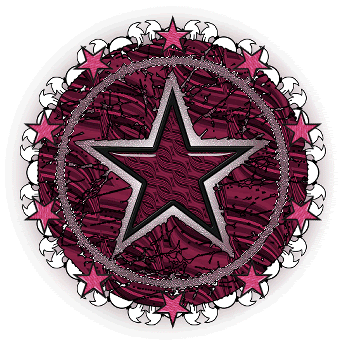
Seeing Stars Preset Shapes here
Plugin: Mura Meister Copies
Font of choice - I am using Adam Gorry-Lights
 
 
Ready? Let's begin!!
 
 
Open a new 700 x 700 blank canvas flood-filled white
 
Open Paper17 and minimise
 
Select your Preset Shape Tool to SeeingStars I
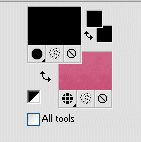
Set yout Material Properties to the following:
Foreground - #000000
Background - Paper17 (or one of choice)
 
Stroke width - 2.00
 
Hold your shift key down and draw out the shape
Objects > Align > Centre in Canvas
Convert to raster layer
 
 
Duplicate layer
 
Rename bottom layer BLUR, then
Apply Gaussian Blur with a radius of 20.00
 
Rename top layer STAR BACKGROUND, then
With your Magic Wand select the outer area
Selections > Invert
Selections > Modify > Contract by 5
 
Go back to blurred layer
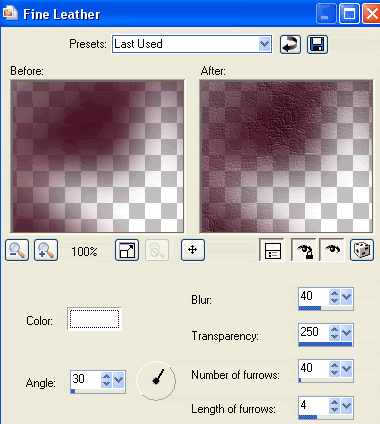
Effects > Texture Effects > Fine Leather with the following settings:
 
 
Then Effects > Edge Effects > Enhance
 
Selections > Invert
Apply Gaussian Blur again
Deselect
 
Paste Star5 as new layer
Position in the centre of star
 
 
Paste Star1 as new layer in same place as first star
Resize by 25%
 
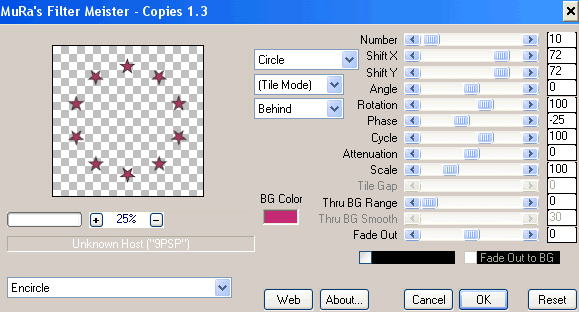
Effects > Plugins > Mura Meister > Copies with the following settings:
 
 
Duplicate layer
Adjust > Brightness & Contrast > Brightness/Contrast
Brightness - 100
Contrast - 0
 
Set blend mode to Soft Light
Layers > Merge > Merge Down
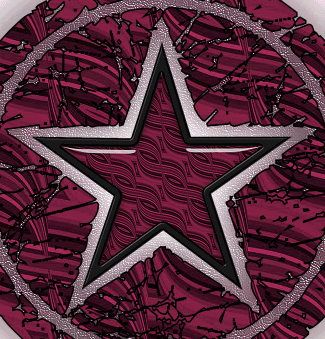
Rename layer STAR FRAME
 
Paste SkullFrame2 as new layer
Resize if needed (depending on size of your STAR BKGD)
Move to layer between BLUR and BACKGROUND STAR
 
With your Magic Wand select the inner ring of BACKGROUND STAR
Selections > Modify > Expand by 2
 
 
Activate SKULL FRAME
Press delete then deselect
 
Paste your tube as new layer
Resize if necessary
Use your Magic Wand to select the outer area of your STAR BACKGROUND
Selections > Modify > Expand by 2
 
Activate your tube and erase any excess
 
Go to STAR FRAME
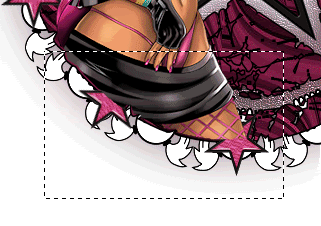
With your Selection Tool draw around the bottom two stars your Tube partially covers
 
 
Selections > Promote Selection to Layer
Layers > Arrange > Bring to Top
Deselect
 
Paste a Charm Medal of choice as new layer
Resize by 30%
Position in the centre of and beneath the upper right star
 
Paste another Charm Medal of choice as new layer
Image > Rotate by 30 to the right
Resize by 30%
Position to the left of the first charm
Duplicate, then
Image > Mirror
Position on the exact opposite side of star
 
Now let's resize tag to your liking
 
Select Preset Shape Tool to Ellipse
Hold Shift key down and draw out circle slightly larger than tag
Objects > Align > Centre in Canvas
 
Select Text Tool and font of choice
I am using Adam Gorry-Lights
 
Foreground - null
Background - colour of choice (mine is #7c1f3f)
 
 
Type out your text and position to your liking
Open your Layer Palette and Vector Layer
Close off the Ellipse then convert to raster layer
 
Still using your Text Tool select another font
I used the same one
Type out your name
Objects > Align > Horizontal Centre in Canvas
 
Add a slight drop shadow:
H & V - 1
Opacity - 30
Blur - 2.00
Colour - #000000
 

**THIS NEXT PART IS IF YOU WISH TO ANIMATE**
 
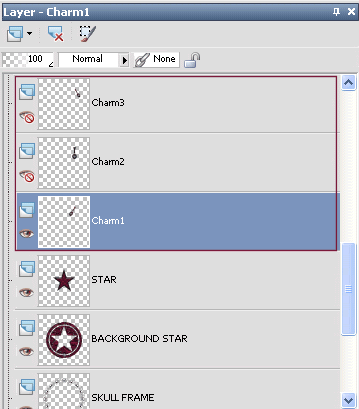
Go to your Charm layers
You should have three of them
Move the first rotated one (on the left) down a layer
Rename each to Charm1, Charm2 and Charm3
 
Your layer palette should looking something like this, with Charm1 to the left and Charm3 to the right
 
 
Now hide Charm2 and Charm3
Edit > Copy Merged
 
Open Animation Shop
Edit > Past as New Animation
 
Back to PSP
Hide Charm1 and activate Charm2
Edit > Copy Merged
 
In Animation Shop
Edit > Paste after Current Frame
 
Back to PSP
Hide Charm2 and activate Charm3
Edit > Copy Merged
 
In Animation Shop
Edit > Paste after Current Frame
 
Back to PSP
Hide Charm3 and activate Charm2 again
Edit > Copy Merged
 
In Animation Shop
Edit > Paste after Current Frame
 
You should know have a total of FOUR frames
 
Edit > Select All
Animation > Frame Properties
 
Change properties to 50
 
Finally save as a GIF and you're done!
 
Thank you for trying my tutorial!
 
::st!na::
 

© Tutorial written by Stina on 20th April 2009
All rights reserved
Monday, February 16, 2009

S.W.A.K.

swak-stina_stina0209
Supplies

"Is This Love" scrap kit by Bea's Creations which is a freebie and can be downloaded from her blog
Tube of choice - I am using the artwork of Ismael Rac which can be purchased from My PSP Tubes
**PLEASE DO NOT USE HIS ARTWORK WITHOUT THE APPROPRIATE LICENCE**
Template#7 by Babe's Designz
WSL_Mask192 by Chelle which can be found on her blog
Fonts of choice - I am using Baby Kruffy here and LiorahBT (pay font)
Eye Candy 4000 Gradient Glow

~ Step 1 ~

Open Template and duplicate (shift D)
Close off original
Delete copyright layer

Activate BlackHeart1 layer
Using your magic wand click inside the heart
Selections / Modify / Feather by 2

Select P10 from scrap kit
Copy and paste as new layer
Resize by 70%
Selections / Invert
Delete
Deselect

Rename Heart1

Activate MediumHeart
Click inside area
Selections / Modify / Feather by 2

Select P9 from scrap kit
Copy and paste as new layer
Resize by 70%
Selections / Invert
Delete
Deselect

Rename Heart2

Activate Small Black Heart
Click inside one of the hearts
Selections / Modify / Feather by 2

Select P11 from scrap kit
Copy and paste as new layer
Resize by 40% and place in correct position
Selections / Invert
Delete
Deselect

Repeat with other Small Black Heart

Layers / Merge / Merge Down

Rename Heart3

Activate Lace Heart (large)
Duplicate then
Layers / Merge / Merge Down

Activate Small Lace Heart
Duplicate then
Layers / Merge / Merge Down

Delete all the template heart layers

Crop and Resize

~ Step 2 ~

Activate Heart1
Effects / Plugins / Eye Candy 4000 / Gradient Glow
Glow width - 3.00
Soft Corners - 25
Opacity - 100
Setting - Fat
Colour - Black

swak-01

Then apply plugin again, this time changing the colour to WHITE

Repeat with the Heart3 layer

Activate Heart2 and apply the Gradient Glow in BLACK ONLY

Apply a drop shadow to each layer:
H & V - 0
Opacity - 25
Blur - 8.00
Colour - #000000swak-02

~ Step 3 ~

Paste Letter as new layer
Resize by 50%
Image / Rotate by 20 to the left
Position behind small heart to the left

Paste Flower7 as new layer
Resize by 60%
Position to the left with the Letter

Paste Flower10 as new layer
Resize by 50%
Image / Rotate by 50 to the left
Position on the small heart to the right

Paste Flower9 as new layer
Resuize by 50%
Position with Flower10 on small heart on the right

Select your Text Tool and a nice bold font (I am using Baby Kruffy)

In your Materials Palette use the following settings:
Foreground - #000000
Background - P4 (Pattern)

swak-03
Type out S.W.A.K

Objects / Align / Horizontal Centre in Canvas
Convert to Raster Layer

Effects / Plugins / Eye Candy 4000 / Gradient Glow with the same settings as above IN WHITE

Add a drop shadow:
H & V - 0
Opacity - 25
Blur - 10.00
Colour - #000000

Paste Leaf as new layer
Resize by 25% and position beneath the K

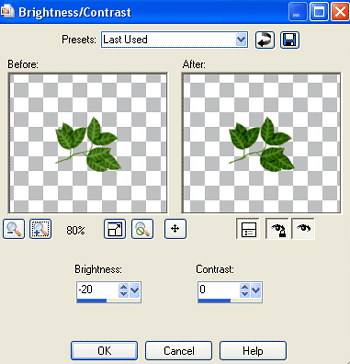
Adjust / Brightness & Contrast / Brightness/Contrast with the following settings:

swak-04
Duplicate and Image / Mirror
Position behind the S

Paste Flower3 as new layer
Resize by 12%
Position OVER the S
Duplicate and move slightly to the right
Duplicate again and place on the opposite side over the K

Paste Flower4 as new layer
Resize by 12%
Position between the two pink flowers over the S
Duplicate and place over the K
Duplicate again and position on the other side of pink flower and move this layer below the K

~ Step 4 ~

Paste tube as new layer
Resize as necessary and place BELOW the text in the centre

Add the same drop shadow as above

Activate Background
Add new raster layer
In Materials Palette select Pattern and find P5
Flood fill layer with pattern

Layers / New Mask Layer / From Image
Locate WSL_Mask192
Source luminance checked
OK

swak-051

In your Layer Palette locate the mask Layer and activate it
Resize layer by 107%
Layers / Merge / Merge Group
Lower opacity to 65

In another font of choice type your name and apply a drop shadow

Add your ©copyright, licence and watermark and you're done!

Thank you for trying my tutorial

::st!na::

©Tutorial written by Stina on 13th February 2009
All rights reserved