Please email me designed.by.stina@gmail.com with your creations. I'd love to see them.

Showing posts with label Tutorials (FTU). Show all posts

Friday, March 16, 2012

Spring Dreams

Supplies

Scrap kit of choice - I am using "Beautiful Day" by Seachell Scrapz which is FTU
Tube of choice - I am using Josephine Wall who is FTU
Plugins:
Xero / Porcelain
Gradient Glow (optional)


Open BD_Element25 and duplicate it
Close off your original

Image / Canvas Resize
Placement:
Top - 150
Bottom - 0
Left and Right - 50

Canvas should now be 600 x 650

Paste a paper of your choice as new layer
Resize by 50%
Move to layer beneath Frame

Open your tube of choice
Resize as necessary
(Tube is STILL below the Frame)

Effects / Plugins / Xero / Porcelain with default settings

With your Selection Tool set to Point to Point
Make a selection of your Tube around the top of the Frame:

Selections / Promote Selection to Layer
Deselect
Move Selection to layer ABOVE Frame

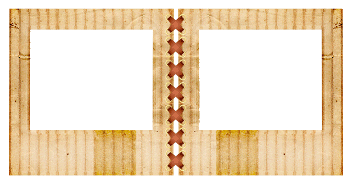
It should now look something like this:

Paste one of Ribbons (Element31 - 34) as new layer
Resize by 65% (you may need to widen your canvas to 550)
Duplicate layer
Set Blend Mode to Soft Light and duplicate again

Choose three flowers and paste them as new layers
Resize first one by 25%
Resize second one by 30%
Resize third one by 35%
Position them to your liking

Paste Elements 22 and 23 as new layers
On first one, Image / Free Rotate to the right
Resize by 15% and position
On second one, Image / Free Rotate to the left
Resize by 15% and position

Now add a new raster layer and move to the bottom
Flood fill with black (for now)

Paste BD_Element27 as new layer
Position behind tag toward the top (or to your liking)
Duplicate, then Image / Flip, then Image / Mirror
Move the duplicate to the layer below

On the first layer, choose your Manual Colour Correction
(you may have to go into View / Customise / Unused Commands, locate Manual Colour Correction and drag it to somewhere on your Toolbar or menu)
Use similar settings to this:
(I used my dropper tool to select the colours - left click for Source and right click for Target)

Apply Manual Colour Correction again WITH SAME SETTINGS!

Now on the second (bottom) layer, apply Manual Colour Correction with these or similar settings:

Using your Eraser tool erase any excess protruding at the top

Delete your background layer as you no longer need it

Activate top layer and add your credits and your name
Save as a PNG and you're done!

Thank you for trying my tutorial!

Tag for Josephine Wall:

© Tutorial written by Stina on 16th March 2012

Thursday, October 27, 2011

Smokin' Hot

Smokin Hot

Supplies

Scrap kit of choice - I am using the FTU Burlesque Collab by Avenue Did Me and Misty Scraps
Tube of choice - I am using the FTU artwork of Medusa-The Dollmaker
Font of choice - I am using TikiSurf
Plugins:
Xero Soft Mood
Xero Porcelain
Eye Candy 5 Impact Gradient Glow
Eye Candy 4000 HSB Noise


Open a new transparent image 600 x 300
Paste a paper of your choice as a new layer (I used ADM-Paper(4)

Paste "bur-ms diamond star" as new layer
Set blend mode to Multiply
Duplicate
Layers / Merge / Merge Down

With your Selection Tool draw out a rectangle along the centre of the canvas

Photobucket

Now paste a paper of choice as a new layer (I used ADM-Paper(1)
Resize by around 75%
Selections / Select all, then Invert
Delete then deselect
Duplicate layer and set blend mode to Multiply
Layers / Merge / Merge Down

Paste a tube of choice as new layer - I am using the FTU artwork of Medusa
Resize to your liking (I resized by 50%)
Position to the right
Duplicate tube layer
Effects / Plugins / Xero / Soft Mood with default settings
Lower the opacity of this layer to around 65 or to your liking
Layers / Merge / Merge Down

Paste another tube of choice (from same artist) as new layer
Resize by around 50% or to your liking
Position to the far left
Duplicate
Effects / Plugins / Xero / Soft Mood with default settings
Lower the opacity of this layer to around 80 or to your liking
Layers / Merge / Merge Down

Paste ADM-Element(10) as new layer (or one similar)
Move it below the tube layers and position toward top of rectangle

You should have something like this:

Photobucket

Add a new raster layer
Flood fill black
Selections / Select All, then Modify / Contract by 2
Delete
Selections / Modify / Contract by 6
Selections / Invert
Activate your bottom layer
Selections / Promote Selection to Layer
Deselect
Move to second layer from the top

Effects / 3D Effects / Inner Bevel with the following settings:

Photobucket

Select a font of your choice - I am using TikiSurf
Type out your name using a black stroke and a colour from the tag
Position between the tubes in the rectangle

Effects / Plugins / Xero / Soft Soft Mood with default settings

Then Effects / Plugins / Alien Skin Eye Candy 5 Impact / Gradient Glow with the following settings:

Photobucket
Photobucket

Now add your credits

ANIMATION

Duplicate your background layer twice


Hide the second and third layers and activate the first

Effects / Plugins / Eye Candy 4000 / HSB Noise with the following settings:

Photobucket

Now hide the first layer and activate the second
Repeat the effect adjusting the random seed to your liking
And repeat once again with the third layer

Hide the second and third background layers again and activate the first
Edit / Copy Merged

Open Animation Shop
Paste as new animation

Back to PSP
Hide first layer and activate second
Edit / Copy Merged

In Animation Shop
Paste after Current frame

Back to PSP
Hide second layer and activate third
Edit / Copy Merged

In Animation Shop
Paste after current frame

Select All
ALT + Enter to open Frame Properties
Change to 20

Save as a GIF and you're done

Thank you for trying my tutorial!

Smokin Hot


© Tutorial written by Stina on 27th October 2011

Burlesque

Burlesque
Supplies

Scrap kit of choice - I am using the FTU Burlesque Collab by Avenue Did Me and Misty Scraps
Tube of choice - I am using the FTU artwork of Medusa-The Dollmaker
Mask of choice - I am using WSL_Mask286
(the alternate one is ww-edgemask6)
Font of choice - I am using PassionsConflictROB
Plugin:
Alien Skin Xenofex 2 Constellation


Open the "bur-ms filigree frame"
Shift + D to duplicate it, then close the original
Image / Canvas Resize
Width - 700
Height - 750
Centre checked

First of all let's greyscale the frame so it is completely black
Adjust / Hue and Saturation / Colourise
Then set both to 0

With your Selection tool on Point to Point draw around the frame parts, keeping in the black borders
(I tried using the Magic Wand inside the frames but there appears to be some "noise" the wand picks up)

Photobucket

KEEP SELECTED!

Paste a paper of your choice as a new layer
Move paper below frame
Selections / Invert
Delete

KEEP SELECTED!

Paste tube of choice as new layer
I am using the FTU artwork of Medusa-The Dollmaker and the tube "Burlesque", which I mirrored before pasting as new layer
Resize (I resized by 75%) and position to your liking
Press delete to remove the excess outside the frame

KEEP SELECTED!

Duplicate tube and position to your liking in the right frame
Move below the first tube layer
Delete (to remove excess)

Adjust / Hue and Saturation / Colourise
Set both to 0
This layer should now be greyscale

Photobucket

STILL SELECTED!

Now I mirrored the tube back to its original state
Paste as new layer and resize by 75%
Position in the left from to your liking
Delete to remove the excess
And deselect

This is what I now have:

Photobucket

Paste the ADM-Element(7) as new layer and resize by 90%
Position toward lower right

Paste "bur-ms word art 1" as new layer
Resize by 95% and position to lower right over the bottom of the Feathered fan

Paste another paper of choice and move it to the bottom layer of the canvas
Layers / Load/Save Mask / Load Mask from Disk
Select Mask of choice - I am using WSL_Mask286
Apply
Layers / Merge / Merge Group

Now before we do anything else resize the tag to your liking

Add your credits to the artist etc.
Then add your name in a font of your choice


ANIMATION

I also animated the Word Art but for simplicity's sake I will refer only to the Mask layer - it is up to you if you wish to animate the Word Art as well

Now for the animation we need to have a background because the optimisation will add ugly black excess to anything transparent
So before we animate just add a white background layer to your canvas


Duplicate the mask layer twice
Hide the second and third layers and activate the first

Effects / Plugins / Alien Skin Xenofex 2 / Constellation with the following settings:

Photobucket

Hide the first layer and activate the second layer
Repeat effect, adjusting the Random Seed

Repeat with the third layer once again

Hide second and third layers and activate the first layer again
Edit / Copy Merged

Go to Animation Shop
Paste as New Animation

Back to PSP
Hide first layer and activate second layer
Edit / Copy Merged

In Animation Shop
Paste AFTETR current Frame

Back to PSP
Hide second layer and activate third
Edit / Copy Merged

In Animation Shop
Paste after current frame

Select all frames
ALT + Enter to open Frame Properties
Change to 20

Save as a GIF and you're done!

Thank you for trying my tutorial!


Here is another version using a different mask:
Burlesque 02

© Tutorial written by Stina on 27th October 2011

Thursday, September 29, 2011

The Spideress (with two animated versions)

The Spideress

All tutorials require a basic knowledge of PSP

Supplies

Scrap kit of choice - I am using "Gothic Halloween" by Kittz Kreations
Tube of choice (black and white tube works best) - I am using one by Anna Ignatieva
Font of choice - I am using Addams
Plugin - Xero / Porcelain
Animation Shop


Open a new 700 x 300 transparent image

Select All
Then Selections / Modify / Contract by 40
Flood fill selection with black

KEEP SELECTED!!

Selections / Modify / Contract by 10
Press Delete

Selections / Modify / Expand by 5
Paste a paper of choice as a new layer
(I used GH-P6)
Move it to below the frame you just made

Selections / Invert
Delete and deselect

Now paste your tube of choice and position to your liking
Move it to the top layer above the frame
Position it so some of the tube overhangs the top of the border frame

With your Magic Wand select the inside of the border frame
Activate your tube layer again and with your Eraser Tool carefully erase the excess AT THE BOTTOM of the tube
Deselect

Effects / Plugins / Xero / Porcelain with the following settings:
Softness - 50
Strength - 128
Brightness - 128
Red Channel - 0
Green Channel - 0
Blue Channel - 100

Now beneath the tube and frame layers add a new raster layer
Use your Selection Tool set to rectangle with Feather on 0
Draw out a rectangle vertically centred and to the left
Try and keep the same amount of distance between the top, bottom and the left to the frame

DBS_sp_01

Now flood fill the selection Black
Duplicate layer
Selections / Modify / Contract by 5
Press delete
Then paste your tube again but mirror it BEFORE pasting it or only the selection mirrors
Selections / Modify / Expand by 3
Selections / Invert
Delete then deselect
Position this layer BELOW the inner frame
Apply the same effect with the Porcelain filter

DBS_sp_02

Paste GH-SkullWeb as new layer and position it BENEATH the inner frame to its centre
Resize by about 90% Bicubic

Paste GH-M2 as a new layer and position to the upper right corner of frame
Activate Background layer and use your Magic Wand to select OUTSIDE the background
On the Moon layer press Delete to remove the excess
Deselect

Now lets go back to the top layer
Paste GH-GothicGoblet as a new layer
Resize by 60% and position to the left just slightly overhanging the outer border

Paste GH-Skull as new layer
Resize by 45% and position next to the Goblet

Paste GH-BloodSpatter as new layer
Resize by 60%
Position to the right to your liking
Duplicate layer, then set blend mode to Multiply
Layers / Merge / Merge Down

Paste GH-PearlString as new layer
Free Rotate by 10 to the left
Resize by 55%
Position to the bottom right and move to the bottom layer
Duplicate and position second layer to the bottom left
Layers / Merge / Merge Down

Paste GH-GemSpider as new layer
Free Rotate by 90 to the right
Resize by 25%
Duplicate three times so that you have FOUR spider layers
Position along the bottom of the frame spaced evenly apart

I added my copyright and name at this point, since the next steps are the animation
(You will also need to add a white background as the optimationisation in Animation Shop will create black dithering around the elements in the tag)


ANIMATION #1

Now got to the image layer in the second smaller frame
Duplicate three times
On the first layer keep the opacity at 100%
On the remaining three lower them to:
75
50
25
Turn off the visibility of these layers leaving only the first visible

Edit / Copy Merged
Open Animation Shop
Paste as new animation

In PSP
Close off first layer and open 2nd
Repeat copy

In Animation Shop
Paste AFTER current frame

Repeat steps with remaining frames, turning the last layer off so you have just a black image for the last frame

THEN
In Animation Shop
Select All Frames
Copy, then paste as new animation

Select all frames again
Animation / Reverse frames

Select all frames again
Copy and then activate LAST frame in original animation
Then paste AFTER current frame

Select all frames once again
Animation / Frame Properties
Change to 20

Save as a gif and you're done!


ANIMATION #2

The Spideress02

Now for the second animation!

Hide the bottom Pearl String layer
Unhide the tube in the frame at whatever opacity you choose

Activate your first spider layer
Copy merged

In Animation Shop
Paste as a new animation

Repeat steps for the rest of the spiders, pasting AFTER current frame

Select All frames
Animation / Frame Properties
Change to 35

Now save as a gif and you're done!


Thank you for trying my tutorial!


© Tutorial written by Stina on 29th September 2011

Tuesday, September 20, 2011

Witch Way

Photobucket

All tutorials require a basic knowledge of PSP

Supplies

Tube of choice - I am using 68 Ways to Scream by Popeye Wong
Scrap kit of choice - I am using "Halloween Night" by Foxys Designz which is FTU
Font of choice - I am using Thriller
Plugins:
Xero / Porcelain
Photo Effex / Scanlines
Eye Candy 4000 / HSB Noise

OK, let's get started..........


Open a new transparent image 600 x 250

Paste a paper of your choice onto the canvas and position to your liking
I used Paper7_FD

Paste SpiderWeb_FD as new layer
Position to the left or to your liking
In the layer palette change the Blend Mode to Screen, then Duplicate layer
Layers / Merge / Merge Down

Paste Spider_FD as new layer
Image / Free Rotate / Left by 20.00
Resize by 20%
Position in the web to your liking
Duplicate and set Blend Mode to Screen
Layers / Merge / Merge Down

Paste Glitter_FD
No need to position it as it should fall directly in the centre

Open your tube of choice
For this I am using Popeye Wong's "68 Ways to Scream"

Paste the tube and position it to your liking
Using your Freehand Selection Tool on Point to Point draw around the excess and delete

Paste the tube again and position once again
Draw around the excess once more with your Selection Tool as above and delete the excess

Next with the Selection Tool I cut around the bat in the tube
Then I copied and paste positioning him to my liking on my canvas
Then resized him by about 70%

Paste MoonBats_FD as new layer
Resize by 35% and position partially behind one of the witches in your tube

Now go to the Glitter layer
Add a new raster layer
Choose your Selection Tool and set it to Rectangle
Draw a narrow rectangle the length of the canvas near the bottom

On your material palette select your foreground to a light colour
I used the dropper tool to pick a colour from the moon - #dddddd (which you need to do BEFORE you make your selection)
Flood fill rectangle with your colour
Deselect

Go to Effects / Plugins / PhotEffex / Scanlines
Default settings
Lower opacity to around 35

Go back to your top layer
Add a new raster layer and flood fille with the same light colour
Selections / Select All

Selections / Modify / Contract by 2
Delete the deselect

With your Magic Wand Tool select OUTSIDE this border
Activate your Recangle layer and delete
Then deselect

Now you may want to delete some of the excess of the glitter layer now with your Eraser Tool

Hide the Background, Spider Web and two border layers
Then Layers / Merge / Merge Visible

You should now have four layers -
Background, Spiderweb, Merged layer and the Border

Activate your Merged layer
Effects / Plugins / Xero / Porcelain
Default settings

Repeat Porcelain effect on Border layer
Duplicate then Layers / Merge / Merge Down

At this point I added my credits

Select a font of your choice
I am using Thriller
Make sure your foreground and background are active with the colours of your choice

I am using Black for the foreground with a stroke of 1.0
Background is #dddddd

Type out your name
Add any effects of your choice and apply a drop shadow

Repeat Porcelain effect altering the Blue Channel to 100

Now let's animate!

First hide your background layer
Then merge the other layers together

Now activate your background layer
Duplicate twice
Hide the last two and activate the first layer

Effects / Plugins / Eye Candy 4000 / HSB Noise
with the following settings:
Photobucket

Now activate the second layer
Repeat the plugin effect changing the Random Seed

Activate the third layer and repeat again

Go over each layer with the Porcelain effect changing the Blue Channel back to 255

Now hide background layers 2 and 3 once again leaving the first background layer visible with the Merged layer

Edit / Copy Merged

Open Animation Shop
Paste as new animation

In PSP
Activate second background layer and Copy Merged

In Animation Shop
Paste after Current Frame

In PSP
Activate third background later and Copy Merged

In Animation Shop
Paste after Current Frame

Select all frames
ALT + Enter to open the Frame Properties box
Change to 25

Now save as a GIF and you're done!

Thank you for trying my tutorial.


Here is a still version in PNG format
Photobucket

And here is another version using the same tube differently:
Photobucket

© Tutorial written by Stina 20th September 2011

Thursday, July 8, 2010

More than I Deserve


Supplies

Scrap kit of choice - I am using "Here Come the Newborns" by me (Designs by Stina) available from Cullenary Delights
Tube of choice - I am using the artwork of Loga90 which is available with a permission
Fonts of choice - I am using P22 Dearest Swash
Plugins: dsb Flux > Linear Transmission


Let's begin...


Open a blank transparent image 800 x 600

Open Frame05 and paste as new layer
Leave in place

Select inside Frame with Magic Wand
Selections > Modify
Then Expand by 10

Open Paper16 and paste as new layer
Layers > Arrange > Move to Bottom
Resize by 35%
Selections > Invert
Then Delete

KEEP SELECTED!!

Open your tube of choice and paste as new layer
Resize to your liking
Then Delete to remove excess outside selection
Deselect

Duplicate your tube layer
On the bottom copy Adjust > Blur > Guassian Blur
Set your Radius to 10.00
Lower opacity to 55

Duplicate this layer
Then Effects > Textures > Mosaic - Antique with the following settings:


Then, Adjust > Blur > Motion Blur
Angle - 140.00
Strength - 100

Activate your paper layer again (bottom layer)
Select OUTSIDE layer with your Magic Wand
On your Blurred layer, press Delete
Then on your Mosaic layer, Delete again
Deselect

Activate top layer
Paste Feather as new layer
Resize by 65%
Position to the left of the Frame with the spine of the feather running along the swirl of the Frame

Paste a Flower as new layer
Image > Rotate by 20 to the right
Resize by 30%
Position to the right of the Frame

Open a Ribbon and paste as new layer
Resize by 60%
Position along bottom of Frame

Open THREE charms of your choice
Resize each by 20%
Position each of them at the knots on the Ribbon
Merge Charms as one layer
Then Layer > Arrange > Move Down
(this will position them the layer below the Ribbon)

Paste a GlitterSplat of choice as new layer
Resize by 30%
Position between 1st and 2nd charms over Ribbon

Paste Heart of choice as new layer
Image > Rotate by 10 to the right
Resize by 18%
Position to the right, then Layers > Arrange > Send to Bottom
Position to your liking

Duplicate Heart
Image > Rotate by 20 to the right
Resize by 60%
Position slightly below first heart

Paste Moon as new layer
Resize by 25%
Position to the upper left

Paste Heart of choice again
Resize by 85%
Move Heart down slightly


Effects > Plugins > dsb fluxx > Linear Transmission with the following settings:


Crop and resize image to your liking

Add your watermark and credits, and any word art or text of your choice
Add your name (I used Eye Candy Gradient Glow on my name)
Save your tag as a PNG (to remain transparent) and you're done!


© Tutorial written by Stina on 7th July 2010
All rights reserved

Sunday, September 6, 2009

Good Girl Gone Badder


Supplies

Scrap kit of choice - I am using "Good Girl Gone Bad" by Butterfly Flutter Creations which is a freebie available from her blog
Tubes of choice - I am using the lovely artwork of Jamie Kidd available with a licence from CILM
**PLEASE DO NOT USE HER ARTWORK WITHOUT THE APPROPRIATE ARTWORK**
Fonts of choice - I am using 2Peas Bad Attitude and A&S Snapper Script
Plugins: dxb Flux > Bright Noise
Eye Candy 4000 > Gradient Glow (optional for text)


Let's begin...


Open a new 600 x 600 blank canvas flood-filled white

Paste Frame1, 2 or 3 as new layer
Resize by 60%

Select inside Frame with Magic Wand
Selections > Modify > Expand by 10
Add new raster layer
Paste Paper of choice INTO selection
Layers > Arrange > Move Down

KEEP SELECTED!!

Paste two Tubes of choice as new layers
Resize as necessary and position inside Star frames
Selections > Invert
Delete then deselect
Rename Tube1 and Tube2


Paste Splatter as new layer
Layers > Arrange > Send to Bottom
Resize by 70%

Adjust > Blur > Gaussian Blur with a radius of 10.00

Effects > Texture Effects > Mosaic - Antique with the following settings:


Paste MusicNotes of choice as new layer
Image > Rotate by 15 to the left
Resize by 70%
Position to your liking


Activate top layer

Paste a Star Button as new layer
Resize by 8%
Duplicate several times and position around tag

Paste another Star Button as new layer
Resize by 5%
Duplicate several times and position around tag

Paste Tube of choice as new layer
Resize as necessary
Position in centre
Rearrange Star Buttons to liking around tube

Hide all layers except Star Buttons
Layers > Merge > Merge Visible
Unhide layers again

Paste a Keychain as new layer
Image > Rotate by 15 to the right
Resize by 10%
Position to the right hanging from the Frame

Paste another Keychain as new layer
Repeat rotation and resizing, then
Image > Mirror
Position to the left hanging from Frame

Crop and then resize

Using your Magic Wand select the "circles" on the Frame
Selections > Modify > Expand by 2


Effects > Plugins > dsb Flux > Bright Noise with the following settings:


Select your Preset Shape Tool to Ellipse and draw out a circle in the upper left

Select your Text Tool and font of choice
I am using 2Peas Bad Attitude
Foreground - #000000
Background - I am using one of the papers from the kit
Stroke width - 1.0

Type out your text on the curve and position


Open your Layer Palette and Vector Layer
Turn off the Ellipse then,
Convert to raster layer
Apply a drop shadow of choice

Select another font of choice
I am using A&S Snapper Script
Text Colour Black

Type out your name
Objects > Align > Horizontal Centre in Canvas
Convert to raster layer
Apply a Gradient Glow and drop shadow of choice

Finally, add your © copyright, licence and watermark, then save as a GIF or JPG and you're done!


** IF YOU WISH TO ANIMATE PLEASE FOLLOW THESE NEXT STEPS **

This is an easy animation!

Activate your Tube1 layer
Lower opacity to 50
Edit > Copy Merged

Open Animation Shop
Edit > Paste as New Animation

Back to PSP
Return opacity to 100 and lower opacity of Tube2 to 50
Edit > Copy Merged

In Animation Shop
Edit > Paste after Current Frame

Select All and change Frame Properties to 50
Save as a gif and you're done!

Thanks for trying my tutorial!

::st!na::


Here is a non-animated version:


© Tutorial written by Stina on 6th September 2009
All rights reserved

Sunday, August 23, 2009

A Perfect Companion


Supplies

Scrap kit of choice - I am using two kits from the freebie blog train "Mommy Can We Keep Him?" by Miggins and Royanna
Tube of choice - I am using the lovely artwork of Bovar
WSL_Mask185 by Chelle available from her blog
Fonts of choice - I am using 2Peas Renaissance and Alex Brush
Plugin: Eye Candy 4000 > HSB Noise

Let's begin....

Open a new 750 x 600 blank canvas flood-filled white

Paste Royanna_SlideMount as new layer
Resize by 40%
Position to the right
Duplicate, then Image > Mirror
So they are now side by side
Layers > Merge > Merge Down

Paste Miggs_elem25 as new layer
Resize by 38%
Position between the two slide frames
Layers > Merge > Merge Down


Select inside the Frames with Magic Wand
Selections > Modify > Expand by 10
Add new raster layer
Layers > Arrange > Move Down
Paste paper of choice INTO selection

KEEP SELECTED!!

Paste Tube of choice as new layer
Image > Mirror
Position in one of the Frames
Selections > Invert
Delete then deselect
Lower opacity to around 45

Paste Tube as new layer again
Bring to Top
Resize as necessary and position in opposite slide frame

Select inside the Frame your tube is positioned in
Selections > Invert
Selections > Modify > Contract by 2
Selections > Modify > Feather by 2
Activate tube layer and erase the overhanging excess
Deselect

Paste Miggs_elem23 as new layer
No need to resize
Position toward the lower portion of Frames

Paste Miggs_elem6 as new layer
Image > Rotate by 65 to the right
Resize by 30%
Position to the upper right

Paste Miggs_elem38 as new layer
Image > Rotate by 20 to the right
Resize by 35%
Position in upper right to fasten Bone to Frame


Paste Miggs_elem14 as new layer
Resize by 35%
Position in lower right
Duplicate, then Image > Mirror

Paste a Flower element as new layer
Resize by 35%
Repeat with three more Flowers and position to liking
Paste Royanna_Stamp01 as new layer
Image > Rotate by 20 to the left
Resize by 7%
Duplicate and position around Frame

Paste Paper of choice as new layer
Layers > Arrange > Send to Bottom
Adjust > Blur > Gaussian Blur with a radius of 10.00

Layers > New Mask Layer > From Image
Apply WSL_Mask185
OK
Layers > Merge > Merge Group

Crop and resize to liking

Select your Text Tool and font of choice
I am using 2Peas Rennaissance and Alex Brush
Text Colour to match tag - I am using #4d3a3f

Type out Text of choice and position in centre above Frame
Apply a drop shadow of choice
Using the same text, position in Frame with the lowered opacity
Set blend mode to Screen

Select another font of choice
I am using 2Peas Renaissance
Same text colour

Type out your name
Objects > Align > Horizontal Centre in Canvas
COnvert to raster layer
Apply any effects and drop shadow of choice

Finally, add your © copyright, licence and watermark, then save as a GIF or JPG and you're done!


** IF YOU WISH TO ANIMATE PLEASE FOLLOW THESE NEXT STEPS **

Activate your Frame Mask layer
Duplicate twice and rename Noise1, Noise2 and Noise3

Activate Noise1 and hide Noise2 and Noise3
Effects > Plugins > Eye Candy 4000 > HSB Noise with the following settings:


Hide Noise1 and activate Noise2
Repeat HSB Noise again adjusting the Random Seed

Hide Noise2 and activate Noise3
Repeat HSB Noise once again, adjusting the Random Seed

Activate Noise1 and hide Noise2 and Noise3
Edit > Copy Merged

Open Animation Shop
Edit > Paste as New Animation

Back to PSP
Hide Noise1 and activate Noise2
Edit > Copy Merged

In Animation Shop
Edit > Paste after Current Frame

Back to PSP
Hide Noise2 and activate Noise3
Edit > Copy Merged

In Animation Shop
Edit > Paste after Current Frame

Now save as a GIF and you're done!

Thanks for trying my tutorial!

::st!na::


Here is a non-animated version:


© Tutorial written by Stina on 22nd August 2009
All rights reserved

Sunday, August 9, 2009

Fallen Angel


Supplies

Scrap kit of choice - I am using "Majestic Midnight Freebie Add On" by Tanya of Scraps by Joe's Wife available from her blog
Tube of choice - I am using the FTU artwork of Melody Blackburn
Fonts of choice - I am using 2Peas Bad Attitude and LD Twylight
Plugins: Eye Candy 4000 > Gradient Glow
Alien Skin Eye Candy 5: Nature > Fire

**This is a fairly simple tutorial with animation**
(Can be used with or without a scrap kit)


Let's begin...

Open a new 500 x 250 blank transparent canvas

Paste Paper of choice as new layer (I used Paper4)
Adjust > Blur > Radial Blur with the following settings:


Paste your Tube of choice as new layer
Resize as necessary
Position to your liking

Select Text Tool and font of choice
I am using 2Peas Bad Attitude
Foreground - #000000
Background - null
Stroke width - 2.0

Type out Text of choice and position
Convert to raster layer

On same layer select outside Text with your Magic Wand
Selections > Invert


Effects > Plugins > Eye Candy 4000 > Gradient Glow with a slight Gradient Glow
Lower opacity of Glow to around 35
Deselect

Paste Spider Web as new layer
Resize by 20%
Position to your liking
Set blend mode to Multiply
Lower opacity to 70

Paste Spider as new layer
Image > Rotate by 25
Resize by 15%
Position in Web or to your liking

Paste Candles as new layer
Resize by around 70%
Position to your liking

Add drop shadows of choice to layers

Add a new raster layer
Flood-fill black
Select All
Selections > Modify > Contract by 10
Delete

KEEP SELECTED!!

Selections > Invert
Apply the following drop shadow:
V - 3
H - 3
O - 30
Blur - 8.00
Colour - #000000

Repeat drop shadow changing the Vertical and Horizontal to -3
Deselect

Select Text Tool and font of choice
I am using LD Twylight
Text colour - Black
Type out your name and position to your liking
Convert to raster layer
Apply same or similar Gradient Glow as above

Finally, add your © copyright, licence and watermark, then save as a GIF or JPG and you're done!


** IF YOU WISH TO ANIMATE PLEASE FOLLOW THESE NEXT STEPS **

Activate your Candles layer
Duplicate twice and rename Candles1, Candles2 and Candles3

With your Freehand Tool draw out the shape of flames on each candle


Activate Candles1
Effects > Plugins > Alien Skin Eye Candy 5: Nature > Fire with the following settings:


Hide Candles1 and activate Candles2
Repeat Fire effect, adjusting Random Seed

Hide Candles2 and activate Candles3
Repeat Fire effect, adjusting Random Seed once more

Now to animate!

Activate Candles and hide the other two Candle layers
Edit > Copy Merged

Open Animation Shop
Edit > Paste as New Animation

Back to PSP
Hide Candles1 and activate Candles2
Edit > Copy Merged

In Animation Shop
Edit > Paste After Current Frame

Back to PSP
Hide Candles2 and activate Candles3
Edit > Copy Merged

In Animation Shop
Edit > Paste After Current Frame

Now save as a GIF and you're done!

Thanks for trying my turorial!

::st!na::


Here is a non-animated version:


© Tutorial written by Stina on 9th August, 2009
All rights reserved