 Supplies
Scrap kit of choice - I am using "Beautiful Day" by Seachell Scrapz which is FTU
Tube of choice - I am using Josephine Wall who is FTU
Plugins:
Xero / Porcelain
Gradient Glow (optional)
Open BD_Element25 and duplicate it
Close off your original
Image / Canvas Resize
Placement:
Top - 150
Bottom - 0
Left and Right - 50
Canvas should now be 600 x 650
Paste a paper of your choice as new layer
Resize by 50%
Move to layer beneath Frame
Open your tube of choice
Resize as necessary
(Tube is STILL below the Frame)
Effects / Plugins / Xero / Porcelain with default settings
With your Selection Tool set to Point to Point
Make a selection of your Tube around the top of the Frame:
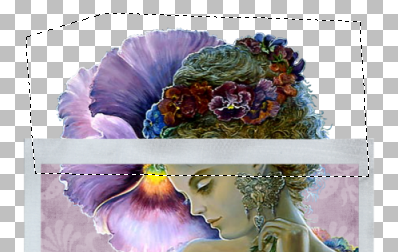
Selections / Promote Selection to Layer
Deselect
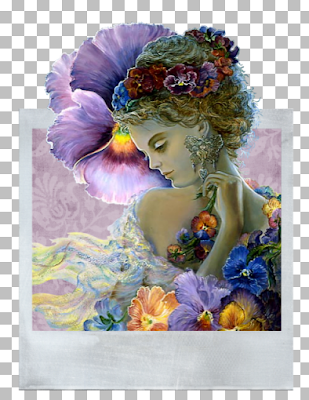
Move Selection to layer ABOVE Frame
It should now look something like this:
Paste one of Ribbons (Element31 - 34) as new layer
Resize by 65% (you may need to widen your canvas to 550)
Duplicate layer
Set Blend Mode to Soft Light and duplicate again
Choose three flowers and paste them as new layers
Resize first one by 25%
Resize second one by 30%
Resize third one by 35%
Position them to your liking
Paste Elements 22 and 23 as new layers
On first one, Image / Free Rotate to the right
Resize by 15% and position
On second one, Image / Free Rotate to the left
Resize by 15% and position
Now add a new raster layer and move to the bottom
Flood fill with black (for now)
Paste BD_Element27 as new layer
Position behind tag toward the top (or to your liking)
Duplicate, then Image / Flip, then Image / Mirror
Move the duplicate to the layer below
On the first layer, choose your Manual Colour Correction
(you may have to go into View / Customise / Unused Commands, locate Manual Colour Correction and drag it to somewhere on your Toolbar or menu)
Use similar settings to this:
(I used my dropper tool to select the colours - left click for Source and right click for Target)
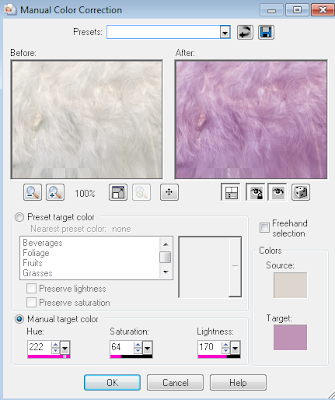
Apply Manual Colour Correction again WITH SAME SETTINGS!
Now on the second (bottom) layer, apply Manual Colour Correction with these or similar settings:
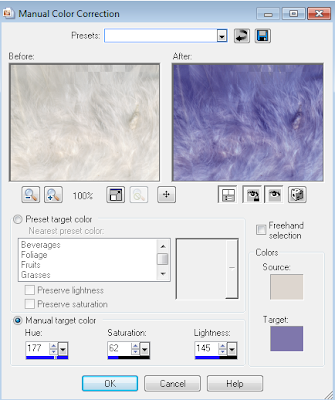
Using your Eraser tool erase any excess protruding at the top
Delete your background layer as you no longer need it
Activate top layer and add your credits and your name
Save as a PNG and you're done!
Thank you for trying my tutorial!
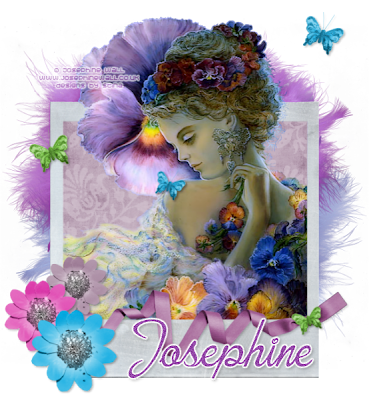
Tag for Josephine Wall:
© Tutorial written by Stina on 16th March 2012

No comments:
Post a Comment