Supplies
Scrap kit of choice - I am using "Cotton Tail" by Pimp'd Dezigns which is available from Paradise 4 Scrappers and Stargazer Scraps
Tube of choice - I am using the lovely artwork of Ed Muroniuk which can be purchased from CILM
**PLEASE DO NOT USE HIS ARTWORK WITHOUT THE APPROPRIATE LICENCE**
WSL_Mask84 by Chelle available from her blog
Fonts of choice - I am using Cheri and Bello Script
Plugin: Eye Candy 4000 Gradient Glow
Let's begin...
Open a new 700 x 700 blank canvas flood-filled white
Paste Frame02 as new layer
Resize by 85%
Resize by 85%
Select inside the Frame with your Magic Wand
Selections > Modify > Expand by 10
Add a new raster layer
Paste PP01 into Selection
Deselect
Layers > Arrange > Move Down
Selections > Modify > Expand by 10
Add a new raster layer
Paste PP01 into Selection
Deselect
Layers > Arrange > Move Down
Paste Flower01 and Flower02 as new layers respectively
Layers > Arrange > Move Down
Place each in position
Layers > Arrange > Move Down
Place each in position
Paste Flower09 and Flower10 as new layers
Resize by 70%
Position each upon each Flower respectively
Resize by 70%
Position each upon each Flower respectively
Paste Flower03 and Flower06 as new layers
Resize by 70%
Position alongside other flowers on bottom layer
Resize by 70%
Position alongside other flowers on bottom layer
Close off Background, Frame and Frame background
Activate one of the Flower layers
Layers > Merge > Merge Visible
Unhide all layers
Activate one of the Flower layers
Layers > Merge > Merge Visible
Unhide all layers
Paste Wrap01 as new layer
Resize by 90%
Resize by 90%
Select the area outside the Frame with your Magic Wand
Selections > Modify > Contract by 2
Selections > Modify > Feather by 2
Selections > Modify > Contract by 2
Selections > Modify > Feather by 2
Use your Erase Tool to erase each end of the Wrap then deselect
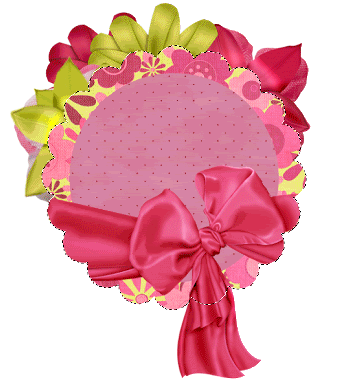
Paste Vine as new layer
Resize by 70% and place to the right
Resize by 70% and place to the right
Activate Wrap layer and select the area around it with your magic Wand
Then erase part of the Vine overlapping the Wrap
Deselect
Then erase part of the Vine overlapping the Wrap
Deselect
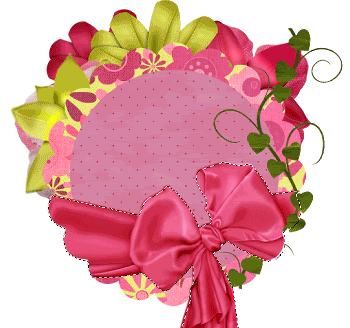
Paste Greens01 as new layer
Image > Rotate by 40 to the left
Layers > Arrange > Send to Bottom
Position behind flowers
Duplicate then Image > Rotate by 20 to the right
Duplicate then Image > Mirror
Position greenery to your liking
Image > Rotate by 40 to the left
Layers > Arrange > Send to Bottom
Position behind flowers
Duplicate then Image > Rotate by 20 to the right
Duplicate then Image > Mirror
Position greenery to your liking
Paste Bunny as new layer
Resize by 35%
Position to the left of the Wrap and Frame
Resize by 35%
Position to the left of the Wrap and Frame
Paste your tube as a new layer
Position behind Wrap
Erase any excess protruding below the Wrape and Frame
Add a slight drop shadow
Position behind Wrap
Erase any excess protruding below the Wrape and Frame
Add a slight drop shadow
Crop and resize
Paste PP10 as new layer
Layers > Arrange > Send to Bottom
Layers > New Mask Layer > From Image
Locate WSL_Mask84
OK
Layers > Merge > Merge Group
Lower opacity to around 30
Layers > Arrange > Send to Bottom
Layers > New Mask Layer > From Image
Locate WSL_Mask84
OK
Layers > Merge > Merge Group
Lower opacity to around 30
Select your Preset Shape Tool to Ellipse
Foreground - #000000
Background - null
Foreground - #000000
Background - null
Draw out a circle around your tag
Select your Text Tool and font of choice
I am using Cheri
Choose two colours from your tube and/or scrap
Set the Materials Palette:
Foreground - #ff9bb0
Background - #d50058
I am using Cheri
Choose two colours from your tube and/or scrap
Set the Materials Palette:
Foreground - #ff9bb0
Background - #d50058
Stroke Width - 1.00
Rest your mouse over the Ellipse till you see an A with a curve beneath it
Type out your text and position
Type out your text and position
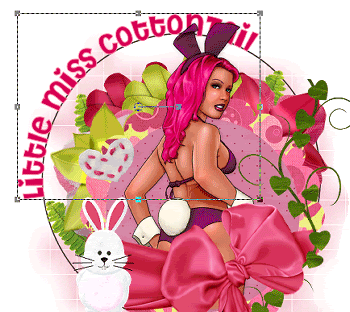
In your Layer Palette open your Vector Layer
Hide the Ellipse and convert to raster layer
Add a slight drop shadow
Apply a Gradient Glow and another small drop shadow
Hide the Ellipse and convert to raster layer
Add a slight drop shadow
Apply a Gradient Glow and another small drop shadow
Select another font of choice - I am using Bello Script
Type out your name
Objects > Align > Horizontal Centre in Canvas
Convert to raster layer
Apply Gradient Glow and drop shadow
Type out your name
Objects > Align > Horizontal Centre in Canvas
Convert to raster layer
Apply Gradient Glow and drop shadow
Finally, add your © copyright, licence and watermark the save as a GIF or JPG and you're done
Thanks for trying my tutorial!
::st!na::
© Tutorial written by Stina on 6th April 2009
All rights reserved