Please email me designed.by.stina@gmail.com with your creations. I'd love to see them.

Showing posts with label Steve Baier. Show all posts

Thursday, June 18, 2009

Splish Splash


Supplies

Scrap kit of choice - I am using "Splish Splash Splosh" by Seachell Scrapz which is a freebie on her blog
Tube of choice - I am using the lovely artwork of Steve Baier available with a licence from UpYourArt
**PLEASE DO NOT USE HIS ARTWORK WITHOUT THE APPROPRIATE LICENCE**
Splish Splash WordArt from "Splish Splash Splosh" by Creative Intentionz available from Twilight Scraps
WSL_Mask216 by Chelle available from her blog
Font of choice - I am using 2Peas High Tide
Plugins: Penta.com Color Dot
Xero Porcelain
Eye Candy 4000 HSB Noise


Ready? Let's begin....


Open a new 600 x 600 blank canvas flood-filled white

Paste Element53 Frame as new layer
Resize by 50%

Select the inside of your Frame with Magic Wand
Selections > Modify > Expand by 10
Add new raster layer
Paste Paper2 (or one of choice) INTO selection
Layers > Arrange > Move Down

Effects > Plugins > Penta.com > Color Dot with default settings

KEEP SELECTED!!

Paste Tube or Image of choice as new layer
Resize UP as necessary
I used the image supplied with my Tube and resized by 150%
Position to liking
Selections > Invert
Delete
Lower opacity to 30
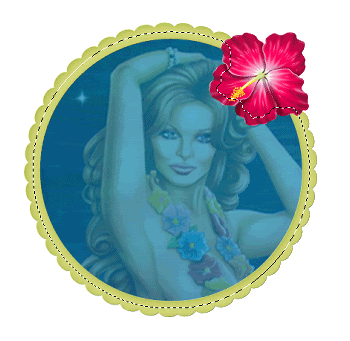

STILL SELECTED!!

Paste Element20 (Waves) as new layer
Resize by 40%
Position in Frame to liking
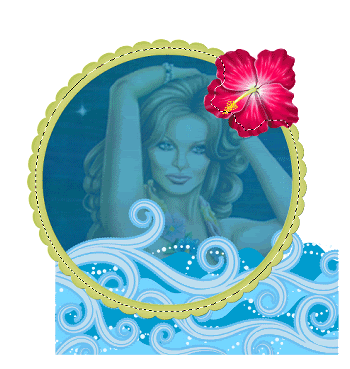

Delete then deselect

Paste Tube as new layer
Layers > Arrange > Bring to Top
Resize as necessary and position to the left

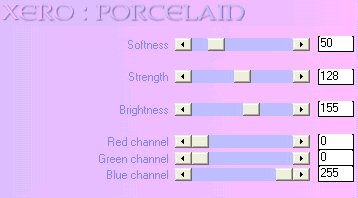
Effects > Plugins > Xero > Porcelain with the following settings:

Paste Element17 (Coral) as new layer
Resize by 20%
Position in lower right

Paste Element 10 (Fish in Coral) as new layer
Resize by 15%
Position behind Coral so that it is "peeking out" *g*
Use your Eraser to erase any excess around it

Paste Element1 (Clam with Pearl) a new layer
Resize by 12%
Position alongside Coral

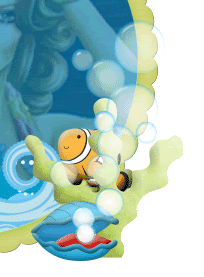
Paste Element22 (Bubbles) as new layer
Image > Mirror, then
Image > Rotate by 30 to the left
Resize by 40%
Position with the bottom bubble over the Pearl

Paste any other elements you wish to your liking

Now paste Element (PalmTree) as new layer
Resize by 35%
Position in the upper right behind Flower, then
Layers > Arrange > Send to Bottom

Open Element23 (Clouds) and make a selection around one of the clouds
Edit > Copy
Paste as new layer and position behind Palm Tree in upper right


Paste Paper of choice as new layer (I used Paper7)
Resize by 75%
Layers > Arrange > Send to Bottom

Layers > New Mask Layer > From Image
Apply WSL_Mask216

DO NOT MERGE!!

Open Layer Palette and activate Mask layer
Resize by 110%
Layers > Merge > Merge Group
Lower opacity to 45

Apply drop shadows of choice to your elements

Paste a WordArt of choice or two as new layers
I am using two WordArts from Creative Intentionz's "Splish Splash Splosh" kit
Resize as necessary and position to liking

Crop and resize tag

Select your Text Tool and font of choice
I am using 2Peas High Tide
Foreground - #0176a2
Background - #FFFFFF
Stroke width - 1.5

Type out your name
Objects > Align > Horizontal Centre in Canvas
Convert to raster layer
Apply drop shadow of choice

Finally, add your © copyright, licence and watermark, then save as GIF or JPG and you're done!


** IF YOU WISH TO ANIMATE PLEASE FOLLOW THESE NEXT STEPS **

Activate your Frame Background layer
Duplicate twice and rename Water1, Water2 and Water3

Activate Water1 and hide Water2 and Water3

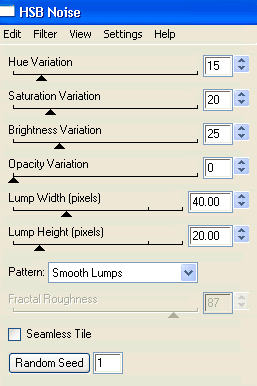
Effects > Plugins > Eye Candy 4000 > HSB Noise with the following settings:

Hide Water1 and activate Water2
Repeat HSB Noise again adjusting the Random Seed

Hide Water2 and activate Water3
Repeat HSB Noise once again, adjusting the Random Seed

Activate Water1 and hide Water2 and Water3
Edit > Copy Merged

Open Animation Shop
Edit > Paste as New Animation

Back to PSP
Hide Water1 and activate Water2
Edit > Copy Merged

In Animation Shop
Edit > Paste after Current Frame

Back to PSP
Hide Water2 and activate Water3
Edit > Copy Merged

In Animation Shop
Edit > Paste after Current Frame

Select All and change the Frame Properties to 20
Now save as a GIF and you're done!

Thanks for trying my tutorial!

::st!na::


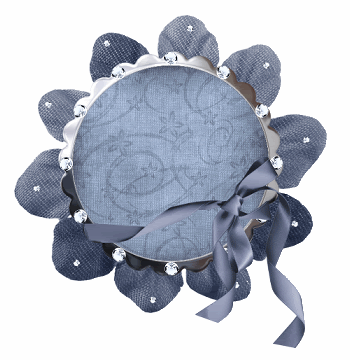
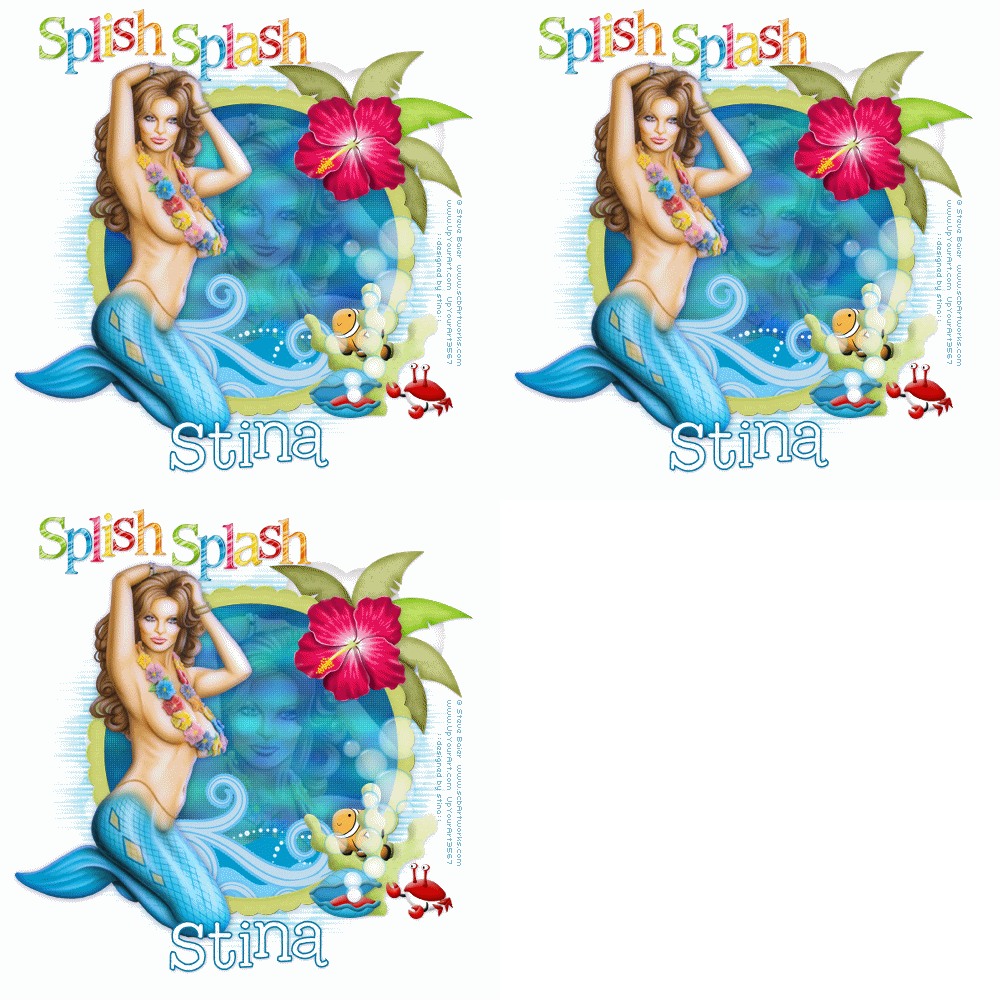
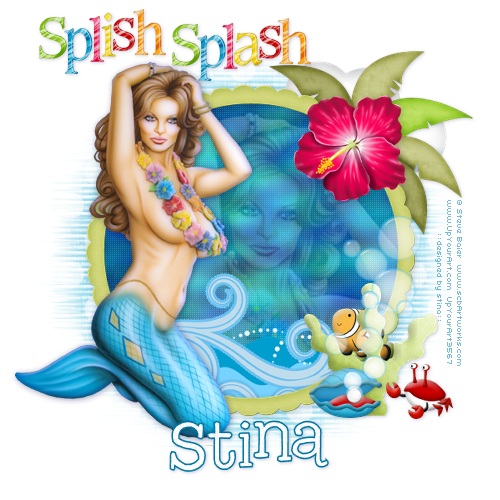
Here is a non-animated version:


© Tutorial written by Stina on 17th June 2009
All rights reserved

Sunday, June 7, 2009

Jazz Singer


Supplies

Scrap kit of choice - I am using the gorgeous "Casino Royale" by Tootypup Scraps available from Twilight Scraps, Stargazer Scraps, Dazzling Scraps, Scraps with Attitude and KatelynnsDesigns
Tube of choice - I am using the gorgeous artwork of Steve Baier which is available with a licence through UpYourArt.com
WSL_Mask84 by Chelle available from her blog
Fonts of choice - I am using AgencyFB, BickhamScript Pro Regular and Toonish
Plugins: Mura Meister Copies, Dsb Fluxx Bright Noise and Greg's Factory Output 2 Pool Shadow


Ready? Let's begin...


Open a new 600 x 600 blank canvas flood-filled white
Paste Frame of choice as new layer
Resize by 60%

Select the inside of Frame with your Magic Wand
Selections > Modify > Expand by 10
Add new raster layer
Paste paper of choice INTO selection
Layers > Arrange > Move Down

KEEP SELECTED!!

Paste Doodles2 (StarDrop Bling) as new layer
Resize by 50%
(it will automatically fall within your Frame)
Set blend mode to Multiply

KEEP SELECTED STILL!!

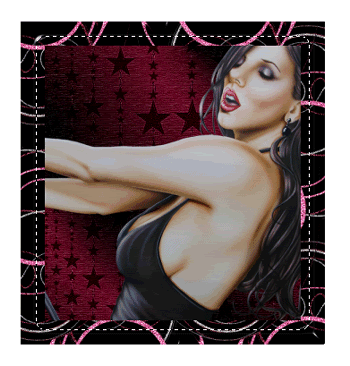
Paste Tube of choice as new layer
Resize as necessary
Position beneath the Frame to your liking
Duplicate
Layers > Arrange > Bring to Top
Hide top layer and return the the one below the Frame
Selections > Invert
Delete then deselect
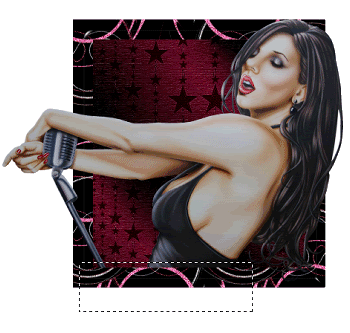
Activate your top layer
Using your Selection Tool make a small selection around the overhang at the bottom of the tube
Paste MusicBar of choice as new layer
Resize by 65%
Position along bottom of Frame

Paste Flower3 as new layer
Resize by 65%
Position in the upper left

Paste MusicNotes as new layer
Image > Rotate by 20 to the right
Resize by 20%
Position to the right

Paste MusicNote as new layer
Image > Rotate by 10 to the left
Resize by 25%
Position to the left
Duplicate Music Notes and position around canvas
Paste Star as new layer
Resize by 25%

LEAVE IN POSITION!!

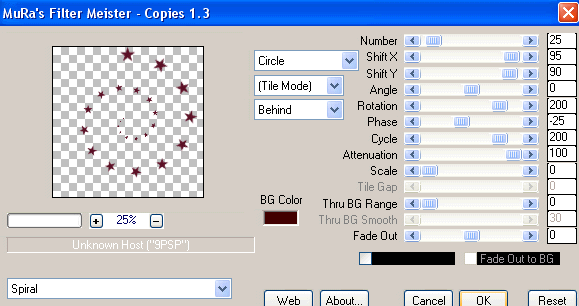
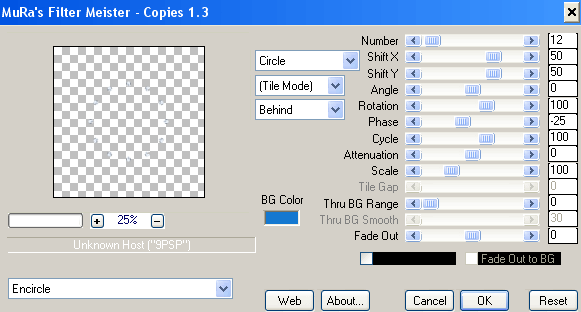
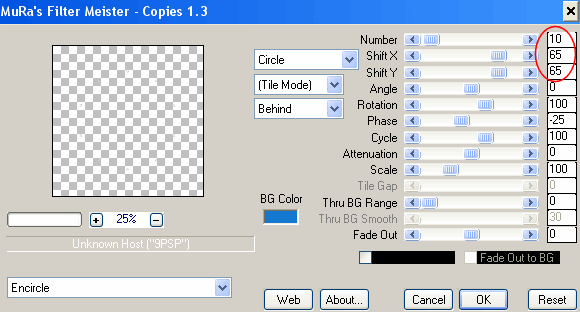
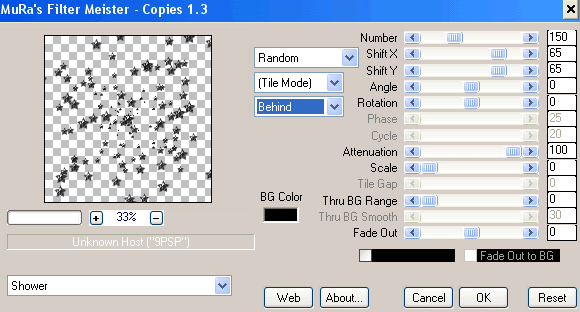
Effects > Plugins > Mura Meister > Copies with the following settings:


Layers > Arrange > Send to Bottom
Position centred behind Frame

Paste Doodles8 as new layer
Resize by 70% and position
Layers > Arrange > Move Down
(below Star Spiral)

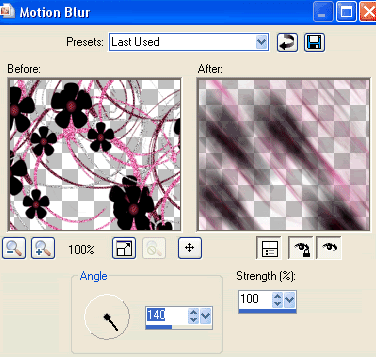
Adjust > Blur > Motion Blur with the following settings:


Move layer upwards slightly then apply the Motion Blur again

Paste Paper of choice as new layer
Layers > Arrange > Move Down
(below Doodle layer)

Layers > New Mask Layer > From Image
Apply WSL_Mask84
OK
Layers > Merge > Merge Group
Lower opacity to 40

Crop and resize

Select a Text Tool and font of choice
I am using AgencyFB and BickhamPro Script Regular

Type out your text and position to your liking
Apply any effects and drops shadow of choice

Select another font of choice
I am using Toonish
Foreground - #FFFFFF
Background - #570c20
Stroke width - 2.0

Type out your name
Objects > Align > Horizontal Centre in Canvas
Convert to raster layer

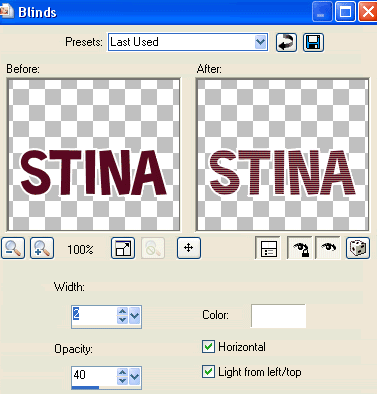
Apply the Blinds effect with the following settings:


Add a drop shadow of choice

Finally, add your © copyright, licence and watermark, then save as GIF or JPG and you're done!


** IF YOU WISH TO ANIMATE PLEASE FOLLOW THESE NEXT STEPS **

Firstly, activate your Star Spiral layer
Duplicate twice and rename Noise1, Noise2 and Noise3

Hide Noise2 and Noise3
Activate Noise1

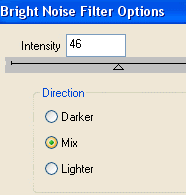
Effects > Plugins > dsb Fluxx > Bright Noise with the following settings:


Hide Noise1 and activate Noise2
Apply Bright Noise, adjusting the Noise by 2

Hide Noise2 and activate Noise3
Apply Bright Noise, adjusting the Noise by 2

Now let's activate the Frame Background
Duplicate twice and rename Light1, Light2 and Light3

Keep Light1 as is and activate Light2
Effects > Plugins > Greg's Factory Output 2 > Pool Shafow with the default settings

Activate Light3
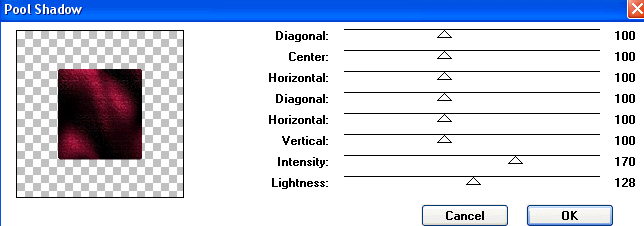
Repeat Pool Shadow with the following settings:


Now for the animation!
IMPORTANT to remember - there are THREE star animations to every Pool Shadow effect, so you should end up with 9 Frames at the end

Activate Noise1 and Light1 and hide Noise2, Noise3, Light2 and Light3
Edit > Copy Merged

Open Animation Shop
Edit > Paste as New Animation

Back to PSP
Hide Noise1 and activate Noise2
Edit > Copy Merged

In Animation Shop
Edit > Paste AFTER Current Frame

Back to PSP
Hide Noise2 and activate Noise3
Edit > Copy Merged

In Animation Shop
Edit > Paste AFTER Current Frame
Activate Noise1 and Light2 and hide Light1
Edit > Copy Merged

Open Animation Shop
Edit > Paste as New Animation

Back to PSP
Hide Noise1 and activate Noise2
Edit > Copy Merged

In Animation Shop
Edit > Paste AFTER Current Frame

Back to PSP
Hide Noise2 and activate Noise3
Edit > Copy Merged
Activate Noise1 and Light3 and hide Light2
Edit > Copy Merged

Open Animation Shop
Edit > Paste as New Animation

Back to PSP
Hide Noise1 and activate Noise2
Edit > Copy Merged

In Animation Shop
Edit > Paste AFTER Current Frame

Back to PSP
Hide Noise2 and activate Noise3
Edit > Copy Merged

In Animation Shop
Edit > Paste AFTER Current Frame

Save as a GIF and you're done!

Thanks for trying my tutorial!

::st!na::
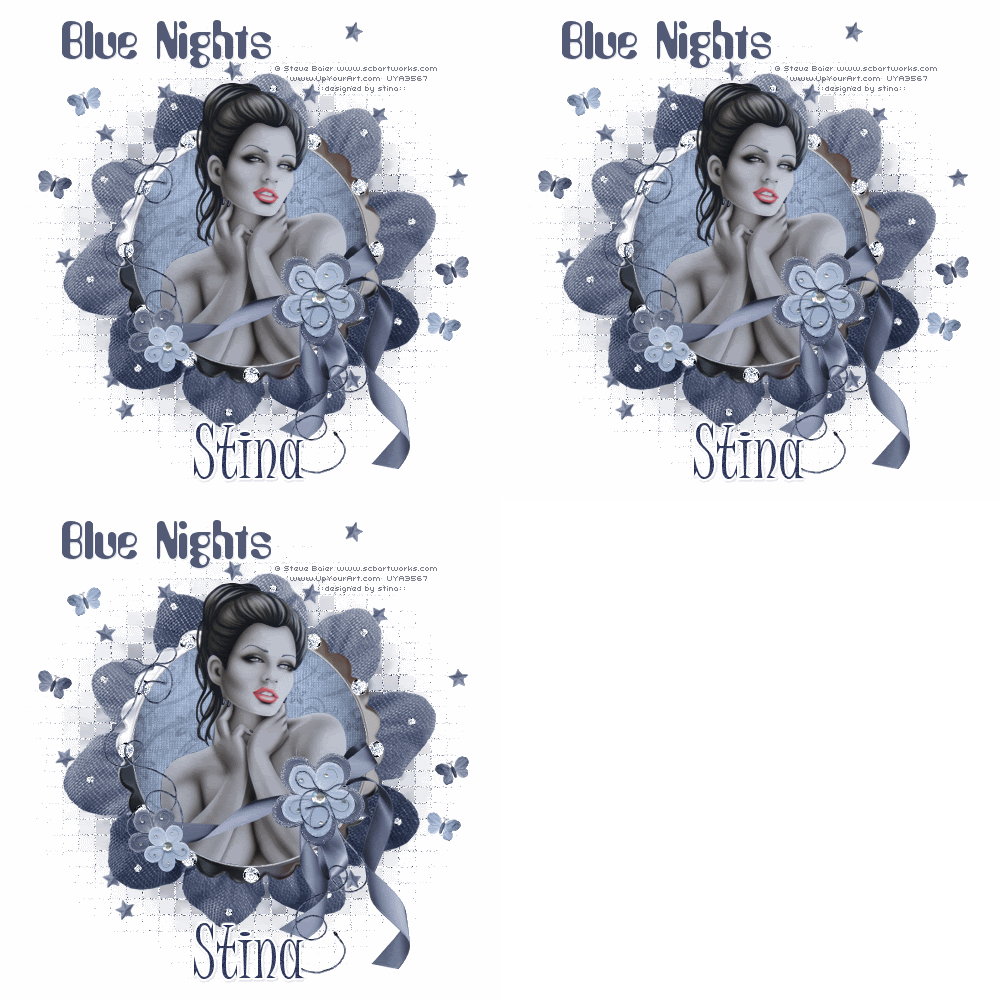
Here is a non-animated version:
© Tutorial written by Stina on 6th June 2009
All rights reserved
Saturday, May 16, 2009

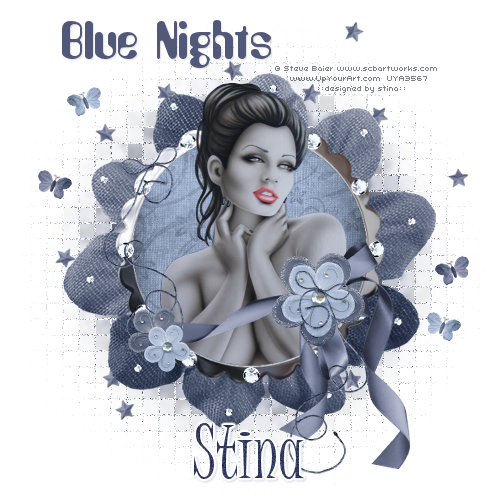
Blue Nights

 
**Grand Opening of Twilight Scraps tut**
 
Supplies
 
Scrap kit of choice - I am using "Parang Saek" by Sevens Scraps available as part of the Grand Opening of Twilight Scraps
**Kit is a FREEBIE from 15th to 18th May then it goes on sale**
Tube of choice - I am using the lovely artwork of Steve Baier available from UpYourArt
WSL_Mask42 by Chelle available from her blog
Fonts of choice - I am using Amethyst and Juice ITC
Plugins: Mura Meister Copies and dsb Fluxx Bright Noise
 
 
Ready? Let's go...
 
 
Open a new 800 x 600 blank canvas flood-filled white
 
Paste Frame5 as new layer
Resize by 85%
 
Select inside the Frame with your Magic Wand
Selections > Modify > Expand by 10
Add a new raster layer
Layers > Arrange > Move Down
Paste a Paper of choice INTO selection
Deselect
 
Paste a Diamond as new layer
Resize by 20%
 
LEAVE IN POSITION!!
 
Effects > Plugins > Mura Meister > Copies with the following settings:
 
 
Adjust > Sharpness > Sharpen
 
Paste Diamond as new layer again
Resize by 10%
 
LEAVE IN POSITION!!
 
Effects > Plugins > Mura Meister > Copies with the following settings:
 
 
Image > Rotate by 8 to the right
Adjust > Sharpness > Sharpen
 
Paste a RibbonBow as new layer
Image > Rotate by 8 to the left
Resize by 59%
Position over Frame
 
 
Paste a dark Flower as new layer
Resize by 50%
Place over Bow on ribbon
 
Paste a light Flower as new layer
Resize by 40%
Place over dark Flower
 
Paste dark Flower as new layer again
Resize by 30%
Position to the left at the end of the Ribbon
 
Paste light Flower as new layer again
Resize by 25%
Position alongside small dark flower
 
Paste one of the Strings as a new layer
Resize by 50%
Position over Flower over Bow
 
 
Duplicate, then Image > Mirror
Place in upper left of Frame
Move layer down so the string falls behind the smaller flowers

Paste a Butterfly as new layer
Image > Rotate by 20 to the right
Resize by 15%
Duplicate and position on either side of Frame
 
Paste another Butterfly as new layer
Image > Rotate by 20 to the right
Resize by 15%
Duplicate and position to your liking
 
Paste a Star as a new layer
Resize by 10%
 
LEAVE IN POSITION!!
 
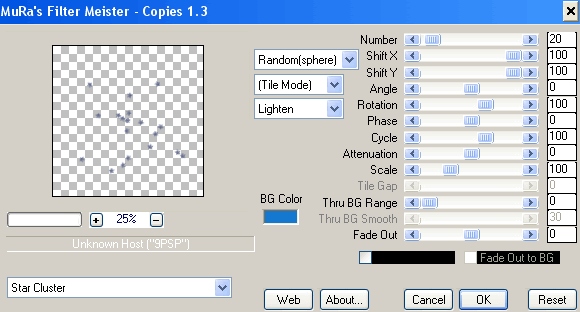
Effects > Plugins > Mura Meister > Copies with the following settings:
 
 
(You may have to play a bit to get the scattering effect you want)
 
Layers > Arrange > Send to Bottom
 
Crop and resize
 
Paste a Paper of choice as new layer
Layers > Arrange > Send to Bottom
 
Layers > New Mask Layer > From Image
Locate WSL_Mask42
OK
Layers > Merge > Merge Group
 
Resize by 85%
Ensure that Mask layer is centred behind your Frame
 
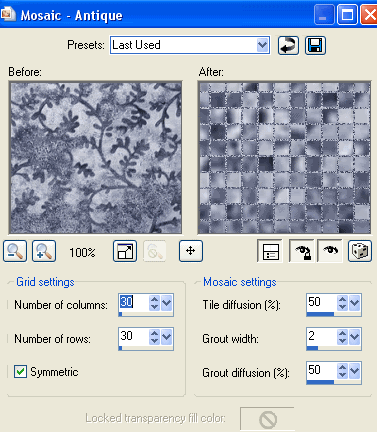
Effects > Texture Effects > Mosaic Antique with the following settings:
 
 
Paste your Tube as new layer
Resize as necessary
Position within Frame BENEATH the RibbonBow
 
Select the inside of the Frame with your Magic Wand
Selections > Invert
Selections > Modify > Feather by 2
 
Carefully erase the bottom of the tube overhanging the Frame
 
 
Select your Text Tool and font of choice
I am using Amethyst
Set your Text colour as the Background - I am using #333a5f
Type out your text
Convert to raste layer and apply a drop shadow of choiue
 
Select your Text Tool again and another font of choice
I am using Juice ITC
Type out your name
Objects > Align > Horizontal Centre in Canvas
Convert to raster layer
Apply Gradient Glow and slight drop shadow of choice
 
Finally, add your © copyright, licence and watermark, then save as a GIF or JPG and you're done!
 

** IF YOU WISH TO ANIMATE PLEASE FOLLOW THESE NEXT STEPS **
 
Activate the Diamonds Layer
Duplicate twice and rename Diamonds1, Diamonds2 and Diamonds3
 
Hide Diamonds2 and Diamonds3 activating only Diamonds1
 
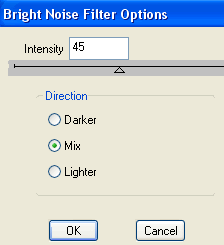
Effects > Plugins > dsb Fluxx > Bright Noise with the following settings:
 
 
Hide Diamonds1 and activate Diamonds2
Apply the Bright Noise effect, adjusting the amount to 47
 
Hide Diamonds2 and activate Diamonds3
Apply same again, adjusting the amount to 50
 
Hide Diamonds2 and Diamonds3 again with only Diamonds1 visible
Edit > Copy Merged
 
Open Animation Shop
Edit > Paste as New Animation
 
Back to PSP
Hide Diamonds1 and activate Diamonds2
Edit > Copy Merged
 
In Animation Shop
Edit > Paste AFTER Current Frame
 
Back to PSP
Hide Diamonds2 and activate Diamonds3
Edit > Copy Merged
 
In Animation Shop
Edit > Paste after Current Frame
 
Thanks for trying my tutorial!
 
::st!na::
 
Here is a non-animated version:


© Tutorial written by Stina on 16th May 2009
All rights reserved
Thursday, April 16, 2009

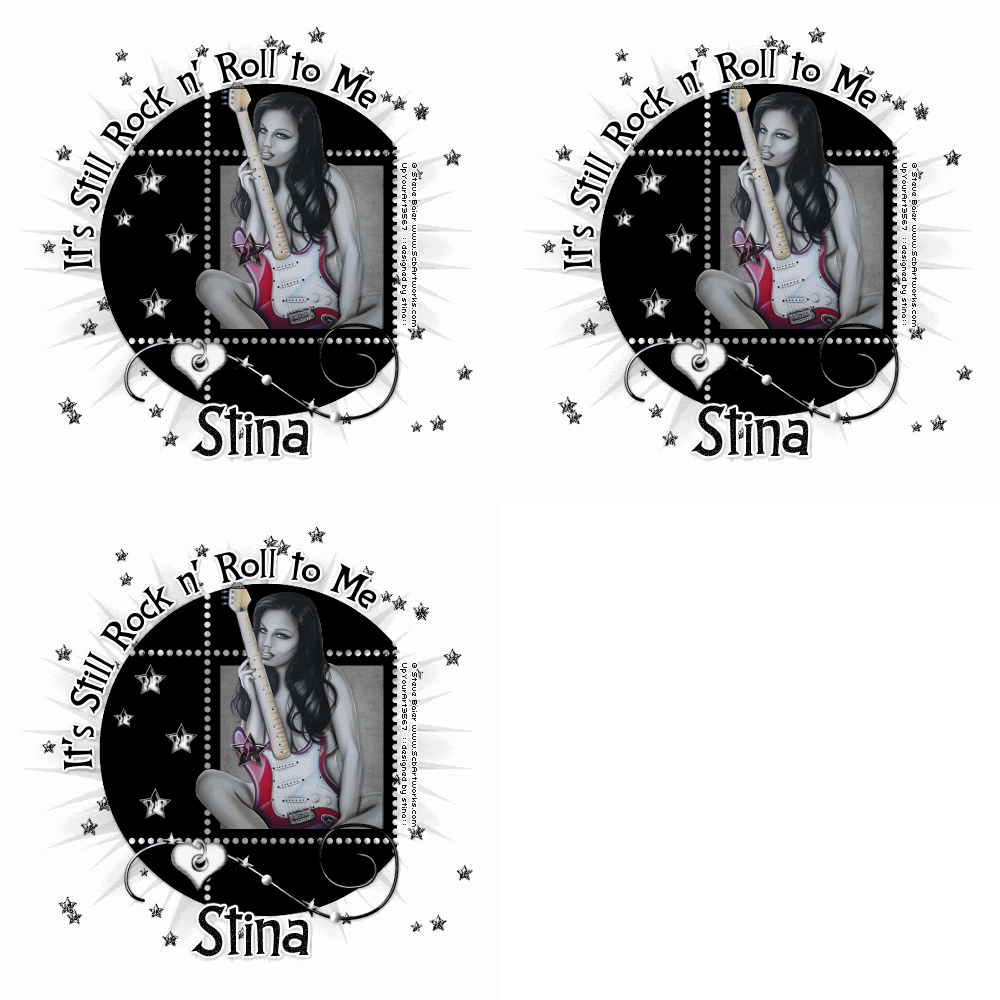
It's Still Rock n Roll to Me

 
Supplies
 
Scrap kit of choice - I am using the gorgeous "Rock n Roll" kit by Shells Scraps which is available from Creative Scraps
Tube of choice - I am using the gorgeous artwork of Steve Baier which can be purchased from UpYourArt
**PLEASE DO NOT USE HIS ARTWORK WITHOUT THE APPROPRIATE LICENCE**
WSL_Mask26 by Chelle available from her blog
Font of choice - I am using CCThingamajig
Plugin: Mura Meister Copies
Plugin: Eye Candy 4000 Gradient Glow
 
 
Ready? Let's go!
 
 
Open a new 600 x 600 blank canvas flood-filled white
 
Paste StampFrame5 as new layer
Resize by 85%
 
Select the square area inside the frame with your Magic Wand
Selections > Modify > Expand by 8
Add a new raster layer
Layers > Arrange > Move Down
Paste Paper3 into Selection
 
KEEP SELECTED
 
Paste your tube of choice as new layer
Resize as necessary
Place in position to your liking
Selections > Modify > Contract by 8
Selections > Invert
Erase any excess you don't wish to overhang
Deselect
 
Add a drop shadow of your choice
 
Paste Bead4 as new layer
Resize by 55%
Position along the bottom of Frame and slightly to the right
Apply same drop shadow
 
Paste Heart as new layer
Resize by about 10%
Position on one of the beads on the wire
Apply same drop shadow
 
Paste FireCharm as new layer
Resize by about 15%
Position to the left within frame
Duplicate twice and position
Duplicate once more and resize by 85%
Place in position to your liking
 
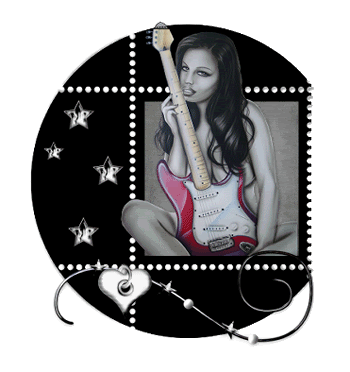
So this is what we have so far:
 
 
Now Paste FireCharm2 as new layer
Resize by 15%
KEEP IN POSITION
 
Effects > Plugins > Mura Meister > Copies with the following settings:
 
 
You may need to play with the settings a little to randomise the stars to where you want them
Then resize the layer by 90%
Erase the excess stars and those cut off till you have a nice "scattering"
 
Paste Paper4 as new layer
Resize by 85%
Layers > New Mask Layer > From Image
Locate WSL_Mask26
OK
Layers > Merge > Merge Group
 
Now activate your top layer
 
Select your Preset Shape Tool to Ellipse
Foreground - #000000
Background - null
 
Draw out a circle around the Frame
Use the nodes of your Vector layer to bring the ellipse to the same size
Then resize by 105%
 
Select your Text Tool and font of choice
I am using CCThingamajig
In your Material Palette:
Foreground - null
Background - #000000
 
On the curved line of the ellipse type out your text
Position to your liking
In your Layer Palette open your Vector Layer, hide the ellipse and convert to raster layer
 
Effects > Plugins > Eye Candy 4000 > Gradient Glow
Glow width - 3.00
Setting - Solid White
Colour - White
 
Apply a drop shadow
 
Select your Text Tool again and a font of choice
I used the same font - at size 60
Type out your name
Objects > Align > Horizontal Centre in Canvas
Convert to raster layer
Apply some noise - I used Gaussian, 40 Monochrome
 
Apply the same Gradient Glow as above, followed by a drop shadow
 
Finally add your © copyright, licence and watermark
 
To animate, let's duplicate our Stars layer twice
Rename them to Sparkle1, Sparkle2 and Sparkle3
 
Hide Sparkle2 and Sparkle3
Activate Sparkle1
Adjust > Add/Remove Noise > Add Noise:
Gaussian - CHECKED
Monochrome - CHECKED
Noise - 70
 
Edit > Copy Merged
 
Open Animation Shop
Edit > Paste as new Animation
 
Back to PSP
Hide Sparkle1 and activate Sparkle2
Repeat the Noise effect, changing the noise to 80
Edit > Copy Merged
 
In Animation Shop
Edit > Paste After Current Frame
 
Back to PSP
Hide Sparkle2 and activate sparkle3
Repeat Noise effect again, changing the noise to 90
Edit > Copy Merged
 
In Animation Shop
Edit > Paste After Current Frame
 
That's it!!  Just save as a GIF and you're done!
 
Thank you for trying my tutorial!
 
::st!na::
 

© Tutorial written by Stina on 16th April 2009
All rights reserved