Please email me designed.by.stina@gmail.com with your creations. I'd love to see them.

Sunday, May 31, 2009

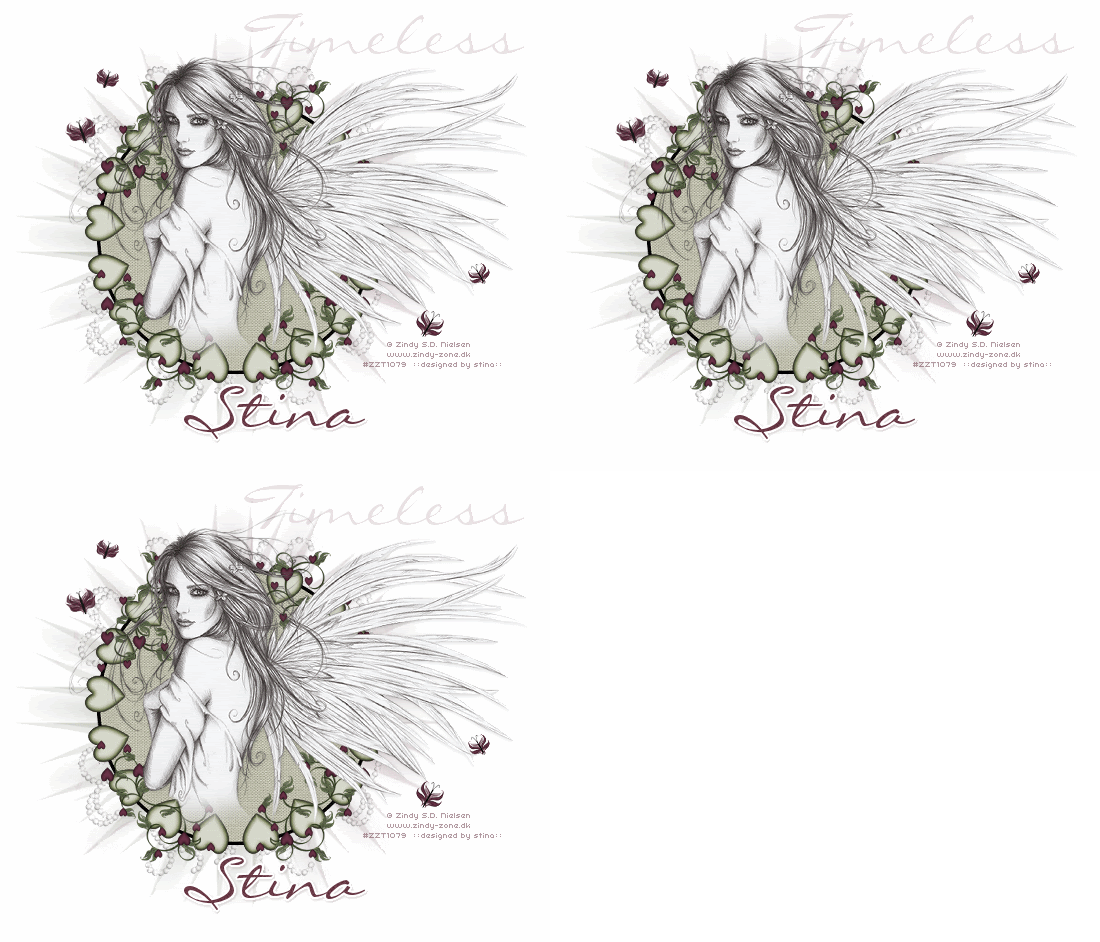
Timeless Angel


Supplies
 
Scrap kit of choice - I am using the gorgeous kit "Timeless" by Tootypup Scraps available at Scraps With Attitude and KatelynnsDesigns
Tube of choice - I am using the lovely artwork of Zindy Nielsen available from her store
WSL_Mask26 by Chelle available from her her blog
Fonts of choice - I am using LiorahBT
Plugins: Simple Top Left Mirror, Xenofex 2 Constellation and Eye Candy 4000 Gradient Glow (optional, for text)
 
 
Ready? Let's begin....
 
 
Open a new 600 x 600 blank canvas flood-filled white
 
Paste HeartCircle as new layer
Resize by 70%
 
Duplicate
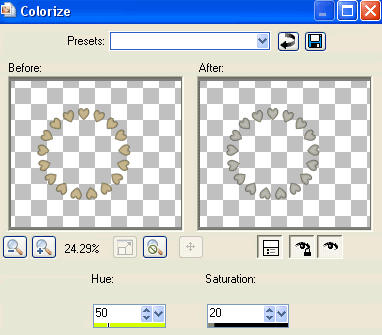
Adjust > Hue & Sturation > Colourise with the following settings:
 
 
Duplicate again, then set the blend mode to Hard Light
 
Paste DoodleA as new layer
Resize by 75%
Position in upper left
 
 
Effects > Plugins > Simple > Top Left Mirror
 
Choose a light colour complementing your tag or a paper of choice
Select your Preset Shape Tool and set it to Ellipse
 
In your Materials Palette, select #000000 for your Foreground and your colour of choice as your Background
**If you are using a Paper then select the paper from under the Patterns tab**
 
Set your Stroke Width to 5.00
 
Hold your Shift key and draw out a circle
 
Objects > Align > Centre in Canvas
 
You may need to resize the Ellipse by moving one of the corner nodes in, then repeat the Centre in Canvas as above till you are satisfied with the result
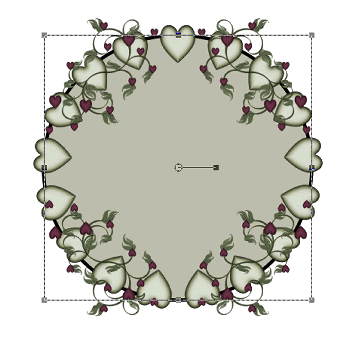
 
 
Convert to raster layer
 
Effects > Plugins > IC Net Software > Filters Unlimited > Canvas, Fine
 
Set the Intensity to your liking - I set it to 100
 
Paste Paper of choice as new layer
Layers > Arrange > Send to Bottom
 
Layers > New Mask Layer > From Image
Apply WSL_Mask26
OK
Layers > Merge > Merge Group
 
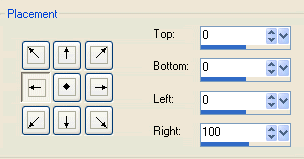
Image > Canvas Resize to 700 wide, 100 px to the right
 
 
Paste your Tube of choice as new layer
Layers > Arrange > Bring to Top
Resize if necessary
Position to your liking and erase any excess overhanging
 
Paste a Butterfly as new layer
Image > Rotate by 20 to the left
Resize by 25%
Duplicate, then Image > Mirror
Resize by 80%
Position Butterflies to your liking
 
Resize canvas down to 550 wide
 
Paste Beads as new layer
Layers > Arrange > Send to Bottom, then move up one layer
Resize by 80%
Position at bottom of Frame
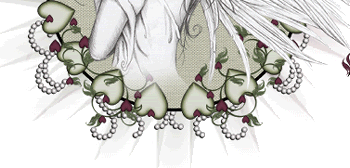
 
 
Image > Flip, then
Layers > Merge > Merge Down
Lower opacity to 35
 
Activate top layer
 
Select your Text Tool and font of choice
I am using LiorahBT
Text colour to match your tag - I am using #46222b
 
Type out your Text and position to liking
Convert to raster layer
Lower opacity to 15
 
Type out your name using the same or different font of choice
Objects > Align > Horizontal Centre in Canvas
Convert to raster layer
Apply any effects and drop shadow of your choice
 
Finally, add your © copyright, licence and watermark, then save as a GIF or JPG and you're done!
 
 
** IF YOU WISH TO ANIMATE PLEASE FOLLOW THESE NEXT STEPS **
 
Activate your Image Layer
Duplicate twice and rename Sparkle1, Sparkle2 and Sparkle3
 
 
Hide Sparkle2 and Sparkle3 leaving only Sparkle1 visible
 
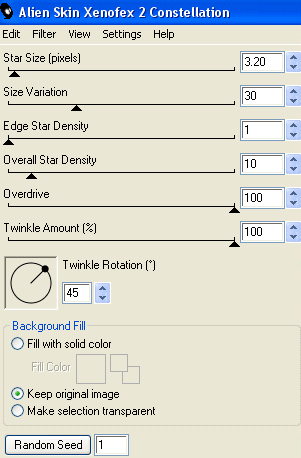
Effects > Plugins > Xenofex 2 > Constellation with the following settings:


Hide Sparkle1 and activate Sparkle2
Apply the Constellation effect, adjusting the Random Seed
 
Hide Sparkle2 and activate Steam3
Apply the Constellation effect again, adjusting the Random Seed once more
 
Now for the animation part!
 
Hide Sparkle2 and Sparkle with only Sparkle1 visible
Edit > Copy Merged
 
Open Animation Shop
Edit > Paste as New Animation
 
Back to PSP
Hide Sparkle1 and activate Sparkle2
Edit > Copy Merged
 
In Animation Shop
Edit > Paste AFTER Current Frame
 
Back to PSP
Hide Sparkle2 and activate Sparkle3
Edit > Copy Merged
 
In Animation Shop
Edit > Paste AFTER Current Frame
 
Now save as a GIF and you're done!
 
Thanks for trying my tutorial!
 
::st!na::
 
 
Here is a non-animated version:
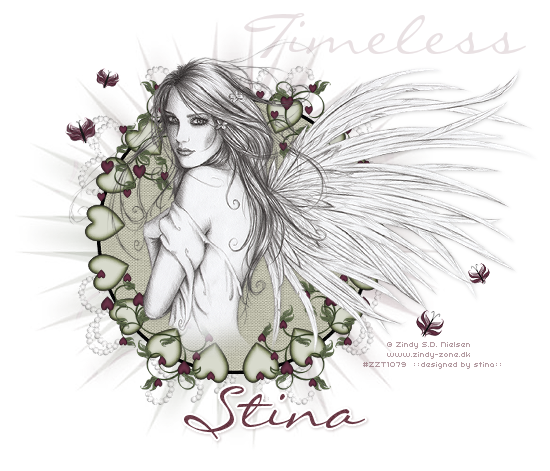


© Tutorial written by Stina on 31st May 2009
All rights reserved
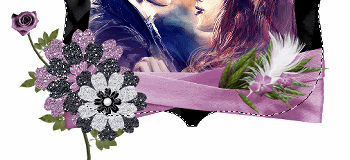
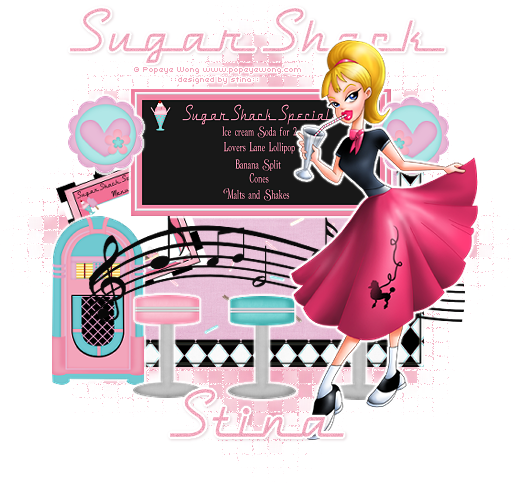
Sugar Shack

 
Supplies
 
Scrap kit of choice - I am using "Sugar Shack" by KristiW Designs available from The Scrappin' Divaz Designz and Sunshine Studio Scraps
Tube of choice - I am using the artwork of Popeye Wong which is free to use and available for download from his site
WSL_Mask88 by Chelle available from her blog
Font of choice - I am using DymaxionScript which is a free font available from DaFont.com
Plugin: Eye Candy 4000 Gradient Glow
 
 
Ready? Let's go...
 
 
Open a new 700 x 600 blank canvas flood-filled white
 
Paste Frame2 as new layer
Resize by 20%
 
Select the inside of Frame with your Magic Wand
Selections > Modify > Expand by 10
Add new raster layer
Paste Paper of choice INTO selection
Layers > Arrange > Move Down
Deselect
 
Paste Sign1 as new layer
Resize by 18% and position
 
Paste Stool1 and Stool2 as new layers
Resize each by 8% and position across bottom of Frame
 
Paste Jukebox as new layer
Resize by 7% and position, then
Paste MusicNotes as new layer
Resize by 16% and position coming from the speaker
 
Paste Sprinkles as new layer
Resize by 15% and position behind MusicNotes
 
Paste a Flower as new layer
Resize by 15%
Position in upper left
Duplicate, then Image > Mirror
 
Paste Menu as new layer
Image > Rotate by 20 to the left
Resize by 10%
Place to the left tucked below the Jukebox and Sign
 
Paste Tube as new layer
Resize as necessary
Position to the right
 
Resize tag down, then
Image > Canvas Resize 550 x 500 centred
 
Paste paper of choice as new layer
Layers > Arrange > Send to Bottom
 
Layers > New Mask Layer > From Image
Apply WSL_Mask88
OK
Layers > Merge > Merge Group
 
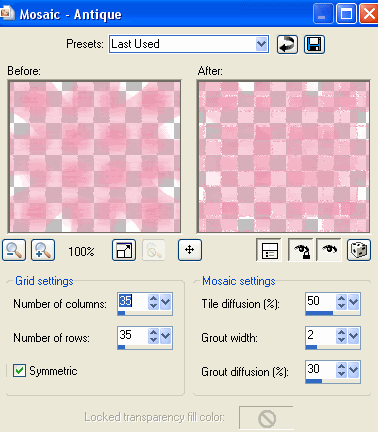
Effects > Texture Effects > Mosaic Antique with the following settings:
 
 
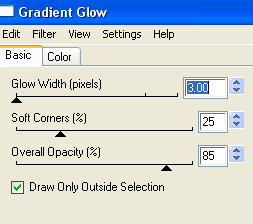
Apply a Gradient Glow in WHITE to each of your elements and your Tube
 
 
Select your Text Tool and font of choice
I am using DymaxionScript
Text colour to match your tag - I am using #f2a8bd
 
Type out your text
Objects > Align > Horizontal Centre in Canvas
Convert to raster layer
Apply same Gradient Glow
 
Type out your name
Objects > Align > Horizontal Centre in Canvas
Convert to raster layer
Apply any effects and drop shadow of your choice
 
Finally, add your © copyright, licence and watermark, then save as a GIF or JPG and you're done!

Thanks for trying my tutorial!
 
::st!na::


© Tutorial written by Stina on 31st May 2009
All rights reserved
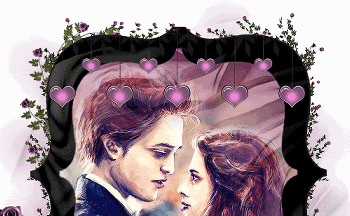
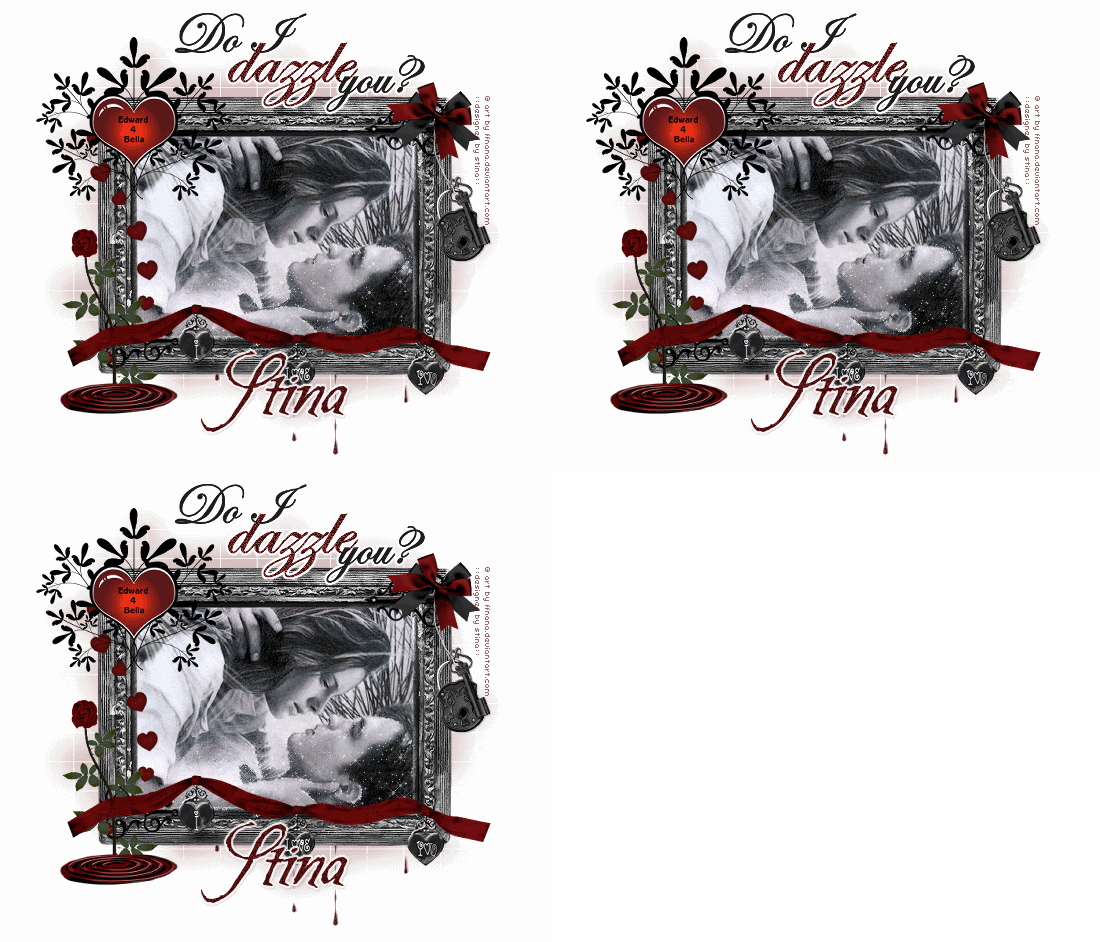
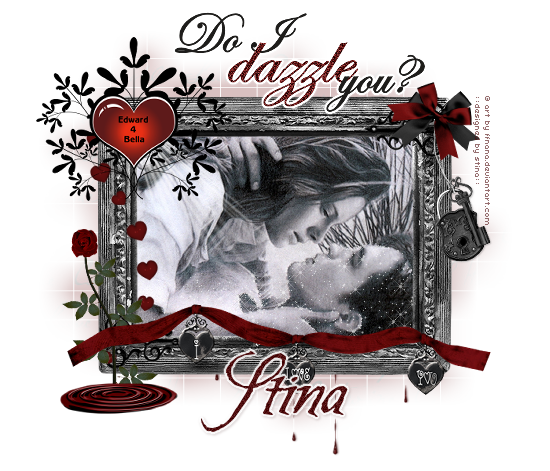
Bedazzled

 
Supplies
 
Scrap kit of choice - I am using "Forbidden Love" by Tracey of Soxsational Scraps
Frame from "Twilight Lover" by Chaos Priestess available from Digital Chaos
WordArt from "Forbidden Love" collab by Yarrow and Grunge and Glitter Scraps available from Stargazer Scraps and Digital Chaos
Image of choice - I am using the artwork of Ffnana
WSL_Mask84 by Chelle available from her blog
Font of choice - I am using Be Safe (Edward's handwriting)
Plugin: Xenofex 2 Constellation and Eye Candy 4000 Gradient Glow (optional, for text)
 
 
Ready? Let's begin....
 
 
Open a new 700 x 600 blank canvas flood-filled white
 
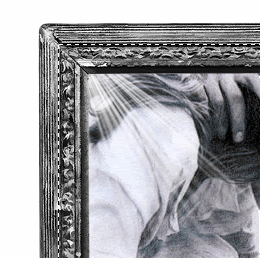
Paste Frame of choice as new layer
(I used one from the kit "Twilight Lovers" by Chaos Priestess)
Resize to your liking
 
Paste an image of choice as new layer
Resize as necessary
Layers > Arrange > Move Down
 
Select the area inside the Frame with your Magic Wand
Selections > Modify > Expand by 10
Selections > Invert
Delete
 
KEEP SELECTED!!
 
Paste Starlight as new layer
Image > Flip
Position over Edward, then
Lower opacity to around 60
 
STILL SELECTED!!
 
Paste LightRay as new layer
Position in upper right
 
 
Delete then deselect
 
Paste RedHearts as new layer
Layers > Arrange > Move Up
Resize by 65%
Position to the left with top heart placed in upper left corner
 
Paste RedRose1 as new layer
Image > Rotate by 15 to the right
Resize by 45%
Position to the left
Erase excess protruding below the frame
 
Paste Edward4Bella element as new layer
Resize by 50%
Position in upper left
 
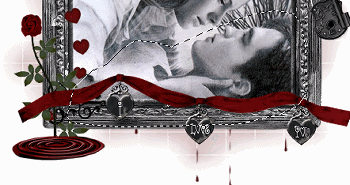
Paste Ribbon & Charms as new layer
Resize by 90%
Position along bottom of Frame
 
Paste BloodPool as new layer
Resize by 25%
Position in lower left
 
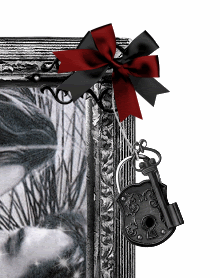
Paste Lock as new layer
Image > Rotate by 15 to the left
Resize by 45%
Position in upper right
 
Paste Bow1 as new layer
Resize by 45%
Position in upper right securing lock to Frame
 
Paste Bow2 as new layer
Image > Rotate by 35 to the right
Resize by 45%
Position over Bow1 in upper right
 
 
Paste Paper of choice as new layer
Layers > Arrange > Send to Bottom
 
Layers > New Mask Layer > From Image
Apply WSL_Mask84
OK
Layers > Merge > Merge Group
Lower opacity to 25
 
Paste BloodDrippings2 as new layer
Resize by 80%
Image > Mirror
Position with some of the drippings falling below Frame
 
Crop and resize canvas
 
Type your Text of choice or use an appropriate WordArt
(I am using a WordArt from "Forbidden Love" by Yarrow and Grunge & Glitter Scraps)
 
Select your Text Tool and font of choice
I am using Be Safe
Text colour to match your tag - I am using #500e0f
 
Type out your name
Objects > Align > Horizontal Centre in Canvas
Convert to raster layer
Apply any effects and drop shadow of your choice
 
Finally, add your © copyright, licence and watermark, then save as a GIF or JPG and you're done!
 
 
** IF YOU WISH TO ANIMATE PLEASE FOLLOW THESE NEXT STEPS **
 
Activate your Image Layer
Duplicate three times and rename Main Image, Sparkle1, Sparkle2 and Sparkle3
 
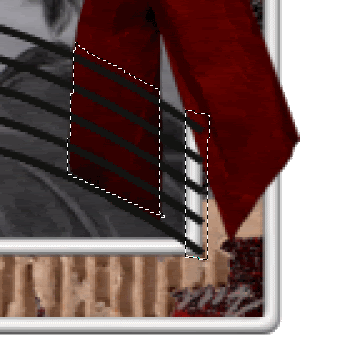
With your Freehand Tool make a selection around Edward (you will not need the Starlight layer we added for this step so you can hide it)
 
 
Hide Sparkle2 and Sparkle3 leaving only Sparkle1 and Main Image visible
**NOTE - MAIN IMAGE WILL REMAIN VISIBLE AT ALL TIMES**
 
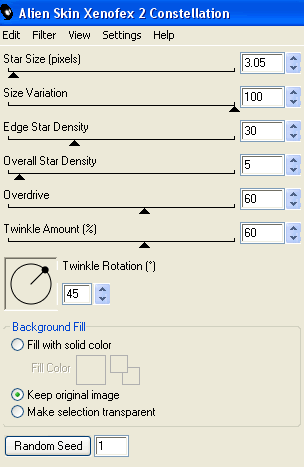
Effects > Plugins > Xenofex 2 > Constellation with the following settings:
 
 
Hide Sparkle1 and activate Sparkle2
Apply the Constellation effect, adjusting the Random Seed
 
Hide Sparkle2 and activate Steam3
Apply the Constellation effect again, adjusting the Random Seed once more
 
KEEP SELECTED!!
 
Now, Selections > Invert
Activate each layer - Sparkle1, Sparkle2 and Sparkle3 - respectively and hit delete ONCE
 
Now for the animation part!
 
Hide Sparkle2 and Sparkle with only Sparkle1 (and Main Image) visible
Edit > Copy Merged
 
Open Animation Shop
Edit > Paste as New Animation
 
Back to PSP
Hide Sparkle1 and activate Sparkle2
Edit > Copy Merged
 
In Animation Shop
Edit > Paste AFTER Current Frame
 
Back to PSP
Hide Sparkle2 and activate Sparkle3
Edit > Copy Merged
 
In Animation Shop
Edit > Paste AFTER Current Frame
 
Go to Frame Properties and change to 15, then save as a GIF and you're done!
 
Thanks for trying my tutorial!
 
::st!na::
 
 
Here is a non-animated version:


© Tutorial written by Stina on 30th May 2009
All rights reserved
Saturday, May 30, 2009

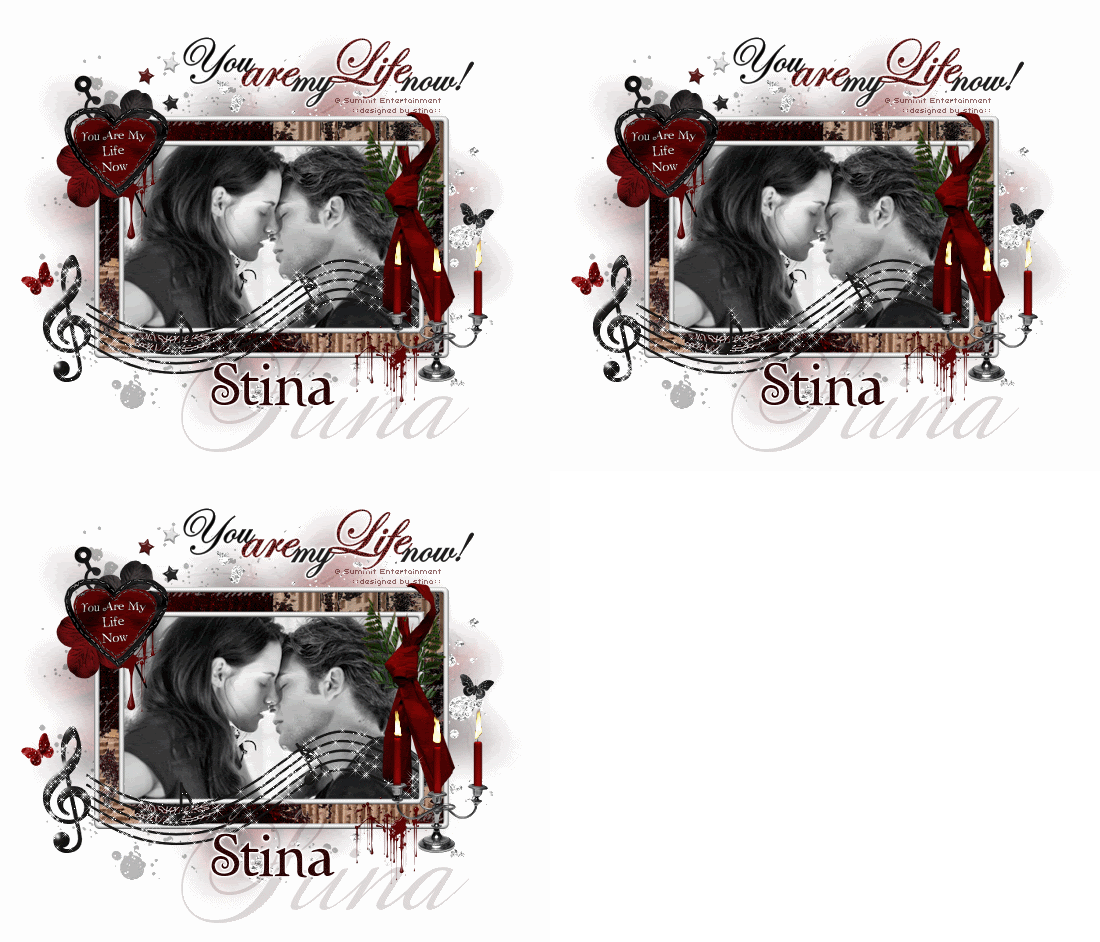
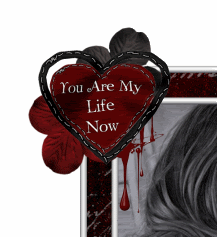
You Are My Life Now


**Please note - I had originally used an image in this tutorial by an artist who had not granted the free usage I had been given so I have therefore removed that image with my humblest apologies** 


Supplies
 
Scrap kit of choice - I am using "Forbidden Love" which is a collab by Yarrow and Grunge and Glitter Scraps available from Stargazer Scraps and Digital Chaos
Image of choice - I am using the lovely image of the "first kiss" from the movie
WSL_Mask7 by Chelle available from her blog
Font of choice - I am using Twilight
Plugins: Alien Skin Eye Candy 5: Nature Fire and Xenofex 2 Constellation
 
 
Ready? Let's begin...
 
 
Open a new 700 x 600 blank canvas flood-filled white
 
Paste GG_Frame04 as new layer
Resize by 70%
 
With your Selection Tool draw a rectangle around the Frame
Paste your image of choice as new layer
Selections > Invert and delete any excess
Deselect
 
Paste GG_MusicNotes as new layer
Position along bottom of Frame
 
With your Freehand Tool draw around the music bars that overlap the ribbon and frame
 
 
Press delete then deselect
 
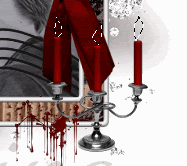
Paste GG_Candelabra as new layer
Resize by 20%
Position to the lower right
 
Paste Yarrow_Flower01 as new layer
Resize by 60%
Position in upper left
 
Paste Yarrow_Flower02 as new layer
Resize by 55%
Position with flower01 to your liking
 
Paste Yarrow_HeartElement as new layer
Resize by 45%
Place in upper left and re-position flowers to either side of Heart
 
Paste GG_Blood03 as new layer
Resize by 15%
Position to upper left and move BELOW the Heart Element as if dripping from Heart
 
 
Paste Yarro_ClockHand as new layer
Image > Flip
Image > Rotate by 25 to the left
Resize by 40%
Position behind Heart in upper left
 
Paste a Yarrow_Butterfly (of choice) as new layer
Resize by 15%
Place to one side of your canvas
 
Paste another Yarrow_Butterfly (of choice) as new layer
Resize also by 15%
Place to opposite side of your canvas to your liking
 
Paste GG_Stars 1, 2 and 3 as new layers
Resize each by 5% and position to your liking
 
Paste Paper of choice as new layer
Layers > Arrange > Send to Bottom
 
Layers > New Mask Layer > From Image
Apply WSL_Mask7
OK
Layers > Merge > Merge Group
 
Paste Yarrow_GlitterSplat02 as new layer
Resize by 90%
Position to the left side of canvas
Lower opacity to around 30
 
Paste Yarrow_GlitterSplat01 as new layer
Resize by 90%
Position slightly to the right
 
Resize your working canvas/tag
 
Paste GG_WordArt (of your choice) as new layer
Resize by 50% and position
 
Select your Text Tool and font of choice
I am using Twilight
Text colour to match your tag - I am using #2c0607
 
Type out your name
Objects > Align > Horizontal Centre in Canvas
Convert to raster layer
Apply any effects and drop shadow of your choice
Finally, add your © copyright, licence and watermark, then save as a GIF or JPG and you're done!
 
 
** IF YOU WISH TO ANIMATE PLEASE FOLLOW THESE NEXT STEPS **
 
Activate the Candelabra Layer
Duplicate twice and rename Candle1, Candle2 and Candle3
 
With your Freehand Tool make a selection around the top of the candles
 
 
Hide Candle2 and Candle3 activating only Candle1
 
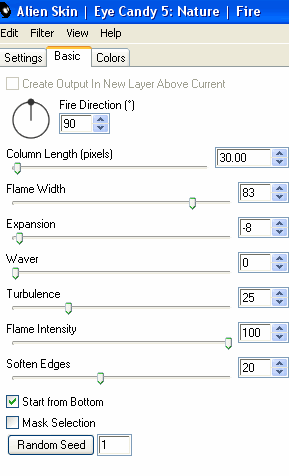
Effects > Plugins > Alien Skin Eye Candy 5: Nature > Fire
Go to the Settings Tab and select "Small, Candle"
Then use the following settings:
 
 
Hide Candle1 and activate Candle2
Apply the Smoke effect, adjusting the Random Seed
 
Hide Candle2 and activate Candle3
Apply the Smoke effect again, adjusting the Random Seed once more
 
Deselect
 
Now activate your MusicNotes layer and duplicate twice
Rename them Sparkle1, Sparkle2 and Sparkle3
 
Hide Sparkle2 and Sparkle3 activating only Sparkle1
 
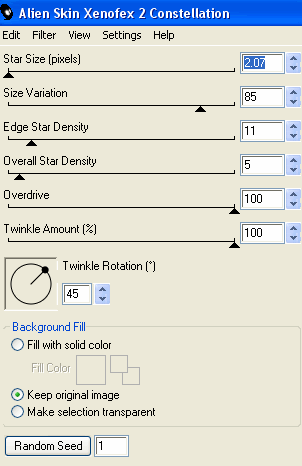
Effects > Plugins > Xenofex 2 > Constellation with the following settings:
 
 
Hide Sparkle1 and activate Sparkle2
Apply the Constellation effect, adjusting the Random Seed
 
Hide Sparkle2 and activate Steam3
Apply the Constellation effect again, adjusting the Random Seed once more
 
Now for the animation part!
 
Hide Candle2, Sparkle2, Candle3 and Sparkle with only Candle1 and Sparkle1 visible
Edit > Copy Merged
 
Open Animation Shop
Edit > Paste as New Animation
 
Back to PSP
Hide Candle1 and Sparkle1 and activate Candle2 and Sparkle2
Edit > Copy Merged
 
In Animation Shop
Edit > Paste AFTER Current Frame
 
Back to PSP
Hide Candle2 and Sparkle2 and activate Sparkle3 and Sparkle3
Edit > Copy Merged
 
In Animation Shop
Edit > Paste AFTER Current Frame
 
Go to Frame Properties and change to 15, then save as a GIF and you're done!
 
Thanks for trying my tutorial!
 
::st!na::


© Tutorial written by Stina on 30th May 2009
All rights reserved
Friday, May 29, 2009

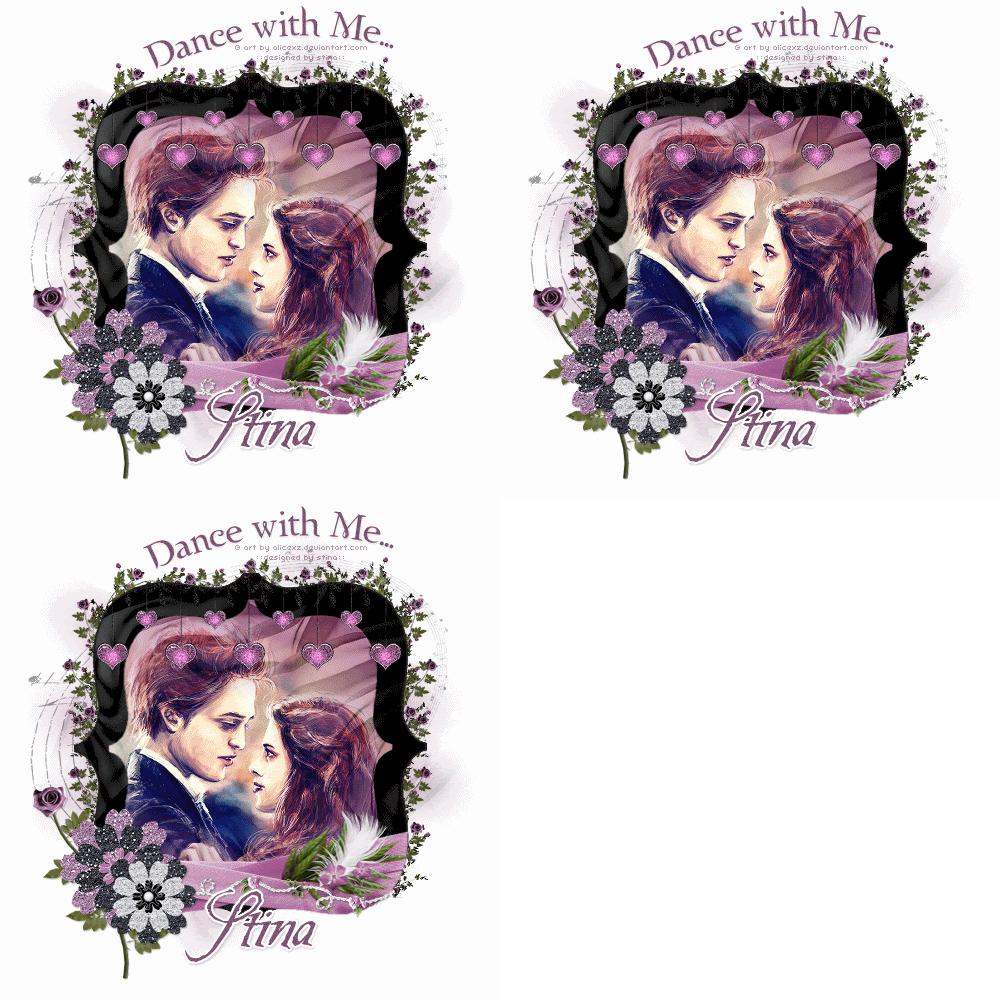
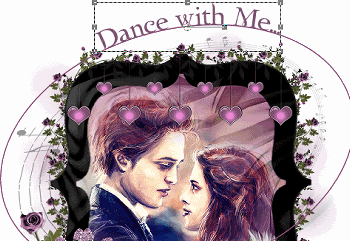
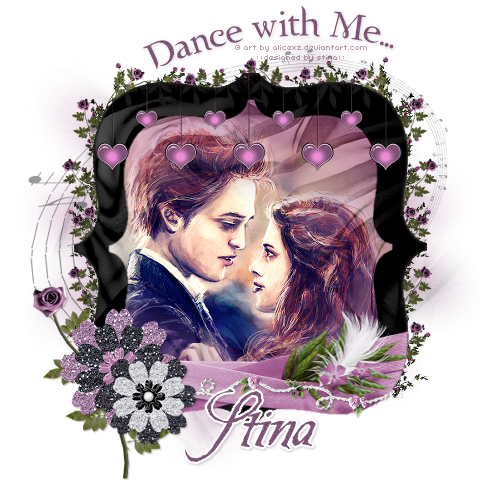
Dance With Me

 
Supplies
 
Scrap kit of choice - I am using the gorgeous "Prom Night" kit by Just a Girl Designs available from Twilight Scraps and Exquisite Scraps
Tube or image of choice - I am using the lovely image by Alicexz of Edward and Bella at the Prom
**I misted this image by using the 20-20 Mask available in your PSP program**
Template #59 by Dezigns by Ali available from her blog
WSL_Mask7 by Chelle available from her blog
Fonts of choice - I am using Twilight and Be Safe
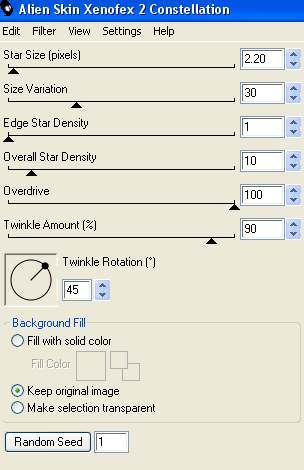
Plugin: Xenofex Constellation
 
 
Ready? Let's begin...
 
 
Open Template #59 by Ali
Resize all layers by 500 wide
Image > Canvas Resize 600 x 600 centred
 
Delete Copyright and Bracket Layers
 
Add new raster layer, then
Layers > Arrange > Send to Bottom
Flood-fill white
Rename BACKGROUND
 
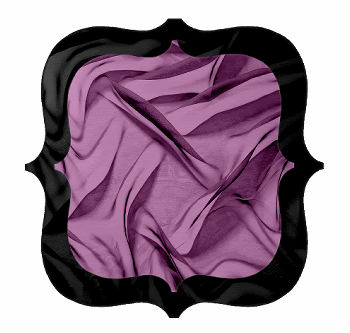
Select SHAPE1 with your Magic Wand
Selections > Modify > Feather by 2
Paste Paper of choice INTO selection
Deselect
 
Select SHAPE2 with Magic Wand
Selections > Modify > Feather by 2
Paste another Paper of choice INTO selection
Deselect
 

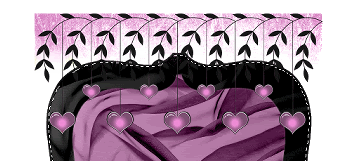
Paste DanglerDeco as new layer
Resize by 50%
Position along the top
 
Select the area outside the bottom SHAPE
Selections > Modify > Expand by 2
Selections > Modify > Feather by 2
 
 
Press delete then deselect
 
Paste your Image, Mist or Tube of choice as new layer
 
Select the area outside SHAPE2
Selections > Modify > Expand by 2
Selections > Modify > Feather by 2
Delete then deselect
 
Layers > Arrange > Move Down
 
Paste a flower as new layer
Resize by 50%
Position to the left
 
Paste another flower of choice as new layer
Resize by 40%
Position alongside first flower
 
Paste a SingleRose as new layer
Resize by 55%
Position to the left and move below the flowers
 
Paste PageWrap as new layer
Resize by 40% and position along bottom
 
Use your Magic Wand to select the area around the SHAPE1, then
Selections > Modify > Feather by 2
Delete then deselect
 

Paste Paper of choice as new layer and move to Background
Layers > New Mask Layer > From Image
Locate WSL_Mask7
OK
Layers > Merge > Merge Group
 
Paste Trellis as new layer
Resize by 75%
Position so it frames SHAPE1
 
For extra flowers and shrubbery paste Roses as new layer
Image > Rotate by 15 to the left
Resize by 70%
Position in upper left
 
 
See the difference in the "thickness" of foliage
Duplicate, then Image > Mirror
Layers > Merge > Merge Down
Duplicate, then move down to the lower part of tag
Duplicate once more, then
Image > Rotate by 90 to the left
Position in the top centre
Erase the excess foliage from the bottom
 
Paste MusicalNotes as new layer
Resize by 42%
Move up slightly to protrude the top
Lower opacity to around 40
 
Apply a drop shadow of choice to your elements then resize tag
 
Select your Preset Shape Tool and set to Ellipse
Draw out an oval and shape it like your Musical Notes layer
 
 
Select your Text Tool and font of choice
I am using Twilight
Text Colour is #7e5675
 
On the curve type out your text of choice
Position to your liking then convert to raster layer
Add a drop shadow of choice
 
Select another font of choice
I am using Be Safe with same text colour
 
Type out your name
Objects > Align > Horizontal Centre in Canvas
Convert to raster layer
Apply a Gradient Glow and drop shadow of choice
 
Finally, add your © copyright, licence and watermark, then save as a GIF or JPG and you're done!


** IF YOU WISH TO ANIMATE PLEASE FOLLOW THESE NEXT STEPS **
 
Activate the MusicalNotes Layer
Duplicate twice and rename Sparkle1, Sparkle2 and Sparkle3
 
Hide Sparkle2 and Sparkle3 activating only Sparkle1
 
Effects > Plugins > Xenofex 2 > Constellation with the following settings:
 
 
Hide Sparkle1 and activate Sparkle2
Apply the Constellation effect, adjusting the Random Seed
 
Hide Sparkle2 and activate Steam3
Apply the Constellation effect again, adjusting the Random Seed once more
 
I also applied some noise to the Hanging Heartsm adjusting it by 5 with each layer
 
Hide Sparkle2 and Sparkle3 with only Sparkle1 visible
Edit > Copy Merged
 
Open Animation Shop
Edit > Paste as New Animation
 
Back to PSP
Hide Sparkle1 and activate Sparkle2
Edit > Copy Merged
 
In Animation Shop
Edit > Paste AFTER Current Frame
 
Back to PSP
Hide Sparkle2 and activate Sparkle3
Edit > Copy Merged
 
In Animation Shop
Edit > Paste AFTER Current Frame
 
Save as a GIF and you're done!
 
Thanks for trying my tutorial!
 
::st!na::
 
 
Here is a non-animated version:


© Tutorial written by Stina on 28th May 2009
All rights reserved
Thursday, May 28, 2009

Hot Chocolate

 
Supplies
 
Scrap kit of choice - I am using "Mocha Latte" by Kittie's Sinful Scraps available from Paradise 4 Scrappers
Tube of choice - I am using the lovely artwork of Rion Vernon and PinUpToons which is available with a licence from CILM
**PLEASE DO NOT USE HIS ARTWORK WITHOUT THE APPROPRIATE LICENCE**
WSL_Mask26 by Chelle available from her blog
Fonts of choice - I am using Agency FB and Rollergirls
Plugins: Mura Meister Copies and Alien Skin Eye Candy5: Nature Smoke
 
 
Ready? Let's begin...
 
 
Open a new 600 x 600 blank canvas flood-filled white
 
Paste Frame1 as new layer
Resize by 85%
 
LEAVE IN POSITION
 
Paste Frame2 as new layer
Resize by 85%
 
Select inside the first Frame with your Magic Wand
Selections > Modify > Expand by 10
Paste Paper of choice as new layer (a colourful paper works best)
Resize by around 50%
 
Adjust > Blur > Gaussian Blur with a radius of 20.00
 
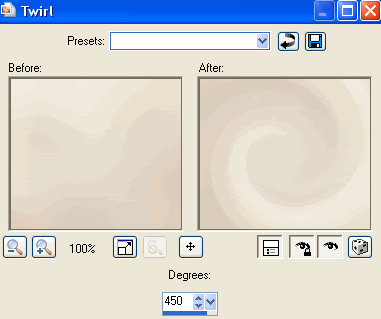
Effects > Distortion Effects > Twirl with the following settings:
 
 
Deselect
 
Paste a Flower of choice as new layer
Resize by 65%
 
LEAVE IN POSITION!
 
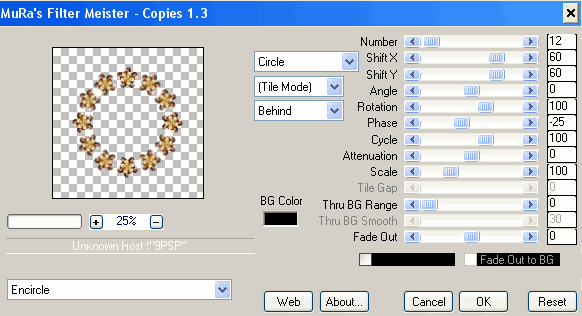
Effects > Plugins > Mura Meister > Copies with the following settings:
 
 
Paste your Tube as new layer
Resize as necessary and position
 
Paste Purse as new layer
Resize by 28%
Position to the right of your tube
 
Paste Pastry3 as new layer
Resize by 18%
Position to the left
 
Paste Pastry2 as new layer
Resize by 15%
Position to the left in front of first pastry and partially tucked behind tube
 
Paste CoffeePot as new layer
Resize by 25%
Position behind pastries and Tube layers
 
 
Paste MochaFlowers as new layers
Resize each by 30 - 35% and position behind Tube
 
Paste Ribbon1 as new layer
Resize by 45% and position in upper right
 
Paste Bow6 as new layer
Reszie by 20% and position OVER ribbon
 
Paste Butterflies as new layers
Resize by 25%
Position, duplicate, then Image > Mirror
Position and duplicate again
 
Add new raster layer and select all
Paste Paper of choice INTO selection
Layers > Arrange > Send to Bottom
Deselect
 
Adjust > Blur > Gaussian Blur with a radius of 20.00
 
Layers > New Mask Layer > From Image
Locate WSL_Mask36
OK
Layers > Merge > Merge Group
 
Adjust > Blur > Gaussian Blur with a radius of 5.00
Duplicate
Lower opacity to 55
Layers > Merge > Merge Down
 
Crop and resize
 
Select your Preset Shape Tool and set to Ellipse
Draw out a circle around your Frame
 
Select your Text Tool and font of choice
I am using Agency FB
Text Colour is #48301a
 
On the curve type out your text of choice
Position to your liking then convert to raster layer
Add a drop shadow of choice
 
Select another font of choice
I am using RollerGirls
Foreground colour - #FFFFFF
Background colour - #48301a
Stroke wodth - 2.0
 
Type out your name
Objects > Align > Horizontal Centre in Canvas
Convert to raster layer
Apply a drop shadow of choice
 
Finally, add your © copyright, licence and watermark, then save as a GIF or JPG and you're done! 
 
 
** IF YOU WISH TO ANIMATE PLEASE FOLLOW THESE NEXT STEPS **
 
Activate the Tube Layer
Duplicate twice and rename Steam1, Steam2 and Steam3
 
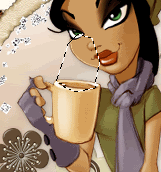
With your Freehand Tool make a selection around the top of the coffee cup


Hide Steam2 and Steam3 activating only Steam1
 
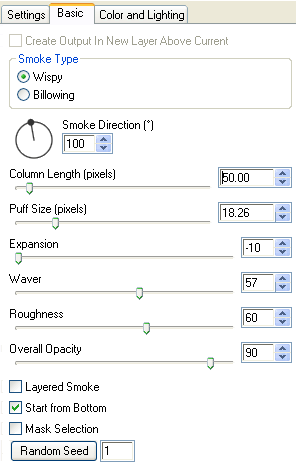
Effects > Plugins > Alien Skin Eye Candy 5: Nature > Smoke
Go to the Settings Tab and select "Medium, Steaming Coffee"
Then use the following settings:
 
 
Hide Steam1 and activate Steam2
Apply the Smoke effect, adjusting the Random Seed
 
Hide Steam2 and activate Steam3
Apply the Smoke effect again, adjusting the Random Seed once more
 
Hide Steam2 and Steam3 with only Steam1 visible
Edit > Copy Merged
 
Open Animation Shop
Edit > Paste as New Animation
 
Back to PSP
Hide Steam1 and activate Steam2
Edit > Copy Merged
 
In Animation Shop
Edit > Paste AFTER Current Frame
 
Back to PSP
Hide Steam2 and activate Steame3
Edit > Copy Merged
 
In Animation Shop
Edit > Paste AFTER Current Frame
 
Go to Frame Properties and change to 30, then save as a GIF and you're done!
 
Thanks for trying my tutorial!
 
::st!na::
 
 
Here is a non-animated version:


© Tutorial written by Stina on 27th May 2009
All rights reserved

Wednesday, May 27, 2009

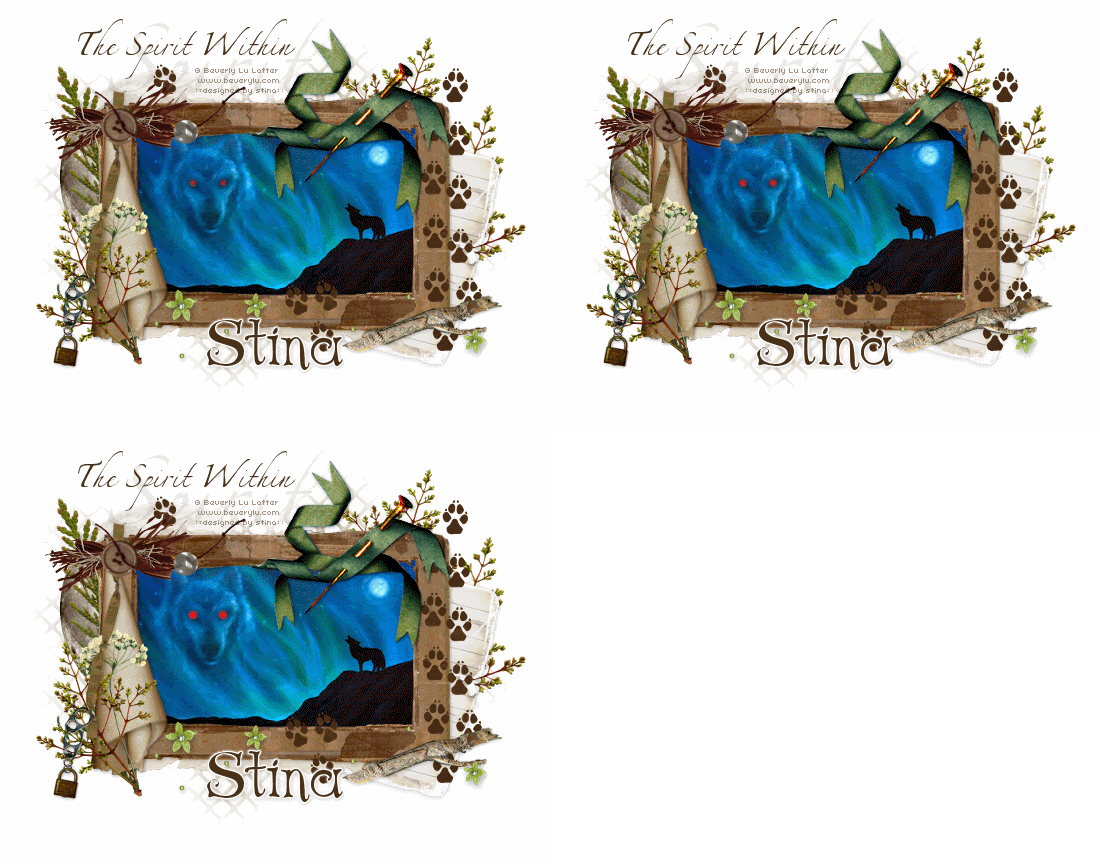
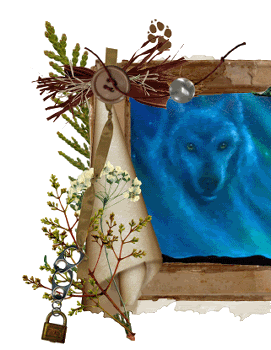
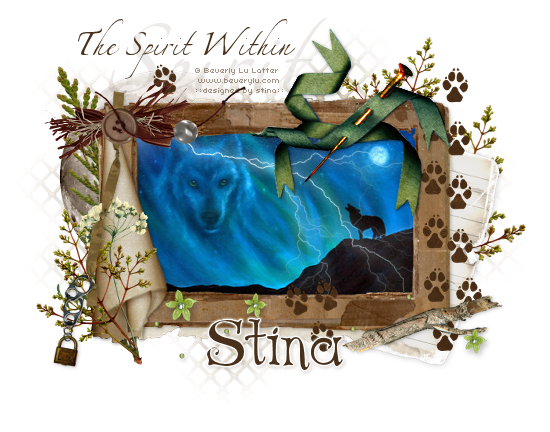
The Spirit Within


Supplies

Scrap kit of choice - I am using the final edition to the Saga Collection "The Wolf Pack" by Pimp'd Dezigns available from Twilight Scraps, Stargazer Scraps and Paradise 4 Scrappers
Image of choice - I am using the lovely artwork of Beverly Lu Latter which is free to use provided proper credit is included
WSL_Mask7 by Chelle available from her blog
Fonts of choice - I am using AL Afternoon Delight and AL Age Old Love
Plugins: Alien Skin Xenofex 2 Lightning
Alien Skin Eye Candy 5: Impact Gradient Glow
Eye Candy 4000 Gradient Glow (Optional for text)


Ready? Let's begin....


Open a new 700 x 550 blank canvas flood-filled white

Paste Frame02 as new layer
Image > Rotate by 90 to the right
Image > Mirror, then
Resize by 75%

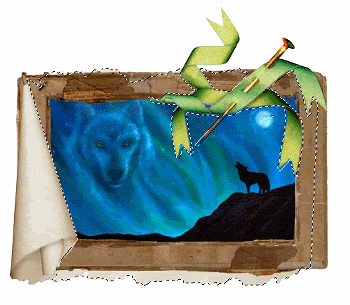
Select the area inside the Frame with Magic Wand
Selections > Modify > Expand by 20
Paste Image of choice as new layer
Resize to liking to fit within Frame
Selections > Invert
Delete, then deselect

Paste Journal as new layer
Layers > Arrange > Send to Bottom
Duplicate and bring that layer to top

Use your Freehand tool to draw around portions of the Journal tag and Ribbon
Selections > Modify > Feather by 1
Press delete once or twice


Then deselect
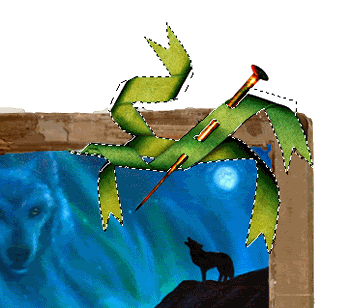
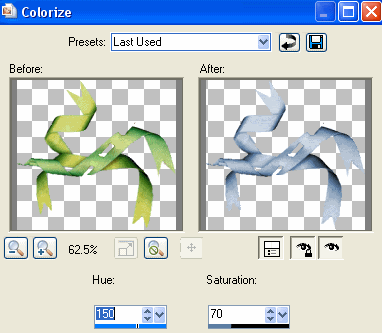
Select the Green bow in the upper right with your Magic Wand


Then got to Adjust > Hue & Saturation > Colourise with the following settings:


KEEP SELECTED!!

Set the blend mode to Multiply, then
Layers > Promote Selection to Layer
Set Promoted Layer to Multiply also
Deselect

Paste Twig as new layer
Image > Rotate by 10 to the left
Resize by 35%
Position in lower right

Paste PawPrints as new layer
Resize by 45%
Layers > Arrange > Move Down

Position to the right beneath the Ribbon
Duplicate, then
Image > Rotate by 25 to the left
Erase the paws covering the image, leaving about three placed over the bottom of Frame

Place another single pawprint at the top
Resize these by 90%

Paste Greens03 as new layer
Image > Mirror
Image > Rotate by 10 to the right
Resize by 42%
Position to the left below Frame

Paste Greens04 as new layer
Layers > Arrange > Bring to top again
Resize by 35%
Position in lower left joining the bottom branch

Paste Flowers03 as new layer
Image > Rotate by 90 to the right
Resize by 30%
Position to the lower left as above, then
Carefully erase the leaves

Paste Rusty Charm as new layer
Layers > Arrange > Bring to Top
Image > Rotate by 10 to the right
Resize by 45%
Position to the left over Paperfold and branch

Paste Bow02 as new layer
Resize by 55%
Position in upper left joining the Charm and PaperFold to the Frame
Duplicate then set blend mode to Multiply
Lower opacity to 60, then
Layers > Merge > Merge Down

Paste ButtonGroup as new layer
Resize by 55%
Position over the Bow


Paste FlowerGroup as new layer
Image > Rotate by 90 to the left
Resize by 60%
Position along bottom of Frame

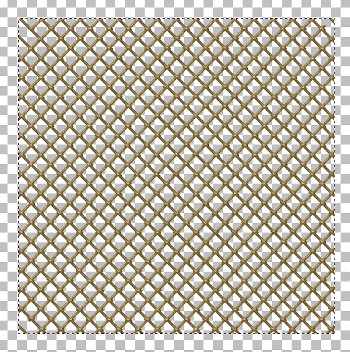
Open Mesh image
Grab your Selection Tool and in your Tool Options Palette where it says "Crate Selection from" select the Layer Opaque (middle)
This will make a selection around the Mesh


Image > Crop to Selection
Now in your Materials Palette click on the Patterns tab and locate your Mesh pattern
Set the Scale to 70; Angle at 0

On your working canvas add a new raster layer
Layers > Arrange > Send to Bottom
Flood-fill with Mesh
Layers > New Mask Layer > From Image
Locate WSL_Mask7
OK
Layers > Merge > Merge Group

Paste Notepaper as new layer
Image > Rotate by 15 to the right
Resize by 55%
Position to the right and slightly protruding

Paste Moon as new Layer
Duplicate then set blend mode to Screen
Layers > Merge > Merge Down
Dulicate again and set blend mode to Screen once more
Layers > Merge > Merge Down
Resize by 45%
Position in upper left behind greenery etc

Resize tag and add any drop shadows of choice

Select your Text Tool and font of choice
I am using AL Afternoon Delight
Text colour is #48301a

Type out your text and position
Convert to raster layer

Select another font of choice
I am using AL Age Old Love
Type out your name
Objects > Align > Horizontal Centre in Canvas
Convert to raster layer
Apply a small Gradient Glow and drop shadow of choice

Finally, add your © copyright, licence and watermark, then save as a GIF or JPG and you're done!


** IF YOU WISH TO ANIMATE THE EYES PLEASE FOLLOW THESE NEXT STEPS **

Activate the Image Layer
Duplicate twice and rename Eyes1, Eyes2 and Eyes3

Hide Eyes2 and Eyes3 activating only Eyes1
With your Freehand Tool or Selection Tool on eclipse (whichever you find easiest) draw out two small circles around the Wolf's eyes
Selections > Modify > Feather by 2

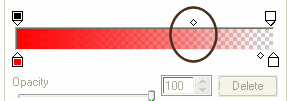
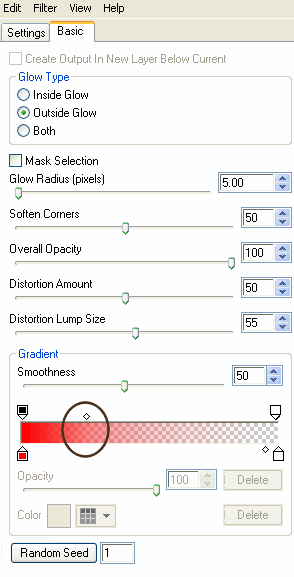
Effects > Plugins > Alien Skin Eye Candy 5: Impact > Gradient Glow with the following settings:


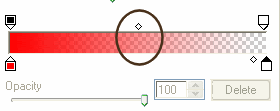
*Please note the position of slider*

KEEP SELECTED!!

Hide Eyes1 and activate Eyes2
Apply the Glow effect, adjusting the Gradient colour slider up to halfway


Hide Eyes2 and activate Eyes3
Apply the Glow effect again, adjusting the Gradient colour slider up to three quarters of the way

Deselect

Hide Eyes2 and Eyes3 with only Eyes1 visible
Edit > Copy Merged

Open Animation Shop
Edit > Paste as New Animation

Back to PSP
Hide Eyes1 and activate Eyes2
Edit > Copy Merged

In Animation Shop
Edit > Paste AFTER Current Frame

Back to PSP
Hide Eyes2 and activate Eyes3
Edit > Copy Merged

In Animation Shop
Edit > Paste AFTER Current Frame
Select All and adjust Frame Properties to 30, then save as a GIF and you're done!


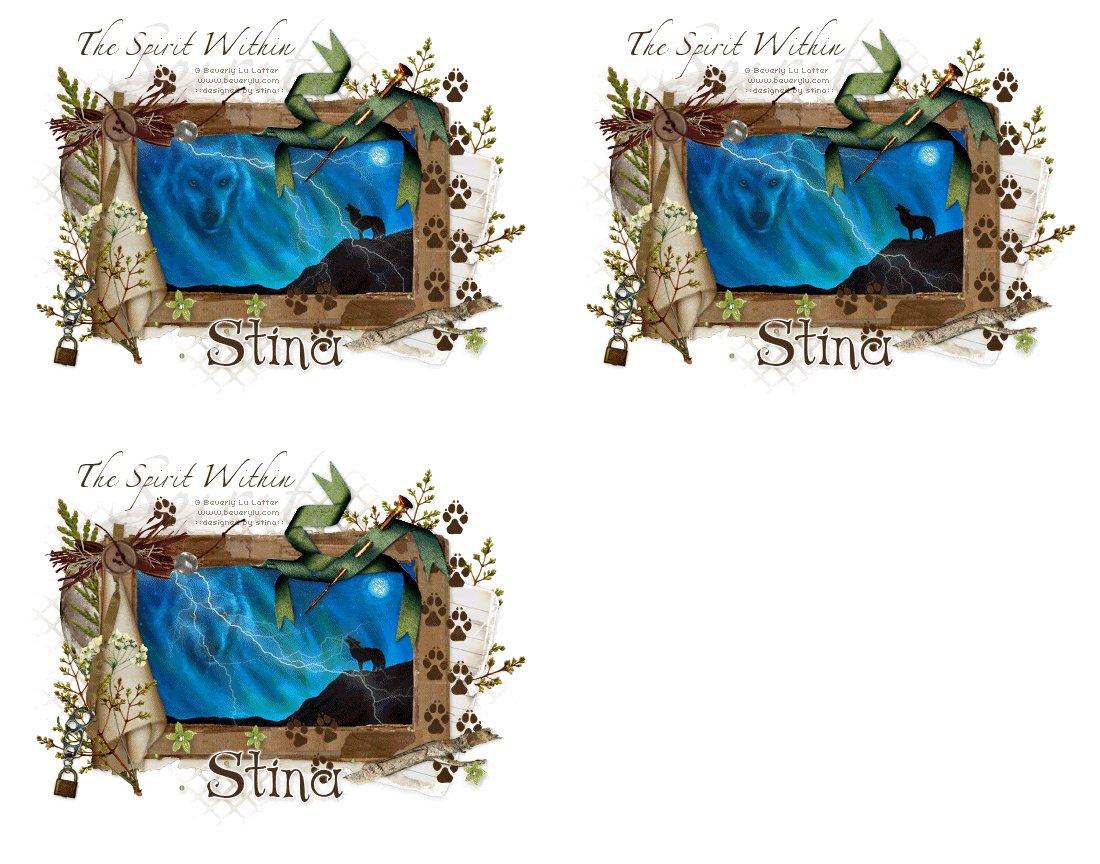
** IF YOU WISH TO ANIMATE WITH LIGHTNING PLEASE FOLLOW THESE NEXT STEPS **


Activate the Image Layer
Duplicate twice and rename Lightning1, Lightning2 and Lightning3

Hide Lightning2 and Lightning3 activating only Lightning1

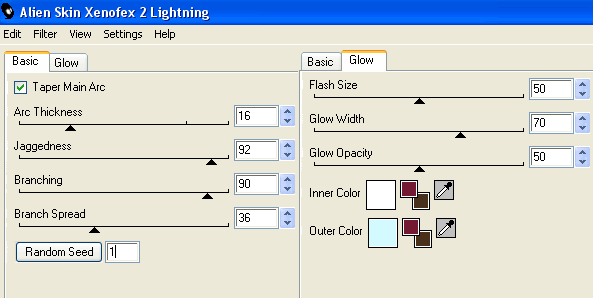
Effects > Plugins > Xenofex 2 > Lightning with the following settings:


Hide Lightning1 and activate Lightning2
Apply the Lightning effect, adjusting the Random Seed

Hide Lightning2 and activate Lightning3
Apply the Lightning effect again, adjusting the Random Seed once more

Hide Lightning2 and Lightning3 with only Lightning1 visible
Edit > Copy Merged

Open Animation Shop
Edit > Paste as New Animation

Back to PSP
Hide Lightning1 and activate Lightning2
Edit > Copy Merged

In Animation Shop
Edit > Paste AFTER Current Frame

Back to PSP
Hide Lightning2 and activate Lightning3
Edit > Copy Merged

In Animation Shop
Edit > Paste AFTER Current Frame
Select All and adjust Frame Properties to 40, then save as a GIF and you're done!

Thanks for trying my tutorial!

::st!na::


Here is a non-animated version:

© Tutorial written by Stina on 27th May, 2009
All rights reserved