
This tut is dedicated to my friend Linda, for whom I made this tag originally because of her love for Arthurian legend and Josephine Wall art
Supplies
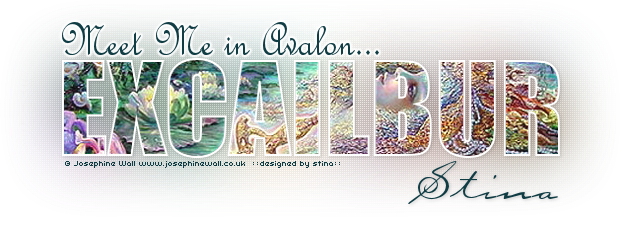
Image of choice - I am using the gorgeous artwork of Josephine Wall which is free to use
The Image I used is called "Lady in the Lake" and is available from her gallery
Plugin: Penta.com > Color Dot (free to use)
Fonts of choice - I am using Impact, French Script MT and Carpenter Script
This is an easy tut of a tag I made some time ago
Ready? Let's begin....
Open a new 600 x 400 blank canvas flood-filled white
Hide background for now so your canvas appears transparent
Hide background for now so your canvas appears transparent
Select your Text Tool and a bold font of choice
I am using Impact
I am using Impact
In your Materials Palette set the following:
Foreground - #FFFFFF
Background - null
Foreground - #FFFFFF
Background - null
Set your stroke width to 2.00 and your font size to around 120 (depending on your choice of font)
Type out your text (a single word) or even your name if you wish

**note - I coloured the background for this screenshot so you could see my example**
Objects > Align > Centre in Canvas
Convert to raster layer
Convert to raster layer
Open an image of choice
I am using Josephine Wall's lovely "Lady of the Lake"
Copy your image
I am using Josephine Wall's lovely "Lady of the Lake"
Copy your image
On your working canvas unhide your white Background, then
Edit > Paste as new layer
Resize image if necessary and position to liking
Layers > Arrange > Move Down (so it is below your text layer)
Edit > Paste as new layer
Resize image if necessary and position to liking
Layers > Arrange > Move Down (so it is below your text layer)
Activate your Text layer
With your Magic Wand select the area outside your text
DON'T FORGET TO SELECT THE SPACES INSIDE LETTERS SUCH AS D, P, B, R, O, A ETC...
Selections > Modify > Expand by 1
With your Magic Wand select the area outside your text
DON'T FORGET TO SELECT THE SPACES INSIDE LETTERS SUCH AS D, P, B, R, O, A ETC...
Selections > Modify > Expand by 1
Activate your Image layer
Delete
Delete
KEEP SELECTED!!
Duplicate layer
Adjust > Softness > Soft Focus with the Soft Glow setting:
Adjust > Softness > Soft Focus with the Soft Glow setting:
Deselect
Lower opacity to 50
Layers > Merge > Merge Down
Lower opacity to 50
Layers > Merge > Merge Down
Duplicate layer again
Activate bottom layer
Adjust > Blur > Gaussian Blur with a Radius of 25.00
Adjust > Blur > Gaussian Blur with a Radius of 25.00
STILL ON SAME LAYER
Grab your Selection Tool and in your Tool Options Palette select Create Selection From:
Choose Layer Opaque
Grab your Selection Tool and in your Tool Options Palette select Create Selection From:
Choose Layer Opaque
Image > Crop to Selection
Resize if you wish
Duplicate blurred layer and lower opacity to 50
Layers > Merge > Merge Down
Layers > Merge > Merge Down
Effects > Plugins > Penta.com > Color Dot with the following settings:
Activate your top layer
Layers > Merge > Merge Down
(The white text outline and your image should now be one layer)
Layers > Merge > Merge Down
(The white text outline and your image should now be one layer)
Add a drop shadow:
H & V - 1
Opacity - 15
Blur - 5.00
Colour - #000000
H & V - 1
Opacity - 15
Blur - 5.00
Colour - #000000
Select your Text Tool and font of choice
I am using French Script MT
Choose a colour from your tag and set it as your Background
I am using French Script MT
Choose a colour from your tag and set it as your Background
Type out your Text
Position along the top of your main text to your liking
Convert to raster layer
Apply a slight gradient glow
Position along the top of your main text to your liking
Convert to raster layer
Apply a slight gradient glow

If your main text WAS NOT your name, then select another font of choice
I used Carpenter Script
I used Carpenter Script
Type out your name and position to the right
Convert to raster layer
Apply any effects and drop shadows you wish
Convert to raster layer
Apply any effects and drop shadows you wish
Finally, add any © copyright, licence and watermark, then save as a GIF or JPG and you're done!
Thanks for trying my tutorial!
::st!na::
© Tutorial written by Stina on 7th May 2009
All rights reserved
No comments:
Post a Comment