Please email me designed.by.stina@gmail.com with your creations. I'd love to see them.

Showing posts with label Babycakes Scraps. Show all posts

Thursday, June 4, 2009

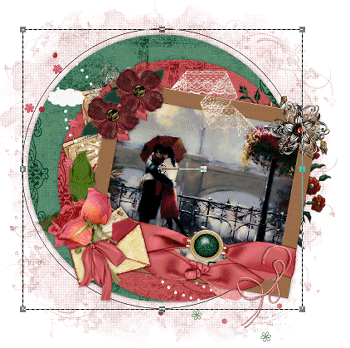
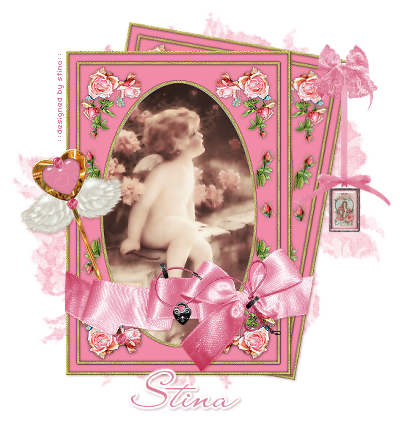
A Touch of Vintage


Supplies
 
Scrap kit of choice - I am using the gorgeous "Serenity" by Lynne of Babycakes Scraps which is available from Cotton Candy Kreations, Creative Scraps and Scraps with Attitude
Tube of choice - I am using the gorgeous artwork of Jennifer Janesko which is available with a licence from CILM
**PLEASE DO NOT USE HER ARTWORK WITHOUT THE APPROPRIATE LICENCE**
WSL_Mask7 by Chelle available from her blog
Fonts of choice - AL Age Old Love and BakerScript
Plugins: Xero Radiance, Penta.com Color Dot and Xenofex 2 Constellation
 
 
Ready? Let's begin....
 
 
Open a 700 x 500 blank canvas flood-filled white
 
Paste PaperFrame as new layer
Resize by 60%
Move slightly to the left
 
Select the inside of the Frame with your Magic Wand
Selections > Modify > Expand by 10
Add a new raster layer
Paste paper of choice INTO selection
Layers > Arrange > Move Down
 
KEEP SELECTED!!
 
Duplicate, then set blend mode to Screen
Lower opacity to 50
Layers > Merge > Merge Down
 
STILL SELECTED!!
 
 
Paste Tube as new layer
Resize as necessary and position behind Frame
Duplicate
 
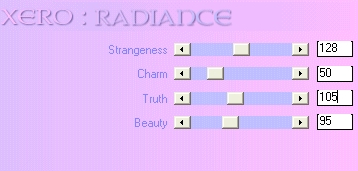
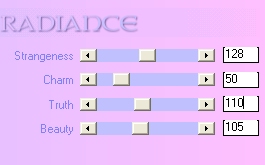
Effects > Plugins > Xero > Radiance with default settings, then
Lower opacity to 50
Deselect
 
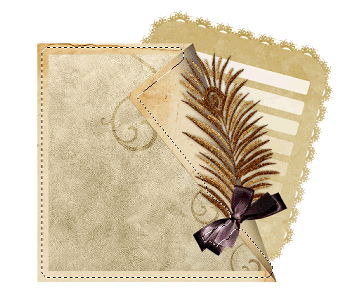
Paste JournalPaper as new layer
Image > Rotate by 10 to the right
Resize by 70%
Layers > Arrange > Move Down
Move slightly to the right

 
 
Paste Fancy Bow as new layer
Resize by 20%
Position over top of existing bow on Frame
 
Paste SkinnyBow of choice as new layer
Image > Mirror, then
Image > Rotate by 5 to the right
Resize by 30%
Position in upper left of Frame

Paste PearlStrand as new layer
Resize by 25%
Position between Frame and JournalPaper layers
 
Paste Flower of choice as new layer
Resize by 25%
Position in lower right corner (behind FRame)
 
Paste second flower of choice as new layer
Resize by 25%
Position above first flower behind Frame
 
Paste third flower of choice
Resize by 25%
Position between first two flowers then move down two layers tucked behind them
 
Paste Handkerchief as new layer
Resize by 30%
Position behind flowers
 
Paste Necklace as new layer
Layers > Arrange > Bring to Top
Image > Rotate by 40 to the left
Resize by 30%
Position in lower left
 
Paste CreamLace as new layer
Resize by 55%
Position along bottom of Frame
 
Paste Glitter Bird as new layer
Resize by 40%
Position amidst the feather cluster on Frame
 
Paste Blossoms as new layer
Resize by 25%
Layers > Arrange > Send to Bottom
Position behind JournalPaper
 
Paste Swirl Doodle
Resize by 25%
Position in lower left
 
Paste Paper of choice as new layer
Send to bottom
 
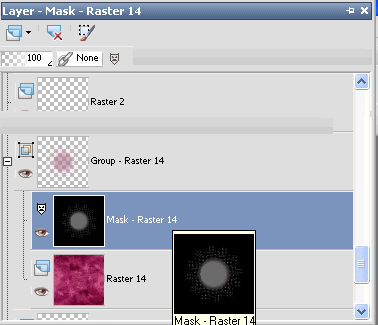
Layers > New mask Layer > From Image
Apply WSL_Mask7
 
Select your Pick Tool (Deformation Tool in some versions)
Use the nodes to pull the mask layer up and out to size
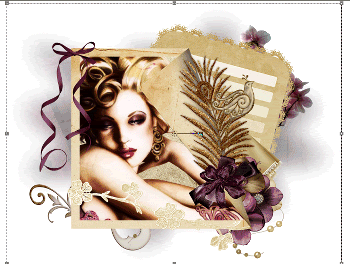
 
 
Layers > Merge > Merge Group
 
Crop and resize to liking
 
Still on Mask Layer, go to
 
Effects > Plugins > Penta.com > Color Dot with default settings
 
Select your Text Tool and font of choice
I am using two fonts - AL Age Old Love and BakerScript
Text colour is #411728
Type out your text and position to liking
Add any drop shadow of choice
 
Select another font or one of the same
I am using BakerScript
 
Type out your name
Objects > Align > Horizontal Centre in Canvas
Convert to raster layer
Apply a drop shadow of choice
 
Finally, add your © copyright, licence and watermark, then save as GIF or JPG and you're done!
 

** IF YOU WISH TO ANIMATE PLEASE FOLLOW THESE NEXT STEPS **
 
Activate your Mask Layer
Duplicate twice and rename Sparkle1, Sparkle2 and Sparkle3
 
Hide Sparkle2 and Sparkle3 leaving only Sparkle1 visible
 
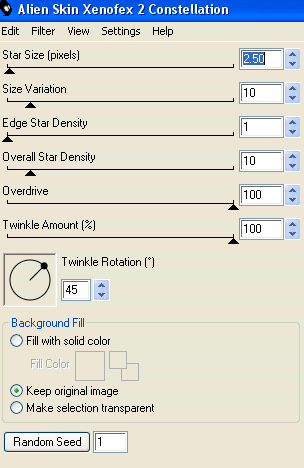
Effects > Plugins > Xenofex 2 > Constellation with the following settings:
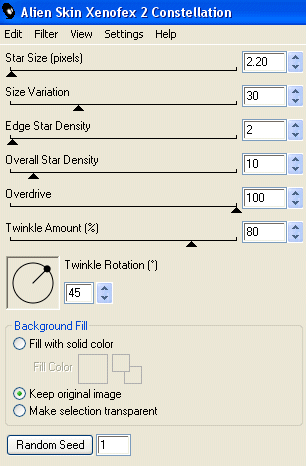
 

Hide Sparkle1 and activate Sparkle2
Apply the Constellation effect, adjusting the Random Seed
 
Hide Sparkle2 and activate Sparkle3
Apply the Constellation effect again, adjusting the Random Seed once more
 
Now for the animation part!
 
Hide Sparkle2 and Sparkle with only Sparkle1 visible
Edit > Copy Merged
 
Open Animation Shop
Edit > Paste as New Animation
 
Back to PSP
Hide Sparkle1 and activate Sparkle2
Edit > Copy Merged
 
In Animation Shop
Edit > Paste AFTER Current Frame
 
Back to PSP
Hide Sparkle2 and activate Sparkle3
Edit > Copy Merged
 
In Animation Shop
Edit > Paste AFTER Current Frame
 
Now save as a GIF and you're done!
 
Thanks for trying my tutorial!
 
::st!na::
 
 
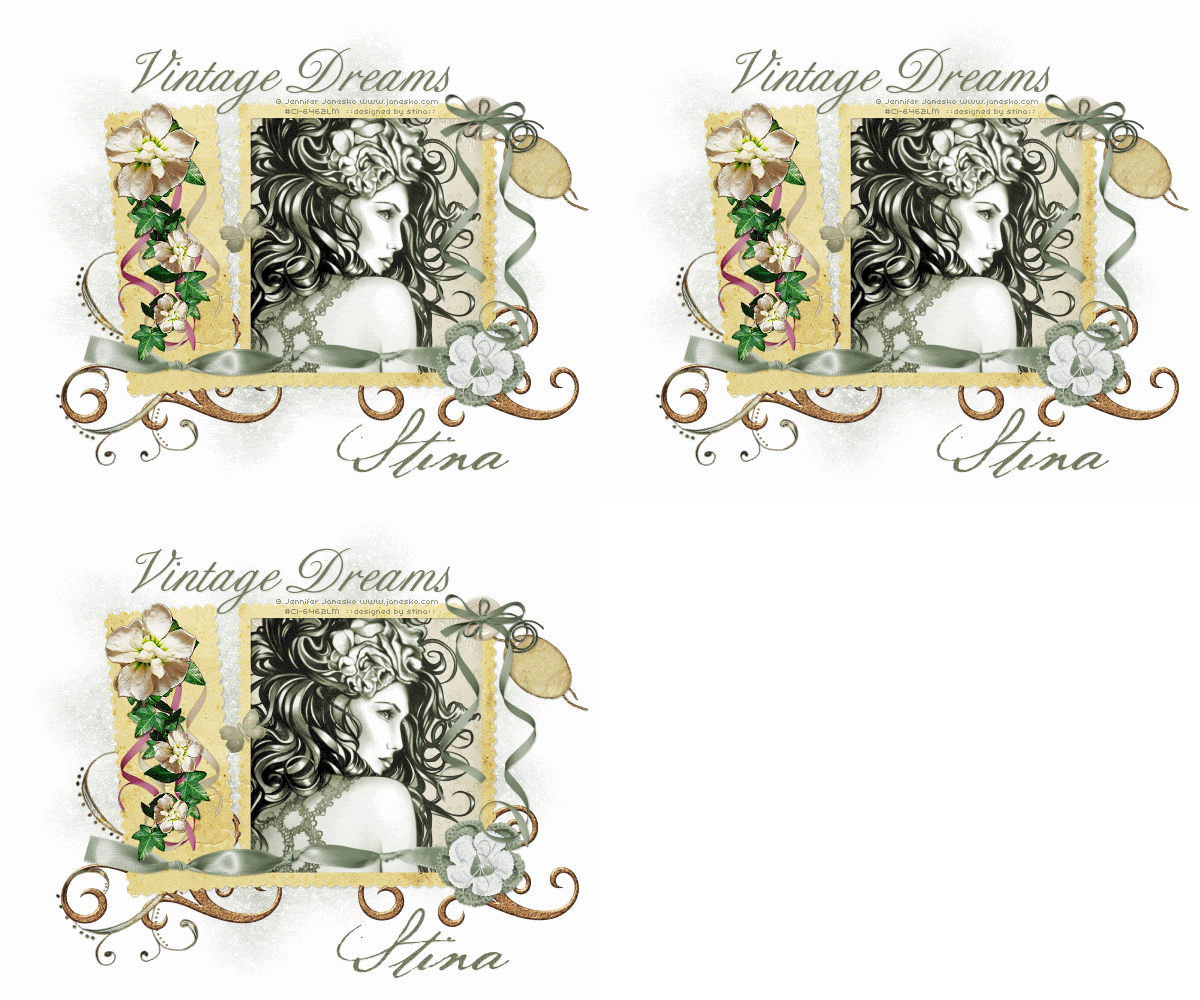
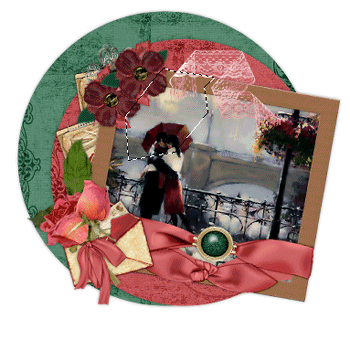
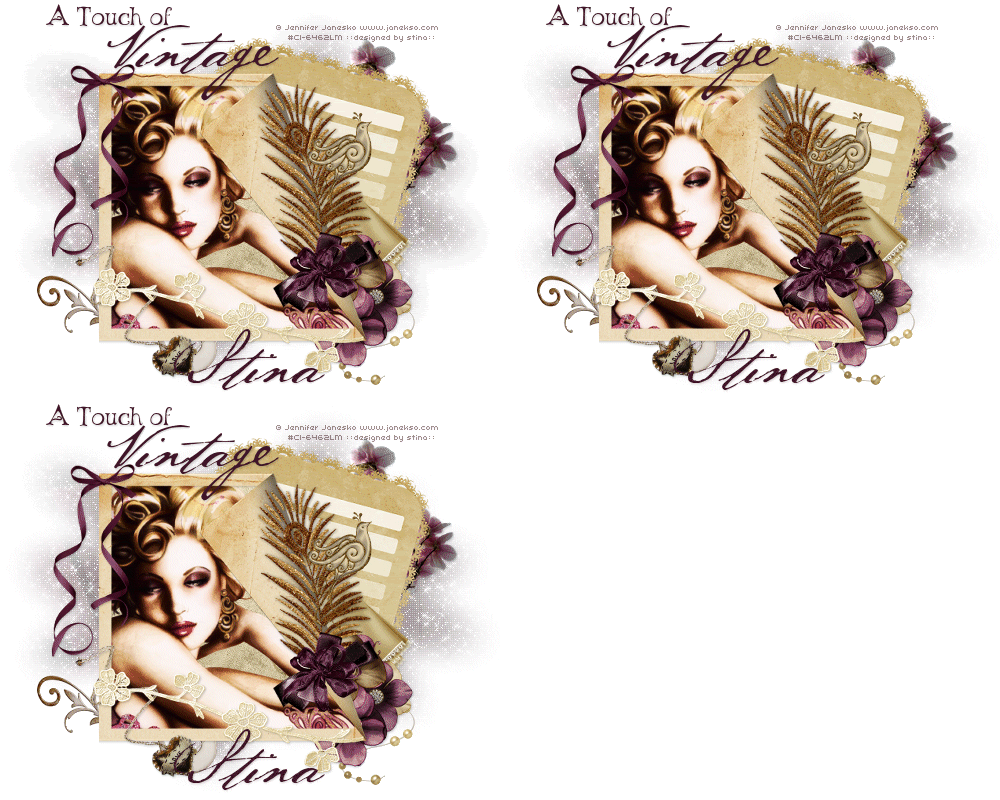
Here is a non-animated version:
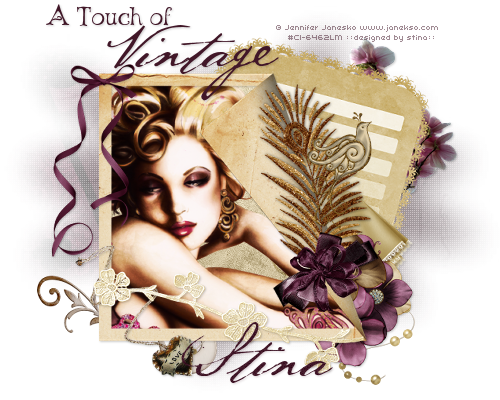


© Tutorial written by Stina on 4th June 2009
All rights reserved

Friday, May 22, 2009

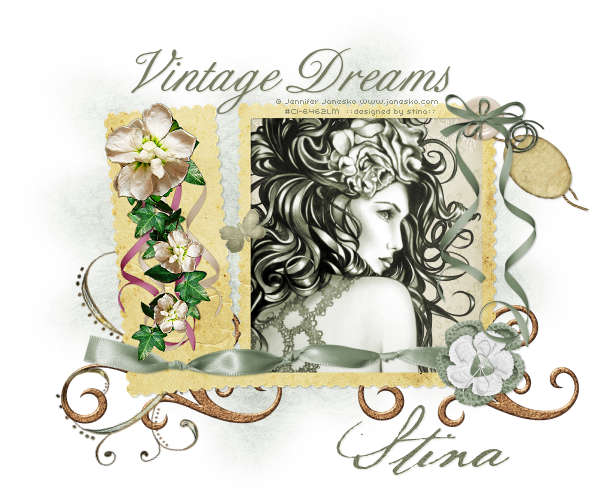
Vintage Dreams

 
Supplies
 
Scrap kit of choice - I am using "Vintage Floral" by Babycakes Scraps available from Creative Scraps, Scraps With Attitude and Cotton Candy Kreations
Tube of choice - I am using the lovely artwork of Jennifer Janesko which is available with a licence from CILM
**PLEASE DO NOT USE HER ARTWORK WITHOUT THE APPROPRIATE LICENCE**
WSL_Mask7 by Chelle available from her blog
Fonts of choice - I am using BixAntiqueScriptHmk and Baker Script
Plugin: Xenofex 2 Constellation
 
 
Ready? Let's begin....
 
 
Open a new 600 x 600 blank canvas flood-filled white
 
Paste StampFrame as new layer
Resize by 70%
 
Select the area inside the Frame with your Magic Wand
Selections > Modify > Expand by 8
Add new raster layer
Paste Paper of choice INTO selection
Deselect
 
Layers > Arrange > Move Down
 
Paste RibbonFlower of choice as new layer
resize by 15%
Position in lower right
 
Paste a Ribbon of choice as new layer
Resize as necessary, depending on size
Position along bottom of Frame
 
With your Freehand Tool draw around the part of the leaf on the Frame that overlaps the Ribbon
Delete then deselect
 
 
Paste TiedButton as new layer
Resize by 25%
Position in upper right
 
Paste Bow & Ribbon as new layer
Resize by around 30%
Position in upper right over the centre of Button
 
Paste a Tag as new layer
Image > Rotate by 50 to the left
Resize by 15%
Position in upper right and below the Tied Button
 
 
Paste SwirlTwo as new layer
Resize by 30%
Position to the lower right
 
Layers > Arrange > Send to Bottom
 
Duplicate, then move across to the left
 
Paste Doodle as new layer
Resize by 40%
Use your Pick Tool to rotate slightly to the left
Position over Swirl in lower left
 
 
Paste Butterfly as new layer
Image > Rotate by 30 to the left
Resize by 10%
Position to your liking
 
Paste your Tube of choice as new layer
Resize as necessary and position
 
Paste Paper of choice as new layer
Layers > Arrange > Send to Bottom
 
Layers > New Mask Layer > From Image
Locate WSL_Mask7
OK
Layers > Merge > Merge Group
Lower opacity to 80
 
Activate top layer
 
Select your Text Tool and font of choice
I am using BixAntiqueScriptHmk
Text colour is #787c62
 
Type out text of choice
Position and convert to raster layer
Apply a drop shadow of choice
 
Select another font of choice
I am using BakerScript
 
Type out your name and position
Convert to raster layer
Apply drop shadow of choice
 
Finally, add your © copyright, licence and watermark, then save as a GIF or JPG and you're done!
 
 
** IF YOU WISH TO ANIMATE PLEASE FOLLOW THESE NEXT STEPS **
 
Activate the Mask Layer
Duplicate twice and rename Sparkle1, Sparkle2 and Sparkle3
 
Hide Sparkle2 and Sparkle3 activating only Sparkle1
 
Effects > Plugins > Xenofex 2 > Constellation with the following settings:
 
 
Hide Sparkle1 and activate Sparkle2
Apply the Constellation effect, adjusting the Random Seed
 
Hide Sparkle2 and activate Sparkle3
Apply the Constellation effect again, adjusting the Random Seed once more
 
Hide Sparkle2 and Sparkle3 with only Sparkle1 visible
Edit > Copy Merged
 
Open Animation Shop
Edit > Paste as New Animation
 
Back to PSP
Hide Sparkle1 and activate Sparkle2
Edit > Copy Merged
 
In Animation Shop
Edit > Paste AFTER Current Frame
 
Back to PSP
Hide Sparkle2 and activate Sparkle3
Edit > Copy Merged
 
In Animation Shop
Edit > Paste AFTER Current Frame
 
Save as a GIF and you're done!
 
Thanks for trying my tutorial!
 
::st!na::
 
 
Here is a non-animated version:


© Tutorial written by Stina on 22nd May 2009
All rights reserved
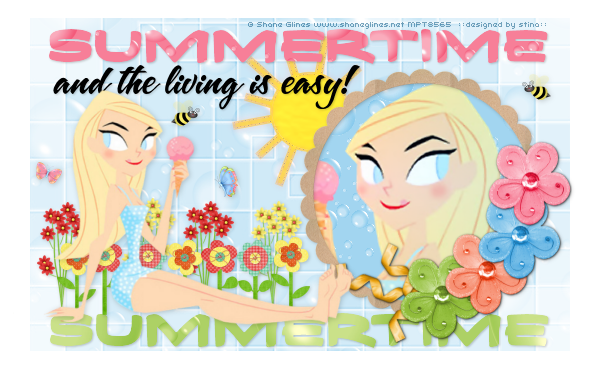
Friday, April 3, 2009

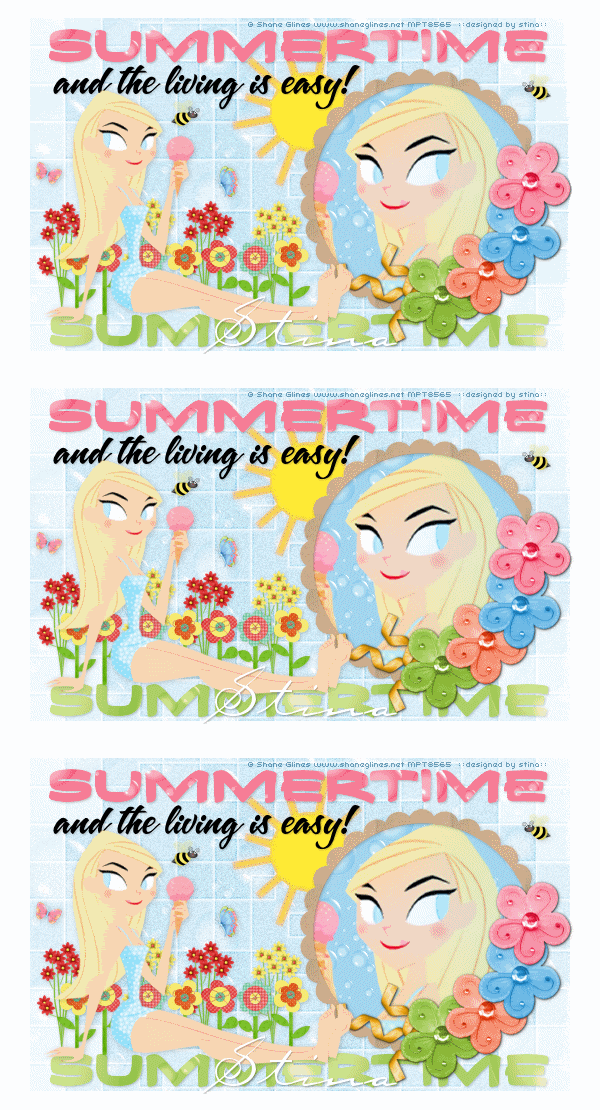
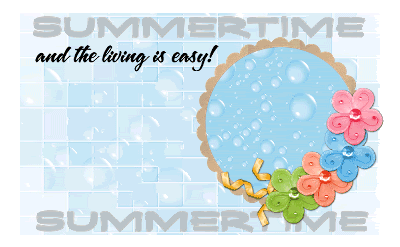
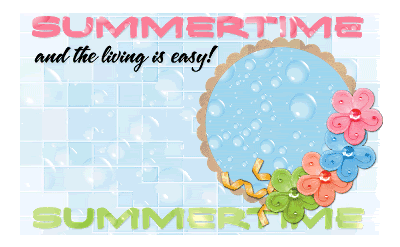
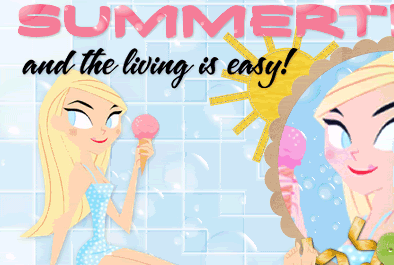
Summertime

 
Supplies
 
"Summer Party" by Farrah's Creations from her part of the Blog Train
Butterflies by Babycakes Scraps from her part of the Summer Party Blog Train
Tube of choice - I am using the artwork of Shane Glines which can be purchased from CILM
**PLEASE DO NOT USE HIS ARTWORK WITHOUT THE APPROPRIATE LICENCE**
Flowers and Bee by Micki from her "Frueling" Scrap
Mask by Caro
Summer WordArt by Yvette
Font of choice - I used Carpenter Script
Plugin: Xero Improver and Soft Mood
Plugin: Color Rave Atmospherizer
 
My Supplies here
 
 
~ Step 1 ~
 
Open a new blank canvas 600 x 370 flood-filled white
 
We will begin with Farrah's kit
Paste Paper4 as new layer
Resize by 18%
 
Layers / New Mask Layer / From Image
Locate Caro10
Source Luminance
OK
 
Layers / Merge / Merge Group
 
Resize layer by 90%
 
Rename this layer to Mask Background
 
Paste Frame as new layer
Resize by 13%
Position to the right
 
Add a new raster layer
Layers / Arrange / Move Down
 
Click inside the Frame with your Magic Wand
Selections / Modify / Expand by 5
Activate your Paper4 layer again
Edit / Copy
Edit / Paste into Selection
Deselect


~ Step 2 ~
 
Open Yvette_EOC_SummerWordArt4
Activate the layer that reads Summertime
Edit / Copy
Paste onto your working canvas and position at the top
Duplicate and place this layer at the bottom
 
Layers / Arrange / Move Down
Repeat twice
Rename layers Summertime1 and Summertime2
 
Back on the WordArt activate the top text layer
Edit / Copy
Paste onto canvas as a new layer
Resize by 90 – 95% if necessary
Position below Summertime1
 

Open Papers1 and 5
On your canvas activate Summertime1 (top layer)
Selections / Float
Selections / Defloat
Paste Paper5 as new layer
Resize by 70%
Selections / Invert
Delete twice
Deselect
 
Activate Summertime2
Selections / Float
Selections / Defloat
Paste Paper1 as new layer
Resize by 70%
Selections / Invert
Delete twice
Deselect
 
Delete the two Summertime template layers
Rename the two you just made with the papers Summertime1 and Summertime2
 
Add a drop shadow to the Word Art layers
H & V – 1
Opacity – 20
Blur – 5.00
Colour - #000000


~ Step 3 ~
 
Paste your tube as a new layer
Resize as necessary
Position to the left on the tag above the Summertime2 wordart
(a sitting tube works best)
 
Add a drop shadow:
H & V – 1
Opacity – 20
Blur – 8.00
Colour - #000000
 
Paste your tube again
Image / Mirror
Resize slightly larger if necessary
Position inside the frame to your liking beneath the Frame
 
Using your Magic Wand click inside the Frame
Selections / Modify / Expand by 5
Selections / Invert
Activate your tube layer
Then delete
Deselect
 
Duplicate then hide layer
 
On original go to:
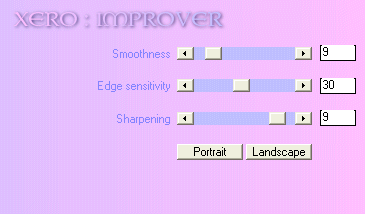
Effects / Plugins / Xero / Improver with default settings
Then,
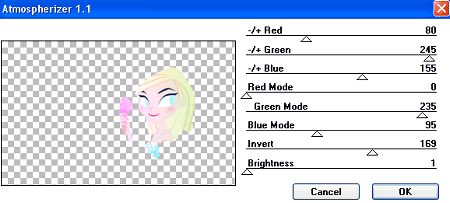
Effects / Plugins / ColorRave / Atmospherizer with the following settings:
 

Turn the visibility of the duplicate layer back on
Set the blend mode to Multiply
Lower opacity to 40
 
Add a drop shadow to your Frame:
H & V – 1
Opacity – 20
Blur – 5.00
Colour - #000000
  
 
~ Step 4 ~
 
Paste SummerParty_Sun as new layer
Resize by 10%
Position toward the centre but tucked behind the Frame and beneath the Word Arts
 
 
Effects / Plugins / Xero / Improver with default settings
Effects / Plugins / Xero / Soft Mood with default settings
 
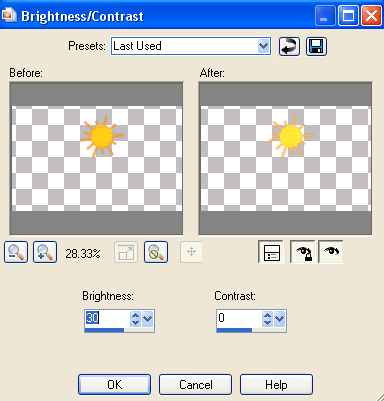
Adjust / Brightness & Contrast / Brightness/Contrast with the following settings:
 
  
Add a drop shadow:
H & V – 1
Opacity – 20
Blur – 5.00
Colour - #000000
 

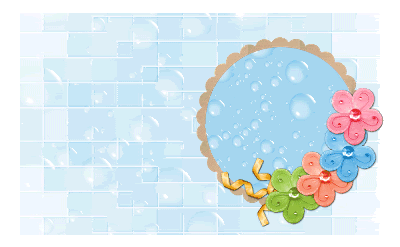
Activate Background Mask layer
 
Paste HD_Country_Flower3 as new layer
Resize by 20%
Position to the left of the frame
 
Paste HD_Country_Flower2 as new layer
Resize by 20%
Position beside first flower
 
Paste HD_Country_Flower1 as new layer
Resize by 20%
Position again
 
Duplicate each flower and place them alternately across your tag
 
Paste Wildflowers2 as new layer
Resize by 30%
Place behind flowers
 
Paste Wildflowers1 as new layer
Resize by 30%
Place behind flowers alongside first set
 
Duplicate each of these layer and place to your liking
 
Merge Down each layer till the flowers are one layer

Then add a drop shadow:
H & V – 1
Opacity – 20
Blur – 5.00
Colour - #000000
 
Paste BCS_Summer bfly as new layer
Image / Rotate by 20 to the right
Resize by 6%
Position to the left  of your tube
 
Paste BCS_Summer Bfly2 as new layer
Resize by 8%
Position to the right
 
Paste Bee1 as new layer
Resize by 10%
Place in position
Duplicate
Image / Mirror
Position duplicate bee to the right
 
Add the same drop shadow as above to the Butterflies and Bees layers
 
Now is the time to crop and resize your tag if you wish to do so
 
Add your © copyright, licence and watermark as a new layer
 
Don't forget to add your name too!
 

~ Step 5 ~
 
**This step is only if you wish to animate**
 
Activate Background Mask layer
Duplicate twice, giving you a total of THREE duplicate layers
Turn off the visibility of the top two
 
On the first layer go to:
Adjust / Add/Remove Noise / Add Noise with a radius of15
Turn off layer and turn on Layer2
Repeat Noise changing the Noise to 20
Turn off layer and turn of Layer3
Repeat Noise changing Noise to 25
 
Once again hide the top two layers
Edit / Copy Merged
 
Then in Animation Shop
Edit / Paste as new Image
 
Back to PSP
Turn off layer and turn on Layer2
Edit / Copy
 
In Animation Shop
Edit / Paste after Current Frame
 
Back to PSP
Turn off layer and turn on Layer3
 
In Animation Shop
Edit / Paste after Current Frame
 
That's it!
 
Save your work as a GIF and you're done!
 
Thank you for trying my tutorial
 

::st!na:
 
 
Here is a non-animated version:


© Tutorial written by Stina on 9th March 2009
All rights reserved
Friday, February 27, 2009

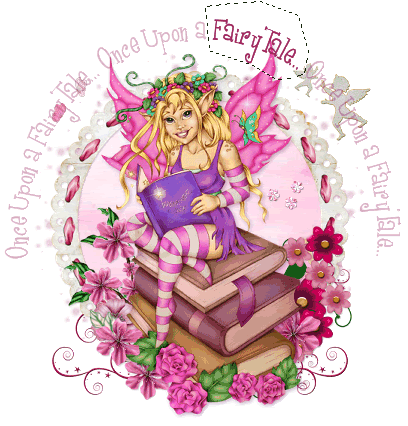
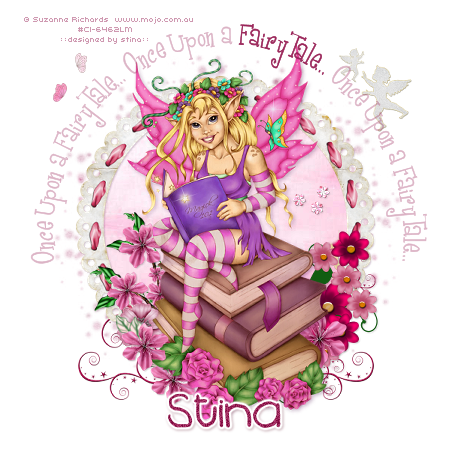
Once Upon a Fairytale...

 
Supplies
 
Scrap kit of choice - I am using the lovely "All About Love" by BabyCakes Scraps which can be purchased from her blog, Creative Scraps, Cotton Candy Kreations and Aussie Scraps (full list available on her blog)
Tube of choice - I am using the delightful artwork of Suzanne Richards which can be purchased from CILM
**PLEASE DO NOT USE HER ARTWORK WITHOUT THE APPROPRIATE LICENCE**
Frame by Cinnamon Scraps from her "All About Love" kit
WSL_Mask1 by Chelle
Fonts of choice - I am using Girls Are Weird and 2Peas Blueberry Pie
Plugin: Eye Candy 4000 Gradient Glow (optional)
 
 
~ Step 1 ~
 
Open a new blank 600 x 600 canvas flood filled white
 
Paste AllAboutLoveFrame as new layer
Resize by 65%
With your magic wand click inside the frame
Selections / Modify / Expand by 10
Paste Soft Pink Paper as new layer
Move below Frame
Selections / Invert
Delete
Deselect
 
Duplicate and set blend mode to Multiply
 
Paste FancyDoodle as new layer
Resize by 50%
Move below Frame
 
Paste ClusterFrame as new layer
Resize by 30%
With your Eraser Tool carefully erase out ALL PARTS of the frame - you may have to zoom in to see better
Position to the lower right


~ Step 2 ~
 
Paste your tube as a new layer
Resize as necessary
Position in the centre of frame
 
Paste BlossomWithLeaves as new layer
Resize by 25% then Image / Mirror
Position to the left
 
Paste PrettyPinkFlower as new layer
Resize by 15%
Position to the left behind flower and books
 
Paste BlossomBranch as new layer
Image / Rotate by 20 to the right
Resize by 40%
Position tucked behind tube and flowers
 
Select your magic wand with the following settings:
 
 
Carefully select inside the dark green areas of the leaves on the branch (zoom in for a better look if you prefer)
When each of the desired areas have been selected, go to
Layers / Promote Selection to Layer
Deselect
Set your blend mode to Screen and duplicate


Paste Cluster as new layer
Resize by 50% and position to the right in the frame
 
Paste DoubleWings as new layer
Resize by 20% twice
Position to the upper left
 
Paste PinkDoubleWings as new layer and repeat resizing as above
Image / Mirror and position alongside first set of wings to the left
 
Paste LargeCupid as new layer
Resize by 40% twice
Position in upper right
 
Duplicate then resize by 50%
Image / Mirror and position with other cupid
Lower the opacity of both these layers to 60
 
Apply slight drop shadows to your layers
Then crop and resize
 

~ Step 3 ~
 
Activate your background
Paste SpongeTexturePaper as new layer
 
Layers / New Mask Layer / From Image
Locate WSL_Mask1
SOurce Luminance
OK
 
In your Layer Palette locate the Mask Layers
Click on the + to open the Group
Activate the actual Mask layer itself
 

Resize by 105%
Then Layers / Merge / Merge Group
 
Select your Preset Shapes Tool with your foreground coloured and background null
Choose Ellipse and draw out a circle around your tag
 
Select your Text Tool and choose a font
On the curve type out "Once upon a FairyTale..." or anything you choose
 
In your layer palette open the Vector Layer and close off the Ellipse
Convert to raster layer
Lower the opacity of this layer to about 35
 
Grab your Freehand Tool and draw around one of the words that stand out in the text
Layers / Promote Selection to Layer
You will see this layer revert to its normal opacity and therefore stands out from the rest of the text
 

Deselect
 
Select another font, type out your name and add any effects you wish
(I used some Noise, Gradient Glow on my usual settings and a slight drop shadow)
 
Add your © copyright, licence and watermark then save as a GIF or JPG and you're done!
 
Thanks for trying my tutorial
 
::st!na::
 

© Tutorial written by Stina on 26th Febraury 2009
All rights reserved
 

Monday, February 16, 2009

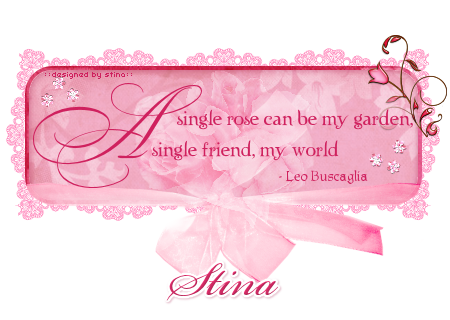
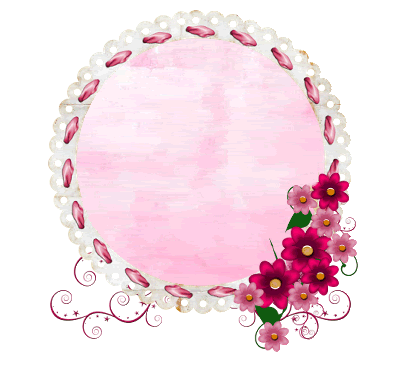
A Single Rose...

asinglerose-stina_stina02091

Supplies

Scrap pieces of choice - I used Paper and Floral doodle from "Spring Fever" by Cinnamon Scraps
Organza Bow, Pink Lace and Floral Cluster from "All About Love" by Babycakes Scraps
Roses from "Vintage Sweetheart" by Kristi of The Scrappin Divaz Designz
Fonts of choice - I used Bickham Script Fancy and Twilight
Eye Candy 4000 Gradient Glow (optional)

~ Step 1 ~

Open a 650 x 450 transparent canvas

Using your kit of choice open a nice paper which will be your main colour (I am using Paper6) and minimise it

Select Rounded Rectangle in your Selection Tools and draw out a rectangle
You will see the marching ants

Add a new raster layer

Select your Flood Fill Tool

In your Materials Palette find the Paper you chose under Patterns
Flood fill layer

KEEP SELECTED!!

Selections / Modify / Contract by 4
Delete

STILL KEEP SELECTED!!

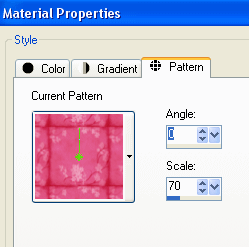
In your Materials Palette change the Scale of the Pattern to 70

asr-01

Add a new raster layer

Layers / Arrange / Send to Bottom

Selections / Modify / Expand by 2
Flood fill layer with paper pattern
Reduce the opacity of this layer to 50

KEEP SELECTED….*g*

Activate your background
Add new raster layer and flood fill white
Deselect

Activate your frame layer and with your magic wand click inside the frame
Selections / Invert
Now add a drop shadow:
H & V - 1
Opacity - 30
Blur - 10.00
Colour - to match your frame (mine is #ac2a57)

KEEP SELECTED

Repeat drop shadow changing the Horizontal and Vertical to -1

Layers / Merge / Merge Visible

~ Step 2 ~

Select your Text Tool
Choose a fancy Script font (I used Bickham Script Fancy)

Keep your foreground null
Background a dark colour which complements your paper

I'm using:
Foreground - null
Background - #cf215e

In your script font type out the letter A
Position it to the far left
Convert to raster layer

Choose a fancy type font (I'm using Twilight)

Type out the words
"single rose may be my garden,
single friend, my world…."

Add some spacing to the beginning of the first line as it staggers against the A

In a smaller print (either in same font or one similar) type out
"- Leo Buscaglia"

~ Step 3 ~

Choose a nice lace element and resize as necessary
Position on the bottom layer behind the frame
Erase any excess overhanging the sides

Duplicate then Image / Flip
Position opposite top to bottom

Duplicate again then Image /Rotate by 90 to the left
Position to the side, erasing the excess above and below

Duplicate again then Image / Mirror
Position on the opposite side

Once satisfied with the positioning of the lace as a frame hide all layers but the lace
Layers / Merge / Merge Visible

~ Step 4 ~

Find a soft bow in organza or even a string bow
Resize as necessary
Drop the Bow layer below the Text but above the Frame
Erase any excess to give the impression of the Bow being wrapped around the bottom

Feel free to add any elements to make this creation "your own"

Add your name and watermark

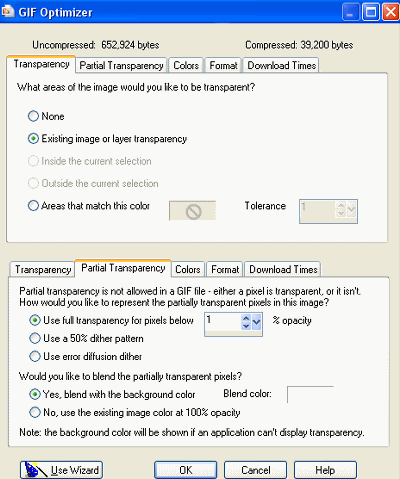
Export as a GIF with the following settings:

asr-02
And you're done!

Thank you for trying my tutorial

::st!na::

©Tutorial written by Stina on 14th February 2009
All rights reserved

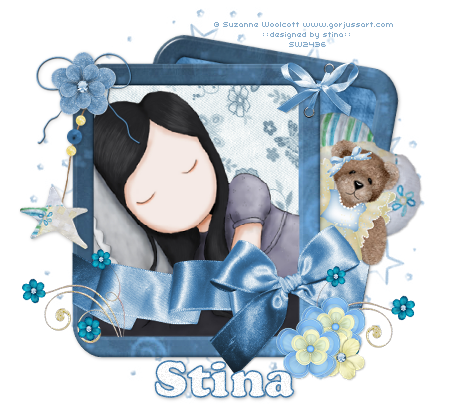
Beary Love

bearylove-stina_stina0209

Supplies

Scrap kit of choice - I am using "Beary Sweet" by Babycakes Scraps which can be purchased from
Creative Scraps, Cotton Candy Kreations, Aussie Scraps or for a full list visit her blog
Tube of choice - I am using the lovely artwork of Suzanne Woolcott which can be purchased from her store
**PLEASE DO NOT USE HER ARTWORK WITHOUT THE APPROPRIATE LICENCE**
WSL_Mask217 by Chelle which can be found on her blog
Font of choice - I am using Cooper Black BT
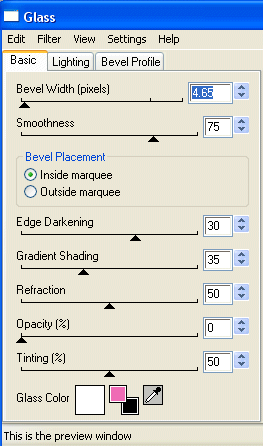
Eye Candy 4000 Glass

**Please Note - any scraps can be used for this or any other of my tuts**

~ Step 1 ~

Open mask and font and minimse for later

Open a new blank canvas 650 x 600 flood filled white

Select a paper of choice from the scrap kit (I'm using Star Trails Paper)
Open and minimise it

Select your Preset Shape Tool on Rounded Rectangle

bcs_bl-01
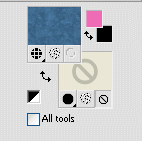
In your Materials Palette:
Foreground - paper of choice (minimised)
Background - null

bcs_bl-02

Set your stroke width to 30.00
Draw out a rectangle about half the width of your canvas
Convert to raster layer
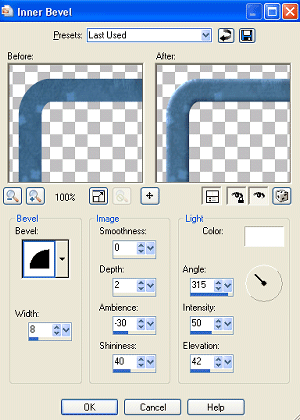
Effects / 3D Effects / Inner Bevel with these settings:

bcs_bl-03

And then Effects / Plugins / Eye Candy 4000 / Glass with the following settings:

bcs_bl-04

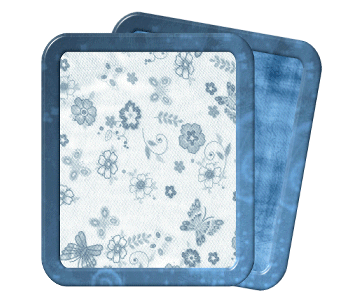
Duplicate frame TWICE and hide layers (we'll come back to them)

~ Step 2 ~

With your magic wand click inside the first frame
Selections / Modify / Expand by 10
Open a nice paper of choice (I'm using BCS Patterned Paper), copy and paste as new layer
Selections / Invert
Delete

KEEP SELECTED!!

Selections / Invert
Adjust / Hue & Saturation / Colourise and set both Hue and Saturation to 0

Choose a colour that matches your frame and select it as your foreground

Add a new raster layer
The flood fille new layer with this colour
Deselect

Set the blend mode of your coloured layer to Soft Light

Hide your background layer
Layers / Merge / Merge Visible

Rename this layer to Frame 1

Unhide background and duplicated frame layers and hide merged frame

Unhide second frame (keep third one hidden for now)

Click inside second frame
Selections / Modify / Expand by 10
Open another paper of choice (I'm using BCS Blue Angel Paper), copy and paste as new layer
Selections / Invert
Delete
Deselect

Duplicate paper layer
Adjust / Blur / Gaussian Blur with a Radius of 5
Lower the opacity of this layer to 70

Hide background layer
Layers / Merge / Merge Visible

Rename this layer to Frame 2

Unhide background and Frame 1 layers

~ Step 3 ~

Move Frame 2 below Frame 1 and slightly to the right
Image / Rotate by 10 to the right
bcs_bl-05
Activate top layer
Paste Large Blue Bow as new layer
Resize by 35 - 40% (depending on size of your frames)
Position over both frames to give the impression they are tied together

Activate Frame 1 and with your magic wand click outside the frame
Selections / Modify / Feather by 2
Use your eraser tool to erase the excess on the left side
Deselect

Activate Frame 2 and with your magic wand click outside the frame
Selections / Modify / Feather by 2
Use your eraser tool to erase the excess on the right side
Deselect

The frames now look bound together by the bow

Now unhide third frame layer and position exactly over first frame

Paste your tube BENEATH this frame layer and the bow
Using your magic wand click inside the third frame
Selections / Modify / Expand by 2
THEN
Selections / Modify / Feather by 2
Selections / Invert
bcs_bl-06
Delete
Deselect

~ Step 4 ~

Paste the Ballerina Bear as new layer
Image / Rotate by 30 to the right
Resize by 85%
Place between frame layers so that it is peering out
Erase part of the ribbon to look as though its arm is overhanging

Paste Heart Pillow as new layer
Image / Rotate by 40 to the right
Resize by 30% and position behind the bear between the frame layers

Paste Star Hanger and resize by 25%
Place in top left corner of frame

Paste String Bow Heart
Resize by 60% and place on the top of the star hanger

Paste Blue Gem Glitter Flower
Resize by 35% and position over the string bow

Paste BiColour Bloom and resize by 85%
Place in the lower left corner
Duplicate and position

Paste Gem Bloom Two and resize by 20%
Place between the two Bicolour Blooms

Paste Blue Eyelet Tie as new layer
Resize by 12% and place over the two frames at the top corner

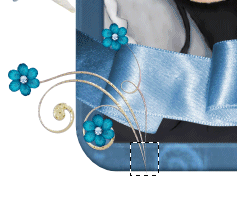
Paste Glass Floral Doodle as new layer
Resize by 12% and position in lower left of frame above ribbon
Using your selection tool draw out a small rectangle around the bottom of doodle then use your eraser tool to make it look like the bottom of it is tucked in the frame

bcs_bl-07
Duplicate then Image / Mirror
Tuck behind flowers on the opposite side

Add a drop shadow to your elements:
H & V - 1
Opacity - 30
Blur - 2.00
Colour - #000000

Crop and resize

~ Step 5 ~

Add a new raster layer and flood fill with the colour you used earlier or one similar
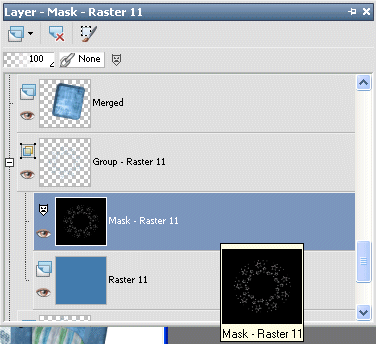
Layers / New Mask Layer / From Image
Locate WSL_Mask217 in drop down
Source Luminance checked
OK

In your layer palette go to your Mask layer and click on the Mask
Resize the mask layer by 135%

bcs_bl-08

Layers / Merge / Merge Group

Lower the opacity of this layer to 50

Select your Text Tool to a font of your choice - I used Cooper Black but Coolsville and Cookie are similar style fonts

Set your stroke width to 1.5 and your colours in your Material Palette:
Foreground - same colour you used for your flood fill
Background - #FFFFFF (white)

Type out your name and apply a drop shadow:
H & V - 1
Opacity - 30
Blur - 5.00
Colour - #000000

Add your ©copyright, licence and watermark and you're done!

Thank you for trying my tutorial

::st!na::

©Tutorial written by Stina on 13th February 2009
All rights reserved
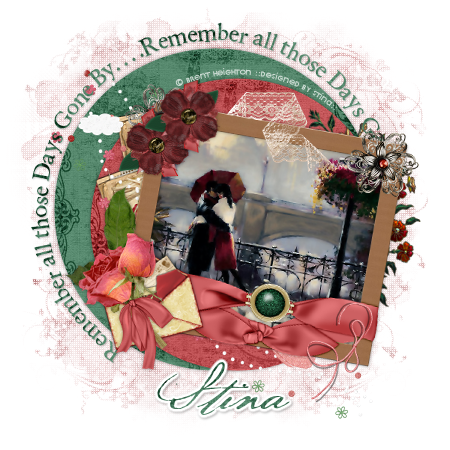
Days Gone By

Supplies

Scrap kit of choice - I am using "Days Gone By" by Babycakes Scraps which can be purchased from Creative Scraps, Cotton Candy Kreations, Aussie Scraps with more listed on her blog
Image of choice or the one I have supplied
SabreL_BraveheartScrapKitMask1 by Sabre (supplied)
Fonts of choice - I am using 2Peas Rennaisance and Baker Script (pay fonts)
Xero Improver and Xero Radiance (supplied)
Penta.Com Colour Dots

My Supplies here

~ Step 1 ~

Open Mask and fonts and minimise for later

Open a new blank canvas 600 x 600 flood filled white

Select a paper of choice from the scrap kit (I'm using Love Paper Rust)
Open and minimise it

Select your Preset Shape Tool on Ellipse

In your Materials Palette:
Foreground - paper of choice
Background - null

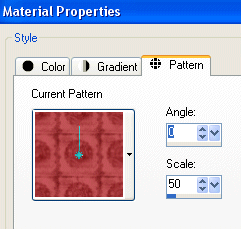
Set the properties for the paper as following:

bcs_dgb-01

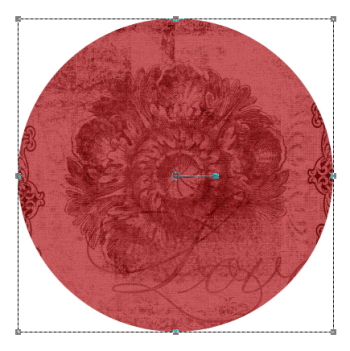
Holding your shift key down draw out a circle with your Preset Shape Tool then release

Your paper should be centred in the circle
If slightly off centre use the nodes to adjust the size

bcs_dgb-02

Once satisfied go to
Objects / Align / Centre in Canvas
Convert to raster layer

Choose another paper of choice (I used Love Paper Green) and follow the same steps as above, making the circle slightly larger

Move it to the layer below your first circle to get a better idea

Use the nodes to adjust the size and
Objects / Align / Centre in Canvas
each time you make an adjustment

Once satisfied and circle is centred, convert to raster layer

Move background circle up slightly

bcs_dgb-03

~ Step 2 ~

Paste Paper Frame (or frame of choice) as new layer
Resize by 35%
Image / Rotate by 10 to the right
Position slightly to the right

Choose an image of choice or use the one supplied and paste as new layer
Resize if necessary
(If using the image supplied you do not need to resize)

Activate the frame layer and with your magic wand click outside the frame
Selections / Modify / Expand by 10
Activate the image layer again
Delete
Deselect

Duplicate the image layer
On duplicate go to
Effects / Plugins / Xero / Improver with the following settings:

bcs_dgb-04

On the same layer
Effects / Plugins / Xero / Radiance with the following settings:

bcs_dgb-05
Then reduce the opacity of this layer to 80

Hide your Background and two circle layers then go to
Layers / Merge / Merge Visible

Unhide all layers

Paste Rose Cluster as new layer
Image / Mirror and resize by 30%
Position in the left corner of frame

Paste Envlope as new layer
Image / Rotate by 10 to the left then resize by 40%
Position in lower left beneath the Rose Cluster

Paste Paper as new layer
Image / Rotate by 10 to the left
Resize by 25% and position tucked behind frame
Duplicate and then Image / Rotate by 10 to the left and move slightly down

Paste Flower as new layer and resize by 25%
Paste Torn Flower as new layer and resize by 35% then position over Flower
Layers / Merge / Merge Down
Position in top left corner

Duplicate and move up slightly
Image / Rotate 20 to the right
Position flowers to your liking

Paste Rust Lace as new layer
Resize by 20%
Position at the top of the frame
With your Freehand Tool draw around the bottom of part of the lace then Delete
Now it will look as though it is tucked behind and over the frame

bcs_dgb-06
Adjust / Hue & Saturation / Colourise
Hue - 20
Saturation - 65

Adjust / Brightness & Contrast / Brightness/Contrast:
Brightness - 15
Contrast - 0

Paste Rusty String as new layer
Resize by 25% and position at the lower right of frame

Paste Filigree Flower as new layer
Resize by 50%
Adjust / Brightness & Contrast / Clarify
Strength of Effect - 5.0
Duplicate and set blend mode to Soft Light

Crop and resize

Add a drop shadow to your element layers:
H & V - 0
Opacity - 30
Blur - 5.00
Colour - #000000

~ Step 3 ~

Activate Background layer
Paste Rust Swirl Paper as new layer
Resize by 65%

Layers / New Mask Layer / From Image
Locate SabreL_BraveheartScrapkitMask
Source Luminance checked
OK

On same layer
Effects / Plugins / Penta.Com / Colour Dot
Default settings
Repeat

Select your Preset Shape Tool to Ellipse
In your Materials Palette set your Foreground to #000000 and your Background to null

Draw out a circle around the larger circle and position it evenly

bcs_dgb-07

Then select your Text Tool with your font of choice
Set your Foreground to null and your Background to one of papers of choice (I used the same paper as my background circle)

Type out the words "Remember all those Days Gone By…Remember all those Days Gone By" or a phrase of your choice

In your layer palette click on the + to open your Vector layer and hide the Ellipse
Convert to Raster Layer

Add a slight drop shadow

Type out your name in a Script font of choice

Add your ©copyright, licence and watermark and you're done!

Thank you for trying my tutorial

::st!na::

©Tutorial written by Stina on 13th February 2009
All rights reserved
Sunday, February 15, 2009

Book of Love

This is a fairly easy tutorial

Supplies

Scrap kit of choice - I am using the lovely "Vintage Valentine" by Babycakes Scraps
which canbe purchased from her blog, Creative Scraps Store, Cotton Candy Kreations
or Aussie Scraps (full list available on her blog)
Thank you Lynne for this gorgeous kit! Such wonderful elements to work with
Image of choice - or you can use mine (supplied)
WSL_Mask224 by Chelle found on her blog (supplied)
Font of choice - I used LaineDayScript (supplied)

Plugins:
Xero Improver (Xero set 3)
Xero Radianace (Xero set 4)
Eye Candy 4000 Gradient Glow (optional)

My Supplies here

~ Step 1 ~

Place the plugin files (.8bf files) into your PSP plugin folder
Open mask and font and minimise for later

Paste Pink Rose Frame as new layer and resize by 65%
Paste image below frame layer and position to your liking

Activate frame layer
Using your magic wand click the area around the frame
Selections / Modify / Expand by 10

Activate your image layer and hit delete
Deselect

On the image layer
On your image layer go to
Effects / Plugins / Xero / Improver
Default settings

Effects / Plugins / Xero / Radiance with the following settings:

bcs_bol-01
Duplicate then
Adjust / Hue & Saturation / Colourise
Hue - 250
Saturation - 55

Hide your background layer then
Layers / Merge / Merge Visible

Duplicate layer
On original (bottom layer)
Image / Rotate by 20 to the right
Position to your liking

Unhide your background

~ Step 2 ~

Paste Pink Ribbon as new layer
Resize by 30%
Position and carefully erase overhang

Paste Charm Tie as new layer
Position on the ribbon's bow
Duplicate then change blend mode to Multiply

Paste Pink Wand as new layer
Resize by 60% and position to the left under the ribbon

Paste Hanging Charm as new layer
Resize by 30% and position to the right

Paste Lace Heart as new layer
Resize by 10% and position over the Hanging Charm

You can add any other elements you wish

~ Step 3 ~

Activate your background layer
Paste Paper Thirteen as new layer and resize by 80%

Layers / New Mask Layer / From Image
Locate WSL_Mask224 in drop down
Source Lumincance checked
Invert mask Data UNchecked
OK

Layers / Merge / Merge Group

Reduce opacity of this layer to 60%

Add your name, watermark and any copyright and you're done!

Thank you for trying this easy tutorial

::st!na::

©Tutorial written by Stina on 9th February 2009
All rights reserved

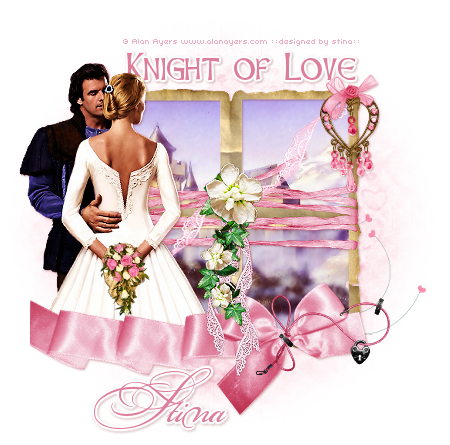
Knight of Love

knightoflove-stina_0209

Supplies

Scrap kit of choice - I am using the lovely "Vintage Valentine" by Babycakes Scraps
which canbe purchased from her blog, Creative Scraps Store, Cotton Candy Kreations
or Aussie Scraps (full list available on her blog)
Thank you Lynne for this gorgeous kit! Such wonderful elements to work with
Tube and image of choice - or you can use mine (supplied)
Tube is by Alan Ayers http://www.alanayers.com/
WSL_Mask214 by Chelle found on her blog (supplied)
Fonts of choice - I used Celtic Hand (supplied) and Bickham Script Fancy
(pay font, not supplied)

Plugins:
Xero Improver (Xero set 3)
Xero Radianace (Xero set 4)
Adjust Variations
Eye Candy 4000 Gradient Glow

My Supplies here

~ Step 1 ~

Place the plugin files (.8bf files) into your PSP plugin folder
Open your mask and fonts and minimise them for later

Open new blank canvas 600 x 600 flood-filled white

Paste Square Frame as new layer and resize by 65%

Open your and paste as new layer
Move below frame and resize as necessary
On the frame layer use your magic wand to click outside the frame
Selections / Modify / Expand by 5
Activate your image layer and hit delete
Deselect

On your image layer go to
Effects / Plugins / Xero / Improver
Default settings

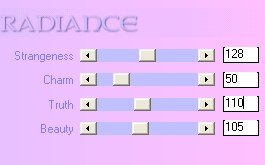
Effects / Plugins / Xero / Radiance with the following settings:

bcs_kol-01

Duplicate this layer

On the duplicate go to
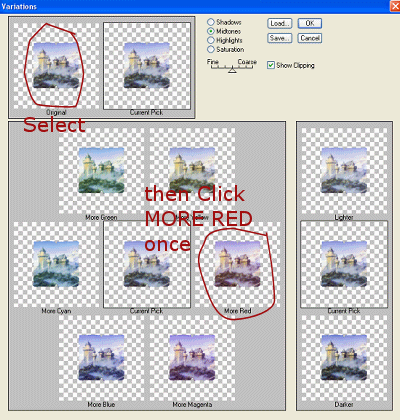
Effects / Plugins / Adjust / Variations
Select the window marked "Original"
Then click the one marked "More Red" ONCE ONLY
Midtones - checked
OK

bcs_kol-02

Duplicate again and then set the blend mode to Soft Light

~ Step 2 ~

Paste tube as new layer
If using a different tube you may need to resize
Duplicate then
Adjust / Hue & Saturation / Colourise
Hue - 250
Saturation - 55

Effects / Plugins / Xero / Improver
Default settings

In your layer palette set the blend mode to Soft Light

Paste Bouquet as new layer
Resize by 15% and position over the woman's hands

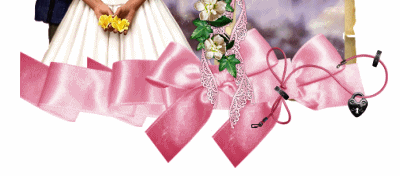
Paste Pink Ribbon as new layer
Resize by 30% then position along the bottom of frame
Duplicate and move it slightly along to cover the bottom of the tube

bcs_kol-03
Use your eraser to erase the excess from the top ribbon layer
till you reach a part where the ribbons blend

bcs_kol-04

Change layers and erase the excess from the bottom so that the two ribbons now look like one
Layers / Merge / Merge Down

Paste Charm Tie as new layer
Image / Mirror then resize by 20%
Position with on the ribbon's bow in lower left
Duplicate this layer then blend mode to Multiply

Paste Ribbon Flowers as new layer
Resize by 35% and position over the flowers in the centre of the frame
so the lace now overhangs the ribbon at the bottom

Adjust / Sharpness / Sharpen

Duplicate layer then blend mode to Screen
Reduce opacity of this layer to 55

Paste Heart Charm as new layer
Resize by 20% and position in the top right corner

Paste Rose Bow as new layer
Resize by 12% and position over the link of the jewelled Heart Charm

Apply a drop shadow to all your element layers:
H & V - 1
Opacity - 30
Blur - 2.00
Colour - #6b0e0e

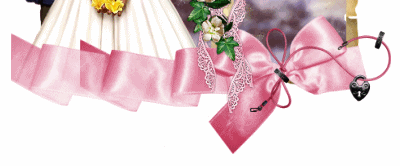
Paste the Pink Lace as a new layer
Image / Mirror then resize by 20%
Position below the Heart Charm across the window

Adjust / Sharpen / Unsharpen Mask
Radius - 1.00
Strength - 100
Clipping - 4

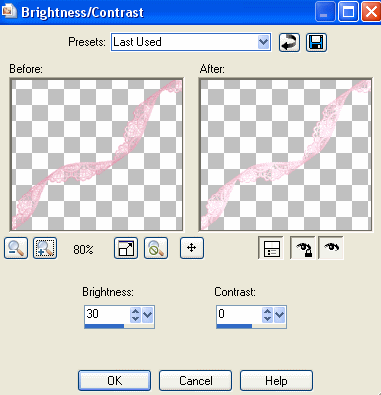
Adjust / Brightness & Contrast / Brightness/Contrast with the following settings:

bcs_kol-05

~ Step 3 ~

Paste Paper Ten as new layer
Resize by 80%
Layers / New Mask Layer / From Image
Locate WSL_Mask214 in drop down list
Source luminance checked
Invert Mask Data UNchecked
OK

Layers / Merge / Merge Group
Reduce the opacity of this layer to around 65

Feel free to add any other elements you wish to make this creation "your own"

Then crop and resize

~ Step 4 ~

Select your Text Tool
Foreground - null
Background - #dd7e9a (or a colour to match your kit)

Type out "Knight of Love" or your choice of phrase

Convert to raster layer

Effects / Plugins / Eye Candy 4000 / Gradient Glow
Glow width - 3.00
Soft Corners - 25
Opacity - 100
Colour - Solid White

Apply a drop shadow:
H & V - 1
Opacity - 30
Blur - 2.00
Colour - #6b0e0e

In a nice script font add your name and any other effects you wish

Then add your © copyright, licence and watermark and you're done!
**Please note: if you are using the same tube as I am please ensure you include credit to
© Alan Ayers www.alanayers.com

Thanks for trying my tutorial

::st!na::

©Tutorial written by Stina on 9th February 2009
All rights reserved