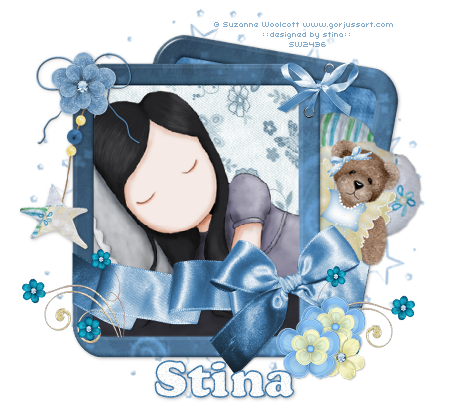
Supplies
Scrap kit of choice - I am using "Beary Sweet" by Babycakes Scraps which can be purchased from
Creative Scraps, Cotton Candy Kreations, Aussie Scraps or for a full list visit her blog
Tube of choice - I am using the lovely artwork of Suzanne Woolcott which can be purchased from her store
**PLEASE DO NOT USE HER ARTWORK WITHOUT THE APPROPRIATE LICENCE**
WSL_Mask217 by Chelle which can be found on her blog
Font of choice - I am using Cooper Black BT
Eye Candy 4000 Glass
**Please Note - any scraps can be used for this or any other of my tuts**
~ Step 1 ~
Open mask and font and minimse for later
Open a new blank canvas 650 x 600 flood filled white
Select a paper of choice from the scrap kit (I'm using Star Trails Paper)
Open and minimise it
Select your Preset Shape Tool on Rounded Rectangle
![]()
In your Materials Palette:
Foreground - paper of choice (minimised)
Background - null
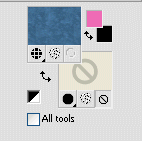
Set your stroke width to 30.00
Draw out a rectangle about half the width of your canvas
Convert to raster layer
Effects / 3D Effects / Inner Bevel with these settings:
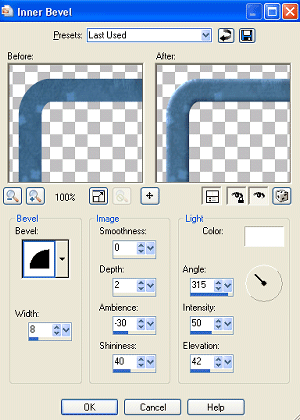
And then Effects / Plugins / Eye Candy 4000 / Glass with the following settings:
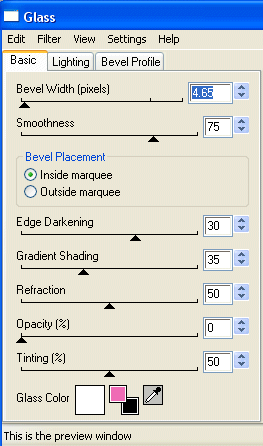
Duplicate frame TWICE and hide layers (we'll come back to them)
~ Step 2 ~
With your magic wand click inside the first frame
Selections / Modify / Expand by 10
Open a nice paper of choice (I'm using BCS Patterned Paper), copy and paste as new layer
Selections / Invert
Delete
KEEP SELECTED!!
Selections / Invert
Adjust / Hue & Saturation / Colourise and set both Hue and Saturation to 0
Choose a colour that matches your frame and select it as your foreground
Add a new raster layer
The flood fille new layer with this colour
Deselect
Set the blend mode of your coloured layer to Soft Light
Hide your background layer
Layers / Merge / Merge Visible
Rename this layer to Frame 1
Unhide background and duplicated frame layers and hide merged frame
Unhide second frame (keep third one hidden for now)
Click inside second frame
Selections / Modify / Expand by 10
Open another paper of choice (I'm using BCS Blue Angel Paper), copy and paste as new layer
Selections / Invert
Delete
Deselect
Duplicate paper layer
Adjust / Blur / Gaussian Blur with a Radius of 5
Lower the opacity of this layer to 70
Hide background layer
Layers / Merge / Merge Visible
Rename this layer to Frame 2
Unhide background and Frame 1 layers
~ Step 3 ~
Move Frame 2 below Frame 1 and slightly to the right
Image / Rotate by 10 to the right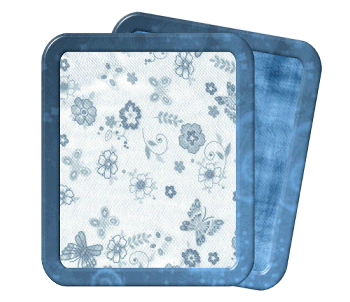
Activate top layer
Paste Large Blue Bow as new layer
Resize by 35 - 40% (depending on size of your frames)
Position over both frames to give the impression they are tied together
Activate Frame 1 and with your magic wand click outside the frame
Selections / Modify / Feather by 2
Use your eraser tool to erase the excess on the left side
Deselect
Activate Frame 2 and with your magic wand click outside the frame
Selections / Modify / Feather by 2
Use your eraser tool to erase the excess on the right side
Deselect
The frames now look bound together by the bow
Now unhide third frame layer and position exactly over first frame
Paste your tube BENEATH this frame layer and the bow
Using your magic wand click inside the third frame
Selections / Modify / Expand by 2
THEN
Selections / Modify / Feather by 2
Selections / Invert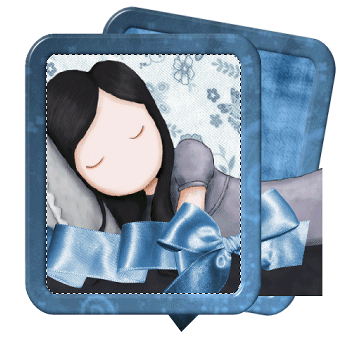
Delete
Deselect
~ Step 4 ~
Paste the Ballerina Bear as new layer
Image / Rotate by 30 to the right
Resize by 85%
Place between frame layers so that it is peering out
Erase part of the ribbon to look as though its arm is overhanging
Paste Heart Pillow as new layer
Image / Rotate by 40 to the right
Resize by 30% and position behind the bear between the frame layers
Paste Star Hanger and resize by 25%
Place in top left corner of frame
Paste String Bow Heart
Resize by 60% and place on the top of the star hanger
Paste Blue Gem Glitter Flower
Resize by 35% and position over the string bow
Paste BiColour Bloom and resize by 85%
Place in the lower left corner
Duplicate and position
Paste Gem Bloom Two and resize by 20%
Place between the two Bicolour Blooms
Paste Blue Eyelet Tie as new layer
Resize by 12% and place over the two frames at the top corner
Paste Glass Floral Doodle as new layer
Resize by 12% and position in lower left of frame above ribbon
Using your selection tool draw out a small rectangle around the bottom of doodle then use your eraser tool to make it look like the bottom of it is tucked in the frame
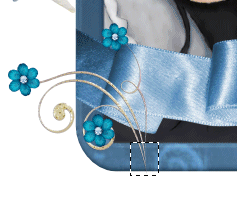
Duplicate then Image / Mirror
Tuck behind flowers on the opposite side
Add a drop shadow to your elements:
H & V - 1
Opacity - 30
Blur - 2.00
Colour - #000000
Crop and resize
~ Step 5 ~
Add a new raster layer and flood fill with the colour you used earlier or one similar
Layers / New Mask Layer / From Image
Locate WSL_Mask217 in drop down
Source Luminance checked
OK
In your layer palette go to your Mask layer and click on the Mask
Resize the mask layer by 135%
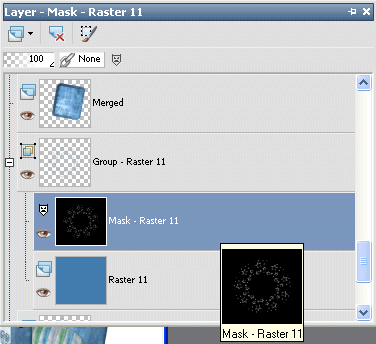
Layers / Merge / Merge Group
Lower the opacity of this layer to 50
Select your Text Tool to a font of your choice - I used Cooper Black but Coolsville and Cookie are similar style fonts
Set your stroke width to 1.5 and your colours in your Material Palette:
Foreground - same colour you used for your flood fill
Background - #FFFFFF (white)
Type out your name and apply a drop shadow:
H & V - 1
Opacity - 30
Blur - 5.00
Colour - #000000
Add your ©copyright, licence and watermark and you're done!
Thank you for trying my tutorial
::st!na::
©Tutorial written by Stina on 13th February 2009
All rights reserved

No comments:
Post a Comment