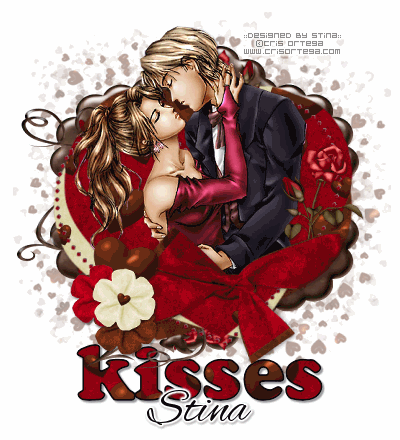
Supplies
Scrap kit of choice - I am using "Valentine Chocolate & Roses" by Designs by Ali which can be purchased at
Scraps With Attitude and Stargazer Scraps
Template 117 by Missy from Divine Intentionz
Tube of choice - I am using the art of Cris Ortega (supplied)
Mask - sg_heart_burst (supplied)
Fonts are Coolsville (supplied) and Alex Brush (which is a pay font and not supplied)
~ Step 1 ~
Open supplies and minimise for later
Open three patterened papers of choice, or use those supplied with the scrap kit
(I used Papers 13, 14 & 15) and a plain paper (I used Paper 7)
Open Missy's template and duplicate
Close off original
Delete credit layer
Go to Image / Canvas size and resize canvas to 500 x 500
Flood fill outer gaps in bottom layer with white
~ Step 2 ~
Activate Heart1 layer
Paste first paper of choice (I used Paper 14 for this layer) and resize if necessary
Go to Selections / float / defloat
Then Selections / Invert
Activate paper layer then hit delete
Deselect
Activate heart2 layer
Paste second paper of choice (I used Paper 15 for this layer) and resize if necessary
Go to Selections / float / defloat
Then Selections / Invert
Activate paper layer then hit delete
Deselect
Activate heart3 layer
Paste third paper of choice (I used Paper 13 for this layer) and resize if necessary
Go to Selections / float / defloat
Then Selections / Invert
Activate paper layer then hit delete
Deselect
Activate dotted circle layer
Paste plain paper of choice (I used Paper 7 for this layer) and resize if necessary
Go to Selections / float / defloat
Then Selections / Invert
Activate paper layer then hit delete
Deselect
Delete template layers
~ Step 3 ~
Open ChocolateFrame4, resize by 75% and paste as new layer
Move this layer below the bottom heart and position behind it so it is fairly central
Choose one of your papers of choice (I used Paper 14 again)
and paste as new layer between the chocolate frame and the white background
Keep this layer activated
Open mask supplied
Go to Layers / New Mask Layer / From Image and select sg_heart_burst mask
Source luminance AND Invert mask data both CHECKED
Apply
Layers / Merge / Merge Group
Position mask layer so that the hearts appear to be bursting from behind
Reduce opacity to 45 and resize if necessary
~ Step 4 ~
Paste your tube as a new layer and resize if necessary
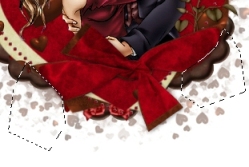
Open a ribbon (I used Ribbon1 and mirrored then flipped it)
Resize by 50% and rotate 10 to the left
Position across the bottom of the hearts then using your eraser on a medium soft setting,
carefully erase the edges of the ribbon along the outside of the hearts
so it looks as though it is wrapped around all three hearts

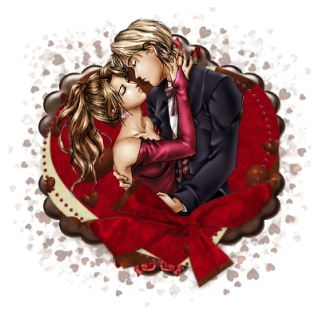
Your tag should now look like this:
~ Step 5 ~
Now the fun part!
Use your imagination to decorate the tag with any elements of your choice
I used Flowers 5, 6 & 7
Resize as necessary and position them to one side where you erased the ribbon
I also used Chocolate Heart1 and tucked it behind the flowers
Find a nice rose (I used Rose 6), resize and then tuck down behind the ribbon but above the tube
Open a doodle element (I used Doodle6), resize
and paste below the mask layer so the edges show slightly
Now is the time to crop and resize your tag
~ Step 6 ~
Open one of your patterned papers (for this I used Paper 13) and minimise it
In your Tool Options Select the Coolsville font to about 72 (depends on your version of PSP)
Always ensure your text layer is set to Create as Vector
In your materials palette set your foreground to #000000, stroke width at 1.5,
and your background to your patterned paper with the following settings:
Angle - 0, Scale - 50
In upper or lower case (whichever your prefer) type out the word "KISSES"
Still as a vector layer go to Objects / Align / Horizontal Center in Canvas
Once centred convert to raster layer
Give a slight drop shadow and move this layer to just above the mask layer
Add your name in a script font of choice (I used Alex Brush)
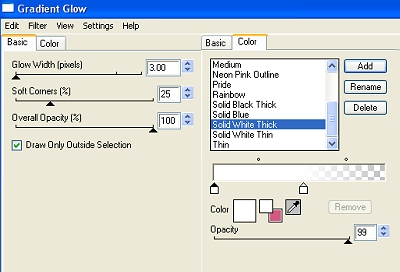
and apply Effects / Plugins / Eye Candy 4 / Gradient Glow with following settings:

Add your © copyright info and your watermark.
Save as GIF or JPG and you're done!
Thank you for trying my tutorial.
::st!na::
©Tutorial written by Stina on 19th January 2009
All rights reserved

No comments:
Post a Comment