
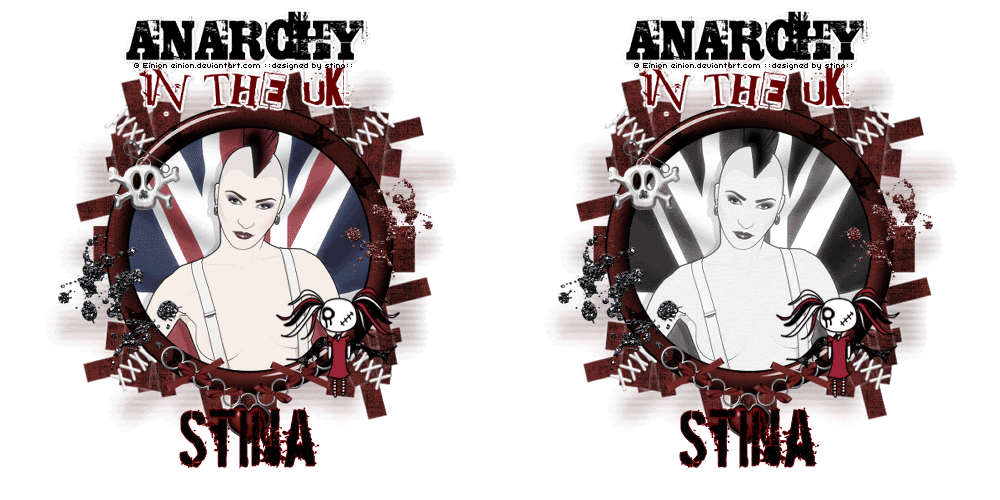
Supplies
Scrap kit of choice - I am using "Anarchy in the UK" by Creative Intentionz available from Twilight Scraps and Paradise 4 Scrappers
Image of choice - I am using the FTU artwork of Einion
WSL_Mask174 by Chelle available from her blog
Font of choice - I am using Dirty Ego
Plugins: Alien Skin Eye Candy 5: Impact Glass and Eye Candy 4000 Gradient Glow (for WordArt)
Let's begin....
Open a new 600 x 600 blank canvas flood-filled white
Add a new raster layer
Selections > Select All
Paste Paper of choice INTO selection
Deselect
Paste Paper of choice INTO selection
Deselect
Layers > New Mask Layer > From Image
Apply WSL_Mask147
OK
Apply WSL_Mask147
OK
Select your Preset Shape Tool and set to Ellipse
Width - 30.00
Foreground - #000000
Background - null
Width - 30.00
Foreground - #000000
Background - null
Hold down Shift key and draw out circle to your liking
Objects > Align > Centre in Canvas
Convert to raster layer
Objects > Align > Centre in Canvas
Convert to raster layer
With your Magic Wand select the rim of the Frame
Selections > Modify > Contract by 5
Paste Paper of choice INTO selection
Selections > Modify > Contract by 5
Paste Paper of choice INTO selection
KEEP SELECTED!!
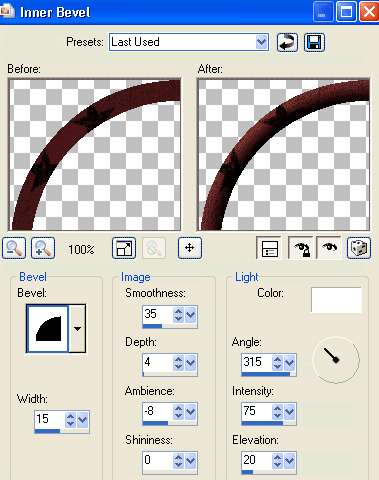
Effects > 3D Effects > Inner Bevel with the following settings:
Deselect
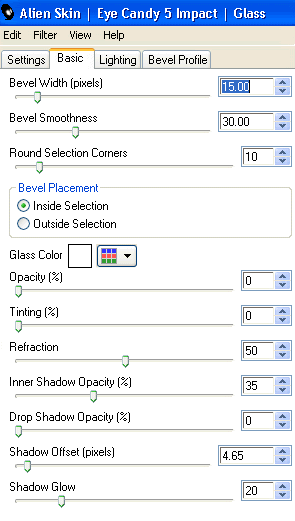
Effects > Plugins > Alien Skin Eye Candy 5: Impact > Glass with the following settings:
Select inside the Frame with your Magic Wand
Selections > Modify > Expand by 10
Selections > Modify > Expand by 10
Paste Image of choice as new layer
Resize as necessary
Position in Frame
Selections > Invert
Delete then deselect
Resize as necessary
Position in Frame
Selections > Invert
Delete then deselect
Duplicate image
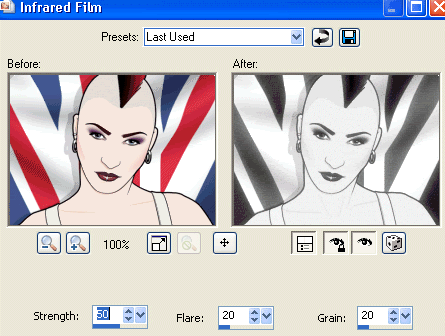
Effects > Photo Effects > Infra Red Film with the following settings:
Effects > Photo Effects > Infra Red Film with the following settings:
Lower opacity to 50
Layers > Merge > Merge Down
Rename Colour and Infrared, then hide the Infrared layer
Rename Colour and Infrared, then hide the Infrared layer
Paste Stitching as new layer
Image > Rotate by 45 to the left
Layers > Arrange > Move Down
Repeat till below Image layer
Image > Rotate by 45 to the left
Layers > Arrange > Move Down
Repeat till below Image layer
Duplicate, then Image > Mirror
Activate top layer
Paste a HeartChain as new layer
Resize by 45%
Position to the centre left
Resize by 45%
Position to the centre left
Paste Pin as new layer
Resize by 30%
Position in upper left near Stitching
Resize by 30%
Position in upper left near Stitching
Paste SkullCharm as new layer
Resize by 50%
Position over Pin
Resize by 50%
Position over Pin
Paste Doll as new layer
Resize by 35%
Position in lower right
Resize by 35%
Position in lower right
Paste a GlitterSplat as new layer
Resize by 35%
Position to the left
Resize by 35%
Position to the left
Paste another GlitterSplat as new layer
Resize by 25%
Position to the right
Resize by 25%
Position to the right
Paste WordArt as new layer
Resize to liking and position
Resize to liking and position
Effects > Plugins > Eye Candy 4000 > Gradient Glow with a thin white setting
Apply a drop shadow of choice
Select your Text Tool and font of choice
I am using Dirty Ego
Foreground - #680000
Background - #000000
Stroke width - 1.0
I am using Dirty Ego
Foreground - #680000
Background - #000000
Stroke width - 1.0
Type out your name
Objects > Align > Horizontal Centre in Canvas
Convert to raster layer
Apply drop shadow of choice
Objects > Align > Horizontal Centre in Canvas
Convert to raster layer
Apply drop shadow of choice
Finally, add your © copyright, licence and watermark, then save as a GIF or JPG and you're done!
** IF YOU WISH TO ANIMATE PLEASE FOLLOW THESE NEXT STEPS **
Activate the Colour (Image) Layer
Keep Infrared (Image) hidden
Edit > Copy Merged
Open Animation Shop
Edit > Paste as New Animation
Back to PSP
Activate Infrared layer
Edit > Copy Merged
In Animation Shop
Edit > Paste AFTER Current Frame
Select All and change the Frame Properties to 50
Save as a GIF and you're done!
Thanks for trying my tutorial!
::st!na::
Activate the Colour (Image) Layer
Keep Infrared (Image) hidden
Edit > Copy Merged
Open Animation Shop
Edit > Paste as New Animation
Back to PSP
Activate Infrared layer
Edit > Copy Merged
In Animation Shop
Edit > Paste AFTER Current Frame
Select All and change the Frame Properties to 50
Save as a GIF and you're done!
Thanks for trying my tutorial!
::st!na::
Here is a non-animated version:
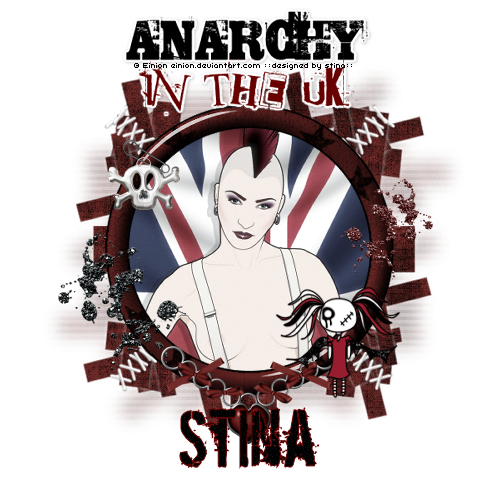
© Tutorial written by Stina on 23rd June 2009
All rights reserved
