
Supplies
Scrap kit of choice - I am using the lovely "Fairy Dreams" kit by Melisa's Scraps which you can purchase from Cotton Candy Kreations and Creative Scraps
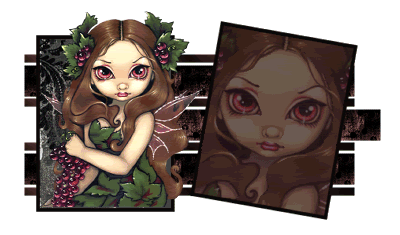
Tube of choice - I am using the delightful artwork of Jasmine Becket-Griffith which can be purchased from CILM
WSL_Mask33 by Chelle
Font of choice - I am using Pharmacy
Plugin: Eye Candy 4000 Gradient Glow
~ Step 1 ~
Open a new blank canvas 600 x 400 flood filled white
Open Paper1 and resize 200 x 200
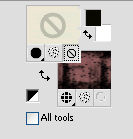
Minimise it and select your Preset Shapes Tool
Set it to Rectangle
Minimise it and select your Preset Shapes Tool
Set it to Rectangle
In your Materials Palette set your Foreground to null and your background to the Paper you just resized
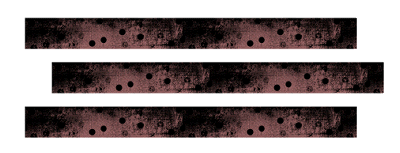
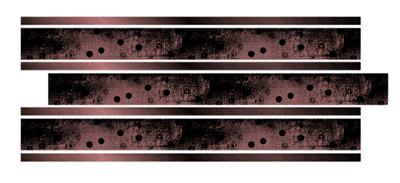
Draw out a long rectangle about 400 pixels long and 50 high
Objects / Align / Centre in Canvas
Convert to raster layer
Objects / Align / Centre in Canvas
Convert to raster layer
Duplicate and position slightly down and across
Duplicate again and position down and in line with the top rectangle
Now with your Dropper Tool select two colours from the paper pattern you just drew out
Set them to your Foreground and Background
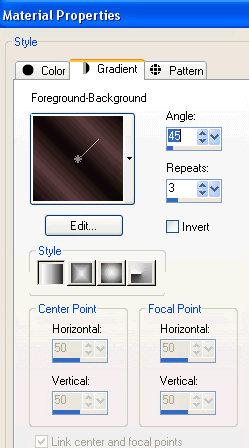
Select your background to Foreground/Background Gradient with the following settings:
Make sure your Foreground is set to Null
Draw out a rectangle the length of the first one but much thinner
Position directly above the top rectangle
Convert to raster layer
Position directly above the top rectangle
Convert to raster layer
Image / Rotate by 90 degrees (either way)
**IMPORTANT** DO NOT MOVE - LEAVE IN PLACE
Effects / Plugins / Graphics Plus / Cross Shadow
Default settings
Repeat
Default settings
Repeat
Image / Rotate by 90 degrees back again
Duplicate and move between next rectangles
Duplicate again and repeat step
Duplicate again and place last one at the bottom
Duplicate again and repeat step
Duplicate again and place last one at the bottom
~ Step 2 ~
Select your Preset Shape Tool again on Rectangle
Set your Foreground to black and your Background to null
Stroke width - 5.00
Set your Foreground to black and your Background to null
Stroke width - 5.00
Draw out a rectangle which will be our frame
Use the nodes to size it up or down
Convert to raster layer
Use the nodes to size it up or down
Convert to raster layer
Duplicate then Image / Rotate by 10 to the right
Position first frame to the left and the second to the right
Position first frame to the left and the second to the right
With your magic wand click inside the first frame
Selections / Modify / Expland by 3
Now open Paper6 and resize to 300 x 300
Paste as new layer on your canvas and position along the left edge of your frame
Paste as new layer on your canvas and position along the left edge of your frame
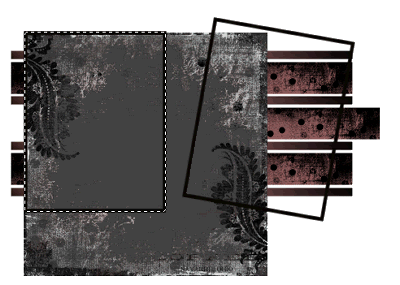
Selections / Invert
Delete
Delete
Add a new raster layer
Using your magic wand click inside your second frame
Selections / Modify / Expand by 3
Flood fill new layer with a colour from the either from your tube or the kit
Deselect
Selections / Modify / Expand by 3
Flood fill new layer with a colour from the either from your tube or the kit
Deselect
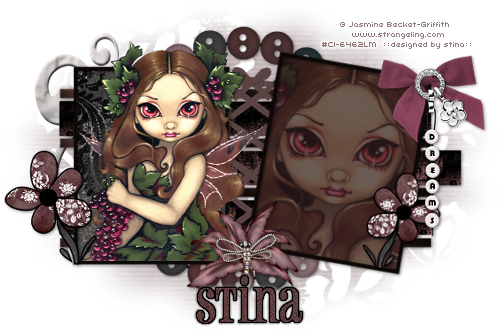
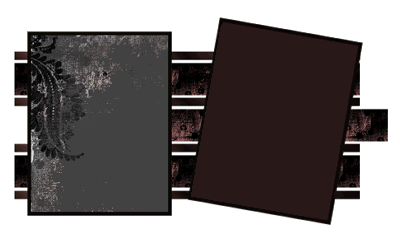
Your canvas should now look something like this:
~ Step 3 ~
You've made your template and frames - now let's decorate!! *s*
First let's add our tubes!
First let's add our tubes!
Paste your tube of choice as new layer
Resize as necessary
Position along the bottom edge of frame but so top and side overhangs
Resize as necessary
Position along the bottom edge of frame but so top and side overhangs
Paste your tube again
Image / Rotate by 10 to the right
Position under second frame to your liking
Use your magic wand to click inside frame
Selections / Modify / Expand by 3
Selections / Invert
Activtate tube layer
Delete
Deselect
Image / Rotate by 10 to the right
Position under second frame to your liking
Use your magic wand to click inside frame
Selections / Modify / Expand by 3
Selections / Invert
Activtate tube layer
Delete
Deselect
Paste Frame1 as new layer
Resize by 50%
Layers / Arrange / Send to Bottom and place behind template and frames in the centre
Resize by 50%
Layers / Arrange / Send to Bottom and place behind template and frames in the centre
Paste FlowerPatch1 as new layer
Resize by 30% and place along the edge of left frame
Duplicate then Image / Mirror
Resize by 30% and place along the edge of left frame
Duplicate then Image / Mirror
Paste Bow1 as new layer
Resize by 50% then Image / Mirror
Place in the upper right frame
Duplicate then set blend mode to Soft Light
Resize by 50% then Image / Mirror
Place in the upper right frame
Duplicate then set blend mode to Soft Light
Paste DreamsText1 as new layer
Resize by 20%
Adjust / Sharpness / Unsharpen Mask
Radius - 1.00
Strength - 100
Clipping - 4
OK
Resize by 20%
Adjust / Sharpness / Unsharpen Mask
Radius - 1.00
Strength - 100
Clipping - 4
OK
Position over the centre of the bow
Paste Flower5 as new layer
Resize by 35% and place in centre between the two frames
Resize by 35% and place in centre between the two frames
Add any other elements you wish to personalise your creation
Apply some drop shadows to your elements
~ Step 4 ~
Paste Paper3 as new layer
Layers / Arrange / Send to Bottom
Layers / Arrange / Send to Bottom
Layers / New Mask Layer / From Image
Locate WSL_Mask33
Source luminance
OK
Locate WSL_Mask33
Source luminance
OK
Layers / Merge / Merge Group
Choose a nice font to type out your name
Apply a Gradient Glow in Black
Apply a Gradient Glow in Black
and a drop shadow in white
Add your © copyright, licence and watermark
Save as a GIF or JPG and you're done!
Save as a GIF or JPG and you're done!
Thanks for trying my tutorial
::st!na::
© Tutorial written by Stina on 25th February 2009
All rights reserved
No comments:
Post a Comment