

Supplies
Scrap kit - "Poppy Fields" by Tootypup Scraps available from the stores listed on her blog
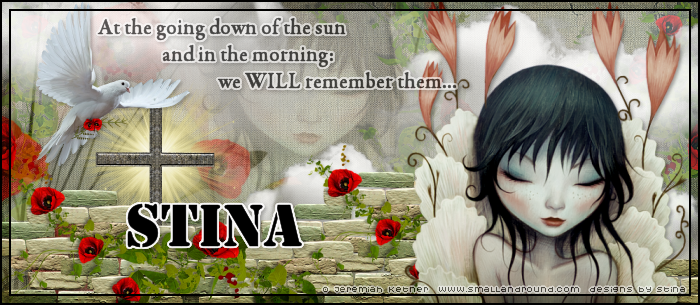
Tube of choice - I am using an FTU one by Jeremiah Ketner
Don't forget when using a tube to make sure it is SAFE to use AND give proper credit to the artist
Fonts of choice - I am using Garamond Premr Pro Smbd and Stencil
Mask of choice - I am using WSL_Mask362 by Weescotslass
Eye Candy 5 Impact Gradient Glow
Download Supplies here
Open a new 700 x 600 transparent canvas
Flood fill white
Paste TP_ScrollFrame_01 as a new layer
Leave in position, or position to your liking
Paste TP_StoneWall_01 as new layer
Resize by 55% and position towards lower half of canvas
Paste one of the TP_LestWeForget elements (I used 01)
Resize by around 70% and position to the right without covering the poppies and in line with the stone wall at the bottom
Paste TP_Cross_03 as new layer
Resize by around 25% and position BEHIND the last element of the solider's gun and boots etc.
Paste TP_PeaceDove_02 as new layer
Resize by 20%, then Image / Mirror and position to the upper left of the frame
Activate bottom layer
Paste a paper of choice as a new layer
Resize by 70%
Layers / Load Mask / Load Mask from Disk
Choose a mask of your choice
I am using WSL_Mask362
Layers / Merge / Merge Group
Now activate the Frame layer
Paste TP_Cloud_02 as new layer
Position behind the stone wall to your liking
I used the Eraser tool to erase the excess on the bottom left

Now activate your Frame layer again
Paste a tube of your choice as a new layer
I am using one by Jeremiah Ketner
Resize to your liking - I resized by 70%
Position to your liking
I am using one by Jeremiah Ketner
Resize to your liking - I resized by 70%
Position to your liking
To make the tube "blend" more with the colours of the tag, I then did the following:
Duplicate tube layer
Adjust / Hue and Saturation / Colorise
With settings set to ZERO
With settings set to ZERO
Then, Adjust / Color / Manual Color Correction with the following settings:

** If you do not have Manual Color Correction in your menu, you need to go to View / Customise / Unused Commands
Then locate Manual Colour Correction in the right window and DRAG it to the menu you want it in
I placed it under Adjust / Color
Add your name and your credits
Merge Visible then Crop to Selection and you're done!
Thank you for trying my tutorial!
Here is a forum style tag I made using the same elements and style from this tutorial. Both animated and non-animated.

© Tutorial written by Stina on 9th November 2012
Then locate Manual Colour Correction in the right window and DRAG it to the menu you want it in
I placed it under Adjust / Color
Now lower the opactity of the colourised layer to around 50%
Apply a drop shadow of choice to your layers
Select a font of your choice and type a phrase or text of choice
I used the closing lines of the "Ode of Remembrance"
I used the closing lines of the "Ode of Remembrance"
Apply a gradient glow if you wish, followed by a slight drop shadow
Add your name and your credits
Merge Visible then Crop to Selection and you're done!
Thank you for trying my tutorial!
Here is a forum style tag I made using the same elements and style from this tutorial. Both animated and non-animated.


© Tutorial written by Stina on 9th November 2012