
Supplies
"Sweet as Easter" scrap kit by Pamela of The Posh Box Scraps which is a freebie available on her blog
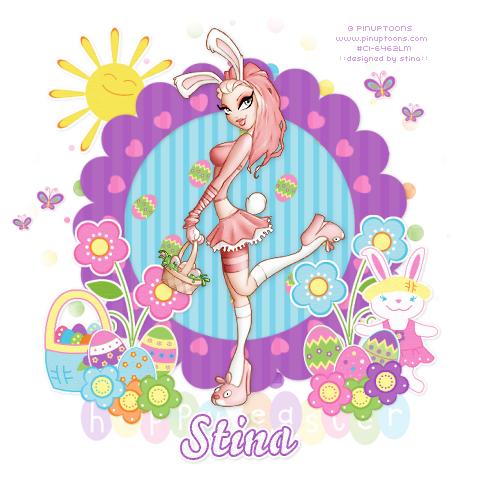
Tube of choice - I am using the artwork of Rion Vernon and PinUpToons which can be purchased from CILM
**PLEASE DO NOT USE HIS ARTWORK WITHOUT THE APPROPRIATE LICENCE**
Template #9 by Babe's Designz
WSL_Mask208 by Chelle
Font of choice - I am using Bello Script
Plugins: Xero Improver and Xero Radiance here
~ Step 1 ~
Open Template #9 by Babe's Designz
Duplicate by pressing Shift D
Close off original
Image / Canvas Resize
650 x 650
Centre checked
Duplicate by pressing Shift D
Close off original
Image / Canvas Resize
650 x 650
Centre checked
Activate FRAME
Selections / Select All
Selections / Float
Selections / Defloat
Selections / Modify / Expand by 1
Paste Paper13 into Selection
Deselect
Selections / Select All
Selections / Float
Selections / Defloat
Selections / Modify / Expand by 1
Paste Paper13 into Selection
Deselect
Activate HEARTS
Selections / Select All
Selections / Float
Selections / Defloat
Selections / Modify / Expand by 1
Paste Paper12 into Selection
Deselect
Selections / Select All
Selections / Float
Selections / Defloat
Selections / Modify / Expand by 1
Paste Paper12 into Selection
Deselect
Activate FRAME
Select the area inside the Frame with your Magic Wand
Selections / Modify / Expand by 10
Add a new raster layer
Paste Paper9 into Selection
Deselect
Layers / Arrange / Move Down
Select the area inside the Frame with your Magic Wand
Selections / Modify / Expand by 10
Add a new raster layer
Paste Paper9 into Selection
Deselect
Layers / Arrange / Move Down
Your Template should now look like this:
~ Step 2 ~
Open Flowers1
Select one of the Flowers (I chose the Blue)
Edit / Copy
Then paste as new layer
Resize by 60%
Position to the right
Select one of the Flowers (I chose the Blue)
Edit / Copy
Then paste as new layer
Resize by 60%
Position to the right
Back on the Flowers1 image
Select another of the flowers (I chose the Pink)
Edit / Copy
Then paste as new layer
Resize by 60%
Image / Mirror
Position on the opposite side
Select another of the flowers (I chose the Pink)
Edit / Copy
Then paste as new layer
Resize by 60%
Image / Mirror
Position on the opposite side
Layers / Merge / Merge Down
Rename this layer to Flowers1
Rename this layer to Flowers1
Open Eggs2
Paste an Easter Egg of choice as a new layer
Image / Rotate by 20 to the left
Resize by 40%
Position to the left at the base of the flowers
Paste an Easter Egg of choice as a new layer
Image / Rotate by 20 to the left
Resize by 40%
Position to the left at the base of the flowers
Paste another egg as new layer
Image / Rotate by 10 to the right
Resize by 40%
Position alongside first egg
Image / Rotate by 10 to the right
Resize by 40%
Position alongside first egg
Paste another egg as new layer
Resize by 40%
Position between the two eggs
Resize by 40%
Position between the two eggs
Layers / Merge / Merge Down
Repeat
Rename this layer Eggs1
Repeat
Rename this layer Eggs1
Now paste another egg as new layer
Image / Rotate by 20 to the right
Resize by 40%
Position to the right at the base of the flowers
Image / Rotate by 20 to the right
Resize by 40%
Position to the right at the base of the flowers
Paste another egg as new layer
Image / Rotate by 10 to the left
Resize by 40%
Position alongside previous egg
Image / Rotate by 10 to the left
Resize by 40%
Position alongside previous egg
Paste another egg as new layer
Resize by 40%
Position between the two eggs
Resize by 40%
Position between the two eggs
Laters / Merge / Merge Down
Repeat
Rename this layer Eggs2
Repeat
Rename this layer Eggs2
Open Flowers4
Select each of the flowers and paste them one by one on your tag
Resize each by 30%
Alternate the position of each on either side of Frame
Layers / Merge / Merge Down
Repeat till each of the little flowers are one layer
Rename to Flowers2
Select each of the flowers and paste them one by one on your tag
Resize each by 30%
Alternate the position of each on either side of Frame
Layers / Merge / Merge Down
Repeat till each of the little flowers are one layer
Rename to Flowers2
Paste Basket as new layer
Resize by 50%
Position to the left between Flowers1 and Eggs1 layer
Resize by 50%
Position to the left between Flowers1 and Eggs1 layer
Paste Bunnie as new layer
Resize by 50%
Position to the right between Flowers1 and Eggs2 layers
Resize by 50%
Position to the right between Flowers1 and Eggs2 layers
Open the Butterflies psp file
Paste Small Butterfly as new layer
Resize by 30%
Position in the upper right
Duplicate
Image / Mirror
Resize by 70%
Position just slight below first butterfly
Layers / Merge / Merge Down
Rename Butterflies1
Paste Small Butterfly as new layer
Resize by 30%
Position in the upper right
Duplicate
Image / Mirror
Resize by 70%
Position just slight below first butterfly
Layers / Merge / Merge Down
Rename Butterflies1
Duplicate
Image / Mirror
Resize by 90%
Position somewhere on the opposite side
Rename Butterflies2
Image / Mirror
Resize by 90%
Position somewhere on the opposite side
Rename Butterflies2
Paste Sun as new layer
Resize by 60%
Place in the upper left
Layers / Arrange / Send to Bottom
Position so it is partially behind Frame
Resize by 60%
Place in the upper left
Layers / Arrange / Send to Bottom
Position so it is partially behind Frame
Open HappyEaster psp file
Select Happy Easter2 words and paste as new layer
Position along the bottom
Resize by 70%
Reposition again so that the words are in place
Lower opacity to around 20
Select Happy Easter2 words and paste as new layer
Position along the bottom
Resize by 70%
Reposition again so that the words are in place
Lower opacity to around 20
Apply a drop shadow to each of the elements:
H & V - 1
Opacity - 15
Blur - 5.00
Colour - #000000
H & V - 1
Opacity - 15
Blur - 5.00
Colour - #000000
And the following to your Frame:
H & V - 1
Opacity - 20
Blur - 8.00
Colour - #000000
H & V - 1
Opacity - 20
Blur - 8.00
Colour - #000000
Crop and resize
~ Step 3 ~
Activate top layer
Paste your tube as new layer
Resize as necessary
Resize as necessary
Effects / Plugins / Xero / Improver with default settings
Duplicate
Effects / Plugins / Xero / Radiance with the following settings:
Effects / Plugins / Xero / Radiance with the following settings:
Add a drop shadow to your tube
H & V - 1
Opacity - 20
Blur - 8.00
Colour - #000000
H & V - 1
Opacity - 20
Blur - 8.00
Colour - #000000
Paste Paper19 as a new layer
Resize by 110%
Layers / Arrange / Send to Bottom
Resize by 110%
Layers / Arrange / Send to Bottom
Layers / New Mask Layer / From Image
Locate WSL_Mask208
DO NOT MERGE GROUP YET!!
Locate WSL_Mask208
DO NOT MERGE GROUP YET!!
In your Layer Palette activate Mask Layer
Resize by 80%
Layers / Merge / Merge Group
Then resize layer by 98%
Select your Text Tool and font of choice
I am using Bello Script
Set your Material Palette:
Foreground - #ad5cc1
Background - #FFFFFF
I am using Bello Script
Set your Material Palette:
Foreground - #ad5cc1
Background - #FFFFFF
Type your name and apply a slight drop shadow
Finally, add your © copyright, licence and watermark
Save as a GIF or JPG and you're done!
Thanks for trying my tutorial
::st!na::
© Tutorial written by Stina on 31st March 2009
All rights reserved
No comments:
Post a Comment