
Supplies
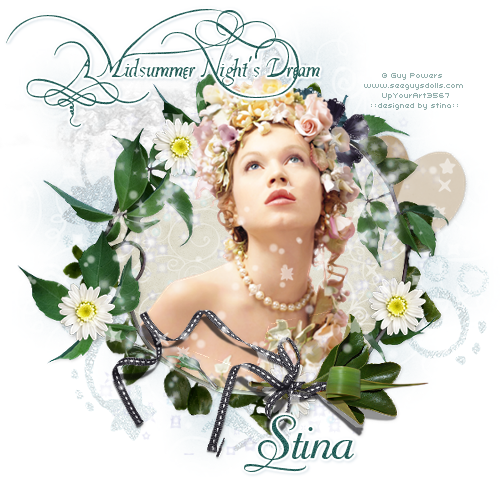
Scrap kit of choice - I am using the lovely "Midsummer Night's Dream" by Pimpd Designs available at Paradise for Scrappers
Tube of choice - I am using the lovely artwork of Guy Powers which can be purchased at UpYourArt
WSL_Mask7 by Chelle available from her Blog
Fonts of choice - I am using Platthand, Mayfair and Mayfair Alt
Plugin: Eye Candy 4000 Gradient Glow
~ Step 1 ~
Open a new 600 x 600 blank canvas flood-filled white
Paste Green-08 as new layer
Resize by 85%
Leave in position
Resize by 85%
Leave in position
Select your Freehand Tool and draw around the "stem" careful not to go either inside or outside the area
Add a new raster later
Paste PP17 into Selection
Deselect
Layers / Arrange / Move Down
Paste PP17 into Selection
Deselect
Layers / Arrange / Move Down
~ Step 2 ~
Paste Cloud as new layer
Place between the paper and Green Frame layers protruding slightly
Place between the paper and Green Frame layers protruding slightly
Paste Green01 as new layer
Resize by 35%
Position in upper right slightly protruding
Layers / Arrange / Send to Bottom
Resize by 35%
Position in upper right slightly protruding
Layers / Arrange / Send to Bottom
Duplicate then Image / Mirror
Image / Rotate by 80 to the left
Position on the underside in the lower left
Image / Rotate by 80 to the left
Position on the underside in the lower left

Paste Paper-Heart as new layer
Image / Rotate by 20 to the right
Position in upper right then
Layers / Arrange / Send to Bottom
Image / Rotate by 20 to the right
Position in upper right then
Layers / Arrange / Send to Bottom
Paste Flower-07 as new layer
Resize by 25%
Position at the top of Frame
Resize by 25%
Position at the top of Frame
Paste Flower-08 as new layer
Resize by 23%
Position along the top beside first flower
Resize by 23%
Position along the top beside first flower
Paste Fairy-Dust-02 as new layer
Resize by 40%
Position over Frame
Select your Eraser Tool and lower the opacity to around 30
Then carefully click on some of the excess to soften it
Resize by 40%
Position over Frame
Select your Eraser Tool and lower the opacity to around 30
Then carefully click on some of the excess to soften it
Paste Stardust as new layer
Position over Frame as desired
Position over Frame as desired
Paste Star-Cluster as new layer
Layers / Arrange / Send to Bottom
Position it centrally behind Frame
Lower opacity to 20
Layers / Arrange / Send to Bottom
Position it centrally behind Frame
Lower opacity to 20
~ Step 3 ~
Paste Tube as new layer
Resize as necessary
Place as desired then LEAVE IN POSITION
Duplicate then move duplicate layer beneath Greenery Frame
Resize as necessary
Place as desired then LEAVE IN POSITION
Duplicate then move duplicate layer beneath Greenery Frame
Lower opacity of top tube layer or turn off visibility altogether
Use your Eraser Tool to erase the bottom of the duplicate Tube that protrudes the Frame
Return to your top tube layer
With your Freehand Tool draw around the bottom of your tube
Delete then deselect
Use your Eraser Tool to erase the bottom of the duplicate Tube that protrudes the Frame
Return to your top tube layer
With your Freehand Tool draw around the bottom of your tube
Delete then deselect
Layers / Arrange / Move Down
The layer should now fall below your Stardust layer
The layer should now fall below your Stardust layer
Paste Greens-Ribbon as new layer
Resize by 50%
Position along the bottom with the bow over one of the flowers
Resize by 50%
Position along the bottom with the bow over one of the flowers
Paste Green-03 as new layer
Resize by 35%
Position in the centre of the greenery with ribbon
Resize by 35%
Position in the centre of the greenery with ribbon
Paste PP16 as new layer
Layers / Arrange / Send to Bottom
Layers / Arrange / Send to Bottom
Layers / New Mask Layer / From Image
Locate WSL_Mask7
OK
Layers / Merge / Merge Group
Locate WSL_Mask7
OK
Layers / Merge / Merge Group
Crop and resize
~ Step 4 ~
Select your Text Tool and a colour from your tube or scrap
Set it as your Background colour with your Foreground NULL
Set it as your Background colour with your Foreground NULL
Foreground - null
Background - #28605b (colour I am using)
Background - #28605b (colour I am using)
Select your font
I am using Platthand
Type out your text of choice
Convert to raster layer
Add a gradient glow
I am using Platthand
Type out your text of choice
Convert to raster layer
Add a gradient glow
Apply a drop shadow:
H & V - 1
Opacity - 20
Blur - 3.00
Colour - #4c7994
H & V - 1
Opacity - 20
Blur - 3.00
Colour - #4c7994
Select another font of choice
I am using Mayfair Alt
Type out your name
Object / Align / Horizontal centre in Canvas
Convert to raster layer
Add the same Gradient Glow as above following the same drop shadow
I am using Mayfair Alt
Type out your name
Object / Align / Horizontal centre in Canvas
Convert to raster layer
Add the same Gradient Glow as above following the same drop shadow
Finally, add your © copyright, licence and watermark then save as a GIF or JPG and you're done!
Thank you for trying my tutorial!
::st!na::
© Tutorial written by Stina on 2nd April 2009
All rights reserved
No comments:
Post a Comment