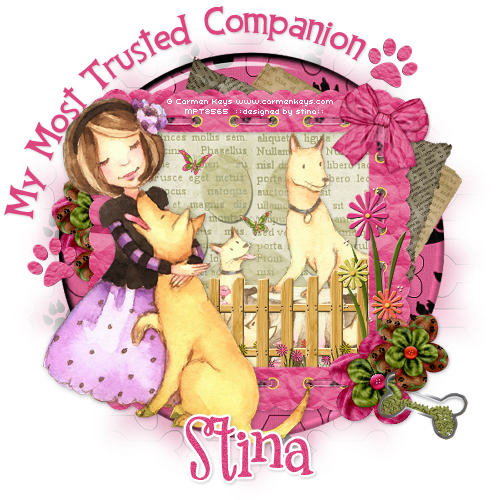
This tutorial is dedicated with much love to my beloved Ciara and to the memory of Sheba - my most trusted companions
Supplies
Scrap kit of choice - I am using the gorgeous "Precious Pup" kit by Gina of KiKeKa Designs available from Paradise 4 Scappers
Tubes of choice - I am using the delightful artwork of Carmen Keys which can be purchased from CILM
WSL_Mask133 by Chelle available from her blog
Plugin: Alien Skin Eye Candy 5 Impact > Glass
Plugin: Xero Improver
Fonts of choice - I am usinf CCThingamajig and 2Peas Mister Giggles
Let's begin!
Open a new 600 x 600 blank canvas flood-filled white
Open Paper3 and minimise
Set your Preset Shape Tool to Ellipse
Open your Material Palette and find the Paper you just minimised and set your Palette to:
Open your Material Palette and find the Paper you just minimised and set your Palette to:
Foreground - null
Background - Paper3
Background - Paper3
Holding the Shift key draw out a circle
Objects > Align > Centre in Canvas
Convert to raster layer
Objects > Align > Centre in Canvas
Convert to raster layer
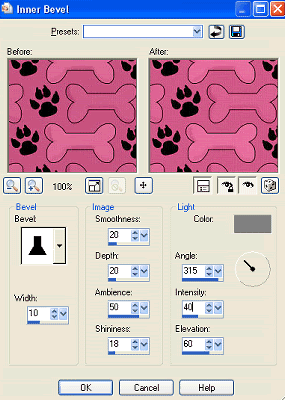
Effects > 3D Effects > Inner Bevel with the following settings:
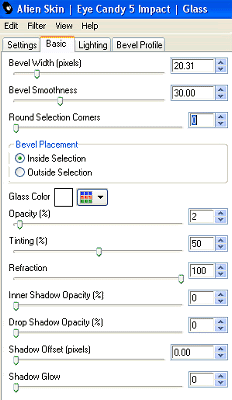
Then Effects > Plugins > Alien Skin Eye Candy 5 Impact > Glass with the following settings:
Paste Frame3 as new layer
Resize by 65%
Resize by 65%
Select in the inner area of the Frame
Selections > Modify > Expand by 10
Add a new raster layer
Paste Paper13 into Selection
Deselect
Selections > Modify > Expand by 10
Add a new raster layer
Paste Paper13 into Selection
Deselect
Layers > Arrange > Move Down
Paste Fence as new layer
Resize by 45%
Position along bottom of (and beneath) Frame
Resize by 45%
Position along bottom of (and beneath) Frame
Paste a tube of choice as new layer
Resize as necessary
Layers > Arrange > Move Down
Position behind Fence and slightly to the right
Resize as necessary
Layers > Arrange > Move Down
Position behind Fence and slightly to the right
With your Frame layer activated select inside the Frame again
Selections > Modify > Expand by 10
Selections > Invert
Delete then deselect
Selections > Modify > Expand by 10
Selections > Invert
Delete then deselect
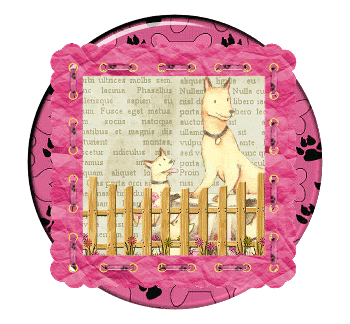
Paste your main tube of choice as new layer
Resize as necessary
Position to the left of Frame
Resize as necessary
Position to the left of Frame
Duplicate
Effects > Plugins > Xero > Improver with default settings
Then lower opacity to 60
Effects > Plugins > Xero > Improver with default settings
Then lower opacity to 60
Layers > Merge > Merge Down
Paste Newsprint1 as new layer below Frame
Image > Flip
Image > Rotate by 15 to the right
Resize by 55%
Position so that it protrudes slightly
Image > Flip
Image > Rotate by 15 to the right
Resize by 55%
Position so that it protrudes slightly
Paste Newsprint2 as new layer
Image > Rotate by 35 to the right
Resize by 65%
Layers > Arrange > Move Down
Position behind first newsprint paper and Frame
Image > Rotate by 35 to the right
Resize by 65%
Layers > Arrange > Move Down
Position behind first newsprint paper and Frame
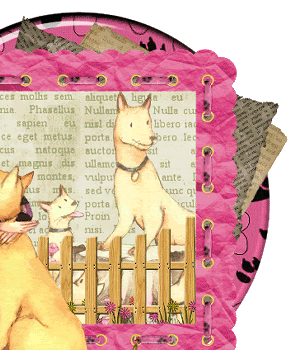
Then make a selection along the bottom around the excess newsprint
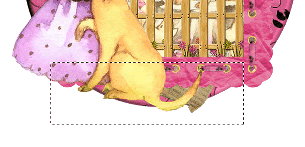
Press delete then deselect
Paste Flowers1 as new layer
Resize by 85%
Position in lower right of Frame
Resize by 85%
Position in lower right of Frame
Paste Flower1 (singular) as new layer
Resize by 30%
Position in lower right over Flowers
Resize by 30%
Position in lower right over Flowers
paste Flower2 as new layer
Resize by 25%
Position beside Flower1
Resize by 25%
Position beside Flower1
Paste Bow2 as new layer
Image > Rotate by 15 to the right
Resize by 20%
Position in upper right
Image > Rotate by 15 to the right
Resize by 20%
Position in upper right
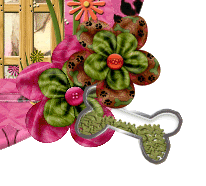
Paste Charm3 as new layer
Image > Mirror
Resize by 35%
Position in the lower right between the two Flowers
Image > Mirror
Resize by 35%
Position in the lower right between the two Flowers
Paste Pawprint2 as new layer
Position in the Frame and move to the layer below the tube
Set your blend mode to Luminance
Lower opacity to 55
Position in the Frame and move to the layer below the tube
Set your blend mode to Luminance
Lower opacity to 55
Paste Pawprint2 as new layer again
Image > Rotate by 35 to the left
Resize by 20%
Position to the left
Duplicate
Image > Mirror
Position to your liking
Image > Rotate by 35 to the left
Resize by 20%
Position to the left
Duplicate
Image > Mirror
Position to your liking
Paste Paper3 as new layer
Layers > Arrange > Send to Bottom
Layers > New Mask Layer > From Image
Locate WSL_Mask133
OK
Layers > Merge > Merge Group
Lower opacity to 50
Layers > Arrange > Send to Bottom
Layers > New Mask Layer > From Image
Locate WSL_Mask133
OK
Layers > Merge > Merge Group
Lower opacity to 50
Activate top layer
Select your Preset Shape Tool to Ellipse
Foreground - #000000
Background - null
Foreground - #000000
Background - null
Draw out a circle around your tag
Select your Text Tool and font of choice
I am using CCThingamajig
I am using CCThingamajig
Choose a colour to complement your tag
On the curve of the circle type out your text
On the curve of the circle type out your text
Open the Vector Layer in your Palette and hide the Ellipse
Convert to raster layer
Apply a small drop shadow
Convert to raster layer
Apply a small drop shadow
Select another font of choice
I am using 2Peas Mister Giggles
Type out your name and apply any effects you wish
Add a drop shadow
I am using 2Peas Mister Giggles
Type out your name and apply any effects you wish
Add a drop shadow
Finally, add your © copyright, licence and watermark the save as a GIF or JPG and you're done
Thanks for trying my tutorial!
::st!na::
© Tutorial written by Stina on 7th April 2009
All rights reserved

No comments:
Post a Comment