
Supplies
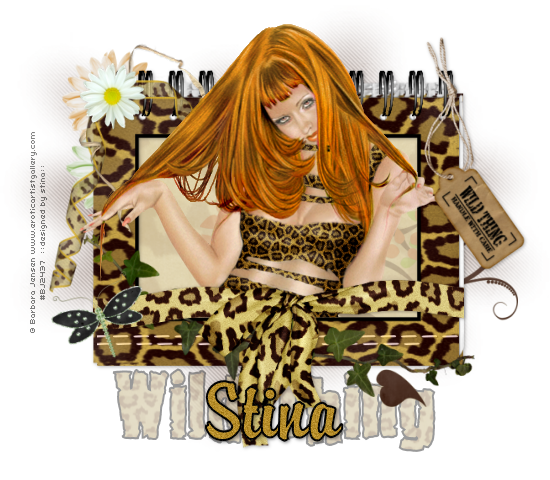
Scrap kit of choice - I am using "Wild Thing" by Candy's Treats available at Stargazer Scraps and Candy's Treats (store)
Tube of choice - I am using the artwork of Barbara Jensen available from her store
**PLEASE DO NOT USE HER ARTWORK WITHOUT THE APPROPRIATE LICENCE**
WSL_Mask7 by Chelle from her blog
Plugin: Penta.com > Jeans
Fonts of choice - 2Peas Bad Attitude and Brody
Ready? Let's begin!
Open a new 700 x 600 blank canvas flood-filled white
Paste Diary1 as new layer
Image > Rotate by 90 to the right
Image > Rotate by 90 to the right
Select your Preset Shape to Rectangle
Foreground - #000000
Background - null
Foreground - #000000
Background - null
Stroke width - 5.00
Draw out a rectangle on your Diary
Objects > Align > Centre in Canvas
Convert to raster layer
Objects > Align > Centre in Canvas
Convert to raster layer
Now select the area INSIDE the shape you have just drawn with your Magic Wand
Selections > Modify > Expand by 2
Activate the Diary layer and press delete
Selections > Modify > Expand by 2
Activate the Diary layer and press delete
KEEP SELECTED!!

Selections > Modify > Expand by 10
Paste Block11 (paper) as new layer
Resize by 55%
Selections > Invert and press delete
Layers > Arrange > Move Down
Paste Block11 (paper) as new layer
Resize by 55%
Selections > Invert and press delete
Layers > Arrange > Move Down
STILL SELECTED!!
Paste Treem1 as new layer
Resize by 50%
Position to your liking
Press delete then deselect
Resize by 50%
Position to your liking
Press delete then deselect
Activate the Preset Shape layer
Layers > Merge > Merge Down
Layers > Merge > Merge Down
You have now created a Frame!! *g*
Paste Stitches-White as new layer
Resize by 54%
Position along bottom of Frame
Set Blend Mode to Luminance Legacy
Resize by 54%
Position along bottom of Frame
Set Blend Mode to Luminance Legacy
Paste JaguarRibbon1 as new layer
Resize by 56%
Position along bottom of Frame
Duplicate then set Blend Mode to Soft Light
Layers > Merge > Merge Down
Resize by 56%
Position along bottom of Frame
Duplicate then set Blend Mode to Soft Light
Layers > Merge > Merge Down
Paste Ivy as new layer
Resize by 90%
Layers > Arrange > Move Down
Position behind Ribbon
Resize by 90%
Layers > Arrange > Move Down
Position behind Ribbon
Paste LeopardCurlyRibbon as new layer
Resize by 70%
Position in upper left
Resize by 70%
Position in upper left
Paste Dragonfly as new layer
Layers > Arrange > Bring to Top
Resize by 40%
Position to the left
Layers > Arrange > Bring to Top
Resize by 40%
Position to the left
Paste Doodle1 as new layer
Resize by 40%
Layers > Arrange > Send to Bottom
Position to the lower right or anywhere to your liking
Resize by 40%
Layers > Arrange > Send to Bottom
Position to the lower right or anywhere to your liking
Paste Flower3 as new layer
Resize by 30%
Position behind FlowerRibbon in upper left
Resize by 30%
Position behind FlowerRibbon in upper left
Add any other elements to your liking
Paste Block5 (paper) as new layer
Layers > Arrange > Send to Bottom
Layers > Arrange > Send to Bottom
Layers > New Mask Layer > From Image
Locate WSL_Mask7
OK
Layers > Merge > Merge Group
Locate WSL_Mask7
OK
Layers > Merge > Merge Group
Crop and resize
Activate your Mask layer
Effects > Plugins > Penta.com > Jeans
Default setting
Effects > Plugins > Penta.com > Jeans
Default setting
Paste a tube of choice as a new layer
Move to the layer BEHIND the ribbon
Use your Magic Wand to select the inner area of your Frame
Selections > Invert
Selections > Modify > Feather by 2
Erase the bottom of the tube
Deselect
Move to the layer BEHIND the ribbon
Use your Magic Wand to select the inner area of your Frame
Selections > Invert
Selections > Modify > Feather by 2
Erase the bottom of the tube
Deselect
Paste Tag2 as new layer
Image > Rotate by 15 to the left
Resize by 60%
Position in upper right as if fastened to the spiral
Image > Rotate by 15 to the left
Resize by 60%
Position in upper right as if fastened to the spiral
Add drop shadows to your elements
Select one of the papers from the kit
I am using Block14
I am using Block14
Select your Text Tool and font of choice
I am using 2 Peas Bad Attitude
I am using 2 Peas Bad Attitude
Set your Material Palette:
Foreground - #000000
Background - Paper of choice (Block14)
Stroke width - 2.00
Foreground - #000000
Background - Paper of choice (Block14)
Stroke width - 2.00
Type out Wild Thing
Objects > Align > Horizontal Centre in Canvas
Convert to raste layer
Lower opacity to 40
Layers > Arrange > Send to Bottom, then
Layers > Arrange > Move Up
Objects > Align > Horizontal Centre in Canvas
Convert to raste layer
Lower opacity to 40
Layers > Arrange > Send to Bottom, then
Layers > Arrange > Move Up
Activate top layer
Select your Text Tool again and another font of choice
I am using Brody
I am using Brody
Choose two colours from your tube/tag and set them in your Material Palette:
Foreground - #000000
Background - #b68d2a
Stroke width - 2.00
Foreground - #000000
Background - #b68d2a
Stroke width - 2.00
Type out your name
Objects > Align > Horizontal Centre in Canvas
Convert to raste layer
Add some noise and apply a slight drop shadow
Objects > Align > Horizontal Centre in Canvas
Convert to raste layer
Add some noise and apply a slight drop shadow
Finally, add your © copyright, licence and watermark, then save as a GIF or JPG and you're done!
Thanks for trying my tutorial!
::St!na::
© Tutorial written by Stina on 27th April 2009
All rights reserved
No comments:
Post a Comment