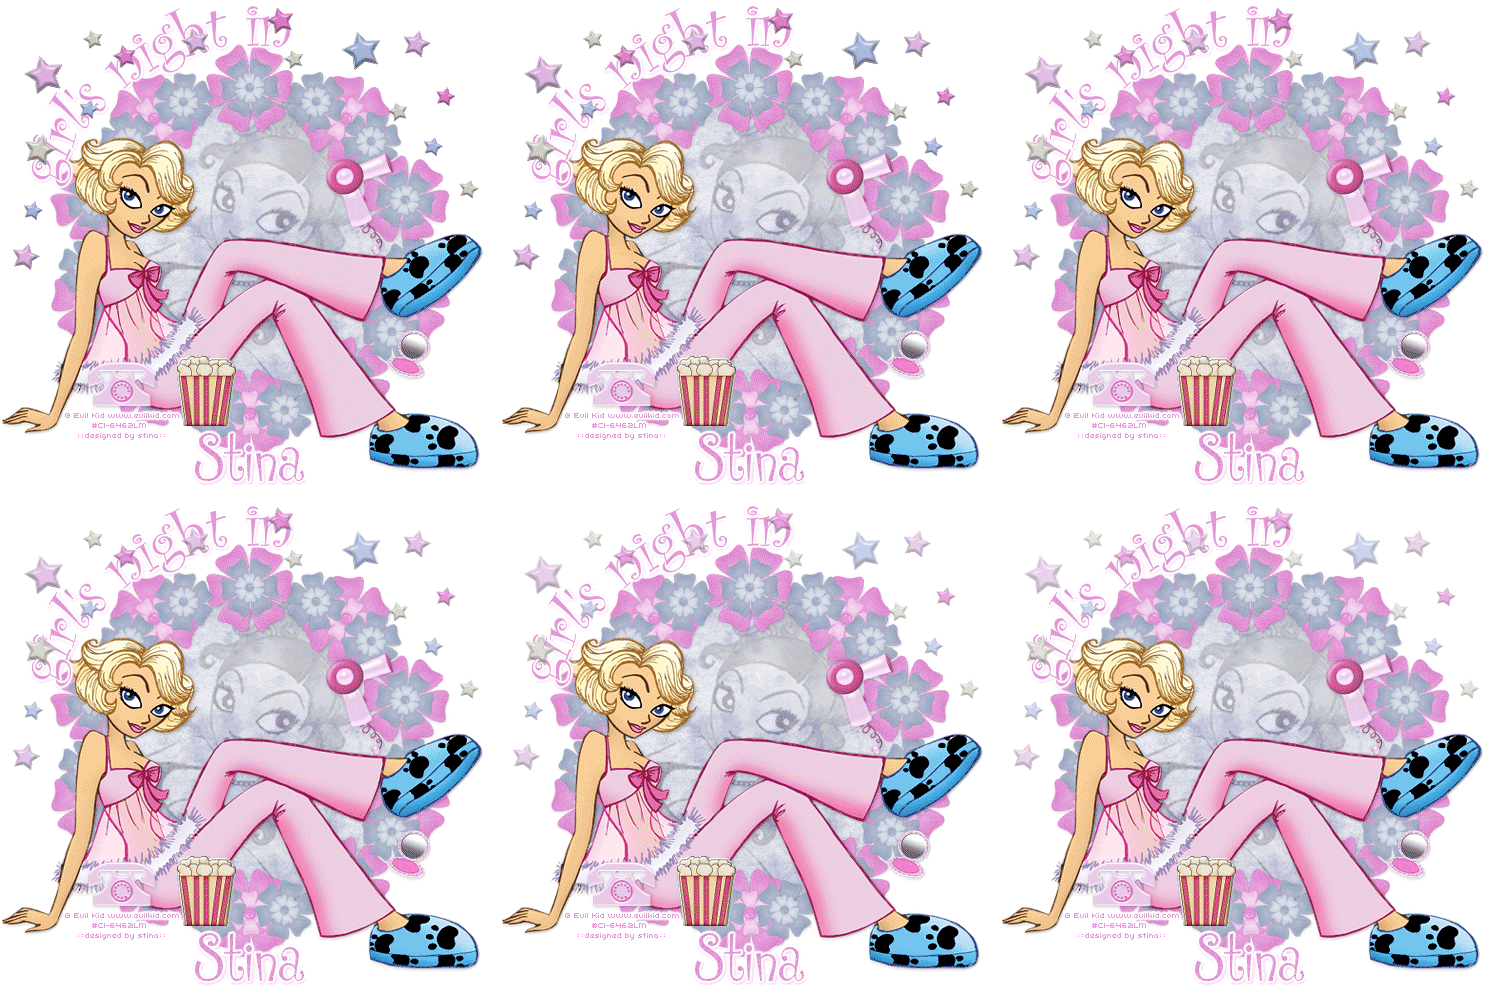
Supplies
Scrap kit of choice - I am using the cute "Slumber Party" by Shell's Scraps available from Creative Scraps
**PLEASE DO NOT USE HIS ARTWORK WITHOUT THE APPROPRIATE LICENCE**
Fonts of choice - I am using CurlzMT and Cinderella ITC TT
Plugin: Mura Meister Copies
Plugin: Eye Candy 4000 Gradient Glow
~ Step 1 ~
Open a new 600 x 600 blank canvas flood-filled white
Paste Flower1 as new layer
Resize by 10%
Resize by 10%
LEAVE IN POSITION
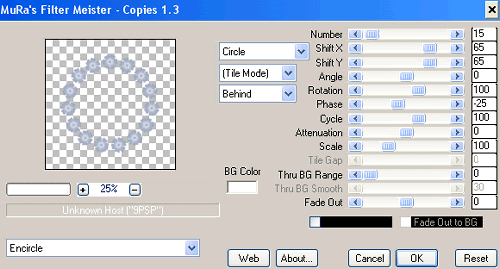
Effects / Plugins / Mura Meister / Copies with the following settings:
Paste Flower2 as new layer
Resize by 15%
Resize by 15%
LEAVE IN POSITION
Apply Mura Meister Copies again, this time changing the NUMBER to 10
Layers / Arrange / Move Down, then
Layers / Merge / Merge Down
Layers / Merge / Merge Down
Select the area inside your new Frame with your Magic Wand
Selections / Modify / Expand by 20
Add a new raster layer
Paste Paper7 into Selection
Selections / Modify / Expand by 20
Add a new raster layer
Paste Paper7 into Selection
KEEP SELECTED
Layers / Arrange / Move Down
Adjust / Hue & Saturation / Colourise
Hue - 165
Saturation - 55
Hue - 165
Saturation - 55
STILL KEEP SELECTED!!
Paste the first of your tubes as new layer
Depending on size of your tube you may have to resize up - we want this tube large
I resized up 200%
Depending on size of your tube you may have to resize up - we want this tube large
I resized up 200%
Selections / Invert
Delete and deselect
Delete and deselect
Effects / Plugins / Xero / Improver
Default settings
Default settings
Set blend mode to Luminance (Legacy) and lower opacity to 25
Add a drop shadow to your Frame
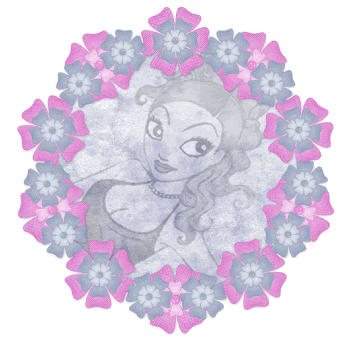
You should now have something like this:
~ Step 2 ~
Let's paste our second tube so that we can work around it
Paste tube as new layer
Resize if necessary
Apply slight drop shadow
Resize if necessary
Apply slight drop shadow
Paste Phone as new layer
Resize by 12%
Position beside your tube
Resize by 12%
Position beside your tube
Paste Sticker3 as new layer
Resize by 10%
Place beside your tube
Resize by 10%
Place beside your tube
Paste Compact as new layer
Image / Rotate by 20 to the right
Resize by 10%
Position to your liking
Image / Rotate by 20 to the right
Resize by 10%
Position to your liking
Paste Blowdryer as new layer
Image / Rotate by 20 to the left
Resize by 20%
Position to your liking
Image / Rotate by 20 to the left
Resize by 20%
Position to your liking
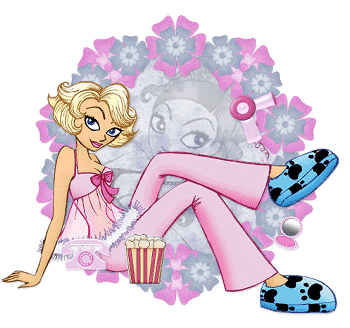
Paste selected StarBrads of your choice as new layers
Resize various sizes from 5 - 10%
Position around Frame to your liking
Resize various sizes from 5 - 10%
Position around Frame to your liking
When you have all your stars HIDE all layers EXCEPT the stars
Then Layers / Merge / Merge Visible
Rename Stars
Unhide other layers
Then Layers / Merge / Merge Visible
Rename Stars
Unhide other layers
Crop and resize
~ Step 3 ~
Select your Preset Shape Tool to Ellipse
Foreground - #000000
Background - null
Foreground - #000000
Background - null
Hold your Shift key down and draw out a circle
Objects / Align / Centre in Canvas
Objects / Align / Centre in Canvas
Select your Text Tool
Choose a colour from your tube and a font of choice
I am using CurlzMT
Choose a colour from your tube and a font of choice
I am using CurlzMT
Set your Materials Palette:
Foreground - null
Background - #e398d6
Foreground - null
Background - #e398d6
Place your mouse over the Ellipse and type your text
Open the Vector Layer in your Layer Palette
Delete Ellipse
Convert to raster layer
Apply a Gradient Glow and a slight drop shadow
Open the Vector Layer in your Layer Palette
Delete Ellipse
Convert to raster layer
Apply a Gradient Glow and a slight drop shadow
H & V - 1
Opacity - 30
Blur - 3.00
Colour - #e398d6
Opacity - 30
Blur - 3.00
Colour - #e398d6
Select your Text Tool again and another font of choice
I am using CinderellaITC TT
Type out your name
Objects / Align / Horizontal Centre in Canvas
Convert to raster layer
Add some noise and apply a Gradient Glow
I am using CinderellaITC TT
Type out your name
Objects / Align / Horizontal Centre in Canvas
Convert to raster layer
Add some noise and apply a Gradient Glow
Add a drop shadow:
H & V - 1
Opacity - 50
Blur - 3.00
Colour - #e398d6
H & V - 1
Opacity - 50
Blur - 3.00
Colour - #e398d6
Finally add your © copyright, licence and watermark
**IF YOU DO NOT WISH TO ANIMATE THEN DISREGARD STEP 4**
~ Step 4 ~
Activate the Stars layer
Edit / Copy
Edit / Copy
Open Animation Shop
Edit / Paste as new Animation
Edit / Paste as new Animation
Effects / Insert Image Transition with the following settings:
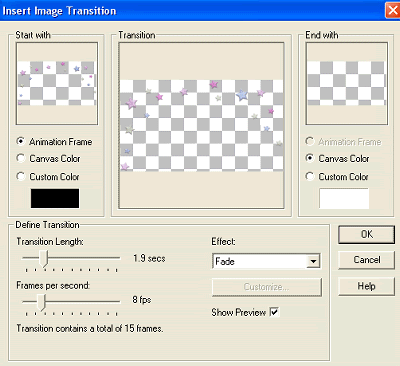
You should now have 8 Frames
Back in PSP
Hide your Stars layer
Edit / Copy Merged
Hide your Stars layer
Edit / Copy Merged
In Animation Shop
Edit / Paste as new animation
Then Paste After Current Frame till you have a total of 8 Frames
Edit / Paste as new animation
Then Paste After Current Frame till you have a total of 8 Frames
Edit / Select All on both image/animations
Ensure Propogate Paste is selected
Edit / Paste / Into Selected Frame
Ensure Propogate Paste is selected
Edit / Paste / Into Selected Frame
DO NOT CLICK UNTIL YOUR STARS ARE RESTING EXACTLY WHERE YOU WANT THEM, then Click
Edit / Select All
Animation / Frame Properties
Set to 30
Animation / Frame Properties
Set to 30
Go to Frame 1
Animation / Frame Properties
Set to 50
Animation / Frame Properties
Set to 50
Now go to Frame 8
Animation / Frame Properties
Set to 50
Animation / Frame Properties
Set to 50
Finally and you're done!
Thanks for trying my tutorial
::st!na::
© Tutorial written by Stina on 30th March 2009
All rights reserved

No comments:
Post a Comment