Supplies
Scrap kit of choice - I am using the lovely "Glam Rock" kit by Candy Kisses Designz which is available at Paradise 4 Scrappers
Tubes of choice - I am using the delightful artwork of Lix which can be purchased from CILM
**PLEASE DO NOT USE THIS ARTWORK WITHOUT THE APPROPRIATE LICENCE**
WSL_Mask84 by Chelle available from her blog
**PLEASE DO NOT USE THIS ARTWORK WITHOUT THE APPROPRIATE LICENCE**
WSL_Mask84 by Chelle available from her blog
Teresa's Template #6 available from her blog
Plugin: Eye Candy 4000 Gradient Glow
Font of choice - I am using Juice
~ Step 1 ~
Open Teresa_Template6
Shift D to duplicate then close off original
Resize to 600 x 600, then
Image / Canvas Resize to 700 x 550
Shift D to duplicate then close off original
Resize to 600 x 600, then
Image / Canvas Resize to 700 x 550
Activate Circle1 layer
Selections / Select All
Selections / Float then Selections / Defloat
Hit delete then
Selections / Modify / Feather by 2
Paste Paper10 into selection
Deselect
Selections / Select All
Selections / Float then Selections / Defloat
Hit delete then
Selections / Modify / Feather by 2
Paste Paper10 into selection
Deselect
Use your Magic wand to select the star in Circle1
Selections / Modify / Expand by 10
Add a new raster layer
Layers / Arrange / Move Down
Paste Paper15 into selection
Deselect
Selections / Modify / Expand by 10
Add a new raster layer
Layers / Arrange / Move Down
Paste Paper15 into selection
Deselect
Activate Frame1
Selections / Select All
Selections / Float then Selections / Defloat
Hit delete
Paste Paper4 into selection
Deselect
Selections / Select All
Selections / Float then Selections / Defloat
Hit delete
Paste Paper4 into selection
Deselect
Repeat same with Frame2
Then on Frame2 Layers / Arrange / Move Down
Then on Frame2 Layers / Arrange / Move Down
Activate Circle2
Selections / Select All
Selections / Float then Selections / Defloat
Hit Delete
Selections / Modify / Feather by 2
Paste Paper11 into selection
Deselect
Selections / Select All
Selections / Float then Selections / Defloat
Hit Delete
Selections / Modify / Feather by 2
Paste Paper11 into selection
Deselect
Activate Strip1
Selections / Select All
Selections / Float then Selections / Defloat
Hit Delete
Selections / Modify / Feather by 2
Paste Paper8 into selection
Deselect
Selections / Select All
Selections / Float then Selections / Defloat
Hit Delete
Selections / Modify / Feather by 2
Paste Paper8 into selection
Deselect
Repeat the same with Strip2
With your Eye Dropper Tool choose a dark colour from one of the papers - I am using #a94577
Activate Stars layer
Selections / Select All
Selections / Float then Selections / Defloat
Selections / Select All
Selections / Float then Selections / Defloat
NOW DELETE STARS LAYER
THEN
ADD A NEW RASTER LAYER AND CALL IT STARS
THEN
ADD A NEW RASTER LAYER AND CALL IT STARS
Selections / Modify / Feather by 2
Flood fill your colour into selection
Deselect
Flood fill your colour into selection
Deselect
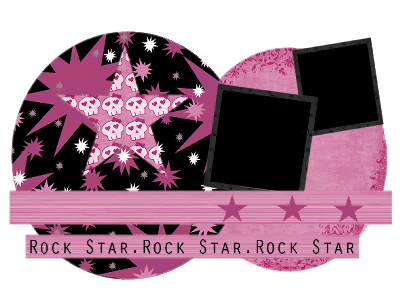
You should now have something like this:
~ Step 2 ~
Activate Photomat1
Click the area with your magic wand
You can paste a paper here if you wish or leave it as I have
Click the area with your magic wand
You can paste a paper here if you wish or leave it as I have
Paste your tube or image as new layer
Position under the Frame to your liking
Selections / Invert
Delete
Deselect
Position under the Frame to your liking
Selections / Invert
Delete
Deselect
Activate Photomat2 and repeat with 2nd tube or image of choice
Paste main tube as new layer
Resize as necessary
Resize as necessary
Add drop shadows of choice to each tube
Paste Flower01 as new layer
Resize by 20%
Position beside Frame 1 and beneath Frame2
Resize by 20%
Position beside Frame 1 and beneath Frame2
Paste Musicnotes3 as new layer
Resize by 20%
Position beside Flower
Resize by 20%
Position beside Flower
Paste Musicnotes9 as new layer
Resize by 20%
Position with flower and musicnote
Resize by 20%
Position with flower and musicnote
Paste Flower2 as new layer
Resize by 12%
Position above Frame1
Resize by 12%
Position above Frame1
Paste Bling2 as new layer
Resuze by 50%
Position beneath Strip1
Resuze by 50%
Position beneath Strip1
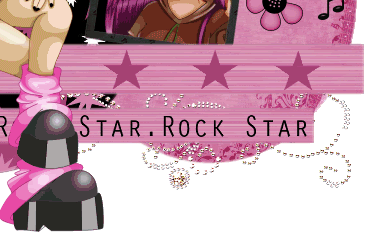
Paste BinderFlowerClip as new layer
Image / Rotate by 50 to the left
Resize by 25%
Position to the edge of the circle on the left
Image / Rotate by 50 to the left
Resize by 25%
Position to the edge of the circle on the left
Paste Bow as new layer
Image / Rotate by 20 to the left
Resize by 20%
Position on the upper left corner of Frame1
Image / Rotate by 20 to the left
Resize by 20%
Position on the upper left corner of Frame1
Paste Bow2 as new layer
Image / Rotate by 30 to the right
Resize by 20%
Position in the upper right corner of Frame2
Image / Rotate by 30 to the right
Resize by 20%
Position in the upper right corner of Frame2
Paste Guitar as new layer
Resize by 22%
Position near your main tube
Resize by 22%
Position near your main tube
Activate your Background layer
Paste Paper13 as new layer
Layers / New Mask Layer / From Image
Locate WSL_Mask84
OK
Paste Paper13 as new layer
Layers / New Mask Layer / From Image
Locate WSL_Mask84
OK
In your Layer Palette activate the Mask layer
Select your Pick Tool (or deformation tool in some versions) and use the top and bottom nodes to make the layer more rectangular
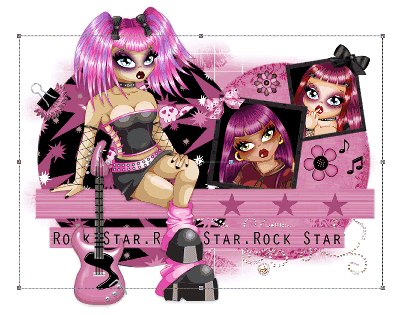
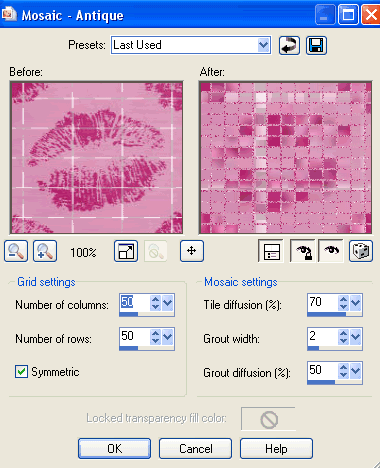
Effects / Texture Effects / Mosaic - Antique with the following settings:
Crop and resize your tag
~ Step 3 ~
Now that we have resized let's add a Gradient Glow (yes, I admit I love Gradient Glow *g*)
Activate your Circle1 layer
Effects / Plugins / Eye Candy 4000 / Gradient Glow with the following settings:
Deep Pink Colour used is #bd2556
Effects / Plugins / Eye Candy 4000 / Gradient Glow with the following settings:
Deep Pink Colour used is #bd2556
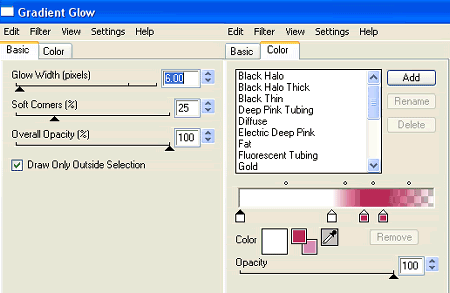
Repeat this Gradient Glow on Circle2, Strip1 and Strip2
Ensure you are back on the top layer
Select your Text Tool and choose your font - I am using Juice
Set your background to a colour that matches your tube - I am using #bd2556
Set your background to a colour that matches your tube - I am using #bd2556
Type out your name
Add a drop shadow:
H & V - 1
Opacity - 30
Blur - 2.00
Colour - #68142f
Add a drop shadow:
H & V - 1
Opacity - 30
Blur - 2.00
Colour - #68142f
Add your © copyright, licence and watermark
IF YOU WISH TO ANIMATE PLEASE READ ON
Activate your Mask layer
Duplicate twice so you should now have three layers
Rename them to Ani1, Ani2 and Ani3
Duplicate twice so you should now have three layers
Rename them to Ani1, Ani2 and Ani3
Hide Ani2 and 3
On Ani1 apply some noise at 15
Edit / Copy Merged
Edit / Copy Merged
Open Animation Shop
Edit / Paste as new animation
Edit / Paste as new animation
Back in PSP
Hide Ani1 and activate Ani2
Apply noise at 20
Edit / Copy Merged
Hide Ani1 and activate Ani2
Apply noise at 20
Edit / Copy Merged
In Animation Shop
Edit / Paste after current frame
Edit / Paste after current frame
Back in PSP
Hide Ani2 and activate Ani3
Apply noise at 25
Edit / Copy Merged
Hide Ani2 and activate Ani3
Apply noise at 25
Edit / Copy Merged
In Animation Shop
Edit / Paste after current Frame
Edit / Paste after current Frame
Then save as a GIF or JPG and you're done!
Thank you for trying my tutorial
::st!na::
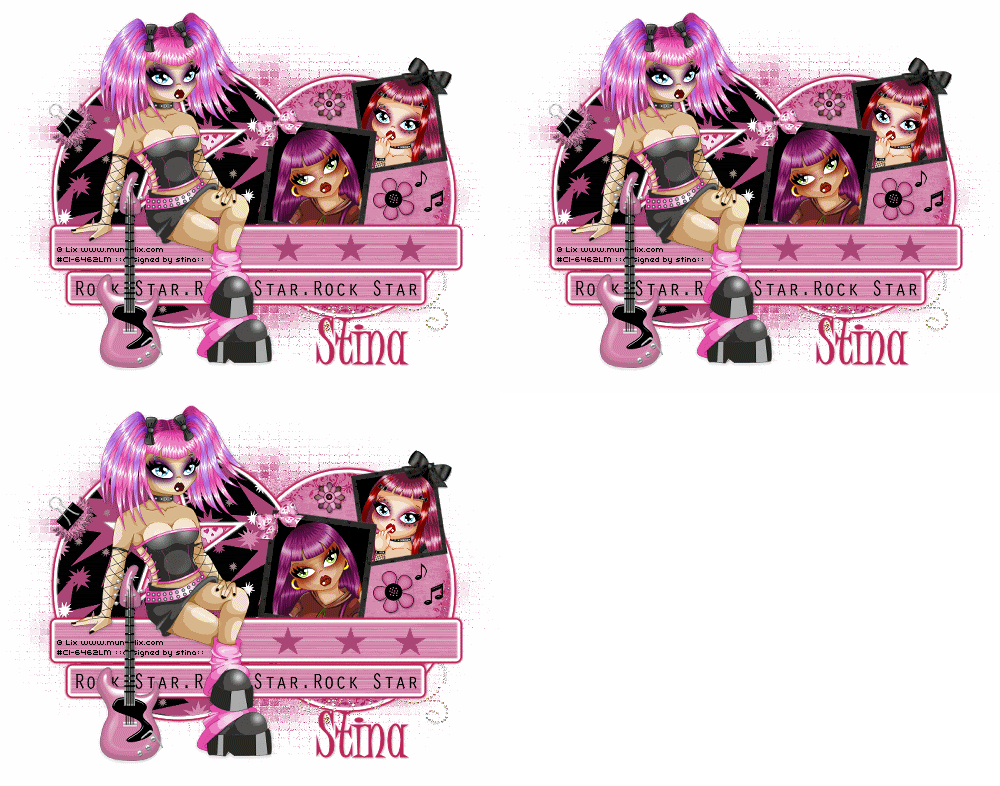
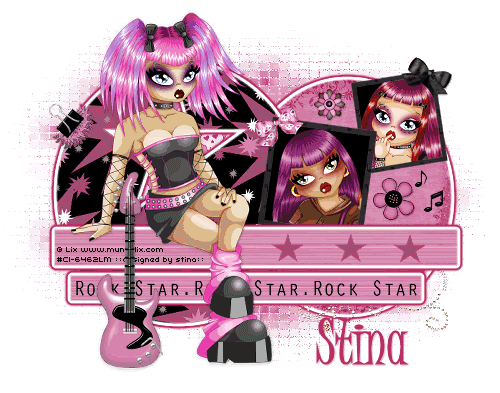
A non-animated version:
© Tutorial written by 11th March 2009
All rights reserved
All rights reserved

No comments:
Post a Comment