
Supplies
Scrap kit of choice - I am using the lovely "Heritage Love" by Creative Intentionz which is available from Exquisite Scraps and Paradise 4 Scrappers
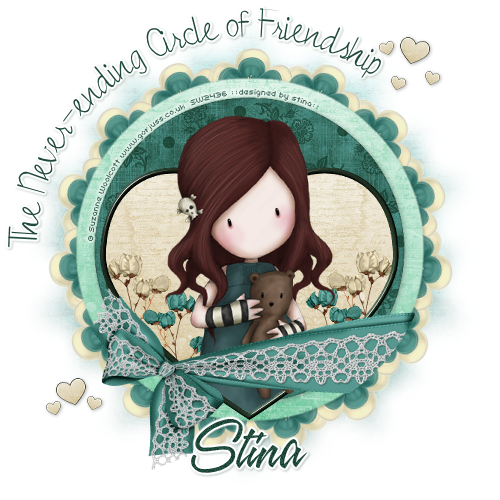
Tube of choice - I am using the lovely artwork of Suzanne Woolcott which can be purchased from her store
WSL_Mask133 by Chelle available from her blog
Fonts of choice - I am using 2Peas Champagne and A&S Speedway
Plugin: Mura Meister Copies
Plugin: Eye Candy 4000 Glass and Gradient Glow
~ Step 1 ~
Open a new 600 x 600 blank canvas flood filled white
Select your Preset Shape Tool to Ellipse and your background to #000000
Hold your Shift key and draw out a circle
Objects / Align / Centre in Canvas
Convert to raster layer
Hold your Shift key and draw out a circle
Objects / Align / Centre in Canvas
Convert to raster layer
Selections / Select All
Selections / Float
Selections / Defloat
Selections / Modify / Feather by 2
Selections / Float
Selections / Defloat
Selections / Modify / Feather by 2
Open Paper9
Edit / Copy
Then on your working canvas Paste into Selection
Deselect
Edit / Copy
Then on your working canvas Paste into Selection
Deselect
Selections / Select All
Selections / Float
Selections / Defloat
Selections / Modify / Expand by 25
Selections / Float
Selections / Defloat
Selections / Modify / Expand by 25
Add a new raster layer
Layers / Arrange / Move Down
Layers / Arrange / Move Down
Open Paper 15
Edit / Copy
On your new layer Paste Into Selection
Deselect
Edit / Copy
On your new layer Paste Into Selection
Deselect
Select your Preset Shape Tool to Heart
Line width - 8.00
Foreground - #223324
Background - null
Foreground - #223324
Background - null
Draw out a heart
Objects / Align / Horizontal Centre in Canvas
Convert to raster layer
Objects / Align / Horizontal Centre in Canvas
Convert to raster layer
Selections / Select All
Selections / Float
Selections / Defloat
Selections / Float
Selections / Defloat
Apply an Inner Bevel with the following settings:
Then Effects / Plugins / Eye Candy 4000 / Glass with the following settings (optional):
Select the inside of the heart with your Magic Wand
Selections / Modify / Expand by 3
Add a new raster layer
Layers / Arrange / Move Down
Open Paper11
Edit / Copy
Then Paste into Selection
Deselect
Edit / Copy
Then Paste into Selection
Deselect
Now Hide your Circle and Background layers leaving only your Heart and Heart Background showing
Edit / Copy Merged and Paste as a new Image
Minimise it for now as we will come back to it later
Edit / Copy Merged and Paste as a new Image
Minimise it for now as we will come back to it later
Unhide your Background and Circle again
You should now have something like this:
~ Step 2 ~
Paste your tube as a new layer
Resize if necessary and position within the frame
Resize if necessary and position within the frame
Select the area inside your Heart frame again
Selections / Invert
Selections / Modify / Feather by 1
Grab your Eraser and carefully erase the bottom of the tube overhanging the frame
Deselect
Selections / Invert
Selections / Modify / Feather by 1
Grab your Eraser and carefully erase the bottom of the tube overhanging the frame
Deselect
Paste Bouganville5 as new layer
Resize by 25%
Position to the left of your tube beneath your Frame layer
Duplicate then Image / Mirror
Resize by 25%
Position to the left of your tube beneath your Frame layer
Duplicate then Image / Mirror
Paste Bouganville2 as new layer
Resize by 30%
Position to the right just slightly above first flower
Layers / Arrange / Move Down
Repeat
This will bring it below both Flower layers
Duplicate then Image / Mirror
Resize by 30%
Position to the right just slightly above first flower
Layers / Arrange / Move Down
Repeat
This will bring it below both Flower layers
Duplicate then Image / Mirror
Activate your Heart background layer
Using your Magic Wand select the area OUTSIDE the heart
Now activate each flower layer and hit delete till the overhanging branches have been removed
Using your Magic Wand select the area OUTSIDE the heart
Now activate each flower layer and hit delete till the overhanging branches have been removed
Paste Organza1 as new layer
Resize by 30%
KEEP IN CENTRE
Resize by 30%
KEEP IN CENTRE
Effects / Plugins / Mura Meister / Copies with the following settings:
Layers / Arrange / Send to Bottom
Paste Organza4 as new layer
Resize by 40%
KEEP IN CENTRE
Resize by 40%
KEEP IN CENTRE
Repeat the Copies plugin with the same settings as above
Layers / Arrange / Send to Bottom
You should now have something like this:
Paste Wrap5 as new layer
Resize by 62%
Position along the bottom of heart with the end running to the edge of the outer circle
Resize by 62%
Position along the bottom of heart with the end running to the edge of the outer circle
Select the outside of that area with your Magic Wand
Selections / Modify / Feather by 2
Selections / Modify / Feather by 2
Activate Wrap layer and with your Eraser Tool erase the excess from that end ONLY
~ Step 3 ~
Now we come back to the heart we minimised earlier
Activate the minimised heart
Edit / Copy
Then paste as a new layer onto your canvas
Edit / Copy
Then paste as a new layer onto your canvas
Image / Rotate by 15 to the right
Resize by 10%
Duplicate then Image / Mirror
Position anywhere you like
Resize by 10%
Duplicate then Image / Mirror
Position anywhere you like
Alternate in duplicating each heart, then
Resize by 50%
Duplicate again and position to your liking
Resize by 50%
Duplicate again and position to your liking
Once you have finished with the hearts resize to 450 x 450
Then enlarge canvas by going to
Image / Canvas Resize to 500 x 500 centred
(this will give us extra space around the tag)
Image / Canvas Resize to 500 x 500 centred
(this will give us extra space around the tag)
Open Paper14
Edit / Copy
Edit / Copy
Add new raster layer
Selections / Select All
Paste into Selection
Deselect
Selections / Select All
Paste into Selection
Deselect
Layers / Arrange / Send to Bottom
Layers / New Mask Layer / From Image
Locate WSL_Mask133
OK
Locate WSL_Mask133
OK
With Mask layer still activated
Resize by 95%
Resize by 95%
Layers / Merge / Merge Group
Lower opacity to 55
Lower opacity to 55
Now Activate your top layer
Select your Preset Shape Tool on Ellipse and your line width to 2.00
Select your Preset Shape Tool on Ellipse and your line width to 2.00
Draw out a circle around your tag (hold the shift key for an even circle)
Objects / Align / Centre in Canvas
Objects / Align / Centre in Canvas
Select your Text Tool and font of choice - I am using 2Peas Champagne
Text colour - #1e493b
Text colour - #1e493b
Type out the words "The Circle of Friendship begins and ends with You"
Turn the Ellipse layer off in your Layer Palette
Convert to raster layer
Turn the Ellipse layer off in your Layer Palette
Convert to raster layer
Apply a Gradient Glow and a slight drop shadow
Choose another font for your name
Apply any effects you wish
Apply any effects you wish
Finally, add your © copyright, licence and watermark
Then save as a GIF or JPG and you're done!
Then save as a GIF or JPG and you're done!
Thank you for trying my tutorial
::st!na::
© Tutorial written by 11th March 2009
All rights reserved
All rights reserved
No comments:
Post a Comment