
Supplies
Scrap kit of choice - I am using the first part of "The Saga" called "The Beginning" by Pimp'd Designs which is available from Paradise 4 Scrappers
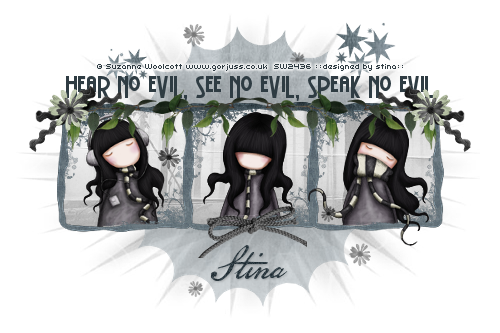
Tubes of choice - I am using the lovely work of Suzanne Woolcott which can be purchased from her store
**PLEASE DO NOT USE HER ARTWORK WITHOUT THE APPROPRIATE LICENCE**
WSL_Mask26 by Chelle (supplied)
Preset Shape: Shape-5 (supplied)
Fonts of choice - I am using BattleLines and American Scribe
My Supplies here
~ Step 1 ~
Open a new 600 x 600 blank canvas flood-filled white
Paste PaperFrame as new layer
Resize by 80%
Duplicate
Set blend mode to Multiply
Lower opacity to 80
Resize by 80%
Duplicate
Set blend mode to Multiply
Lower opacity to 80
Use your Freehand Tool to draw around the frame
Paste PP12 as new layer
Resize by 75%
Layers / Arrange / Move Down
Selections / Invert
Delete
Paste PP12 as new layer
Resize by 75%
Layers / Arrange / Move Down
Selections / Invert
Delete
KEEP SELECTED
Selections / Invert
Activate Background
Selections / Promote Selection to Layer
Deselect
Activate Background
Selections / Promote Selection to Layer
Deselect

Activate paper layer
Lower opacity to 40
Layers / Merge / Merge Down
Lower opacity to 40
Layers / Merge / Merge Down
~ Step 2 ~
Paste your first tube as a new layer
Resize as necessary
Place inside frame beneath frame layer
Duplicate and place duplicate layer above frame
Resize as necessary
Place inside frame beneath frame layer
Duplicate and place duplicate layer above frame
Now using your Freehand Tool draw a selection around the bottom of the duplicate layer
Delete and deselect
Delete and deselect
You won't notice a difference except the tube going under the frame
Now carefully draw along the frame and bottom half of the tube again this time on your first layer
Delete and deselect
Delete and deselect
Repeat these steps for the next two tubes
Merge top layer of Tubes together as one and rename Tube1
Merge bottom layer of tubes together as one and rename Tube2
Merge bottom layer of tubes together as one and rename Tube2
Paste RR-Bow-01 as new layer
Image / Rotate by 30 to the left
Resize by 20%
Position in upper left corner of Frame
Duplicate then Image / Mirror
Image / Rotate by 30 to the left
Resize by 20%
Position in upper left corner of Frame
Duplicate then Image / Mirror
Paste Flower-02 as new layer
Resize by 15%
Position over Bow
Duplicate then Image / Mirror
Resize by 15%
Position over Bow
Duplicate then Image / Mirror
Paste Flower-03 as new layer
Resize by 10%
Position over Flower-02
Duplicate then Image / Mirror
Resize by 10%
Position over Flower-02
Duplicate then Image / Mirror
Activate your Background layer
In your Materials Palette set your background to one of the Papers in your scrap
Select your Preset Shape Tool and find Shape-5
Draw out an even shape
Objects / Align / Centre in Canvas
Convert to raster layer
Lower opacity to 50
Select your Preset Shape Tool and find Shape-5
Draw out an even shape
Objects / Align / Centre in Canvas
Convert to raster layer
Lower opacity to 50
Select your Preset Shape Tool again and using the same Paper choose a star shape
Draw out a couple of stars to one side
Convert to raster layer
Duplicate then Image / Mirror
Draw out a couple of stars to one side
Convert to raster layer
Duplicate then Image / Mirror
Activate Tube1 layer
Paste Leaves-01 as new layer
Image / Rotate by 10 to the left
Resize by 20%
Paste slightly to the right off-centre
Duplicate then Image / Mirror
Image / Rotate by 10 to the left
Resize by 20%
Paste slightly to the right off-centre
Duplicate then Image / Mirror
Duplicate again
Move slightly to the left so the leaves tuck under the bow
Duplicate again (last time *s*)
Mirror / Image
Move slightly to the left so the leaves tuck under the bow
Duplicate again (last time *s*)
Mirror / Image
Now open Ribbon-Frame-01
Rotate 90° to the right
With your Freehand Tool draw around the bow
Edit / Copy
Rotate 90° to the right
With your Freehand Tool draw around the bow
Edit / Copy
Back to your working canvas
Paste as new layer
Resize by 40%
Position in the centre bottom of the frame
Paste as new layer
Resize by 40%
Position in the centre bottom of the frame
Paste some flowers around the frame
Crop and resize
~ Step 3 ~
Activate your background layer
Paste PP08 as new layer
Layers / New Mask Layer / From Image
Locate WSL_Mask26
OK
Layers / Merge / Merge Layer
Layers / New Mask Layer / From Image
Locate WSL_Mask26
OK
Layers / Merge / Merge Layer
Back to top layer
Select your Text Tool and font of choice
Foreground colour - null
Background colour - #2f3c43
Foreground colour - null
Background colour - #2f3c43
Font I am using is BattleLines
Type out the words "Hear No Evil, See No Evil, Speak No Evil" or words of your choice
Apply a slight drop shadow
Apply a slight drop shadow
Change to a script font
Retain same colour for your text
Type out your name
Add any effects and drop shadows of choice
Retain same colour for your text
Type out your name
Add any effects and drop shadows of choice
Finally, add your © copyright, licence and watermark
Then save as a GIF or JPG and you're done!
Then save as a GIF or JPG and you're done!
Thanks for trying my tutorial
::st!na::
© Tutorial written by Stina on 17th March 2009
All rights reserved
No comments:
Post a Comment