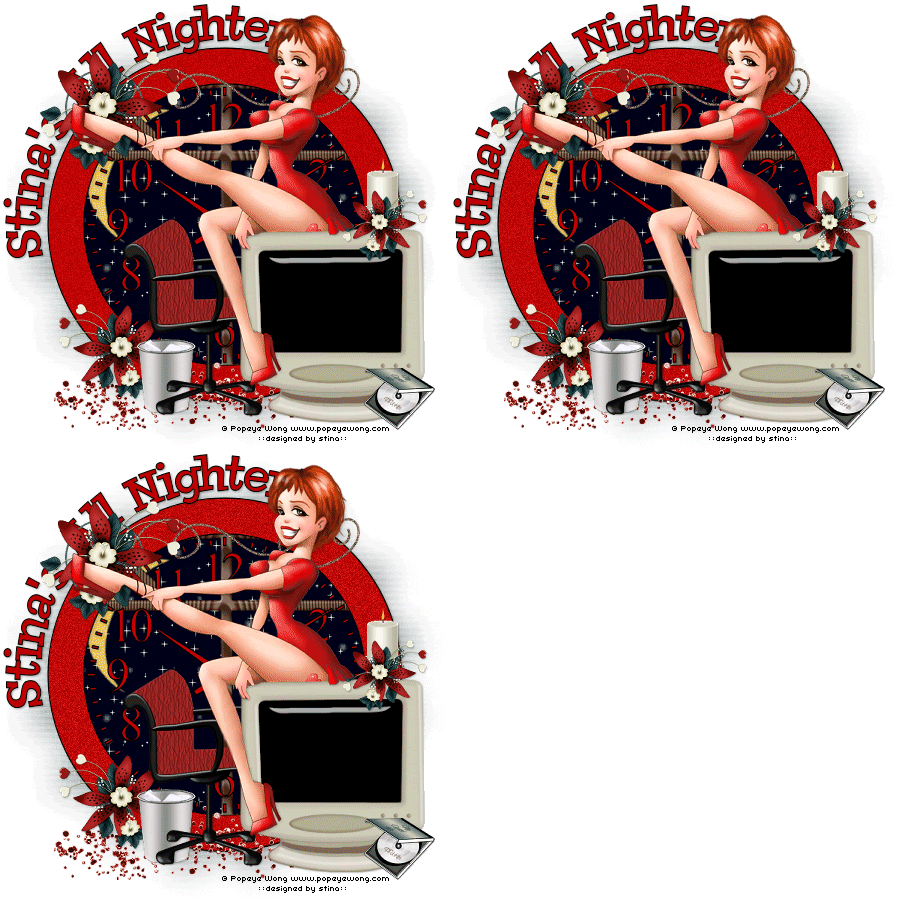
Supplies
Scrap kit of choice - I am using the wonderful "Suz's All Nighter" by Created by Jill which can be purchased from Exquisite Scraps, Paradise 4 Scrappers and Creative Scraps
Tube of choice - I am using the delightful artwork of Popeye Wong which is free to use though you must provide credit back to him © Popeye Wong www.popeyewong.com
WSL_Mask33 by Chelle which can be found on her blog
Font of choice - I am using Chowderhead
Paint Shop Pro (I am using X)
Animation Shop
My Supplies here
~ Step 1 ~
Open a blank 600 x 600 canvas flood-filled white
With your dropper tool pick a colour from your tube and set that as your background
Your Foreground should be black (#000000)
Line width - 2.00
Your Foreground should be black (#000000)
Line width - 2.00
Select your Preset Shape Tool and find the Clock
Hold your Shift key and draw out the clock
Objects / Align / Centre in Canvas
Convert to raster layer
Hold your Shift key and draw out the clock
Objects / Align / Centre in Canvas
Convert to raster layer
Using your Magic Wand select the inside rim of the clock
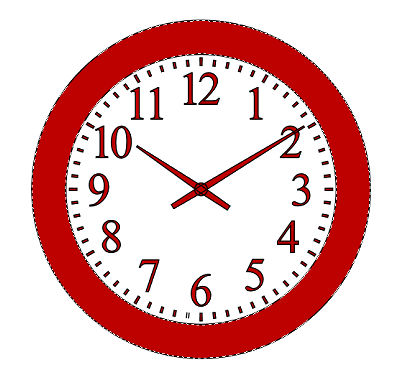
Layers / Promote Selection to Layer
Duplicate twice
Rename them Noise1, Noise2 and Noise3
Duplicate twice
Rename them Noise1, Noise2 and Noise3
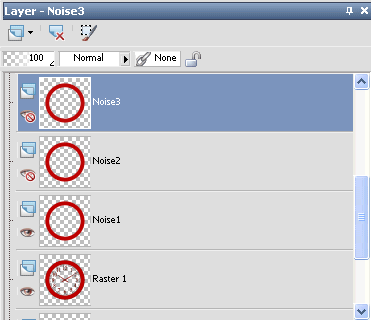
Close off the visibility of Noise 2 and 3, leaving Noise1 visible
Adjust / Add/Remove Noise / Add Noise
Gaussian
Noise - 15
Monochrome
OK
Gaussian
Noise - 15
Monochrome
OK
Close off Noise1 and activate Noise2
Repeat steps, changing Noise to 20
Repeat steps, changing Noise to 20
Close off Noise2 and activate Noise3
Repeat steps above, changing Noise to 25
Repeat steps above, changing Noise to 25
You can close off these layers until later when we will return to them
~ Step 2 ~
Paste SAN_Window as new layer
Layers / Arrange / Move Down
Resize by 105%
Layers / Arrange / Move Down
Resize by 105%
Use your Magic Wand to click outside the clock
Selections / Modify / Expand by 15
Selections / Modify / Expand by 15
Activate Window layer again and press delete
Paste SAN_Computer as new layer
Resize by 75%
Move to the right
Resize by 75%
Move to the right
With your Selection Tool draw out a rectangle around the monitor screen
Add a new raster layer
Layers / Arrange / Move Down
Flood fill this layer #000000
Deselect
Add a new raster layer
Layers / Arrange / Move Down
Flood fill this layer #000000
Deselect
Paste SAN_Chair as new layer
Resize by 70%
Layers / Arrange / Move Down
Position slightly tucked behind computer
Duplicate then set blend mode to Soft Light
Layers / Merge / Merge Down
Resize by 70%
Layers / Arrange / Move Down
Position slightly tucked behind computer
Duplicate then set blend mode to Soft Light
Layers / Merge / Merge Down
Paste SAN_TrashCan as new layer
Resize by 30%
Layers / Arrange / Move Down
Position behind the chair
Resize by 30%
Layers / Arrange / Move Down
Position behind the chair
Paste CompactDisk as new layer
Resize by 25%
Position beside computer monitor
Resize by 25%
Position beside computer monitor
Paste Candle1 as new layer
Resize by 25%
Place on top of computer
Resize by 25%
Place on top of computer
Paste FlowerDeco as new layer
Resize by 50%
Position in upper left
Duplicate and set blend mode to Hard Light
Layers / Merge / Merge Down
Resize by 50%
Position in upper left
Duplicate and set blend mode to Hard Light
Layers / Merge / Merge Down
Duplicate and resize by 80%
Image / Mirror
Position in the lower left partially behind Trash Can
Image / Mirror
Position in the lower left partially behind Trash Can
Duplicate and resize by 80%
Image / Mirror
Position over candle and computer
Image / Mirror
Position over candle and computer
Paste Doodle2 as new layer
Resize by 20%
Place behind Flower in upper left
Resize by 20%
Place behind Flower in upper left
Paste Doodle3 as new layer
Resize by 60%
Place along top of clock tucked under Flower
Resize by 60%
Place along top of clock tucked under Flower
You should now have something that looks like this:
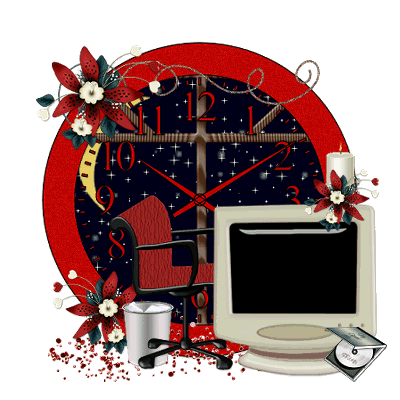
You may add any other embellishments you like - this is your creation! *s*
~ Step 3 ~
Paste your tube as a new layer
Resize if necessary
I used a Popeye Wong tube which is free to use
Resize if necessary
I used a Popeye Wong tube which is free to use
(though you MUST credit him by including his copyright © Popeye Wong www.popeyewong.com)
The tube I used also required some work to get it to how I wanted it
(she was originally on a stool with a dog on the end of a leash that was wrapped round her leg)
After cutting out the stool I then had to clone her leg as if none of it was ever missing (took some work too! *g*)
(she was originally on a stool with a dog on the end of a leash that was wrapped round her leg)
After cutting out the stool I then had to clone her leg as if none of it was ever missing (took some work too! *g*)
You can either use the tube I did or one of your own
Activate your Background layer
Paste PaperK as new layer
Resize by 75%
Paste PaperK as new layer
Resize by 75%
Layers / New Mask Layer / From Image
Locate WSL_Mask33
Source Luminance
OK
Locate WSL_Mask33
Source Luminance
OK
In your Layer Palette locate the Mask layer and activate it
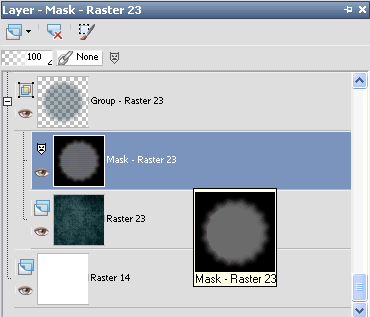
Resize by 105%
Layers / Merge / Merge Group
Crop and resize tag
Select your Preset Shape Tool to Ellipse
Holding your shift key draw out a circle around the clock
Objects / Align / Centre in Canvas
Holding your shift key draw out a circle around the clock
Objects / Align / Centre in Canvas
Select your Text Tool in a font of your choice (I'm using Chowderhead)
Set your Properties to the following:
Stroke width - 1.00
Foreground - #000000
Background - #c00000
Stroke width - 1.00
Foreground - #000000
Background - #c00000
Over the curve of the ellipse type out "YOUR NAME All Nighter"
Or as an alternative you can simply type "My All Nighter"
Or as an alternative you can simply type "My All Nighter"
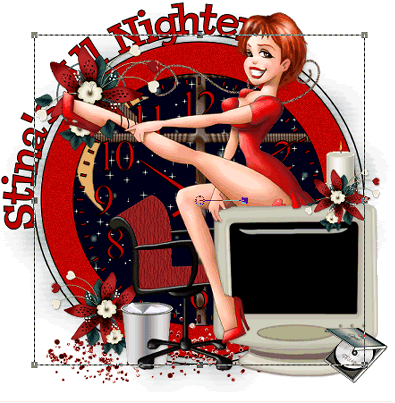
In the Layer Palette open the Vector Layer and turn off the visibility of the ellipse
Convert to raster layer
Add a slight drop shadow
Add © Popeye Wong www.popeyewong.com (if using the same tube)
or the copyright of the tube you are using, licence and watermark
~ Step 4 ~
** This step is purely optional if you wish to animate **
In your Layer Palette find the Noise1, Noise2 and Noise3 layers we created at the beginning
Turn the visibility off Noise 2 and 3, leaving Noise1 visible
Edit / Copy Merged
Open Animation Shop and paste as new animation
Back to PSP
Turn off Noise1 and open Noise2
Edit / Copy Merged
Turn off Noise1 and open Noise2
Edit / Copy Merged
Go to Animation Shop
Edit / Paste / Paste After Current Frame
Edit / Paste / Paste After Current Frame
Back to PSP
Turn off Noise2 and open Noise3
Edit / Copy Merged
Turn off Noise2 and open Noise3
Edit / Copy Merged
Go to Animation Shop
Edit / Paste / Paste After Current Frame
Edit / Paste / Paste After Current Frame
Now just save as a GIF and you're done!!
Thank you for trying my tutorial
::st!na::
Here is a non-animated version:
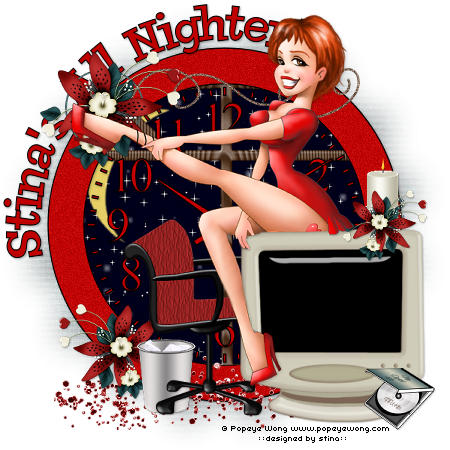
© Tutorial written by Stina on 4th March 2009
All rights reserved

No comments:
Post a Comment