
Supplies
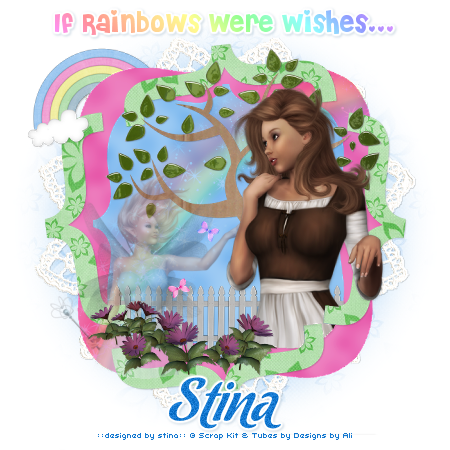
Scrap kit of choice - I am using "Happily Ever After" by Designs by Ali which is available from Stargazer Scraps and Scraps With Attitude
Tubes of choice - I am using those which were supplied and came in the kit
Template #59 by Ali available from her blog
Rainbow Pastel gradient (supplied)
WSL_Mask44 by Chelle (supplied)
A-Dozi's Lace Frame 04 (supplied)
Fonts of choice - I am using Cheri and Chocolate Dulce (supplied)
Plugin: Eye Candy 4000 Gradient Glow
My Supplies here
~ Step 1 ~
Open Template 59 by Ali
Shift D to duplicate then close the original
Image / Canvas Resize with the following settings:
Shift D to duplicate then close the original
Image / Canvas Resize with the following settings:
Add a new raster layer
Flood fill white
Layers / Arrange / Send to Bottom
Flood fill white
Layers / Arrange / Send to Bottom
Activate SHAPE1
Selections / Select All
Selections / Float
Selections / Defloat
Selections / Modify / Expand by 1
Paste Paper12 as new layer
Resize by 75% ALL LAYERS UNCHECKED
Adjust / Blur / Gaussian Blur with a radius of 10.00
Selections / Invert
Delete then deselect
Duplicate the set blend mode to Multiply
Lower opacity to 55
Layers / Merge / Merge Down
Repeat
Activate SHAPE2
Selections / Select All
Selections / Float
Selections / Defloat
Selections / Modify / Expand by 1
Paste Paper11 as new layer
Resize by 75% ALL LAYERS UNCHECKED
Adjust / Blur / Gaussian Blur with a radius of 10.00
Selections / Invert
Delete then deselect
Layers / Merge / Merge Down
Selections / Select All
Selections / Float
Selections / Defloat
Selections / Modify / Expand by 1
Paste Paper11 as new layer
Resize by 75% ALL LAYERS UNCHECKED
Adjust / Blur / Gaussian Blur with a radius of 10.00
Selections / Invert
Delete then deselect
Layers / Merge / Merge Down
Hide all your layers except your Brackets
Layers / Merge / Merge Visible
Rename this layer simply to BRACKETS
Now Unhide your other layers again
Layers / Merge / Merge Visible
Rename this layer simply to BRACKETS
Now Unhide your other layers again
Activate BRACKETS
Selections / Select All
Selections / Float
Selections / Defloat
Selections / Modify / Expand by 1
Paste Paper14 as new layer
Resize by 75% ALL LAYERS UNCHECKED
Selections / Invert
Delete then deselect
Layers / Merge / Merge Down
Selections / Select All
Selections / Float
Selections / Defloat
Selections / Modify / Expand by 1
Paste Paper14 as new layer
Resize by 75% ALL LAYERS UNCHECKED
Selections / Invert
Delete then deselect
Layers / Merge / Merge Down
Now you should have something like this:
~ Step 2 ~
Paste Cinderella2 as new layer
Position to the right and slightly down
Activate SHAPE2 layer and click the area outside the shape
Position to the right and slightly down
Activate SHAPE2 layer and click the area outside the shape
Selections / Modify / Inside/Outside Feather
Inside CHECKED
Feather by 2
Inside CHECKED
Feather by 2
Use your Eraser Tool to erase the BOTTOM ONLY of Cinderella
Deselect
Deselect
Activate BRACKETS
Selections / Select All
Selections / Float
Selections / Defloat
Selections / Modify / Contract by 1
Selections / Select All
Selections / Float
Selections / Defloat
Selections / Modify / Contract by 1
Activate Cinderella again and erase the part of her over the Brackets
So it should now look like this:
So it should now look like this:
Paste Tree2 as new layer
Resize by 60%
Position BEHIND Cinderella
Use your Eraser Tool to erase the area that protrudes over the brackets where you just erased Cinders *g*
Resize by 60%
Position BEHIND Cinderella
Use your Eraser Tool to erase the area that protrudes over the brackets where you just erased Cinders *g*
Activate SHAPE2
Paste Rainbow3 as new layer
Activate SHAPE1
Select the area outside with your Magic Wand
On your Rainbow layer hit delete
Deselect
Paste Rainbow3 as new layer
Activate SHAPE1
Select the area outside with your Magic Wand
On your Rainbow layer hit delete
Deselect
Paste Flower13 as new layer
Resize by 30%
Position next to Cinderella to the left
Resize by 30%
Position next to Cinderella to the left
Paste Flower7 as new layer
Resize by 30%
Position to fill in spaces, erasing any excess
Layers / Merge / Merg Down
Resize by 30%
Position to fill in spaces, erasing any excess
Layers / Merge / Merg Down
Flowers should now be ONE layer
Hide this layer for now while we work on the next
Hide this layer for now while we work on the next
Paste Fence1 as new layer
Resize by 30%
Position to the right
Duplicate then Image / Mirror
Layers / Merge / Merge Down
Then resize by 90%
Resize by 30%
Position to the right
Duplicate then Image / Mirror
Layers / Merge / Merge Down
Then resize by 90%
Move this layer to the layer BELOW the Brackets
Use your Freehand Tool to select the areas where you wish to delete the fence showing
Use your Freehand Tool to select the areas where you wish to delete the fence showing
Press delete and deselect
Unhide your Flowers layer and position in front of the fence
Paste FairyGodmother as new layer
Resize by 50%
Position in lower corner of "garden" at the end of the rainbow
Resize by 50%
Position in lower corner of "garden" at the end of the rainbow
Activate SHAPES1
Use your Magic Wand to select the outer area
Back on your FairyGodmother layer
Erase the bottom part of her
Use your Magic Wand to select the outer area
Back on your FairyGodmother layer
Erase the bottom part of her
Paste one of the butterflies as new layer
Image / Rotate by 30 to the right
Resize by 5%
Position in your "garden"
Image / Rotate by 30 to the right
Resize by 5%
Position in your "garden"
Paste another butterfly
Repeat rotation but this time to the left
Resize by 5% and position
Repeat rotation but this time to the left
Resize by 5% and position
Activate your top layer
Paste Rainbow1 as new layer
Resize by 30%
Position in the upper left
On your SHAPE1 layer select the outer area
Selections / Invert
Resize by 30%
Position in the upper left
On your SHAPE1 layer select the outer area
Selections / Invert
With your Eraser Tool set to around 15 - 20 in size erase just the area of the rainbow overlapping
Now activate your Background layer
Paste A-Dozi's Lace Frame as new layer
Resize by 65%
Leave in position
Paste A-Dozi's Lace Frame as new layer
Resize by 65%
Leave in position
Paste Paper12 as new layer
Layers / Arrange / Move Down
Layers / Arrange / Move Down
Layers / New Mask Layer / From Image
Locate WSL_Mask44
OK
Layers / Merge / Merge Group
Locate WSL_Mask44
OK
Layers / Merge / Merge Group
Crop and resize
~ Step 3 ~
Select your Text Tool and font of choice
I am using Cheri
In your Materials Palette set your Background to the following:
I am using Cheri
In your Materials Palette set your Background to the following:
Type out the text of your choice
I used "If Rainbows were Wishes..."
Objects / Align / Horizontal Centre in Canvas
Convert to raster layer
Apply a gradient glow:
Glow width - 3.00
Soft corners - 25
Opacity - 100
Setting - Fat
Colour - #FFFFFF
I used "If Rainbows were Wishes..."
Objects / Align / Horizontal Centre in Canvas
Convert to raster layer
Apply a gradient glow:
Glow width - 3.00
Soft corners - 25
Opacity - 100
Setting - Fat
Colour - #FFFFFF
Add a drop shadow:
H & V - 1
Opacity - 20
Blur - 3.00
Colour - #023f70
H & V - 1
Opacity - 20
Blur - 3.00
Colour - #023f70
Select a colour to match or contrast your tag
and choose a Script font
I am using Chocolate Dulce
and choose a Script font
I am using Chocolate Dulce
Type out your name
Repeat the Gradient Glow and drop shadow above
Finally, add your © copyright, licence and watermark
Save as a GIF or JPG and you're done!
Thanks for trying my tutorial!
::st!na::
© Tutorial written by Stina on 29th March 2009
All rights reserved
No comments:
Post a Comment