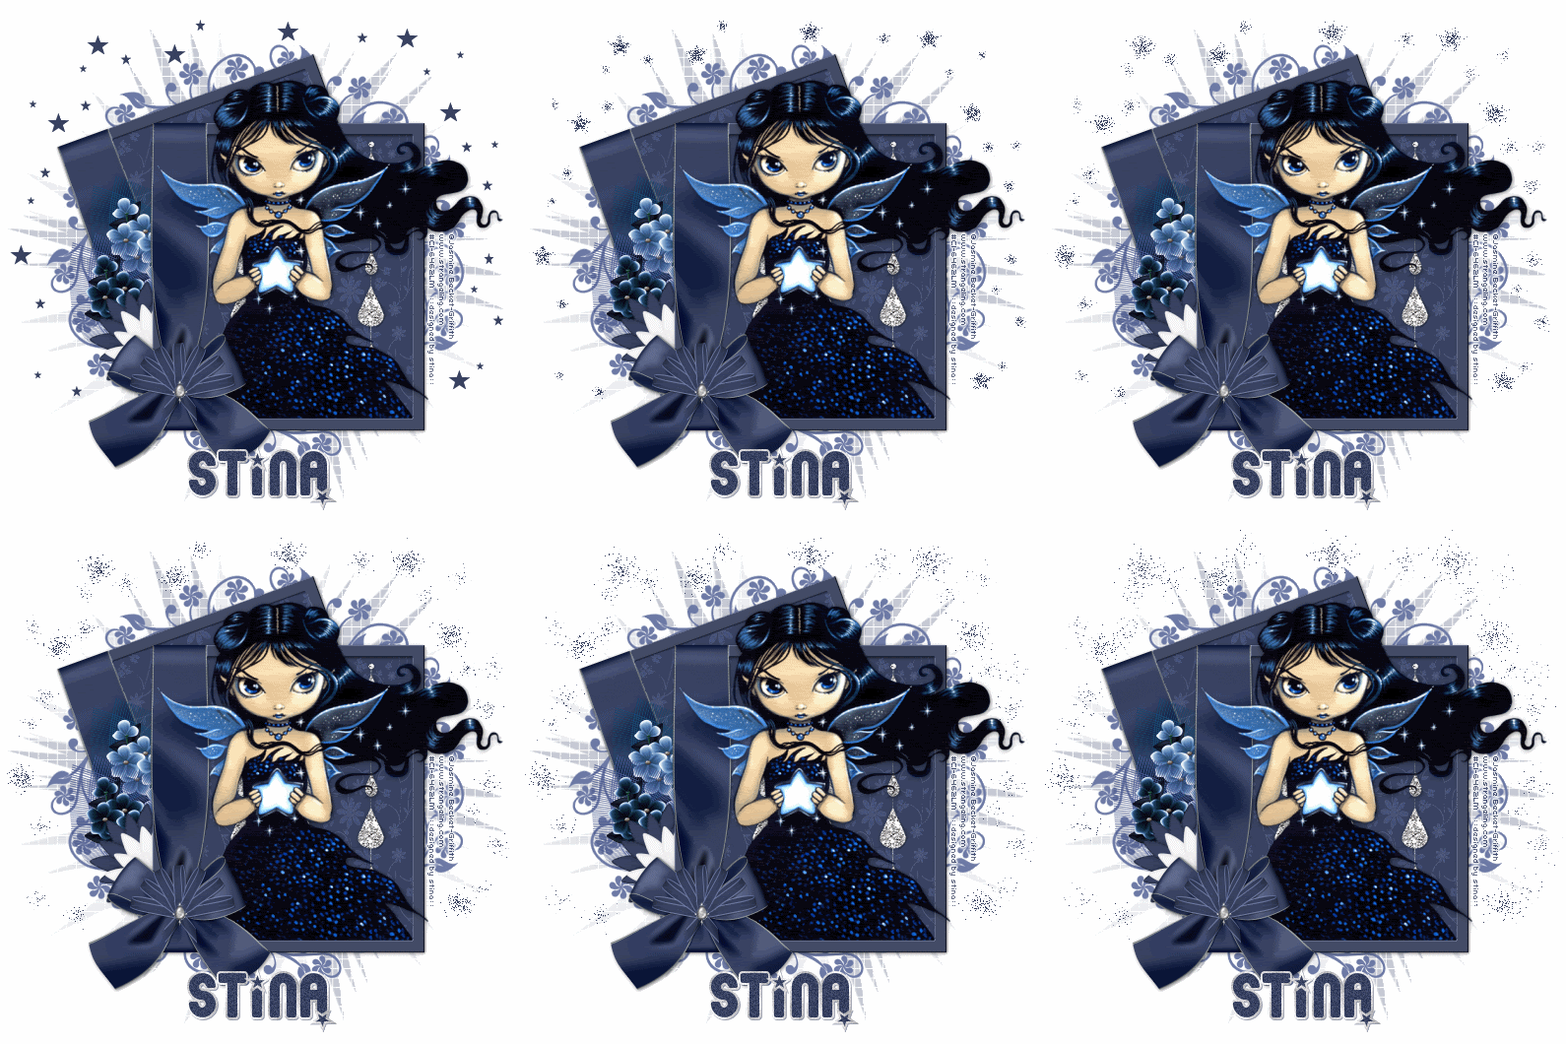
Supplies
Scrap kit of choice - I am using "Moment in Time" by Annie's Designs which can be purchased from Paradise 4 Scrappers and Creative Scraps
Tube of choice - I am using the lovely work of Jasmine Becket-Griffith which can be purchased from CILM
**PLEASE DO NOT USER HER ARTWORK WITHOUT THE APPROPRIATE LICENCE**
Vix_Mask143 (supplied)
Star Preset Shape (supplied)
Font of choice - Pornstar (supplied)
My Supplies here
~ Step 1 ~
Open a new 600 x 600 blank canvas flood-filled white
Paste Frame6 as new layer
Resize by 35%
Duplicate
Image / Rotate by 20 to the left
Layers / Arrange / Move Down
Resize by 35%
Duplicate
Image / Rotate by 20 to the left
Layers / Arrange / Move Down
Rename them Frame1 (bottom) and Frame2 (top)
Activate Frame1 and using your Magic Wand select the inside of them frame
Selections / Modify / Expand by 10
Add new raster layer
Paste Paper7 into Selection
Deselect
Selections / Modify / Expand by 10
Add new raster layer
Paste Paper7 into Selection
Deselect
Activate Frame2 and repeat step
On Frame1 Layers / Merge / Merge Down
DO NOT DO THIS STEP FOR FRAME2
DO NOT DO THIS STEP FOR FRAME2
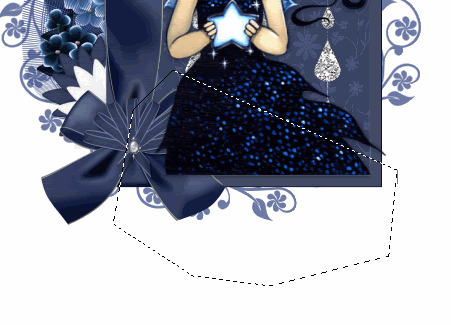
With your Freehand Tool make a small selection around the excess bow from the borrom frame
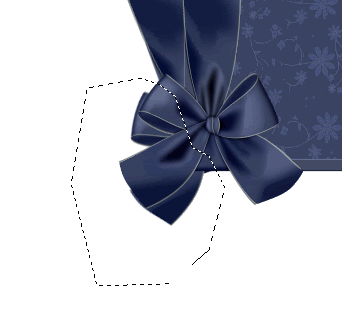
Delete
Paste Bow9 as new layer
Resize by 15%
Position over centre of bow on frame
Resize by 15%
Position over centre of bow on frame
~ Step 2 ~
Paste Flower6 as new layer
Resize by 25%
Position between Frame1 and Frame2
Resize by 25%
Position between Frame1 and Frame2
Paste Flower5
Resize by 25%
Position between Frame1 and Frame2
Resize by 25%
Position between Frame1 and Frame2
Set your Foreground to a colour matching your frames - I chose #1a2448
Now select your Change to Target Tool with the following settings:
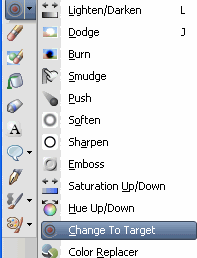

Dust your brush over both your Flower layers to change their colour
Paste Flower as new layer
Resize by 40%
Position behind bow
Resize by 40%
Position behind bow
Paste Flower4 as new layer
Resize by 40%
Position behind Flower behind bow
Resize by 40%
Position behind Flower behind bow
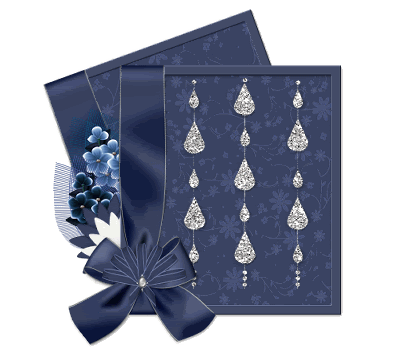
Activate paper layer of Frame1
Paste DustOfPearl as new layer
Resize by 80% Bicububic
Position in the centre of the frame
Paste DustOfPearl as new layer
Resize by 80% Bicububic
Position in the centre of the frame
Paste Frame as new layer
Resize by 45%
Layers / Arrange / Send to Bottom
Position centrally behind frames to look like a circle of "doodles"
Paste tube as new layer
Resize as necessary
Position in Frame1 on top layer
Duplicate and move below Frame1
Resize as necessary
Position in Frame1 on top layer
Duplicate and move below Frame1
Add a drop shadow to the top Tube layer:
H & V - 1
Opacity - 50
Blur - 8.00
Colour - #000000
H & V - 1
Opacity - 50
Blur - 8.00
Colour - #000000
With your Freehand Tool draw around the excess over the bow then Delete
Deselect
Deselect
Crop and resize
~ Step 3 ~
Activate your Background layer
Paste Paper4 as new layer
Adjust / Blur / Gaussian Blur
Radius - 20.00
Adjust / Blur / Gaussian Blur
Radius - 20.00
Layers / New Mask Layer / From Image
Locate Vix_Mask143
OK
Locate Vix_Mask143
OK
Layers / Merge / Merge Group
Lower opacity to 30
Lower opacity to 30
Activate your top layer
Select your Preset Shapes Tool to Seeing_Stars_W
Set your Background colour to one matching your tube and frame - I am using #384160
Set your Background colour to one matching your tube and frame - I am using #384160
Draw out 4 stars of varying sizes
Rename them Star1 - 4
Duplicate and position to your liking
Rename them Star1 - 4
Duplicate and position to your liking
Once you have positioned your stars hide all layers EXCEPT the Stars, then
Layers/ Merge / Merge Visible
Layers/ Merge / Merge Visible
Unhide layers
Select your Text Tool and font (I used Pornstar)
Foreground - Silver colour
Background - #384161
Foreground - Silver colour
Background - #384161
Type out your name
Add some noise and a drop shadow:
H & V - 1
Opacity - 50
Blur - 1.00
Colour - #384161
Add some noise and a drop shadow:
H & V - 1
Opacity - 50
Blur - 1.00
Colour - #384161
Finally, add your © copyright, licence and watermark
~ Step 4 ~
**This next step is for animation**
Copy your Stars layer and paste into Animation Shop
Effects / Insert Image Effect with the following settings:
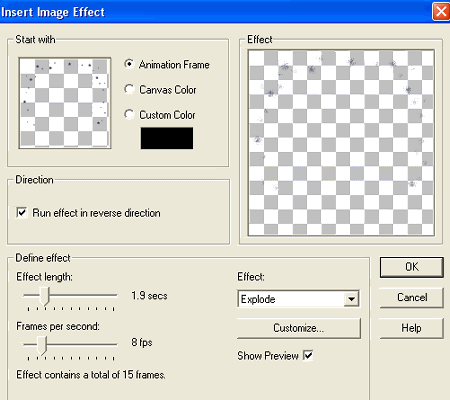
You should now have 16 frames
Back in PSP turn off the visibility of your Stars layer
Edit / Copy Merged
Edit / Copy Merged
In Animation Shop
Edit / Paste as New Animation
Then Paste After Current Frame until you have 16 Frames of your tag
Edit / Paste as New Animation
Then Paste After Current Frame until you have 16 Frames of your tag
Now back to your Star animation we have just created
Edit / Select All
Animation / Reverse Frames
Edit / Copy
Edit / Select All
Animation / Reverse Frames
Edit / Copy
Activate the tag you just pasted
Edit / Propogate Paste (MUST BE SELECTED)
Edit / Paste
Edit / Propogate Paste (MUST BE SELECTED)
Edit / Paste
DO NOT CLICK YOUR MOUSE BUTTON UNTIL YOU ARE SATISFIED WITH THE POSITION
Animation / Frame Properties
Change to 15
Change to 15
Save as a GIF and you're done!
Thank you for trying my tutorial
::st!na::
A non-animated version:
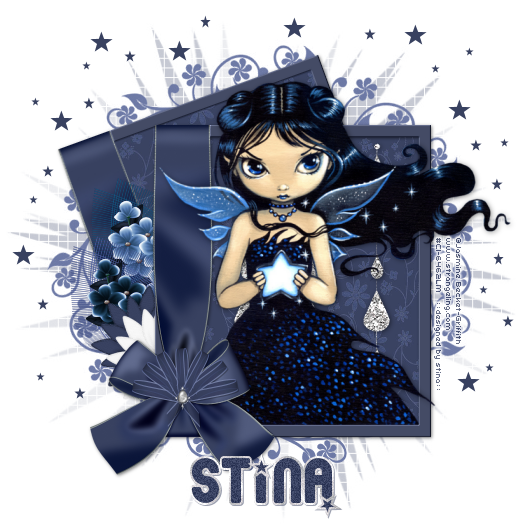
© Tutorial written by Stina on 14th March 2009
All rights reserved

No comments:
Post a Comment