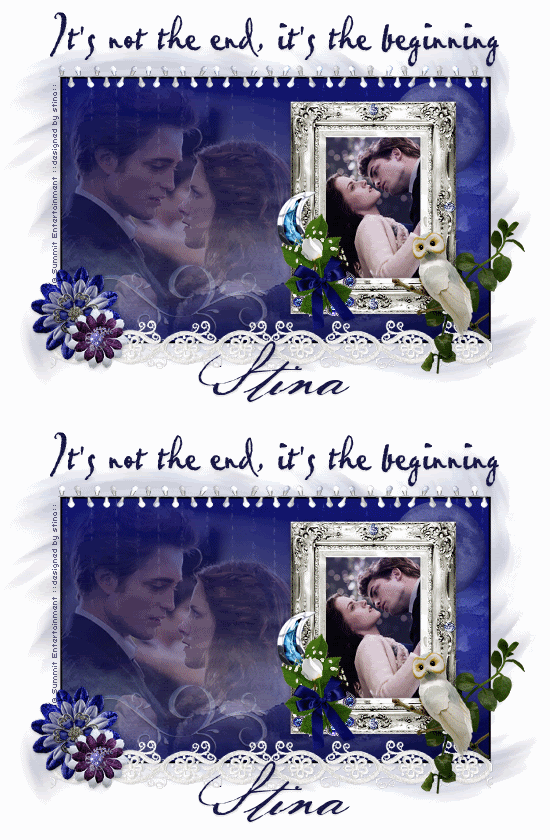
Supplies
Scrap kit of choice - I am using the gorgeous "Dance With Me Edward" by Oopsie Daisy available from Totally Sweet Designs and Stargazer Scraps
Images of choice - I am using two from the movie Twilight © Summit Entertainment
20-20 Mask (supplied)
Warped Mask (supplied)
Lace Strip (supplied)
Fonts of choice - Pablo LET and BakerScript
Let's begin...
Open a new 700 x 500 blank canvas flood-filled white
Open a Paper of choice and minimise
Select your Preset Shape Tool and set to Rectangle
Foreground - #000000
Background - Pattern
Foreground - #000000
Background - Pattern
Click on the Background and set to your Paper of choice from the Patterns tab
Draw out a rectangle on your canvas
Objects > Align > Centre in Canvas
Convert to raster layer
Objects > Align > Centre in Canvas
Convert to raster layer
Paste Raindrops as new layer
Resize by 50%
Position to the left
Duplicate then Image > Mirror
Resize by 50%
Position to the left
Duplicate then Image > Mirror
Use your Selection Tool to make a selection around the excess overlapping in the middle
Delete then deselect
Layers > Merge > Merge Down
Delete then deselect
Layers > Merge > Merge Down
Lower the opacity to 20
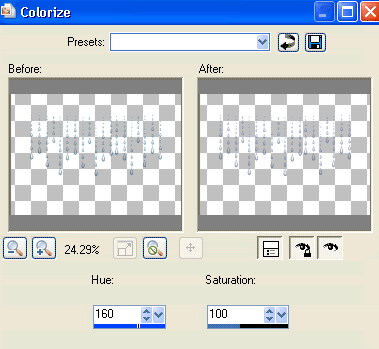
Adjust > Hue & Saturation > Colourise with the following settings:
Paste Frame3 as new layer
Resize by 40%
Position to the right
Resize by 40%
Position to the right
Select inside the Frame with your Magic Wand
Selections > Modify > Expand by 10
Selections > Modify > Expand by 10
Paste an Image of choice as new layer
Layers > Arrange > Move Down
Resize as necessary to fit inside Frame
Set blend mode to Luminance Legacy
Duplicate
Set blend mode to Normal and lower opacity to 40
Duplicate again, then
Set blend mode to Soft Light and opacity back to 100
Open another Image of choice
Before we paste it onto our canvas we are going to mist it with a Mask
Before we paste it onto our canvas we are going to mist it with a Mask
Layers > New Mask Layer > From Image
Apply 20-20 Mask
OK
Layers > Merge > Merge Group
Apply 20-20 Mask
OK
Layers > Merge > Merge Group
Paste new misted image as new layer
Resize as necesssary and position to the right of Frame
Layers > Arrange > Move Down
Lower opacity to 45
Resize as necesssary and position to the right of Frame
Layers > Arrange > Move Down
Lower opacity to 45
Select the outer area of Rectangle with Magic Wand
Selections > Modify > Expand by 2
Activate misted image and delete excess
Deselect
Selections > Modify > Expand by 2
Activate misted image and delete excess
Deselect
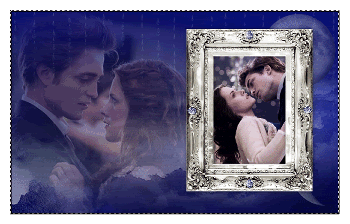
Paste ChromeSwirl as new layer
Resize by 30%
Position in lower left towards bottom of rectangle layer
Resize by 30%
Position in lower left towards bottom of rectangle layer
Paste Lace strip (of choice or one I supplied) as new layer
Resize by 38%
Position in lower right along bottom of Rectangle
Duplicate, then Image > Mirror
Layers > Merge > Merge Down
Resize by 38%
Position in lower right along bottom of Rectangle
Duplicate, then Image > Mirror
Layers > Merge > Merge Down
Paste Floral1 as new layer
Resize by 20%
Position in lower left of Frame
Resize by 20%
Position in lower left of Frame
Paste GemMoon as new layer
Resize by 60%
Layers > Arrange > Move Down
Position behind Leaves and Floral1
Resize by 60%
Layers > Arrange > Move Down
Position behind Leaves and Floral1
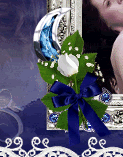
Paste Leaves as new layer
Image > Mirror and resize by 30%
Position in lower right
Image > Mirror and resize by 30%
Position in lower right
Paste OwlBranch as new layer
Resize by 35%
Position over Leaves in lower right
Resize by 35%
Position over Leaves in lower right
Paste Floral2 as new layer
Resize by 20%
Position in lower left
Resize by 20%
Position in lower left
Paste Floral5 as new layer
Resize by 15%
Position alongside Floral2
Resize by 15%
Position alongside Floral2
Paste Lights as new layer
Position to the upper right
Duplicate, then Image > Mirror, then Image > Flip
Place in position alongside first set of Lights
Layers > Merge > Merge Down
Position to the upper right
Duplicate, then Image > Mirror, then Image > Flip
Place in position alongside first set of Lights
Layers > Merge > Merge Down

Paste Paper of choice as new layer
Layers > Arrange > Send to Bottom
Layers > Arrange > Send to Bottom
Layers > New Mask Layer > From Image
Apply Warped mask
Layers > Invert Mask Layer
Apply Warped mask
Layers > Invert Mask Layer
Layers > Merge > Merge Group
Lower opacity to 30
Lower opacity to 30
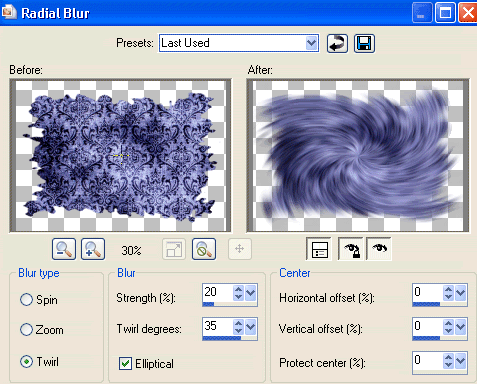
Adjust > Blur > Radial Blur with the following settings:
Select your Text Tool and font of choice
I am using Pablo LET (Bella's handwriting)
Text colour to match - I am using #181845
I am using Pablo LET (Bella's handwriting)
Text colour to match - I am using #181845
Type out text or quote of choice
Objects > Align > Horizontal Centre in Canvas
Convert to raster layer
Apply a drop shadow of choice
Objects > Align > Horizontal Centre in Canvas
Convert to raster layer
Apply a drop shadow of choice
Select another font of choice
I am using Baker Script
Same Text colour
I am using Baker Script
Same Text colour
Type out your name
Objects > Align > Horizontal Centre in Canvas
Convert to raster layer
Apply a drop shadow of choice
Objects > Align > Horizontal Centre in Canvas
Convert to raster layer
Apply a drop shadow of choice
Finally, add your © copyright, licence and watermark, then save as a GIF or JPG and you're done!
** IF YOU WISH TO ANIMATE PLEASE FOLLOW THESE NEXT STEPS **
Activate your Lights layer
With your Magic Wand set to a Tolerance of 40 select every second bulb
With your Magic Wand set to a Tolerance of 40 select every second bulb
Layers > Promote Selection to Layer
Adjust > Brightness & Contrast > Brightness/Contrast with the following settings:

Rename Lights1 and hide layer
Back to original Lights layer
Select every OTHER second bulb with Magic Wand
Layers > Promote Selection to Layer
Select every OTHER second bulb with Magic Wand
Layers > Promote Selection to Layer
Adjust > Hue & Saturation > Colourise with the same settings as above, then
Brightness and Contrast with same settings again
Rename Lights2
Now for the animation!
Hide Lights2 and activate Lights1
Edit > Copy Merged
Open Animation Shop
Edit > Paste as New Animation
Back to PSP
Hide Lights1 and activate Lights2
Edit > Copy Merged
Hide Lights1 and activate Lights2
Edit > Copy Merged
In Animation Shop
Edit > Paste AFTER Current Frame
Edit > Paste AFTER Current Frame
Select all and set your Frame Properties to 30
Save as a GIF and you're done!
Save as a GIF and you're done!
Thanks for trying my tutorial!
::st!na::
Here is a non-animated version:
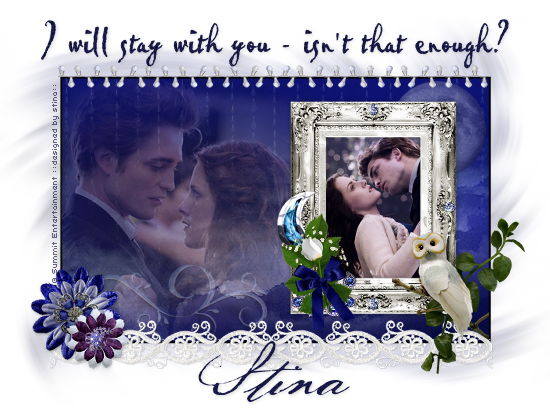
© Tutorial written by Stina on 1st July 2009
All rights reserved
All rights reserved

No comments:
Post a Comment