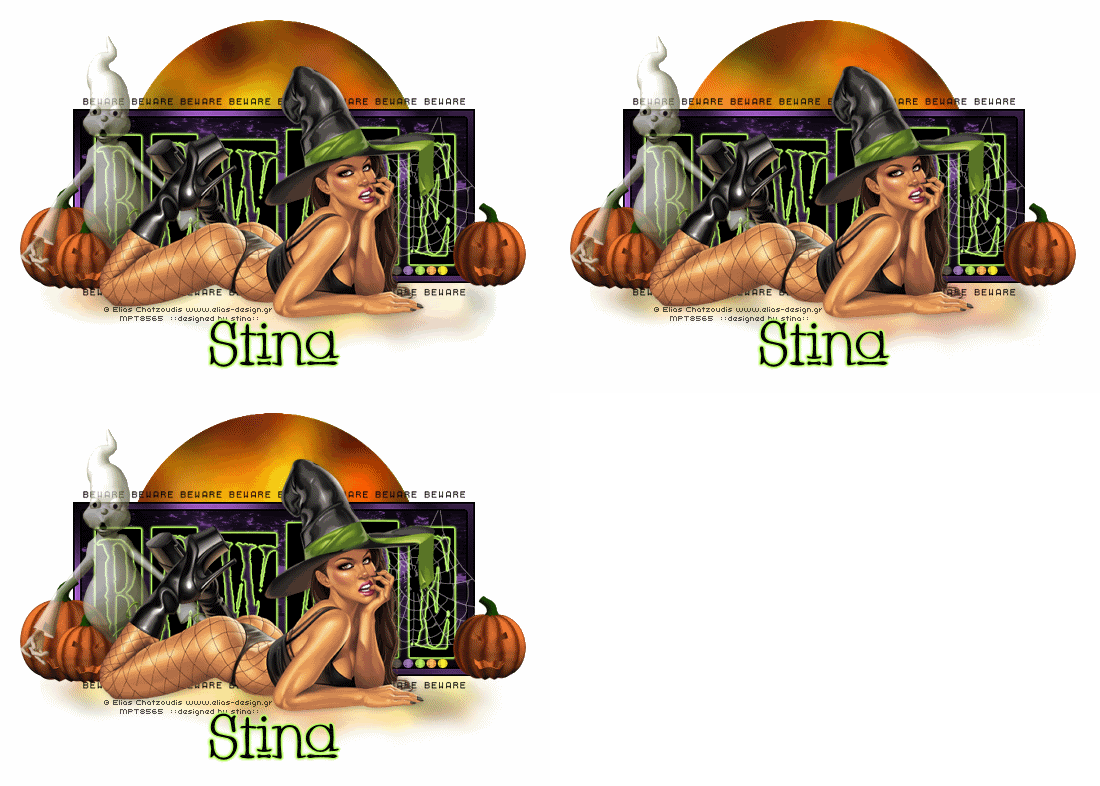
Supplies
Scrap kit of choice - I am using "Spookylicious" by Dana's Creative Studio available from Twilight Scraps
Tube of choice - I am using the artwork of Elias Chatzoudis available with a licence from My PSP Tubes
**PLEASE DO NOT USE HIS ARTWORK WITHOUT THE APPROPRIATE LICENCE**
Template 104 by Beth available from her blog
Fonts of choice - I am using Whackadoo Upper
Plugins: Greg's Factory Output II > Pool Shadow
Eye Candy 4000 > Gradient Glow (optional) and HSB Noise
Let's begin...
Open Template 104 by Beth
Shift D to duplicate and close off original
Image > Canvas Resize 700 x 500 (centred)
Flood fill excess background white
Activate LG BLACK RECT and select with Magic Wand
Paste Paper of choice INTO selection
Deselect
Select LG ORANGE RECT FRAME
Selections > Modify > Expand by 1
Flood fill with Black
Selections > Modify > Contract by 3
Flood fill with #462856
KEEP SELECTED!!
Effects > Plugins > Greg's Factory Output II > Pool Shadow with default settings
STILL SELECTED!!
Image > Flip
Repeat the Pool Shadow twice
Deselect
Activate LG BEWARE WORD ART
Select entire area with Magic Wand
Press delete
Selections > Modify > Inside/Outside Feather with the following settingss:
Inside - checked
Feather - 1.00
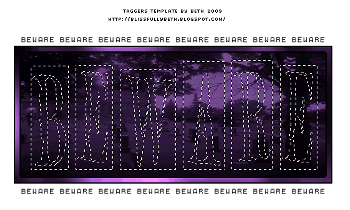
Flood fill entire area Black
Deselect
Effects > Plugins > Eye Candy 4000 > Gradient Glow with the following settings:
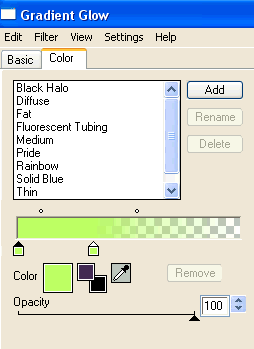
Glow width - 4.00
Colour - #b9ff63
Paste BeadRibbon as new layer
Resize by 55%
Position directly below the word BEWARE but above Frame
Paste SpiderWeb as new layer
Resize by 30%
Position over word art to liking
Set blend mode to Screen and lower opacity to 55
Paste Ghost as new layer
Resize by 60%
Position to your liking
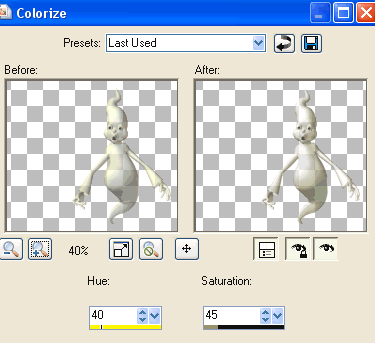
Adjust > Hue & Saturation > Colourise with the following settings:
Paste Pumpkin as new layer
Resize by 45%
Position to the lower left
Duplicate, then resize by 70%
Position alongside first pumpkin
Duplicate Pumpkin1 again
Resize by 80%
Position to the lower right below Ghost
Paste Moon01 as new layer
Layers > Arrange > Send to Bottom
LEAVE IN POSITION!!
Paste Moon02 as new layer
It should fall directly on top of Moon01
Set blend mode to Soft Light
Layers > Merge > Merge Down
Set your Eraser Tool to:
Size - 100
Hardness - 10
Erase the bottom of cloud where it darkened when merging the two layers
Paste Tube of choice as new layer
Resize as necessary and position to liking
Crop and resize tag
Select your Text Tool and font of choice
I am using Whackadoo Upper
Text colour is Black
Type out your name
Objects > Align > Horizontal Centre in Canvas
Convert to raster layer
Add the same Gradient Glow as above and drop shadow of choice
Finally, add your © copyright, licence and watermark, then save as a GIF or JPG and you're done!
** IF YOU WISH TO ANIMATE PLEASE FOLLOW THESE NEXT STEPS **
Activate your Moon layer
Duplicate twice and rename Moon1, Moon2 and Moon3
Activate Moon1
Effects > Plugins > Eye Candy 4000 > HSB Noise with the following settings:
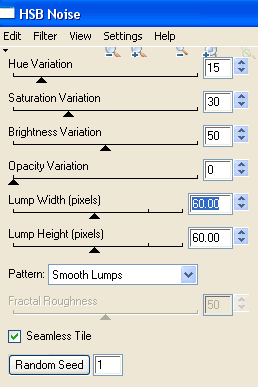
Hide Moon1 and activate Moon2
Repeat Noise, adjusting Random Seed
Hide Moon2 and activate Moon3
Repeat Noise once again, adjusting the Random Seed
Now to animate!
Activate Moon1 and hide Moon2 and Moon3
Edit > Copy Merged
Open Animation Shop
Edit > Paste as New Animation
Back to PSP
Hide Moon1 and activate Moon2
Edit > Copy Merged
In Animation Shop
Edit > Paste After Current Frame
Back to PSP
Hide Moon2 and activate Moon3
Edit > Copy Merged
In Animation Shop
Edit > Paste After Current Frame
Select all and change Frame Properties to 15
Now save as a GIF and you're done!
Thanks for trying my tutorial!
::st!na::
Here is a non-animated version:
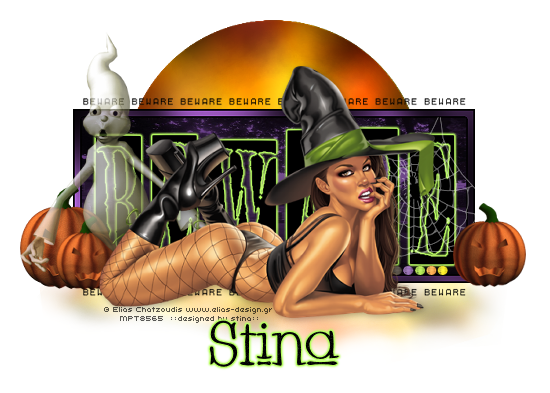
© Tutorial written by Stina on 12th September 2009
All rights reserved

No comments:
Post a Comment