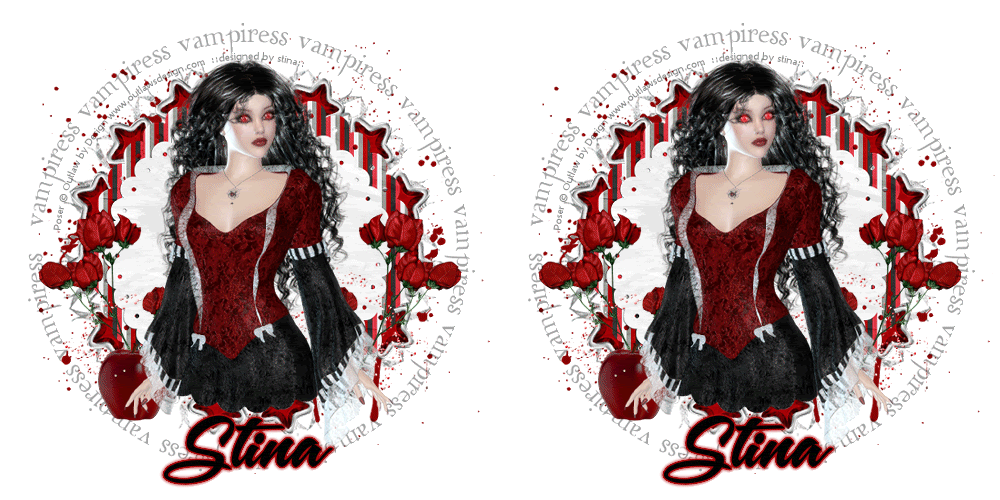
Supplies
Scrap kit of choice - I am using "First Bite" by Oopsie Daisy available from Totally Sweet Designs and Stargazer Scraps
Tube of choice - I am using a free poser tube by Outlaw Designs
sg_feather-edge Mask here
Fonts of choice - I am using LD Twylight and A&S Snapper Script
Plugins: Mura Meister > Copies
Eye Candy 4000 > Gradient Glow
Alien Skin Eye Candy 5: Impact > Gradient Glow
Let's begin...
Open a new 600 x 600 blank canvas flood-filled white
Paste RubyStar as new layer
Resize by 50%
Resize by 50%
LEAVE IN POSITION!!
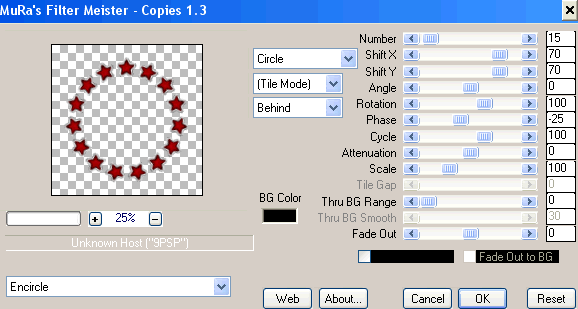
Effects > Plugins > Mura Meister > Copies with the following settings:
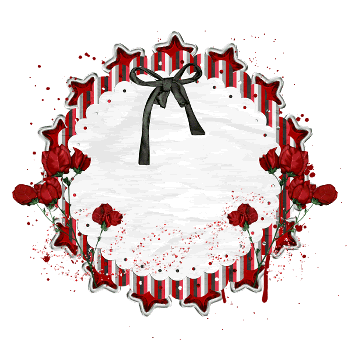
Paste Journal1 as new layer
Resize by 35%
Resize by 35%
Paste Glitpprborder as new layer
Resize by 60%
Position towards bottom of Journal layer
Resize by 60%
Position towards bottom of Journal layer
Paste Floral2 as new layer
Image > Rotate by 15 to the left
Resize by 35%
Position to the lower left
Duplicate, then Image > Mirror
Image > Rotate by 15 to the left
Resize by 35%
Position to the lower left
Duplicate, then Image > Mirror
Paste some Blood Spatter and move to bottom layer
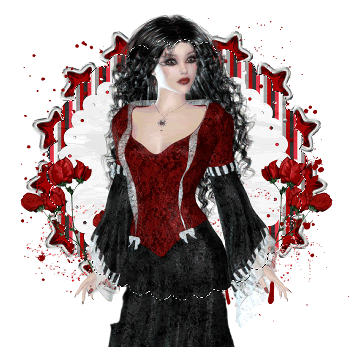
Paste Tube of choice as new layer
Resize as necessary and position
Resize as necessary and position
Depending on the tube you use you may have to do the following steps:
Select outside the Journal tag layer with your Magic Wand
Selections > Modify > Feather by 2
Use your Eraser Tool to erase excess
Deselect
Selections > Modify > Feather by 2
Use your Eraser Tool to erase excess
Deselect
Now paste the Apple as new layer
Resize by 25% and position to the lower left or right (depending on your tube) BEHIND your Tube layer
Resize by 25% and position to the lower left or right (depending on your tube) BEHIND your Tube layer
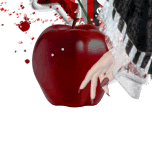
Paste Paper of choice as new layer
Layers > Arrange > Send to Bottom
Layers > Arrange > Send to Bottom
Layers > New Mask Layer > From Image
Apply sg_feather-edge
Ok
Layers > Merge > Merge Group
Resize by 86%
Lower opacity to 50
Apply sg_feather-edge
Ok
Layers > Merge > Merge Group
Resize by 86%
Lower opacity to 50
Crop and resize to 500 x 500
Image > Canvas Resize 550 x 550
Make sure the background colour is white
Select your Preset Shape Tool and set to Ellipse
Foreground - #000000
Background - null
Foreground - #000000
Background - null
Hold your shift key and draw out a Circle around your tag
(holding shift ensures the shape is drawn symmetrically)
Objects > Align > Centre in Canvas
(holding shift ensures the shape is drawn symmetrically)
Objects > Align > Centre in Canvas
Select your Text Tool and font of choice
I am using LD Twylight
Text colour black
I am using LD Twylight
Text colour black
On the curve type out your text of choice
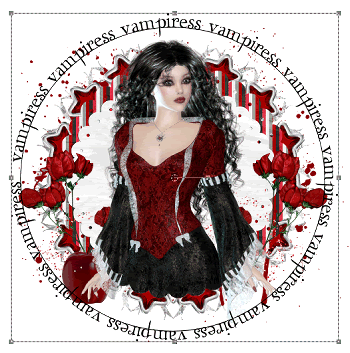
Open your Layer Palette and Vector Layer
Close off the Ellipse then convert to raster layer
Lower opacity to 35
Select another font of choice
I am using A&S Snapper Script
I am using A&S Snapper Script
Type out your name
Objects > Align > Horizontal Centre in Canvas
Convert to raster layer
Objects > Align > Horizontal Centre in Canvas
Convert to raster layer
Effects > Plugins > Eye Candy > Gradient Glow with the following settings:
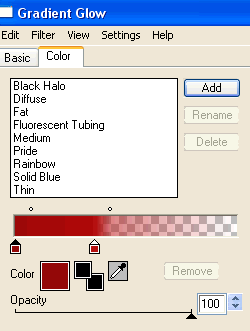
Finally, add your © copyright, licence and watermark, then save as a GIF or JPG and you're done!
** IF YOU WISH TO ANIMATE PLEASE FOLLOW THESE NEXT STEPS **
Activate your Tube layer and zoom in on the eyes
Select your Magic Wand and click once in the pupils of each eye
It will only be a very small area as we don't want too much
It will only be a very small area as we don't want too much
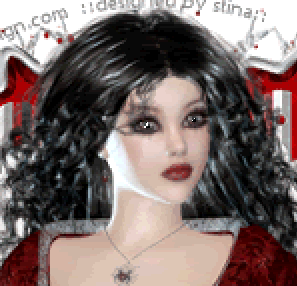
Add a new raster layer
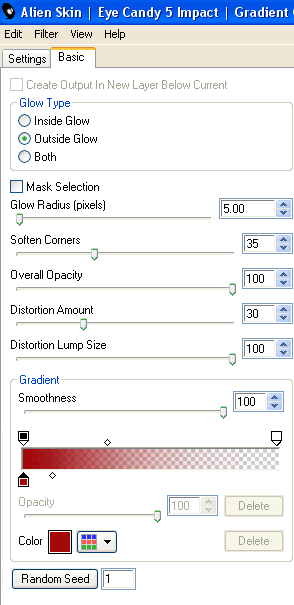
Effects > Plugins > Alien Skin Eye Candy 5: Impact > Gradient Glow with the following settings:
Deselect
Set blend mode to Screen then duplicate
Rename Eyes1 and Eyes2
Rename Eyes1 and Eyes2
Now to animate!
Hide Eyes2 keeping Eyes1 visible
Edit > Copy Merged
Edit > Copy Merged
Open Animation Shop
Edit > Paste as New Animation
Edit > Paste as New Animation
Back to PSP
Activate Eyes2
Edit > Copy Merged
Activate Eyes2
Edit > Copy Merged
In Animation Shop
Edit > Paste After Current Frame
Edit > Paste After Current Frame
Select All and change Frame Properties to 50
Now save as a GIF and you're done!
Now save as a GIF and you're done!
Thanks for trying my tutorial!
::st!na::
Here in a non-animated version using a different tube:
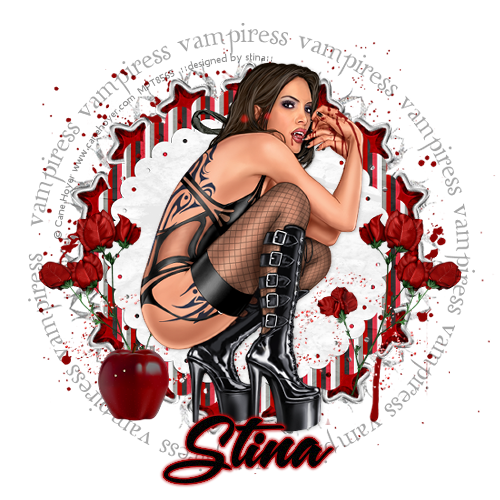
© Tutorial written by Stina on 4th September 2009
All rights reserved

I did you tut on the vampiress and i posted the
ReplyDeleteresults and a tag for you on MTA yahoo psycho email for the group there
i hope you get it
love your tuts
Tiny
icyty@hotmail.com