
Supplies
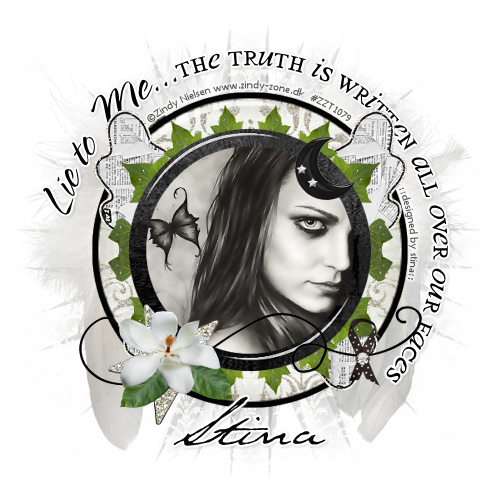
Scrap kit of choice - I am using the gorgeous "Lie to Me" by Designs by Helly available from Cotton Candy Kreations
Tube of choice - I am using the lovely artwork of Zindy Nielsen which can be purchased from her store
**PLEASE DO NOT USE HER ARTWORK WITHOUT THE APPROPRIATE LICENCE**
WSL_Mask 26 by Chelle available from her blog
Fonts of choice - I am using Spring Light, Will & Grace and Texas Hero
Plugin: Alien Skin Eye Candy 5 Impact Glass
Plugin: Simple Top Left Mirror
Plugin: Xero Improver (optional)
Plugin: Eye Candy 4000 Gradient Glow
Let's begin!
Open a new 600 x 600 blank canvas flood-filled white
Set your Preset Shape Tool to Ellipse
Foreground - null
Background - #000000
Foreground - null
Background - #000000
Hold your Shift key and draw out a circle
Objects > Align > Centre in Canvas
Convert to raster layer
Objects > Align > Centre in Canvas
Convert to raster layer
Selections > Select All
Selections > Float
Selections > Defloat
Selections > Modify > Contract by 12
Selections > Float
Selections > Defloat
Selections > Modify > Contract by 12
Paste Paper2 into Selection
Effects > Plugins > Alien Skin Eye Candy 5 Impact > Glass with the following settings:
Paste Wings as new layer
Resize by 15%
LEAVE IN POSITION
Duplicate and set blend mode to Screen
Lower opacity to 85
Layers > Merge > Merge Down
Resize by 15%
LEAVE IN POSITION
Duplicate and set blend mode to Screen
Lower opacity to 85
Layers > Merge > Merge Down
Select your Preset Shape Tool again - same settings
Draw out a smaller circle
Objects > Align > Centre in Canvas
Convert to raster layer
Draw out a smaller circle
Objects > Align > Centre in Canvas
Convert to raster layer
Selections > Select All
Selections > Float
Selections > Defloat
Selections > Modify > Contract by 20
Press delete and deselect
Selections > Float
Selections > Defloat
Selections > Modify > Contract by 20
Press delete and deselect
With your Magic Wand select the black Frame
Selections > Modify > Feather by 2
Paste Paper3 INTO selection
Deselect
Paste Paper3 INTO selection
Deselect
Effects > Plugins > Alien Skin Eye Candy 5 Impact > Glass with the same settings BUT CHANGE THE BEVEL WIDTH TO 10.00
Select the area inside the Frame with your magic Wand
Selections > Modify > Expand by 10
Add a new raster layer
Selections > Modify > Expand by 10
Add a new raster layer
Paste Paper4 INTO selection
Deselect
Layers > Arrange > Move Down
Deselect
Layers > Arrange > Move Down
Activate your Frame layer
Paste Star as new layer
Resize by 22%
Position along the bottom of Frame
Paste Star as new layer
Resize by 22%
Position along the bottom of Frame
Paste Magnolia as new layer
Resize by 10%
Position over the star (see below)
Resize by 10%
Position over the star (see below)
Paste Branch as new layer
Resize by 10%
Position below the Frame and Paper layers
Resize by 10%
Position below the Frame and Paper layers
Effects > Plugins > Simple > Top Left Mirror
Paste Moon as new layer
Resize by 8 - 10%
Image > Mirror
Paste in upper right or to your liking
Resize by 8 - 10%
Image > Mirror
Paste in upper right or to your liking
Paste Ribbon as new layer
Resize by 10%
Position on string at edge of Frame
Resize by 10%
Position on string at edge of Frame
Select the area inside your Frame once again
Selections > Modify > Expand by 10
Selections > Modify > Expand by 10
Paste your tube as a new layer
Resize as necessary to fit
Selections > Invert
Delete (excess) and deselect
Resize as necessary to fit
Selections > Invert
Delete (excess) and deselect
Paste Heart as new layer
Resize by 18%
Layers > Arrange > Send to Bottom
Resize by 18%
Layers > Arrange > Send to Bottom
Add a new raster layer
Selections > Select All
Paste Paper6 INTO selection
Deselect
Layers > Arrange > Send to Bottom
Selections > Select All
Paste Paper6 INTO selection
Deselect
Layers > Arrange > Send to Bottom
Layers > New Mask Layer > From Image
Locate WSL_Mask26
OK
Layers > Merge > Merge Group
Locate WSL_Mask26
OK
Layers > Merge > Merge Group
Select your Preset Shape Tool again to Ellipse
Toggle the colour palette to the reverse of before:
Foreground - #000000
Background - null
Toggle the colour palette to the reverse of before:
Foreground - #000000
Background - null
Hold your Shift key again and draw out a circle around your tag back
Objects > Align > Centre in Canvas
Objects > Align > Centre in Canvas
Select your Text Tool and font of choice
I am using Spring Light and Will & Grace
Colour is Black (#000000)
I am using Spring Light and Will & Grace
Colour is Black (#000000)
On the curve type out your text and position
In your Layer Palette open the Vector Layer and close off the Ellipse
Convert to raster layer
Layers > Arrange > Move Up
(should now be above the feathery wings layer)
Apply a Gradient Glow
Add a slight drop shadow:
H & V - 1
Opacity - 15
Blur - 3.00
Colour - #000000
H & V - 1
Opacity - 15
Blur - 3.00
Colour - #000000
Select another Script font of choice
I am using Texas Hero
Type out your name
Objects > Align > Horizontal Centre in Canvas
Convert to raster layer
Apply a Gradient Glow and the same drop shadow
I am using Texas Hero
Type out your name
Objects > Align > Horizontal Centre in Canvas
Convert to raster layer
Apply a Gradient Glow and the same drop shadow
Finally, add your © copyright, licence and watermark then save as a GIF or JPG and you're done!
Thank you for trying my tutorial!
::st!na::
© Tutorial written by Stina on 9th April 2009
All rights reserved
I absolutely LOVE this tutorial. It's unique and just stunning. Great job!
ReplyDelete