
Supplies
Scrap kit of choice - I am using "Bella's Lullaby" by Soxsational Scraps
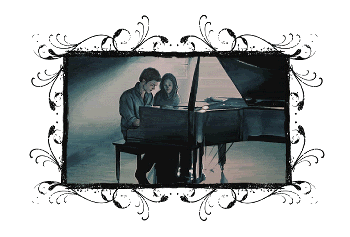
Image of choice - I am using the lovely artwork of David Desbois from whom you must obtain permission
WSL_Mask7 by Chelle available from her blog
Fonts of choice - BakerScript and Pablo LET
Plugin: Xenofex 2 Constellation
Let's begin....
Open a new 700 x 600 canvas flood-filled white
Paste Frame5 as new layer
Resize by 80%
Resize by 80%
Select inside the Frame with your Magic Wand
Selections > Modify > Expand by 5
Selections > Modify > Expand by 5
Paste Image of choice as new layer
Selections > Invert
Delete then deslect
Selections > Invert
Delete then deslect
Layers > Arrange > Move Down
Duplicate twice and hide top two image layers
Return to original image layer
Adjust > Hue and Saturation > Colourise
Hue - 0
Saturation - 0
Saturation - 0
Unhide second layer and set blend mode to Screen
Lower opacity to 30
Lower opacity to 30
Unhide third image layer and set blend mode to Soft Light
Lower opacity to 50
Lower opacity to 50
Now hide Background and Frame layers
Layers > Merge > Merge Visible
Layers > Merge > Merge Visible
Paste Lullaby words as new layer
Resize by 60%
Position along bottom of Frame
Resize by 60%
Position along bottom of Frame
Now we're going to colourise the Flowers and Hearts to match the Image
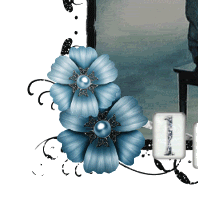
Paste Flower5 as new layer
LEAVE IN POSITION!!
Paste Flower2 as new layer
(Flower should paste directly on top of previous one)
Set blend mode to Multiply
Lower opacity to 50
Layers > Merge > Merge Down
Resize by 20%
Position in lower left
(Flower should paste directly on top of previous one)
Set blend mode to Multiply
Lower opacity to 50
Layers > Merge > Merge Down
Resize by 20%
Position in lower left
Duplicate twice
Resize one by 80% and position slightly up
Resize one by 80% and position slightly up
On other duplicate set blend mode to Multiply again
Lower opacity to 70
Layers > Merge > Merge Down
Lower opacity to 70
Layers > Merge > Merge Down
Duplicate again, then Image > Mirror
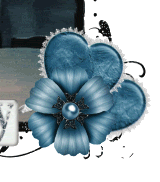
Paste Heart1 as new layer
LEAVE IN POSITION!!
Paste Heart3 as new layer
Set blend mode to Multiply
Lower opacity to 55, then
Layers > Merge > Merge Down
Set blend mode to Multiply
Lower opacity to 55, then
Layers > Merge > Merge Down
Duplicate, then set blend mode to Multiply again
Lower opacity to 55, then
Layers > Merge > Merge Down
Lower opacity to 55, then
Layers > Merge > Merge Down
Image > Rotate by 20 to the right
Resize by 25%
Layers > Arrange > Move Down
Position behind Flower to the right
Resize by 25%
Layers > Arrange > Move Down
Position behind Flower to the right
Duplicate, then Image > Rotate by 20 to the right
Position behind first Heart
Position behind first Heart
Paste GlitterTrails2 as new layer
Resize by 60%
Position along bottom
Resize by 60%
Position along bottom
Should already be tucked behind Flowers and cascading over Lullaby words
Set blend mode to Soft Light and duplicate
Paste Paper Notes as new layer
Image > Rotate by 30 to the left
Resize by 35%
Position above the piano
Image > Rotate by 30 to the left
Resize by 35%
Position above the piano
Paste Notes3 as new layer
Resize by 15%
Position in upper corner above piano
Resize by 15%
Position in upper corner above piano
Paste Sparkles as new layer
Resize by 85%
Position over image in Frame
Set blend mode to Soft Light
Resize by 85%
Position over image in Frame
Set blend mode to Soft Light
Paste TiedBow5 as new layer
LEAVE IN POSITION!!
Paste TiedBow2 as new layer
Change blend mode to Multiply and lower opacity to 40
Layers > Merge > Merge Down
Image > Rotate by 5 to the right
Resize by 65%
Position in upper right
Resize by 65%
Position in upper right
With your Freehand Tool make a couple of selections around each of the ribbon strands
Delete then deselect
Activate Frame Layer
Paste a Doodle as new layer
Resize by 25%
Position in upper left to your liking
Set blend mode to Soft Light
Resize by 25%
Position in upper left to your liking
Set blend mode to Soft Light
Effects > Plugins > Simple > Top Left Mirror
Paste paper of choice as new layer
Layers > Arrange > Send to Bottom
Layers > Arrange > Send to Bottom
Layers > New Mask Layer > From Image
Apply WSL_Mask7
OK
Layers > Merge > Merge Group
Lower opacity to 50
Apply WSL_Mask7
OK
Layers > Merge > Merge Group
Lower opacity to 50
Crop and resize
Select your Text Tool and a font of choice
I am using Pablo LET (Bella's handwriting)
Use same colours for Foreground and Background as above
I am using Pablo LET (Bella's handwriting)
Use same colours for Foreground and Background as above
Type out your name
Objects > Align > Horizontal Centre in Canvas
Convert to raster layer
Apply a drop shadow of choice
Objects > Align > Horizontal Centre in Canvas
Convert to raster layer
Apply a drop shadow of choice
Finally, add your © copyright, licence and watermark, then save as GIF or JPG and you're done!
** IF YOU WISH TO ANIMATE PLEASE FOLLOW THESE NEXT STEPS **
Activate your Frame layer
Duplicate twice and rename Sparkle1, Sparkle2 and Sparkle3
Duplicate twice and rename Sparkle1, Sparkle2 and Sparkle3
With your Selection Tool carefully draw a rectangle around the Frame, then
Selections > Invert
Selections > Invert

Hide Sparkle2 and Sparkle3 and activate Sparkle1
Effects > Plugins > Xenofex > Constellation with the following settings:
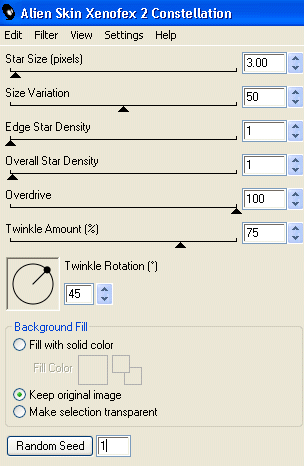
Hide Sparkle1 and activate Sparkle2
Apply the Constellation again, adjusting the Random Seed
Apply the Constellation again, adjusting the Random Seed
Hide Sparkle2 and activate Sparkle3
Apply the Constellation effect again, adjusting the Random Seed
Apply the Constellation effect again, adjusting the Random Seed
Now for the animation!
Activate Sparkle1 and hide Sparkle2 and Sparkle3
Edit > Copy Merged
Edit > Copy Merged
Open Animation Shop
Edit > Paste as New Animation
Edit > Paste as New Animation
Back to PSP
Hide Sparkle1 and activate Sparkle2
Edit > Copy Merged
Hide Sparkle1 and activate Sparkle2
Edit > Copy Merged
In Animation Shop
Edit > Paste AFTER Current Frame
Edit > Paste AFTER Current Frame
Back to PSP
Hide Sparkle2 and activate Sparkle3
Edit > Copy Merged
Hide Sparkle2 and activate Sparkle3
Edit > Copy Merged
In Animation Shop
Edit > Paste AFTER Current Frame
Edit > Paste AFTER Current Frame
Save as a GIF and you're done!
Thanks for trying my tutorial!
::st!na::
Here is a non-animated version:

© Tutorial written by Stina on 21st June 2009
All rights reserved

No comments:
Post a Comment