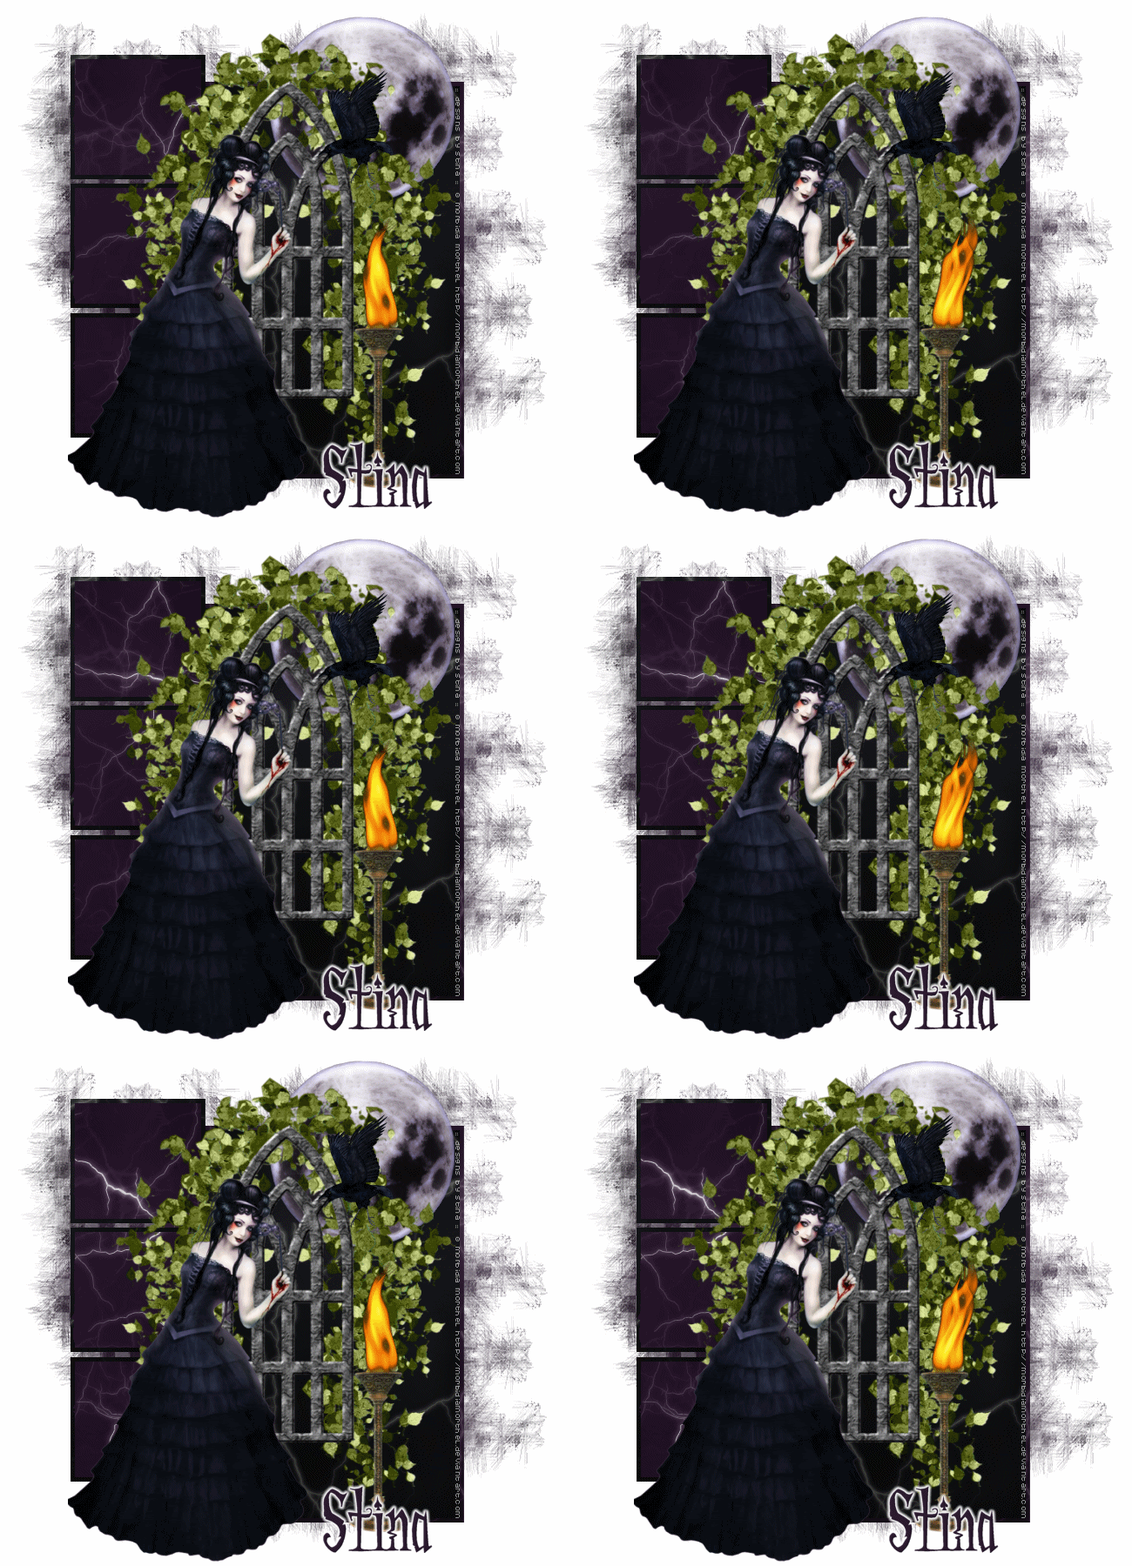
Supplies
Scrap kit of choice - I am using my own "Something Wicked" available from all my stores listed on my blog
Tube of choice - I am using the FTU artwork of Morbidia Morthel
Font of choice - I am using Addams
Halloween Template 4 by Designs by Ali
WSL_Mask297 by Weescotslass
Plugins:
Xero Porcelain
Alien Skin Eye Candy 5: Nature Fire
Alien Skin Eye Candy 5: Texture Marble
Alien Skin Eye Candy 5: Impact Gradient Glow (optional)
Open Halloween_Template_Dezigns_by_Ali_4
Image / Canvase Size
600 width
650 height
Centred
Delete the credit layer
Activate your mask layer
You can either use this mask or your own - I used my own
Paste paper of choice as new layer
Layers / Load/Save Mask / Load Mask from Disk
Select Mask of choice - I am using WSL_Mask297
Layers / Merge / Merge Group
Activate Back Rectangle
Paste paper of choice as new layer
Selections / Select All, then Float, then Defloat, then Invert
Delete and deselect
Repeat with Rectangle Frame, Small Side Frames and the Frame with other papers of choice
Delete the BOO word art layer
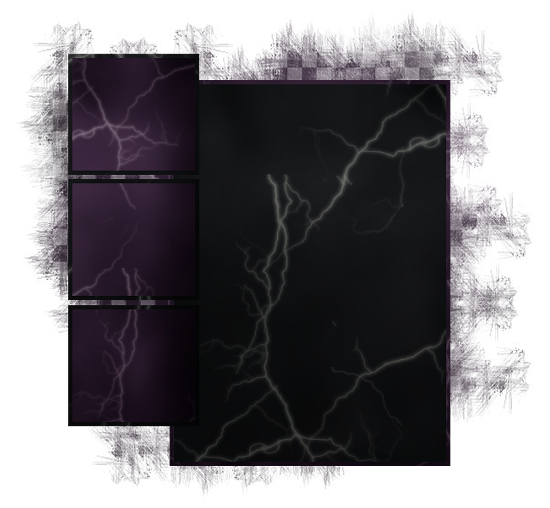
And you should have something like this:
Paste DBS_Window01 as new layer
Resize by 85%
Leave it in position or to your liking
Paste DBS_Moon as new layer
Resize by 35%
Position in upper right then move below window
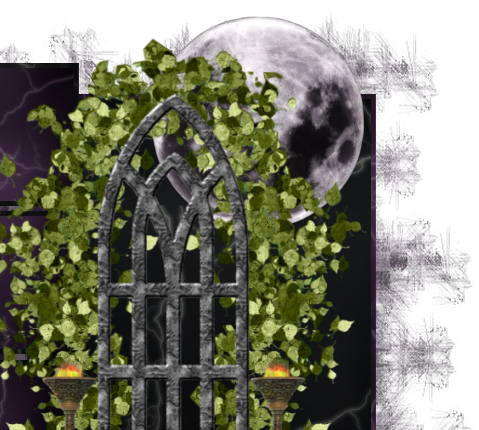
Effects / Plugins / Xero / Porcelain with default settings
Activate window layer again
Paste your tube of choice as new layer
I am using the lovely artwork of Morbidia Morthel
Resize to your liking
Position slightly to the left
If you are using the same tube as me, select your Change to Target brush with the following settings:

Set your Foreground colour to #916792
Now carefully colourise her gown, hair and mask
You may have to reduce the size of the brush for the hair and mask
**IMPORTANT**
Careful NOT to go over the same area twice. This will darken the colour
I recommend colouring the gown, stopping, reducing the brush size and then doing the hair and mask.
DO NOT release your mouse until you have covered your required area! This will result in re-clicking and the chance of going over the same area thus resulting in darkening your effect.
Do the entire colouring by holding your mouse for the entire duration, stopping only to change your brush size for the hair
OK..are you still with me? lol
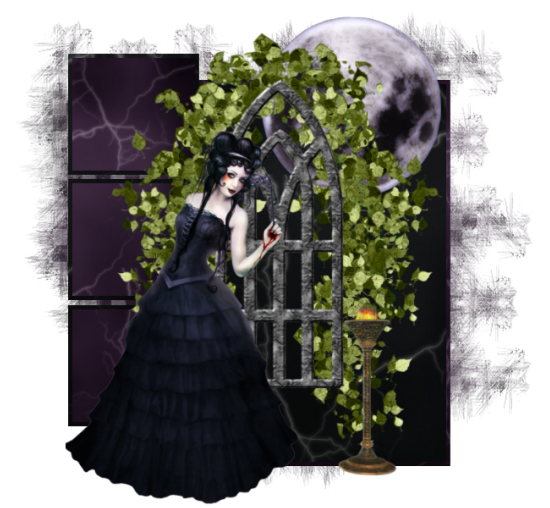
This is like what you should have now:
Paste DBS_Raven as new layer
Resize by 20% and position in the upper left to your liking
Add the necessary credits, then with a font of your choice type out your name
ANIMATION
We are going to be daring and do two animations *s*
First let's start with the flames
Add three new raster layers calling them Flame1, Flame2 and Flame3
Hide Flame2 and 3 and activate Flame1
With your Magic Wand on Point to Point and Feather set to 0 draw out the shape of a flame
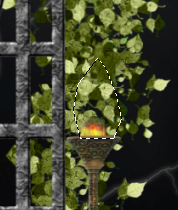
Effects / Plugins / Alien Skin Eye Candy 5: Nature / Fire with the following settings:
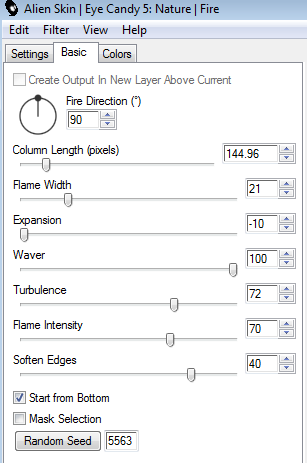
Repeat the effect on each Flame layer adjusting the Random Seed
You may need to play with the Random Seed to get the flame effect you like
Now let's activate the paper layer on the Small Side Rectangles
Duplicate three times
Hide the top paper layer and rename the others to Light1, Light2 and Light3
Then hide Light2 and 3, with Light1 activated
Effects / Plugins / Alien Skin Eye Candy 5: Textures / Marble with the following settings:
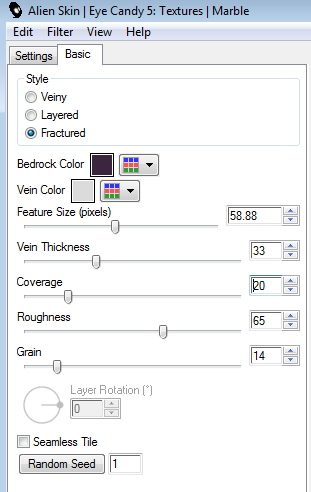
Now your Bedrock colour may differ depending on the colour of the paper you used
I used a deep purple paper so I picked a colour from there
Activate Light2 and repeat the effect, adjusting the Random Seed
Again you may need to play with it to get the effect you like
Activate Light3 and repeat the effect once more
Activate the top paper layer, set the blend mode to Soft Light and lower the opacity to around 75
OK, let's animate...ready?
Hide Flame2, Flame3, Light2 and Light3 layers
Activate only the Flame1 and Light1 layers
Edit / Copy Merged
Go to Animation Shop
Paste as new animation
Back to PSP
Keeping Light1 activated, hide the Flame1 layer and activate Flame2
Edit / Copy Merged
Go to Animation Shop
Paste after current frame
Back to PSP
Keeping Light1 activated, hide the Flame2 layer and activate Flame3
Edit / Copy Merged
Go to Animation Shop
Paste after current frame
Now repeat these same steps with Light2 activated, and then again with Light3
In all you should have 3 Light frames to each Flame
You should end up with a total of 9 frames
Save as GIF and you're done!
Thank you for trying my tutorial!
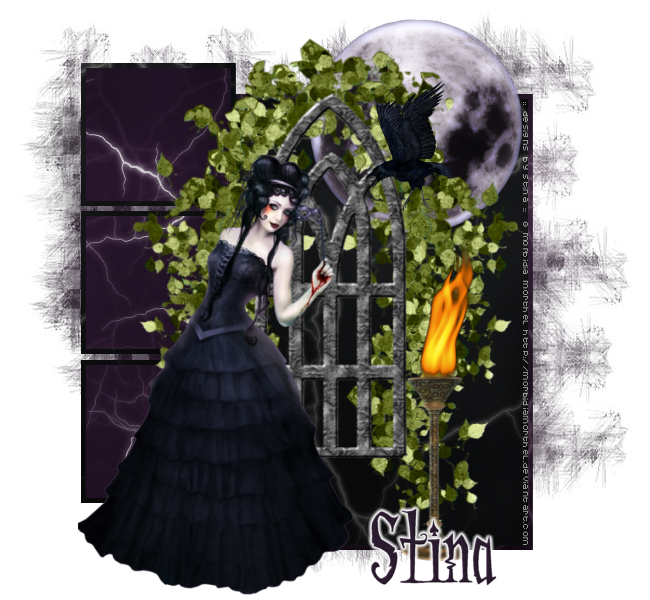
© Tutorial written by Stina on 28th October 2011

No comments:
Post a Comment