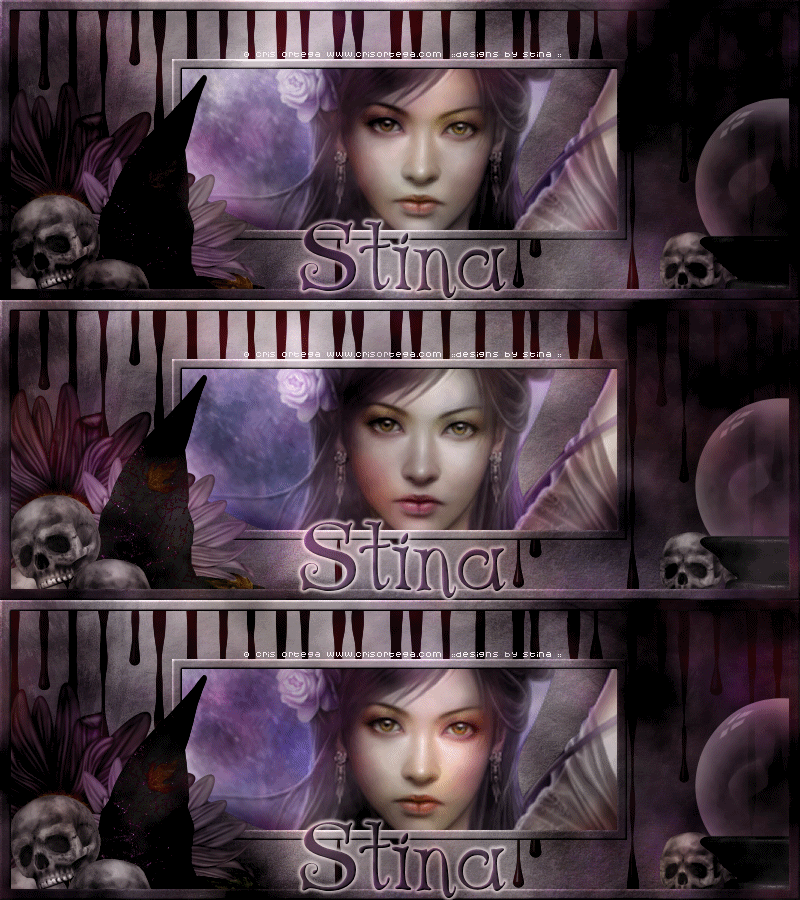
Supplies
Scrap kit of choice - I am using one of my own "Black Magic" which is Full Size and is available for purchase from Twilight Scraps, Aussie Scrap Designs and Scrap Wishes
Tube or image of choice - I am using the FTU artwork of Cris Ortega
Font of choice - I am using AL Age Old Love
Plugins:
Eye Candy 4000 HSB Noise
Open a paper of choice and duplicate it
Close original paper
Resize to 800 x 800
Image > Canvas Size with the following settings:
Width - 800
Height - 300
Centre square checked
OK
Open DBS_Blood
Resize to 800 pixels wide
Paste as new layer and position to liking
Set blend mode to multiply
Select your Preset Shapes tool
Set to Rectangle, stroke width about 2.0
Create as Vector layer checked
Draw out a rectangle in the centre of the canvas
Objects > Align > Centre in Canvas
Convert to raster layer
With your Magic Wand select inside the rectangle
Selections > Modify > Contract by 10
Flood fill with black
Selections > Modify > Contract by 1
Delete, then deselect
You should now have something like this:
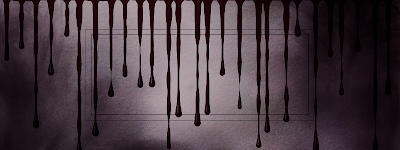
Select inside the borders with your Magic Wand
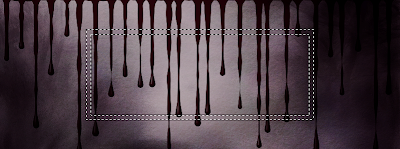
Now activate your bottom layer
Effects > 3D Effects > Inner Bevel with the following settings:
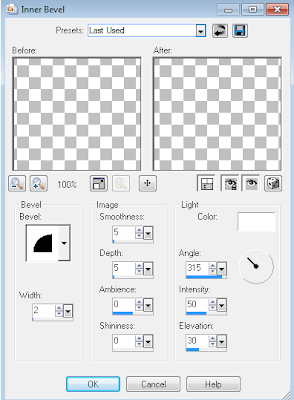
Selections > Promote Selection to Layer
Then deselect
Move your new Frame layer to the top
You can delete the previous border layer as this was just for outlining the frame
With your Magic Wand select inside the frame
Selections > Modify > Expand by 5
Activate the blood layer and delete
KEEP SELECTED!!
Paste a tube of your choice - I am using the lovely artwork of Cris Ortega
Resize up or down as necessary
Selections > Invert
Then delete and deselect
Paste one of the Crystal Balls as a new layer
Resize by about 15%
Position in the lower right corner
Choose two Flowers
Paste and resize the first one by 20%
Position toward the lower left
Paste and resize the second flower by 15%
Position to the lower left and down beside the first flower
Paste DBS_Skulls as new layer
Resize by 12% and position to your liking
Duplicate layer
On duplicate layer go to:
Adjust > Hue and Saturation > Colourise
Set both to 0
Your duplicate skulls should now be greyscale
Go to your Manual Colour Correction (you may find this in your Unused Commands and drag it to one of your menus - I have it under Adjust > Colour)
In the first display box left click to choose a Source colour from the skulls
IN the second display box pick a target colour from your canvas using your RIGHT CLICK - it MUST be your right click or you will change the source colour
REMEMBER:
Left click - Source
Right click - Target
A mistake I often made when first getting used to Manual Colour Correction *g*
You may need to play with both the Source and Target colours to get the desired effect you want
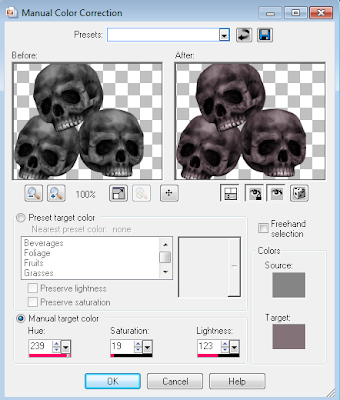
Now it is up to you whether you want to use your Blend Mode with the duplicate layer or leave it as is and delete the original layer
I simply lowered the opacity of my duplicate layer so the original colour from the original layer blended with the coloured layer for a soft effect
Merge the skulls to one layer
Now behind the skull layers paste the DBS_Hat as new layer
Resize by 10% and position to your liking
Duplicate layer, then
Adjust > Hue and Saturation > Colourise
Set both to 0
The hat should be greyscale
Now set the blend mode to Soft Light or to your liking
Layers > Merge Down
Duplicate the skulls layer
Image > Mirror
Resize by 75%
Move second skulls below the Crystal Ball layer and tuck behind to your liking
Activate your crystal ball
Selections > Float, then Defloat
Then activate skulls again and delete
Deselect
Go to your bottom background layer
Selections > Select All
Then
Selections > Modify > Contract by 10
Then
Selections > Promote Selection to Layer
Deselect and move to top layer
Effects > 3D Effects > Inner Bevel with the same settings as before
Now add your credits and your name in fonts of choice
ANIMATION
I cheated for this animation and made it easy...lol
Merge All layers visible then duplicate twice
Hide the top two layers and activate first layer
Effects > Plugins > Eye Candy 4000 > HSB Noise with the following settings:
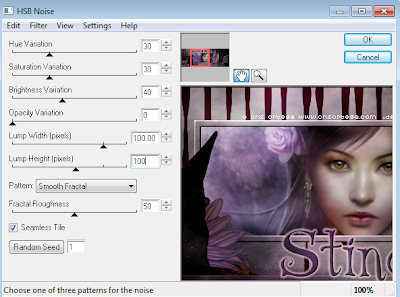
Activate second layer and repeat the effect changing the Random Seed
Repeat process again with the third layer
Now activate the first layer and copy
Open Animation Shop and Paste as New Animation
In PSP activate second layer and copy
In Animation Shop, Paste AFTER current frame
Repeat with the third layer and paste it after the current (second) frame
Select All frames
ALT + Enter to open Frame Properties
Change to 25
Save as a gif and you're done!
Thank you for trying my tutorial
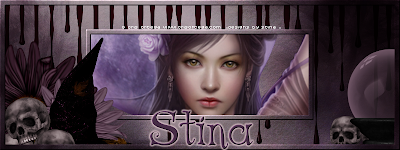
© Tutorial written by Stina on 26th October 2011

No comments:
Post a Comment